Category: F3

  • Location Scouting

    Overview

    Location scouting involves identifying, evaluating, photographing, and researching potential filming locations that support the creative and logistical needs of the production. This process includes assessing factors such as visual suitability, accessibility, sound conditions, power availability, safety concerns, permitting requirements, parking, staging space, and overall production feasibility.

    Effective location scouting is essential because the realities of a location can significantly affect scheduling, equipment needs, crew workflow, safety, and the overall success of a production. Strong scouting practices help productions anticipate challenges early, communicate more clearly across departments, and make more informed creative and logistical decisions before filming begins.

    Safety

    When showing up at someone’s home, be sure to take safety precautions. Not everyone appreciates having strangers show up at their front door.

    • Always carry your student ID for identification.
    • Check out a magnetic “Location Scouting Vehicle” sign from the ER to display on your vehicle.
    • Whenever possible, scout in pairs.
    • Evaluate safety risks at each location—consider hazards, neighborhood security, and any factors that may pose risks to your cast and crew.

    Finding Locations

    On FSUFILM productions, this task is typically led by the Producer, Director, and Production Designer, though any crew member may initiate contact with a property owner. However, only the Producer is authorized to finalize agreements and handle all official paperwork.

    Start your search virtually with Google Maps and Street View. To identify property owners, use the Leon County Property Appraiser website. From there, you may need additional online research to find their contact information.

    You can also scout in person by driving around and visiting locations directly. Be mindful of appropriate times—avoid early mornings, late evenings, or peak business hours when visiting homes or establishments.

    Communication

    Always approach property owners with professionalism and respect. Key discussion points include:

    • The production schedule, including prep days (tech scout, set dressing, photoboarding, etc.).
    • The areas you wish to use (filming spaces, staging areas, green rooms, craft services, parking, etc.).
    • The script content, especially if it includes sensitive material.
    • Any location rental fees or requirements for on-site personnel.

    Location Rental fees

    Most locations are generously provided free of charge. However, exceptions may include commercial venues (e.g., hotels) or businesses requiring a staff presence during filming. If fees are involved, confirm the exact cost upfront.

    Documentation

    When you find a location you plan to use, be sure to complete the following:

    1. Location Hazard Assessment Form – identify any potential hazards.
    2. Hazard Notification Form – if hazards are present, outline mitigation steps for each.
    3. Location Shooting Plan Agreement – personally ask the property owner the listed questions and fill out the form. Do not hand them a blank copy. After completion, have them sign Page 2 and provide them with a copy.
    4. Location Agreement – finalize by having the property owner sign this document as well.
  • Offloading Media Cards

    Overview

    Proper media offloading procedures are essential to protecting the integrity and security of a production’s footage. This post outlines the required workflow for transferring, verifying, organizing, and backing up media cards so that no footage is lost, corrupted, or misplaced during production or post-production.

    These procedures are designed to mirror professional industry practices, where careful data management is considered just as important as capturing the footage itself. A single mistake during the offloading process can jeopardize days of work and create costly delays for the entire production. By following a consistent workflow, students develop habits that prioritize redundancy, organization, and accountability—skills that are foundational to contemporary digital filmmaking.

    The Basic Process

    The CMPAFilmPost Server is where you will offload all of the Original Camera Files (OCF) and Production Audio. Every computer the Post Hall has ShotPut Pro installed as well as a Red Mini Mag reader and a multi card reader attached.

    ShotPut Pro is a software which not only copies video and audio files but will also verify the copies afterwards and make reports documenting that the offload was successful. These reports will be uploaded to Frame.io so that the production can keep track of when the media was offloaded and verify that the offload was successful .Every media card used on a production must use ShotPut Pro for offloading to the proper folder tree on CMPAFilmPost to assure the productions video and audio assets are safe.
    Mounting Media Cards

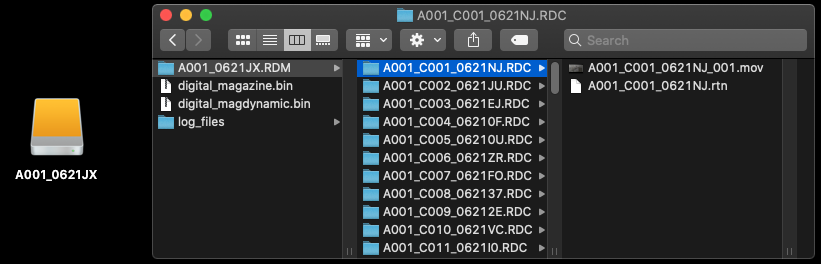
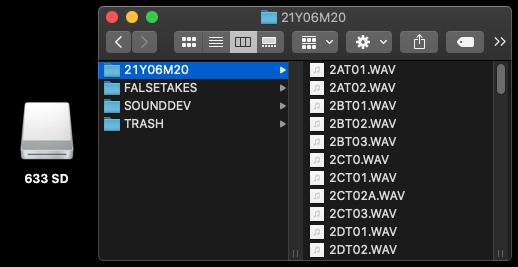
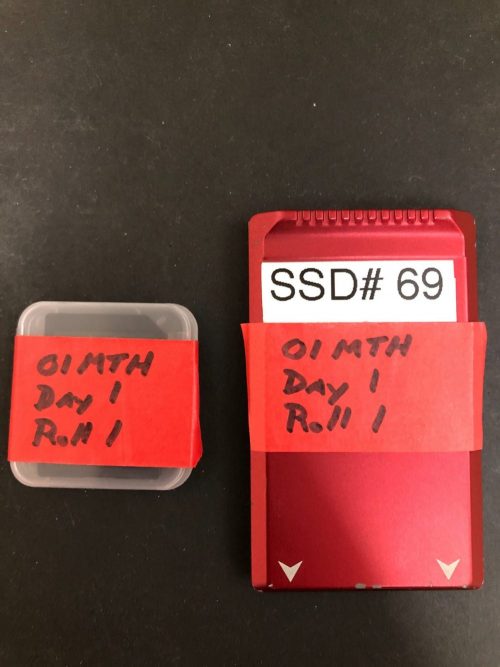
    The Assistant Editor (AE) will retrieve the Red Mini Mag (containing the video), the SD card (containing the audio), and the camera reports from the ingest room cubby and bring them back to their assigned suite on the post hall for offloading. Production should have applied red tape to show live media was on them and labeled them as shown.

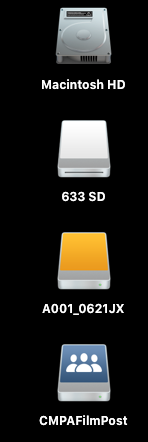
    Remove the tape and insert the cards into the corresponding readers, they will mount like an external hard drive and appear on the desktop.

    Desktop
    RED MINI MAG CONTAINING VIDEO
    SD CARD CONTAINING SOUND

    Offloading Media with ShotPut Pro

    After both media cards are mounted launch ShotPut Pro from the dock.

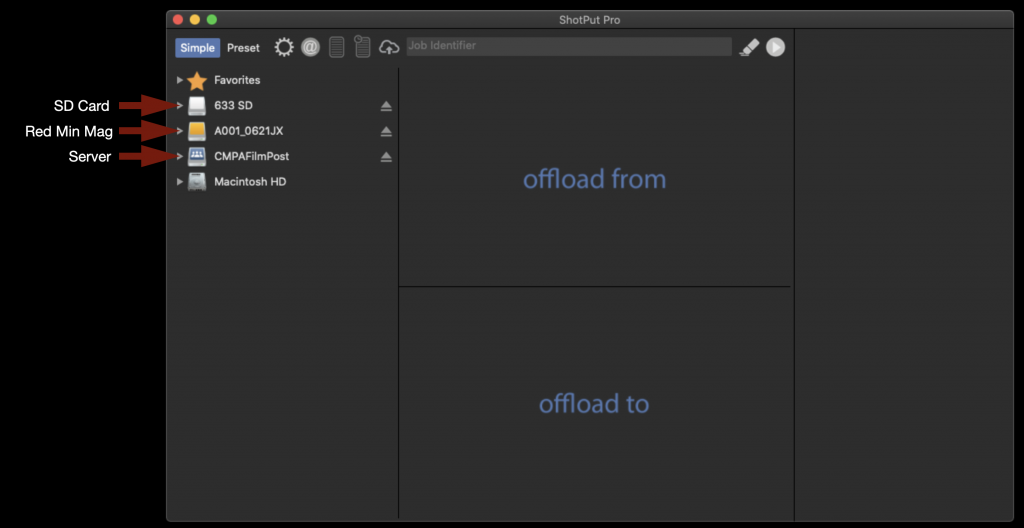
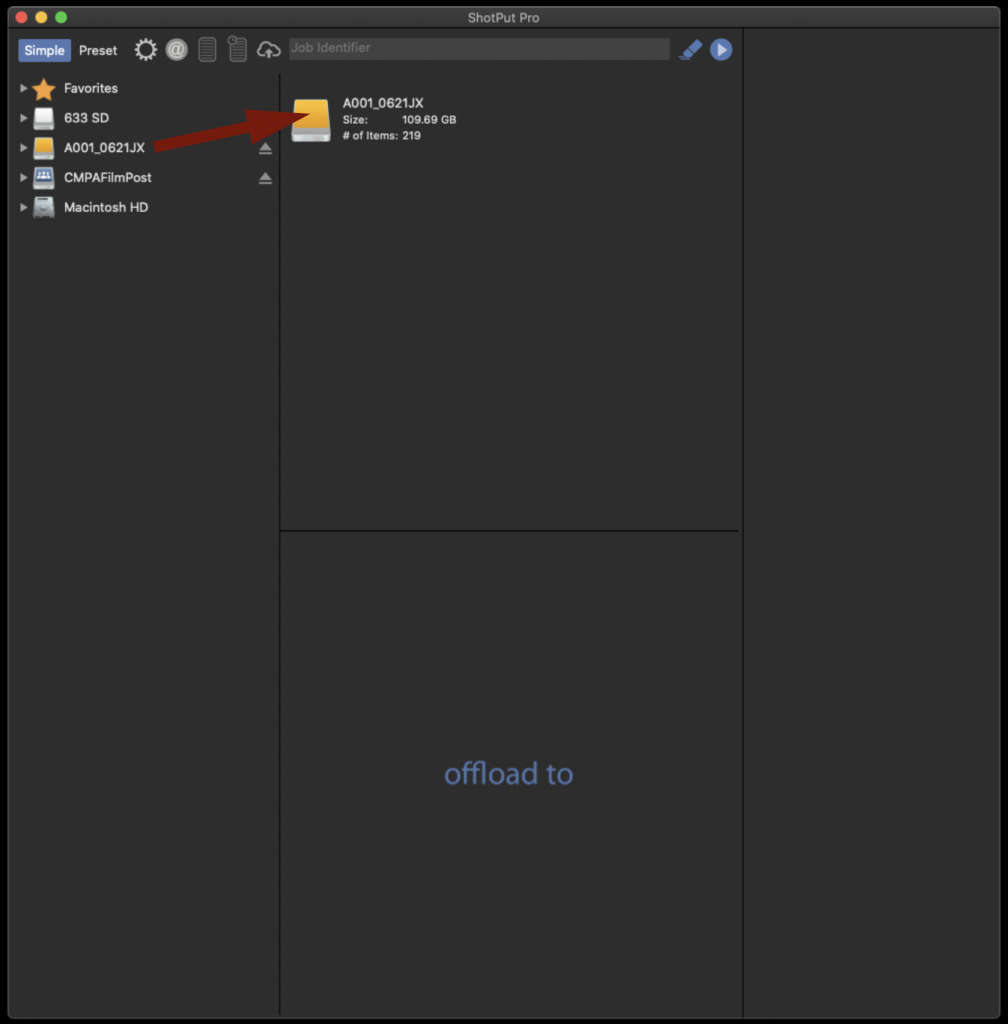
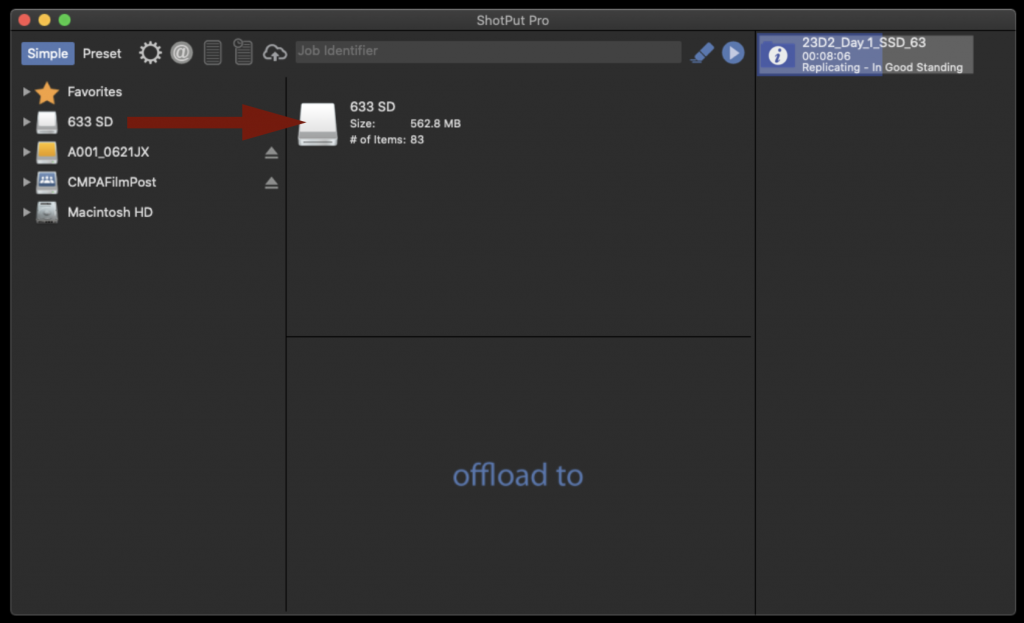
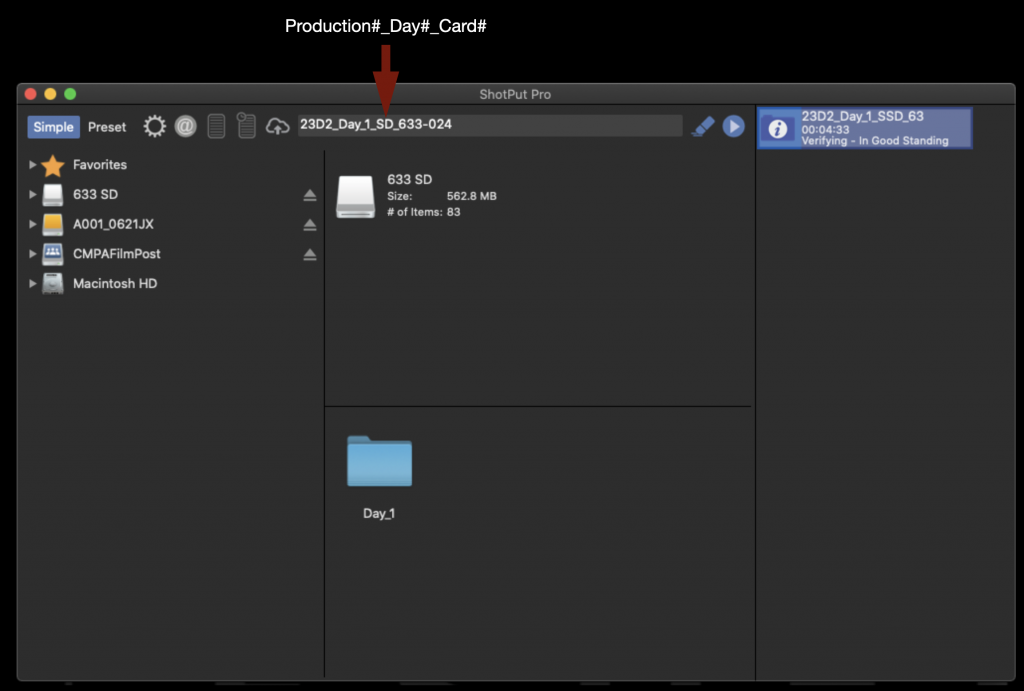
    When it opens it will appear as shown below. Notice how the media cards and the Server are shown on the left of the screen.

    To offload the entire contents of the Red Mini Mag drag the disk icon and drop it in the box labeled “offload from”.

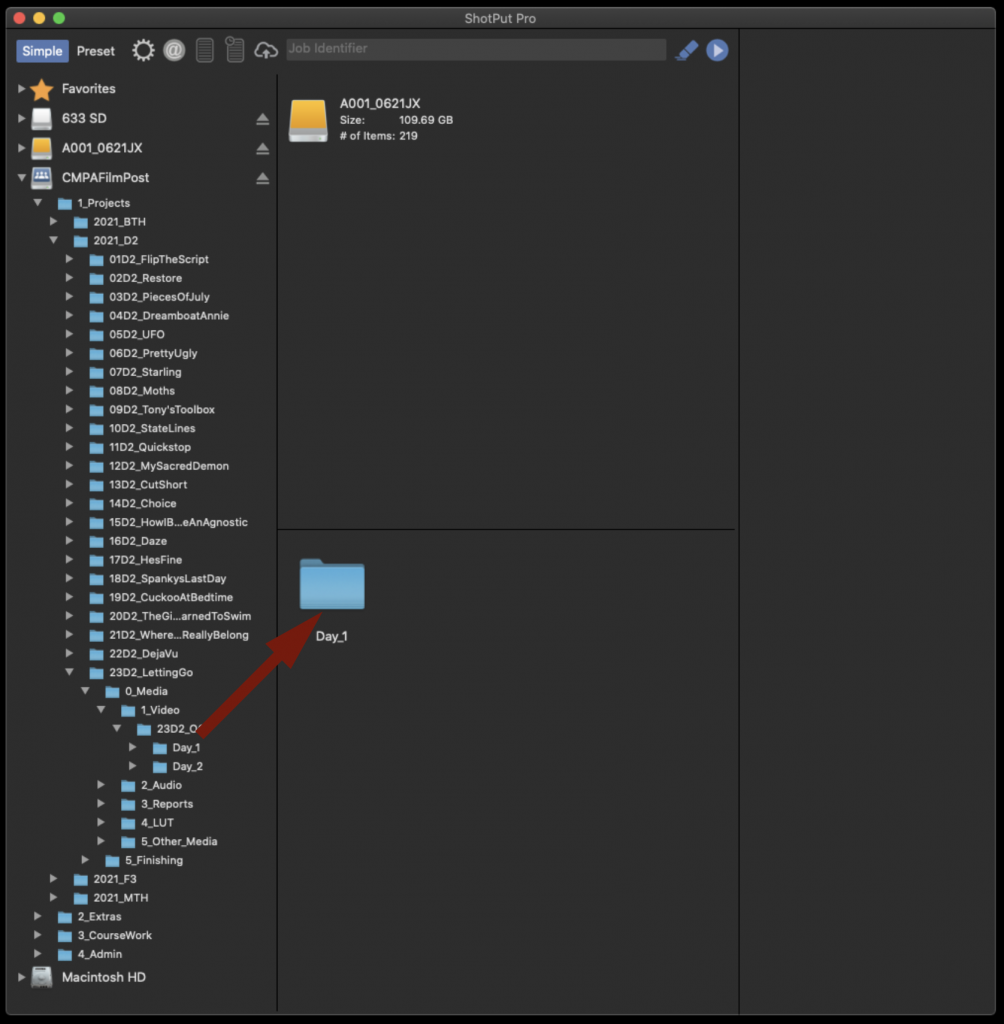
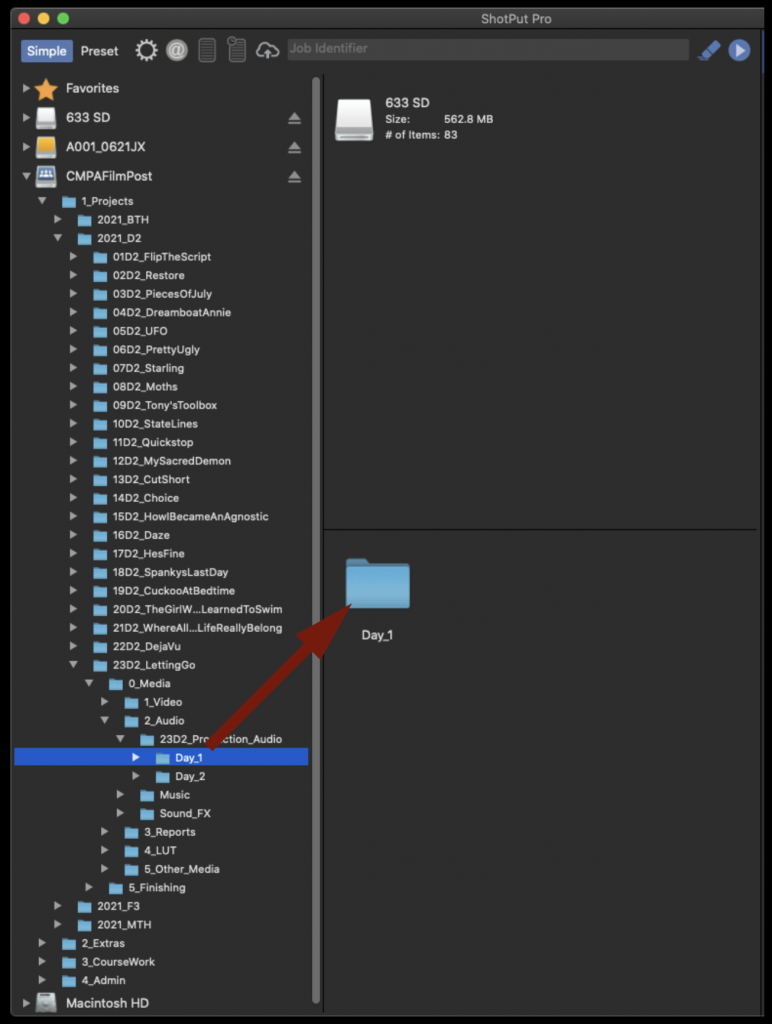
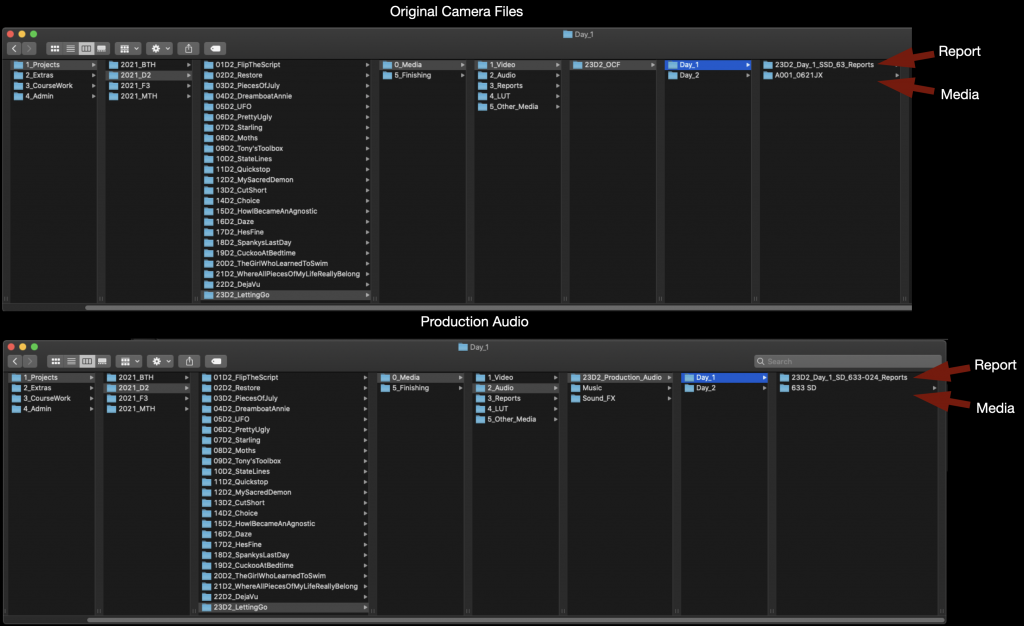
    Next you will need to tell ShotPut in what folder on the CPMAFilmPost Server you would like to offload to. Navigate down into the folder tree on the left hand side until you find the proper Show and Day folder for your production. Then drag the folder icon and drop it in the box labeled “offload to”.

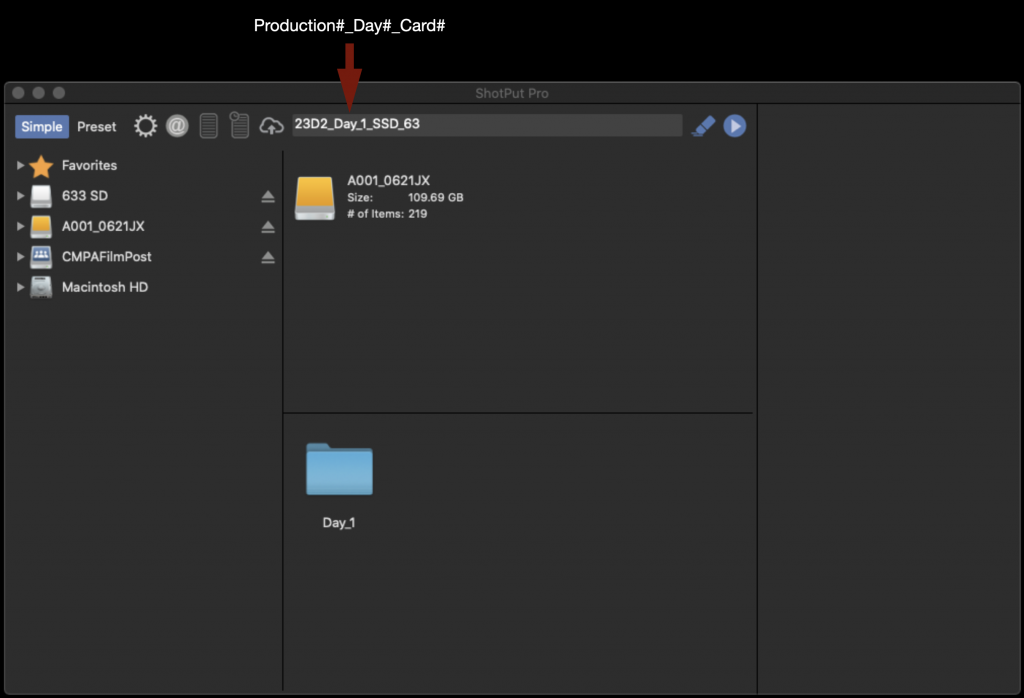
    In the field labeled “Job Identifier” fill in the information for this offload in the following format: Production#_Day#_Card#.

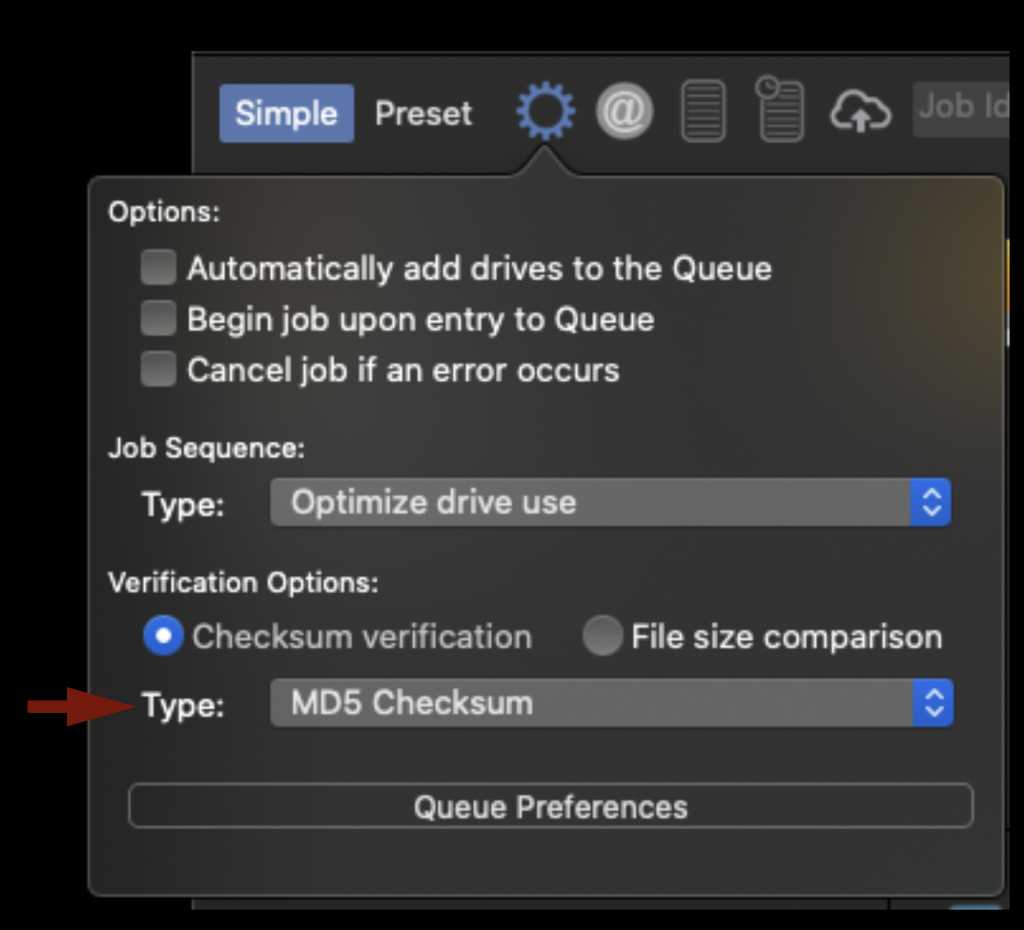
    Before starting the offload you will need to check a few settings. First under “Verification Options” make sure the type is set to “MD5 Checksum”. This is a good balance of speed and security.

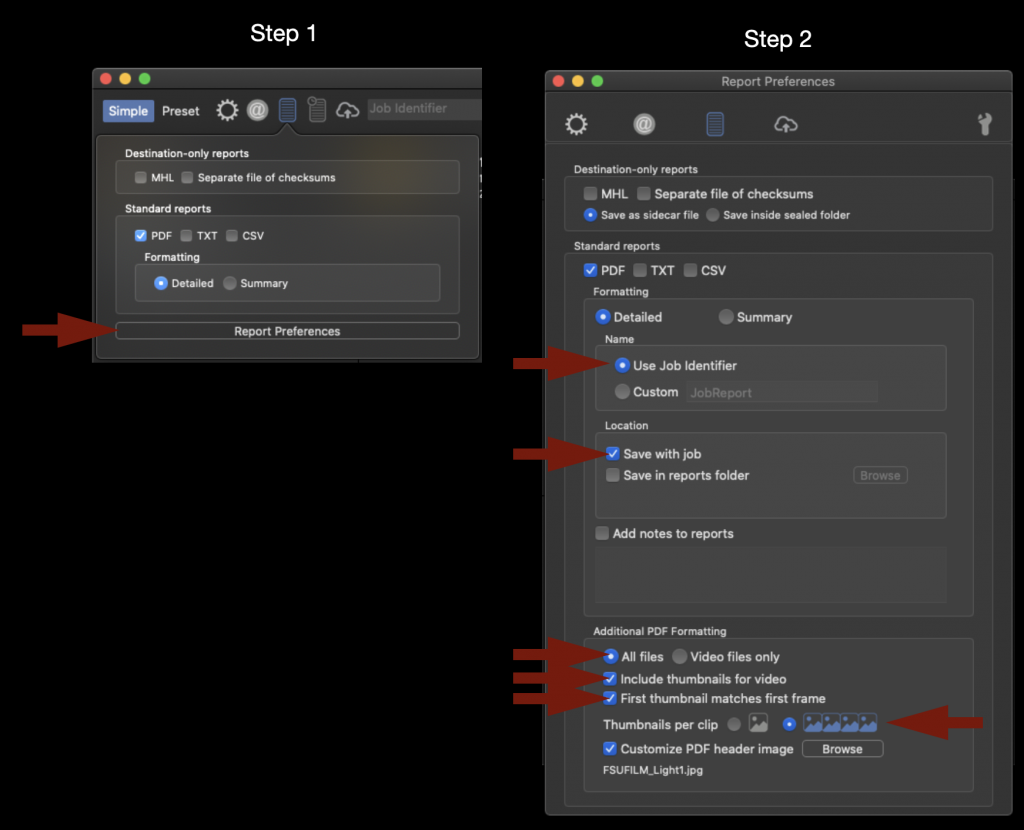
    Next make “Report Preferences” and make sure that all the options are check as shown in the example below. This won’t effect the actual offload at all but it will dictate how the pdf that is generated after the offload will be formatted.

    When everything looks good you can start the offload by selecting the Blue Arrow.

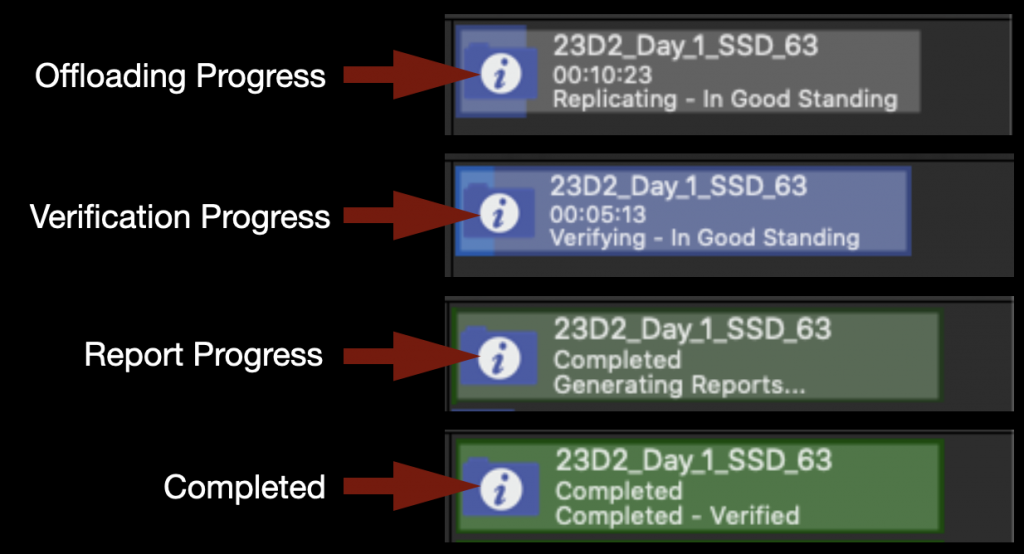
    On the right hand side you will see the progress bar appear and you can monitor how long it will take. It will go through several phases as shown below and ho long it takes is dependent on how much media was on the card.

    While the video is being offloaded you can go ahead and set the audio offloading at the same time. Just repeat the same process as you did before. To offload the entire contents of the SD Card drag the disk icon and drop it in the box labeled “offload from”.

    Next navigate down into the folder tree on the left hand side until you find the proper Show and Day folder for your production. Then drag the folder icon and drop it in the box labeled “offload to”.

    In the field labeled “Job Identifier” fill in the information for this offload in the following format: Production#_Day#_Card#.

    You can click the blue start arrow again and it will sue up your next offload. When both media cards have finished offloading and are verified it will appear as shown below.

    The media is now safely offloaded to the CMPAFilmPost Server.

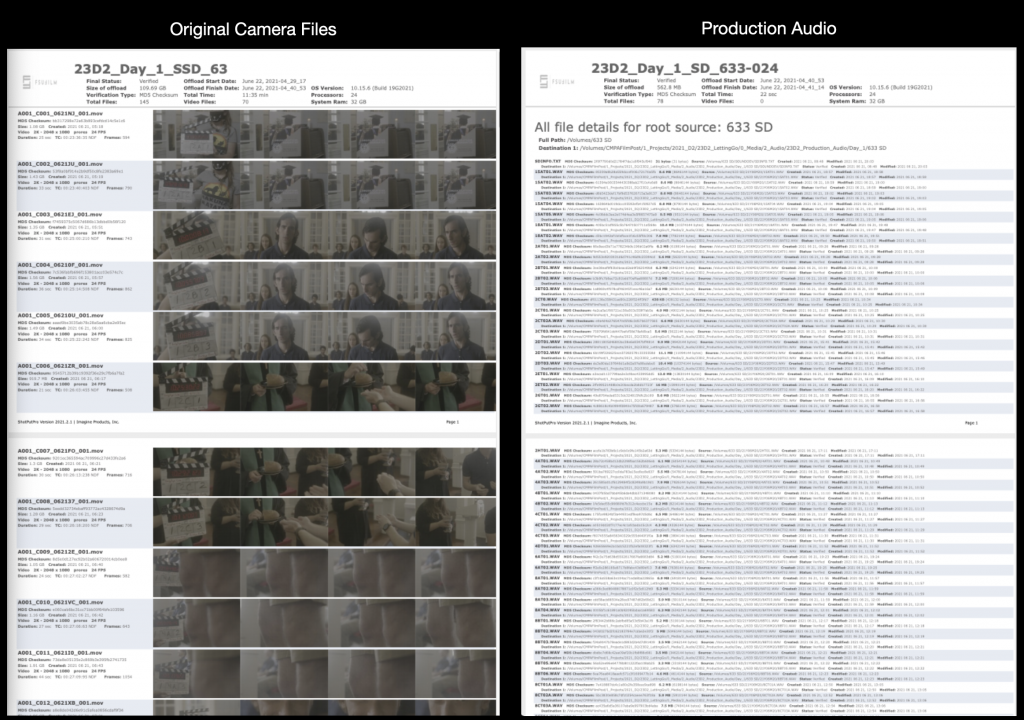
    Verification Reports

    You can find the verification reports alongside the media in the folder that you pointed ShotPut Pro toward.

    The Verification Reports should look like the examples below.

    After checking the reports upload them to the appropriate show folder on Frame.io.

    Wrap Up

    The SD card will need to be erased after you have verification from ShotPut Pro that the data was transferred safely. Remember to empty the trash after deleting the sound card media as that is the only way to free up space on the card. You do not need to erase the Red Mini Mags as they will be reformatted the next time they are put in the camera. Return the media cards to their cases and return them to the shows cubby in the ingest room. Now that the tape has been removed production will know that they are clear to be used again.

  • Mounting Servers and Show Volumes

    Overview

    This post explains the process for mounting production servers and accessing designated show volumes used for storing, organizing, and sharing project media. Maintaining a consistent workflow for server access is essential for collaboration across editorial, sound, color, VFX, and other post-production departments.

    The procedures outlined here are intended to reduce confusion, prevent file management errors, and ensure that all collaborators are working from the correct media and project structures. Consistent server practices help maintain version control, protect shared assets, and support efficient collaboration across large teams. Developing disciplined organizational habits in post-production environments is a critical professional skill, particularly on projects involving multiple editors, assistants, and departments.

    Mounting CMPAFilmPost

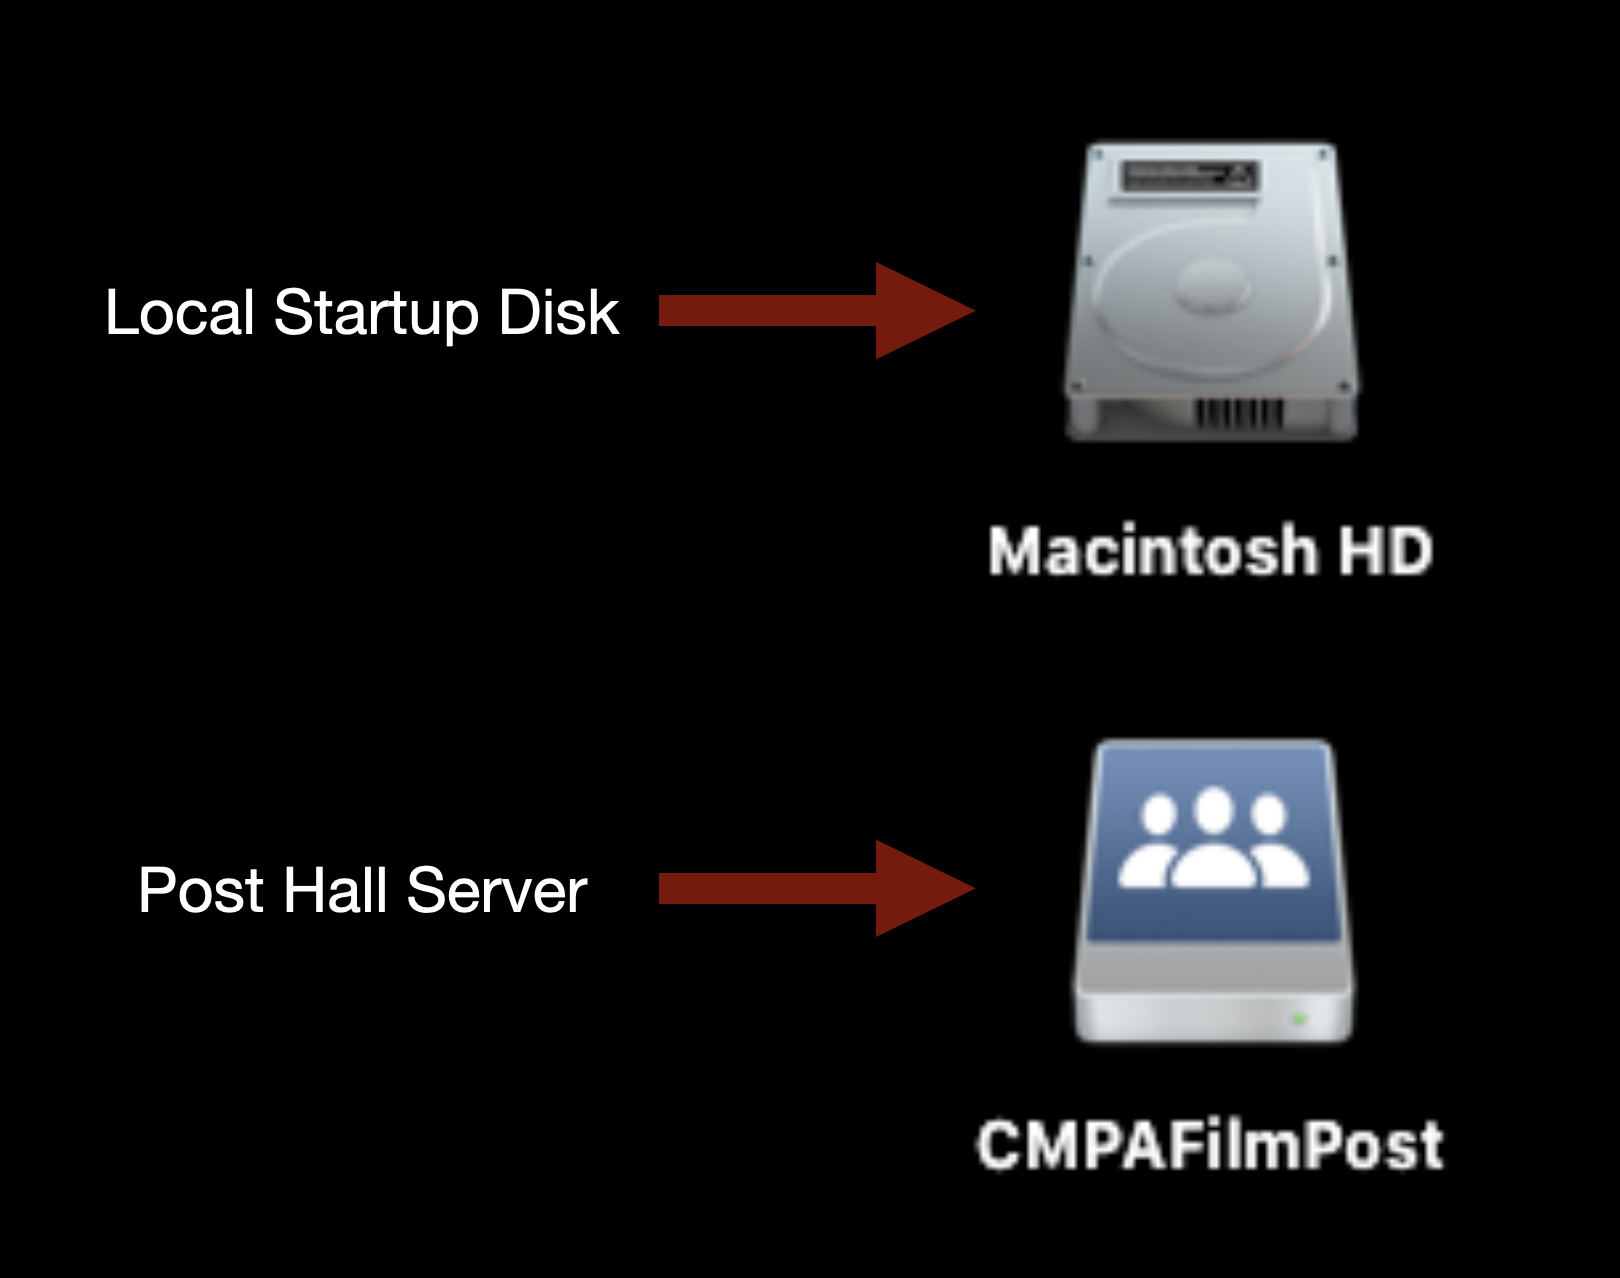
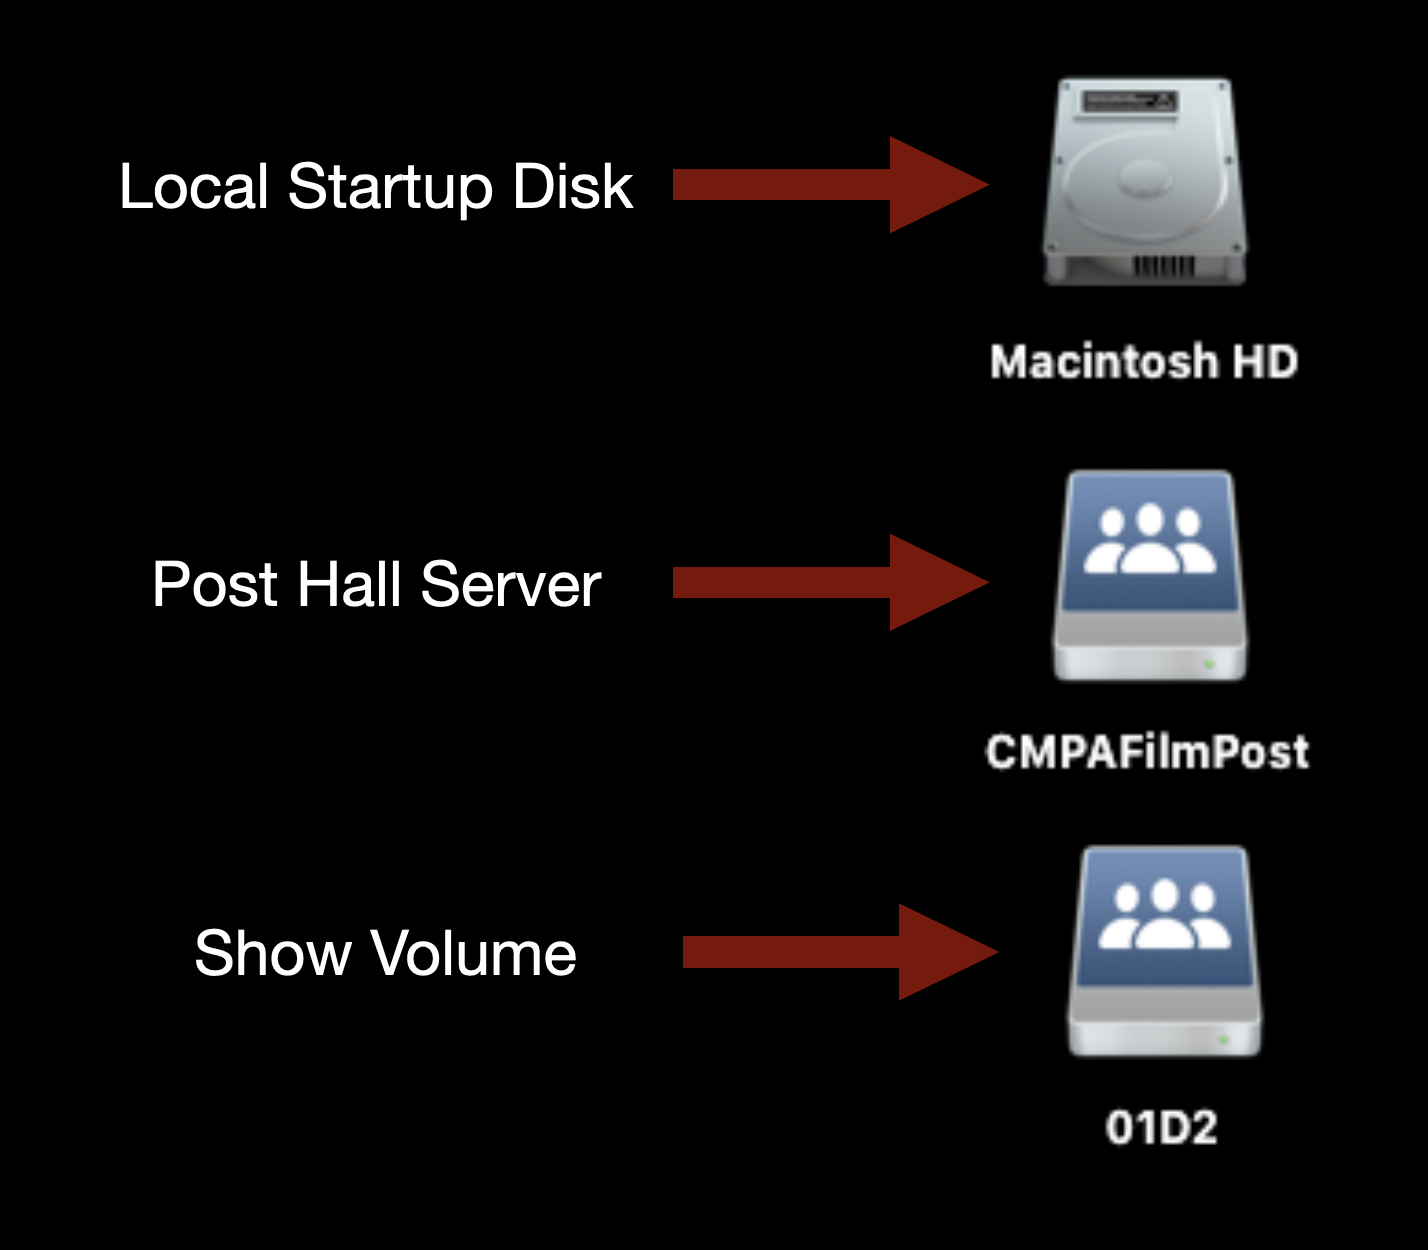
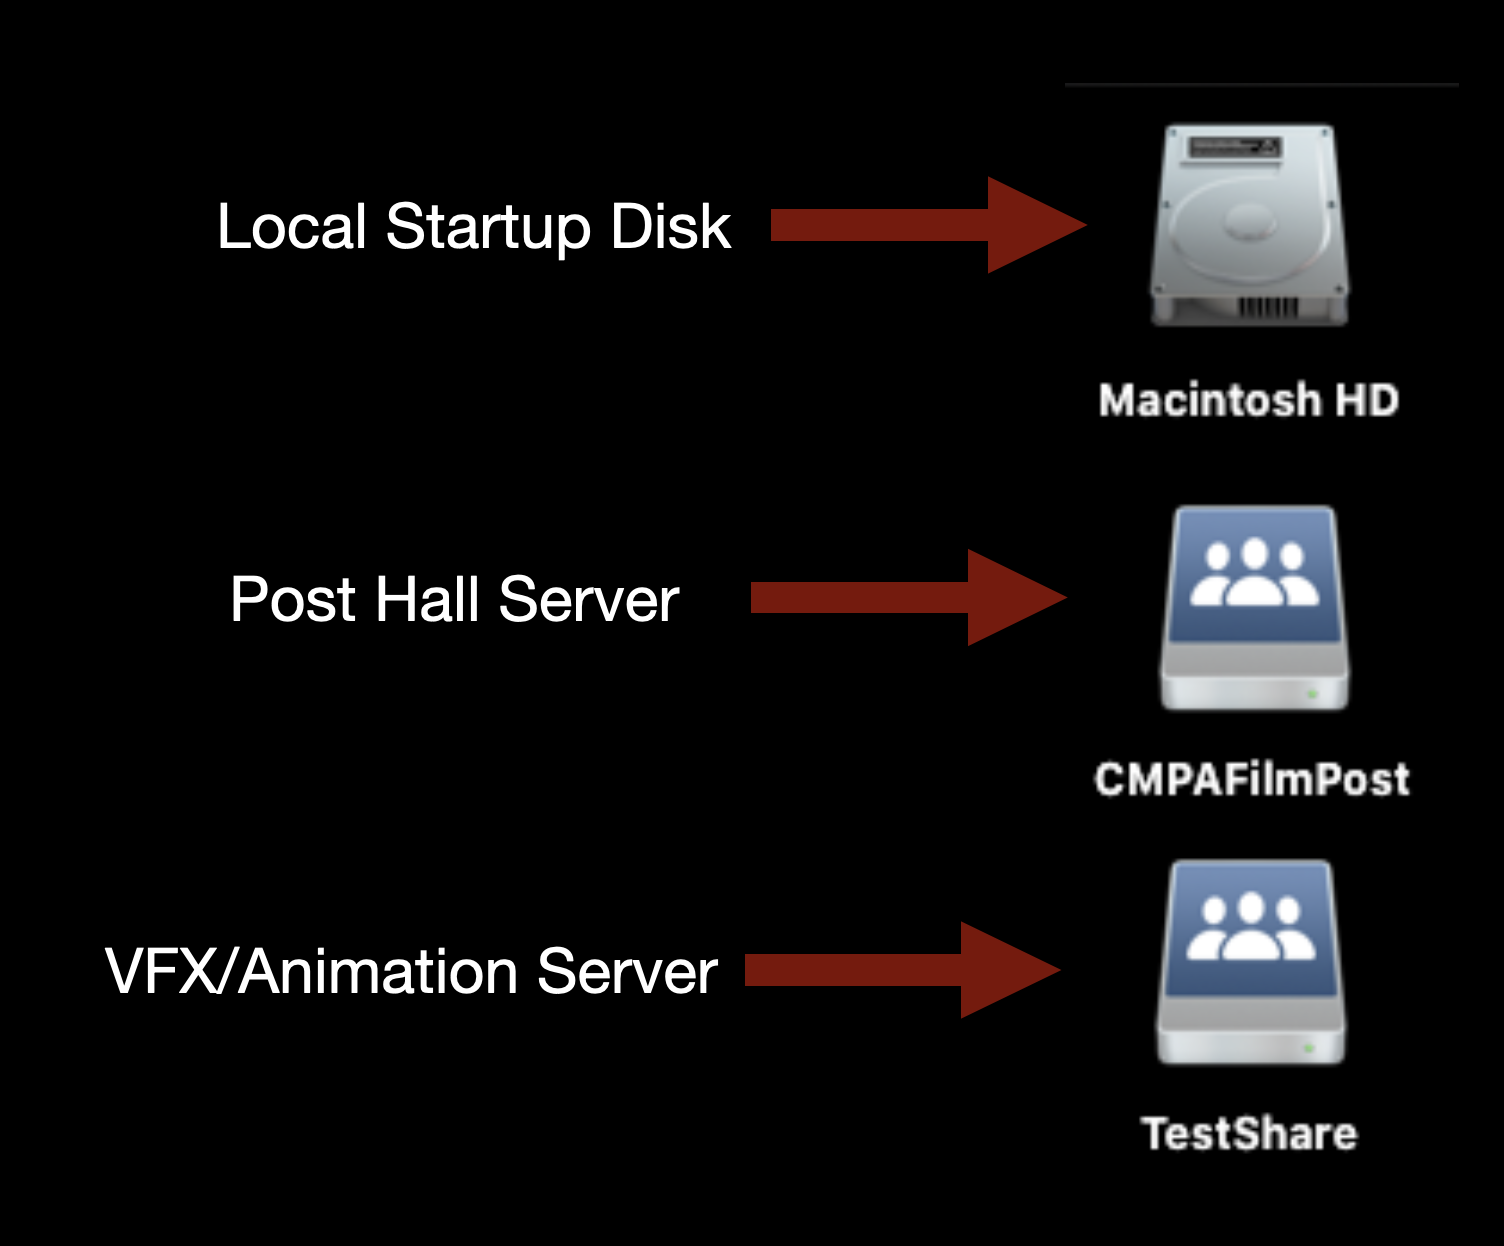
    CMPAFilmPost or “the post hall server” should always be mounted on the desktop of your machine and will look like the example below.

    Desktop icons for Local Startup Disk and Post Hall Server

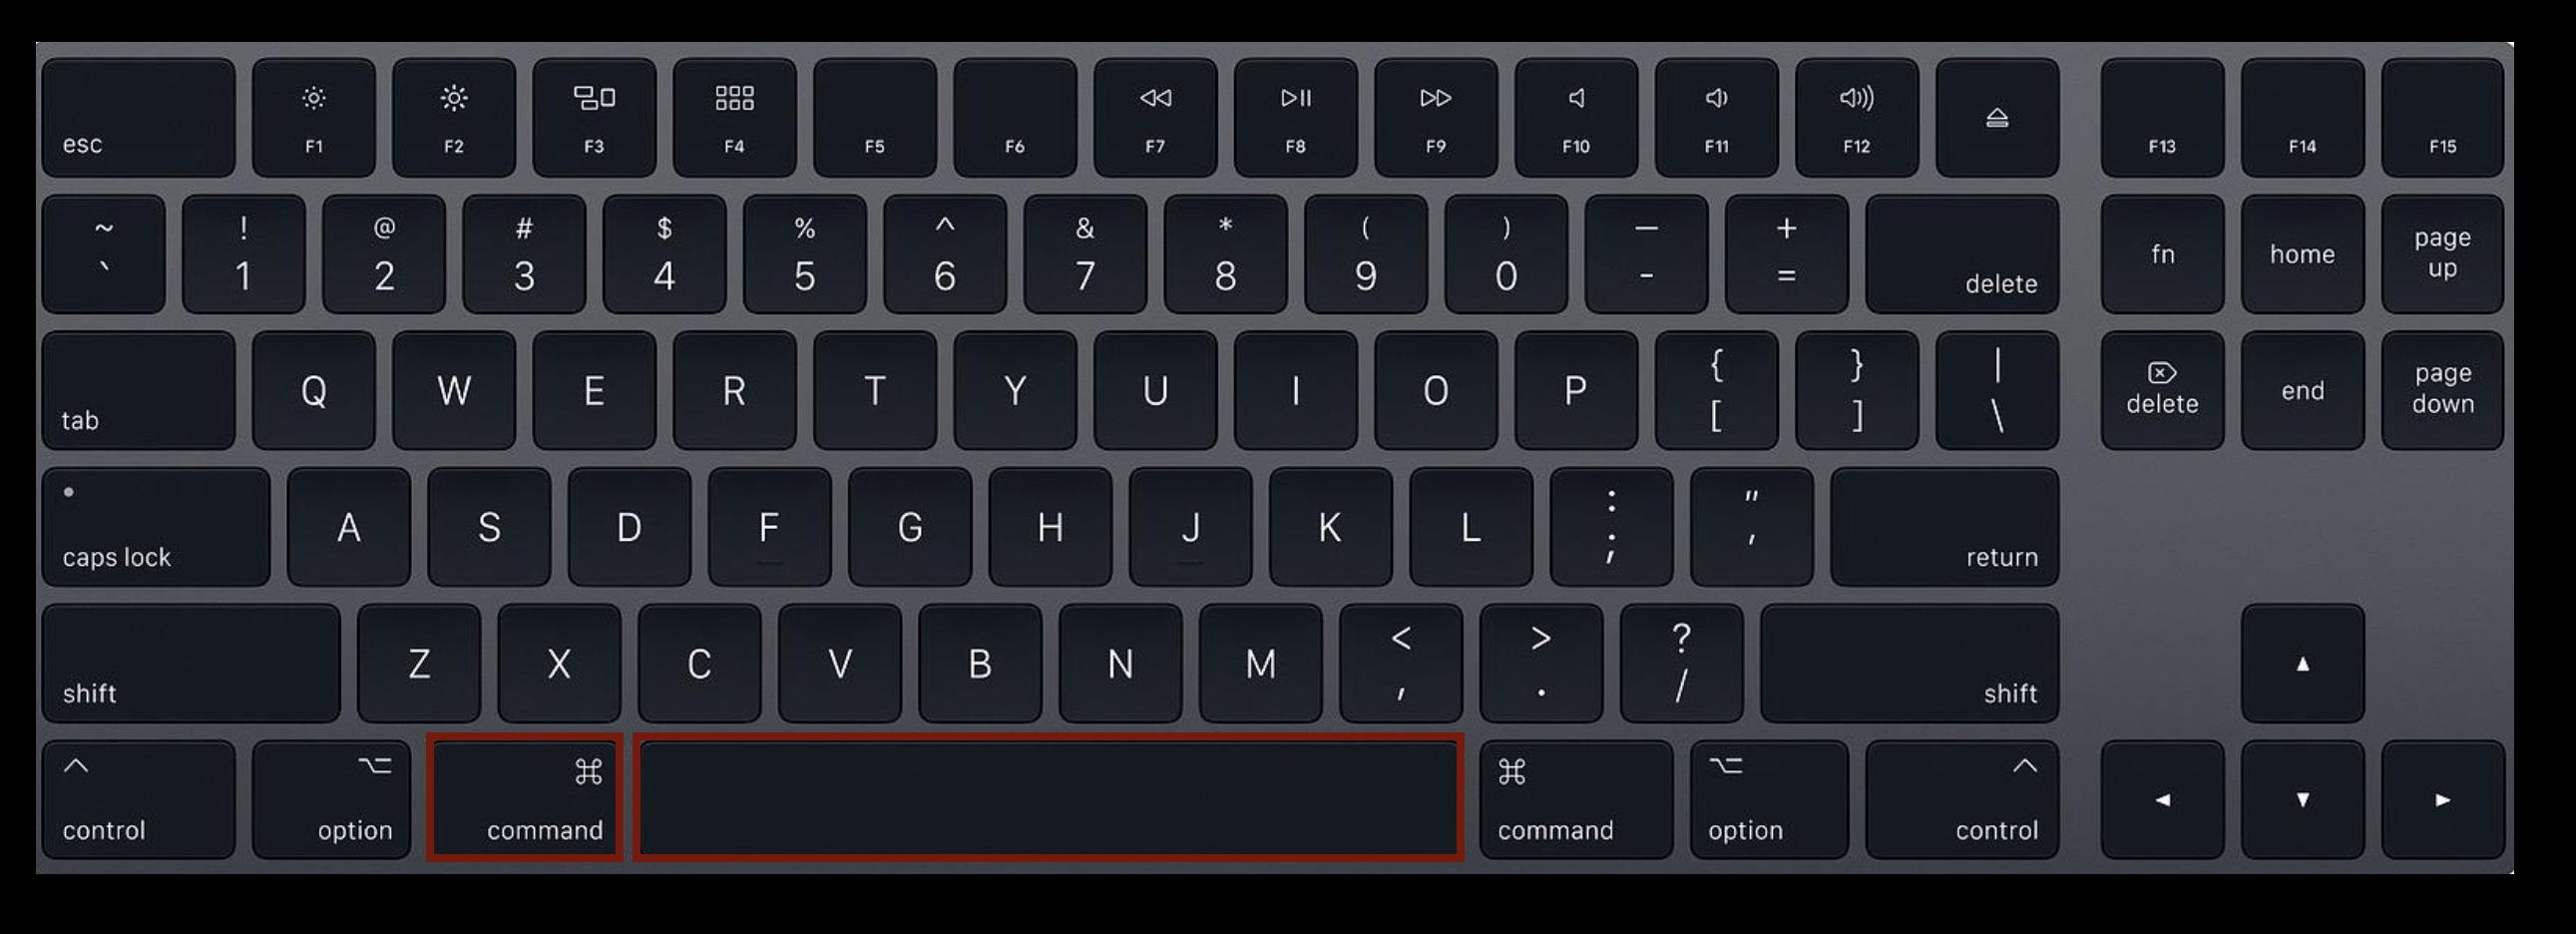
    If for some reason it is not mounted type “Command” + “Spacebar” on the keyboard.

    Command-Space on keyboard

    This will bring up the Spotlight Search function.

    Spotlight search

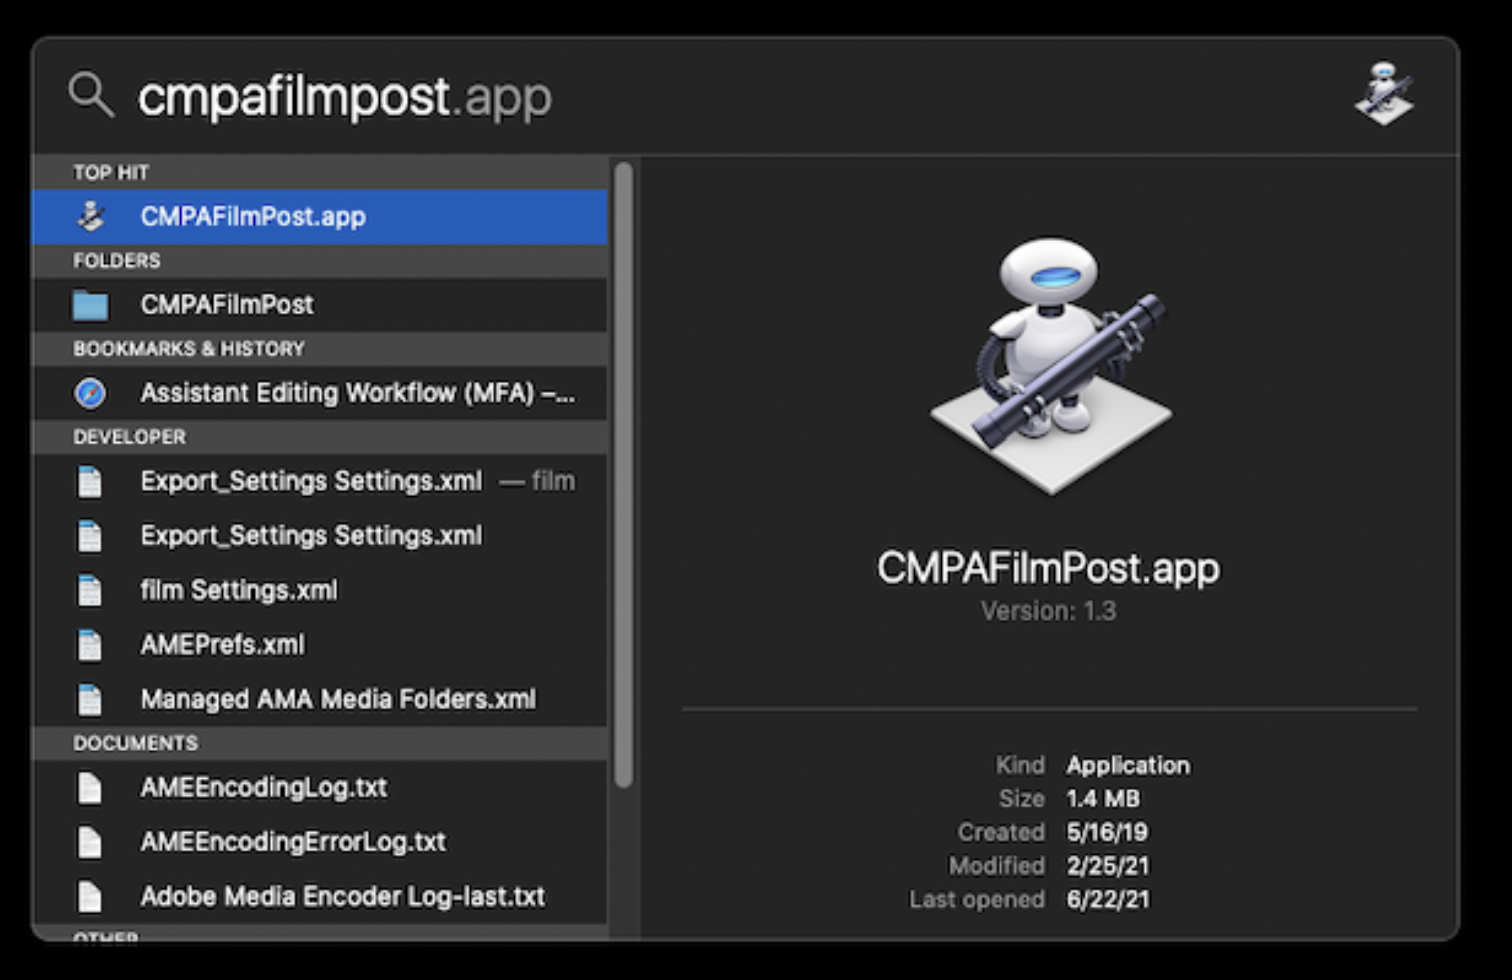
    Type in “cmpafilmpost”. This will find an app that will mount the server. Hit “Enter” and it mount and you will see it on the desktop.

    Cmpafilmpost.app in Spotlight search

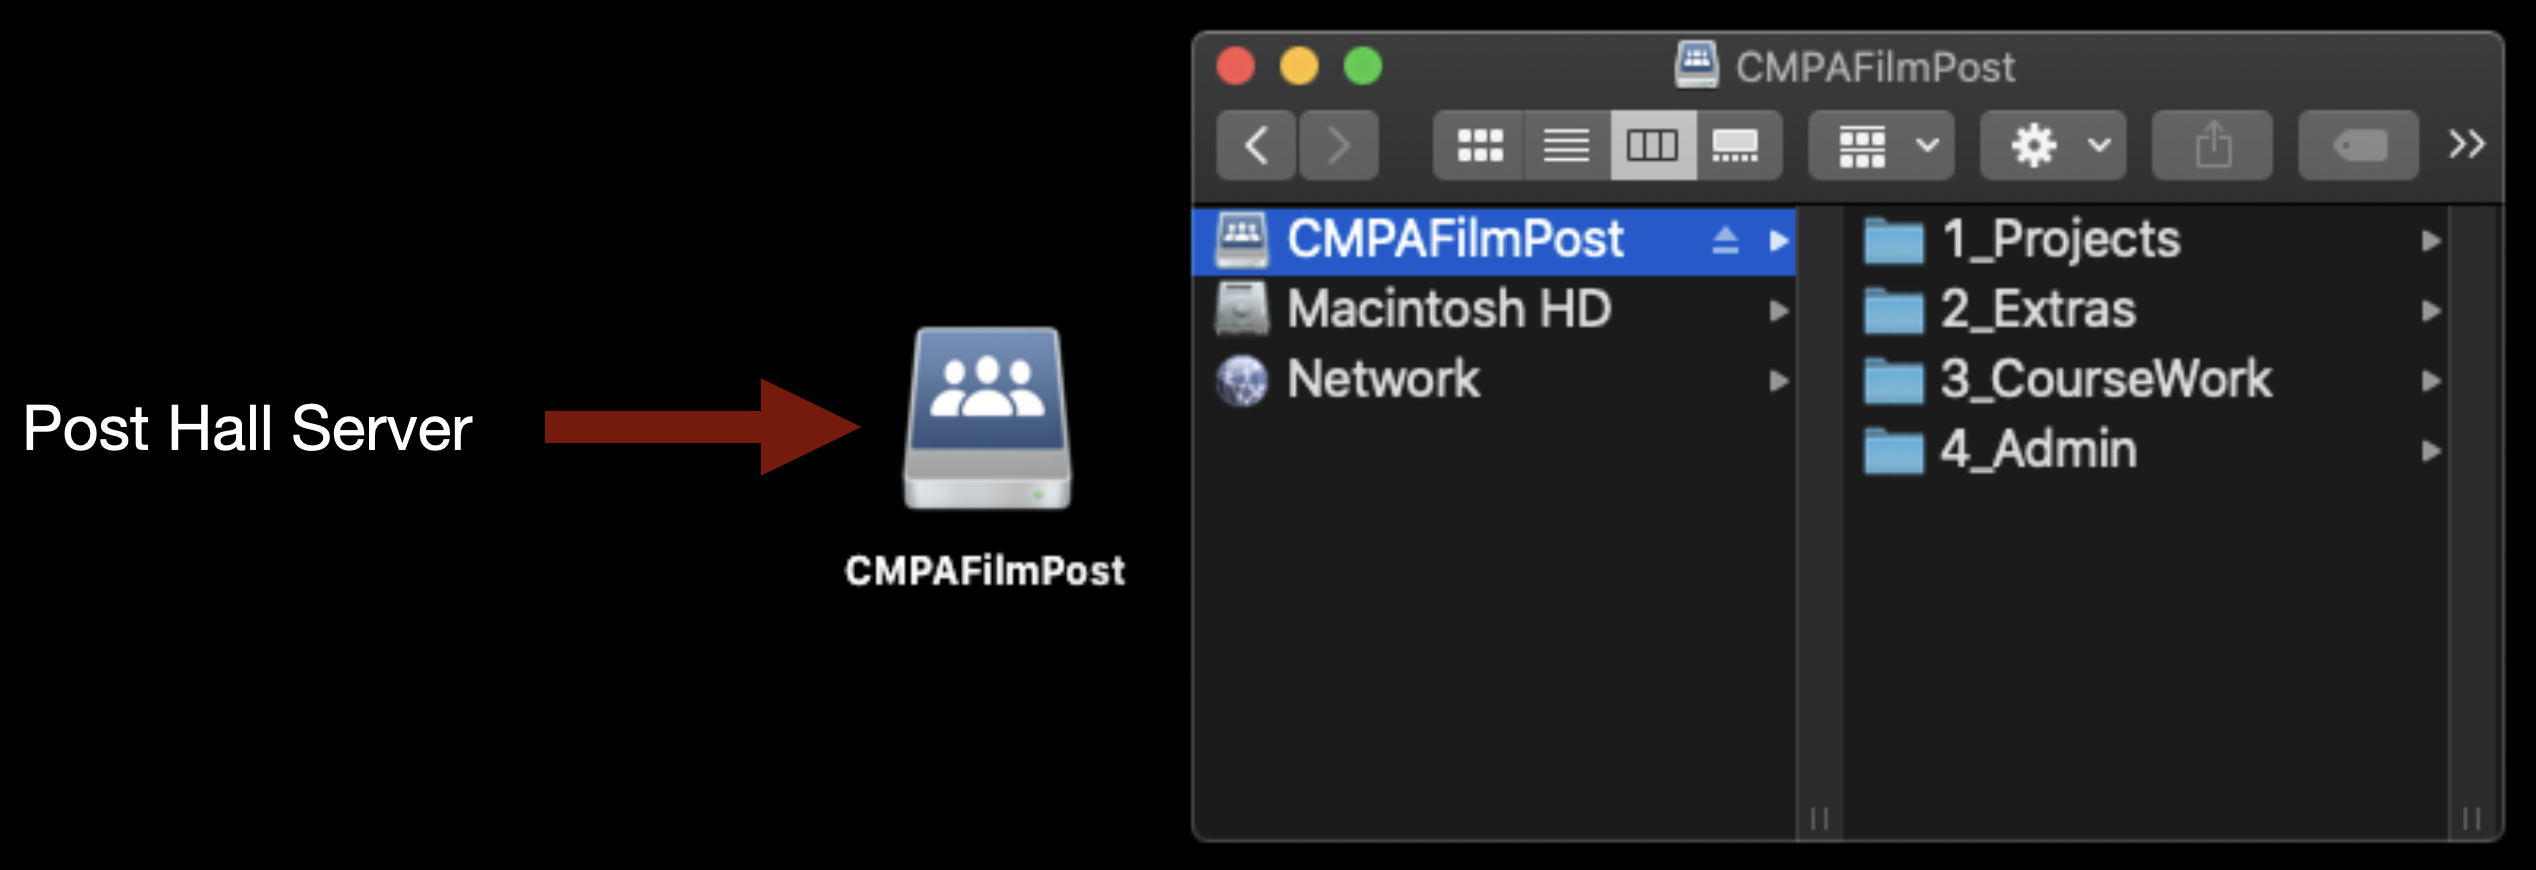
    This is the main post hall server. This is where your Original Camera files and Production Audio will live.

    CMPAFilmPost root-level directory structure

    Mounting Show Volume

    Each film will have its own individual “Show Volume”. This is where your Media Composer Project and ProTools Project will live. You will need to mount the volume specific to the film you are working on.

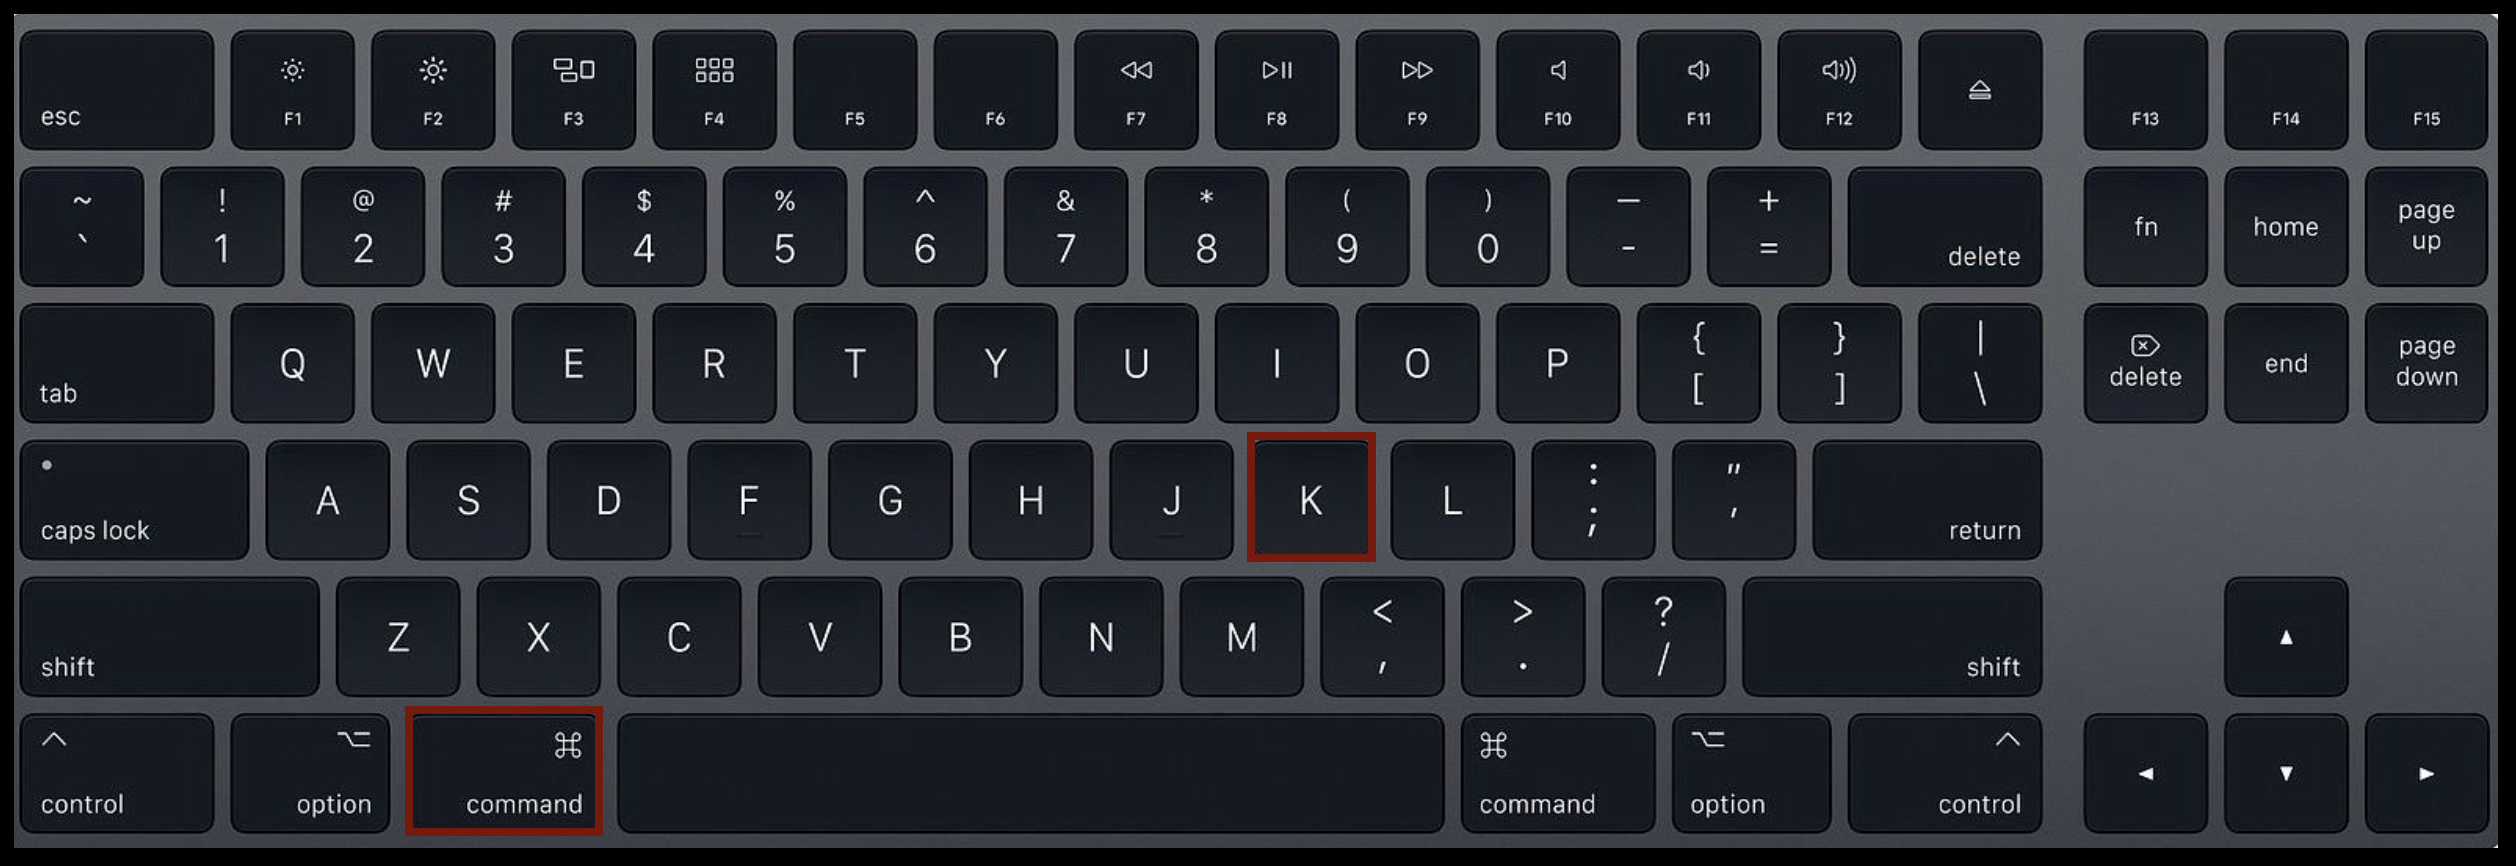
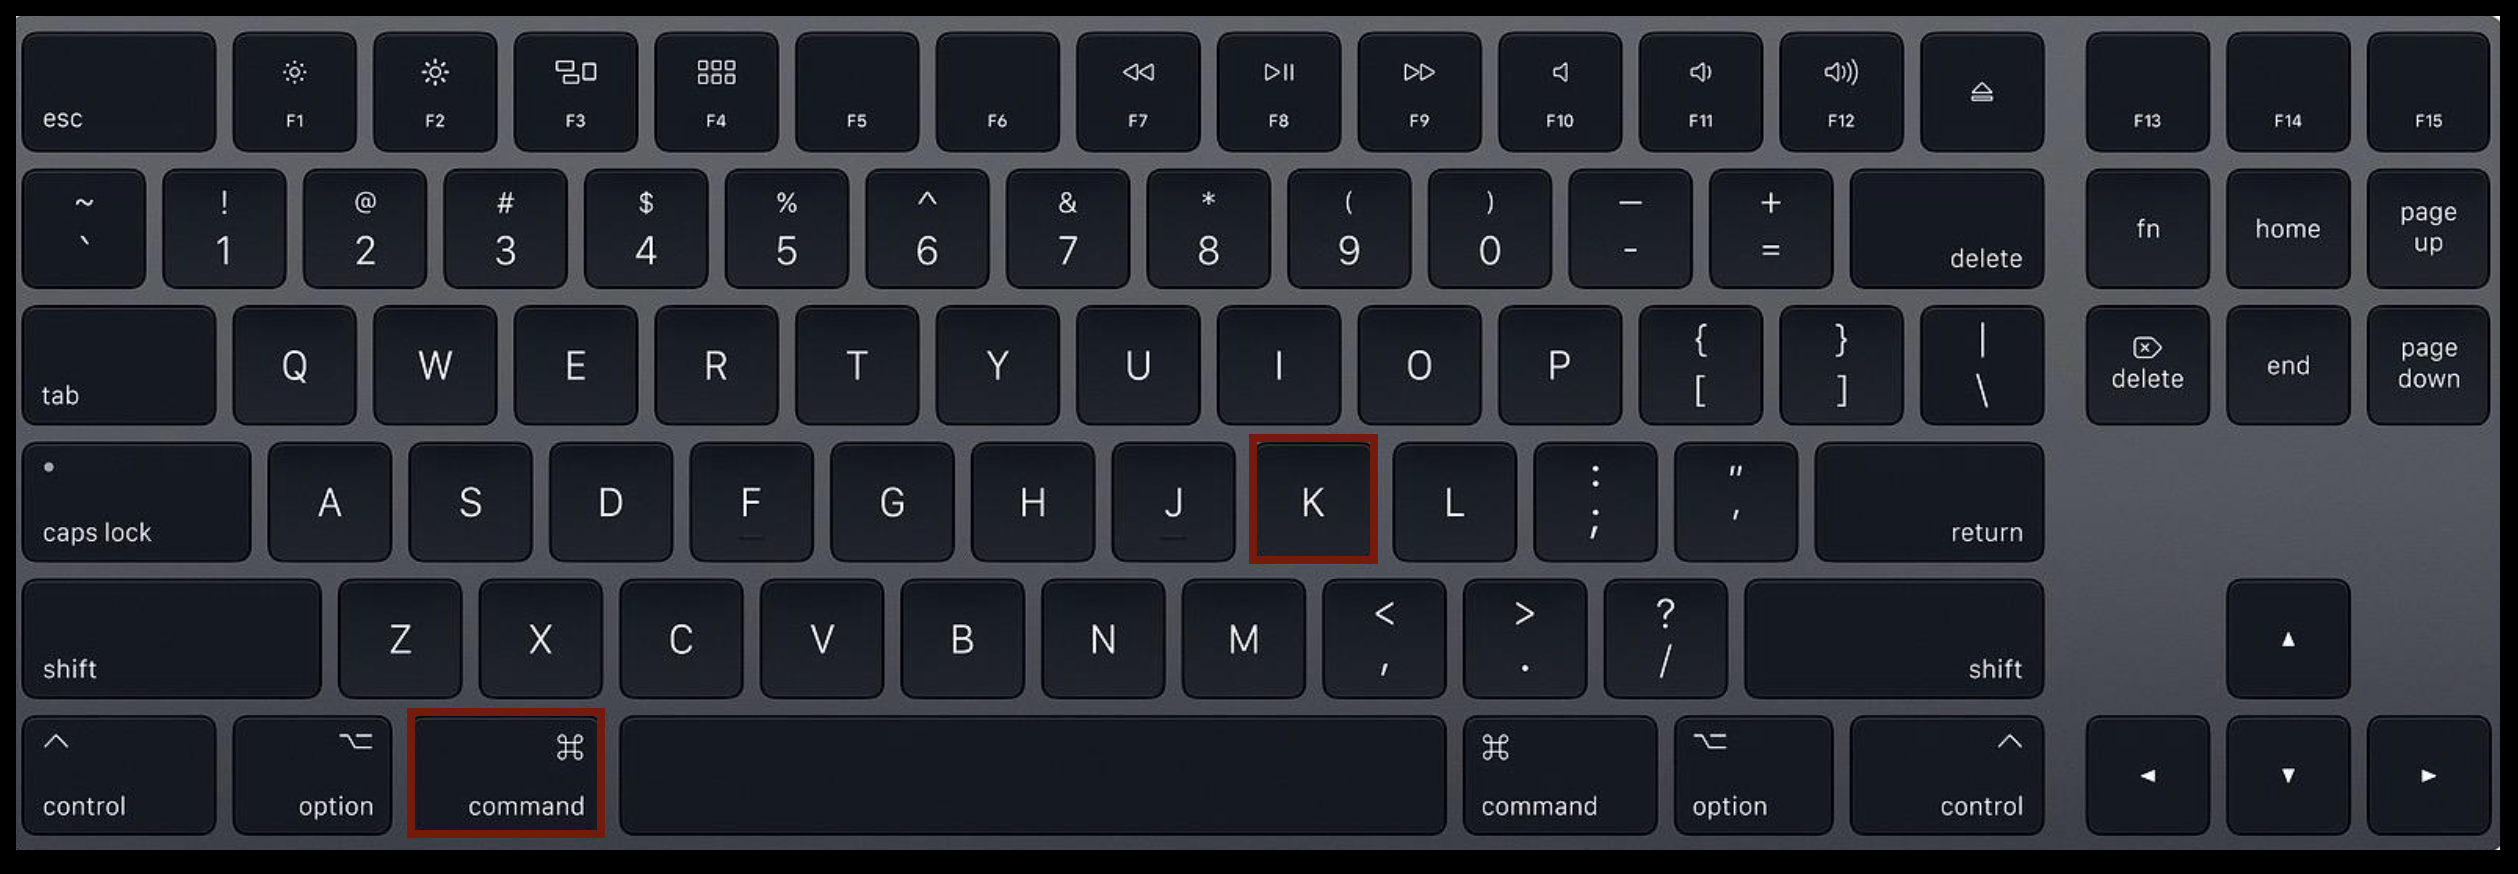
    To do so type “Command” + “K” on the keyboard.

    Command-K on keyboard

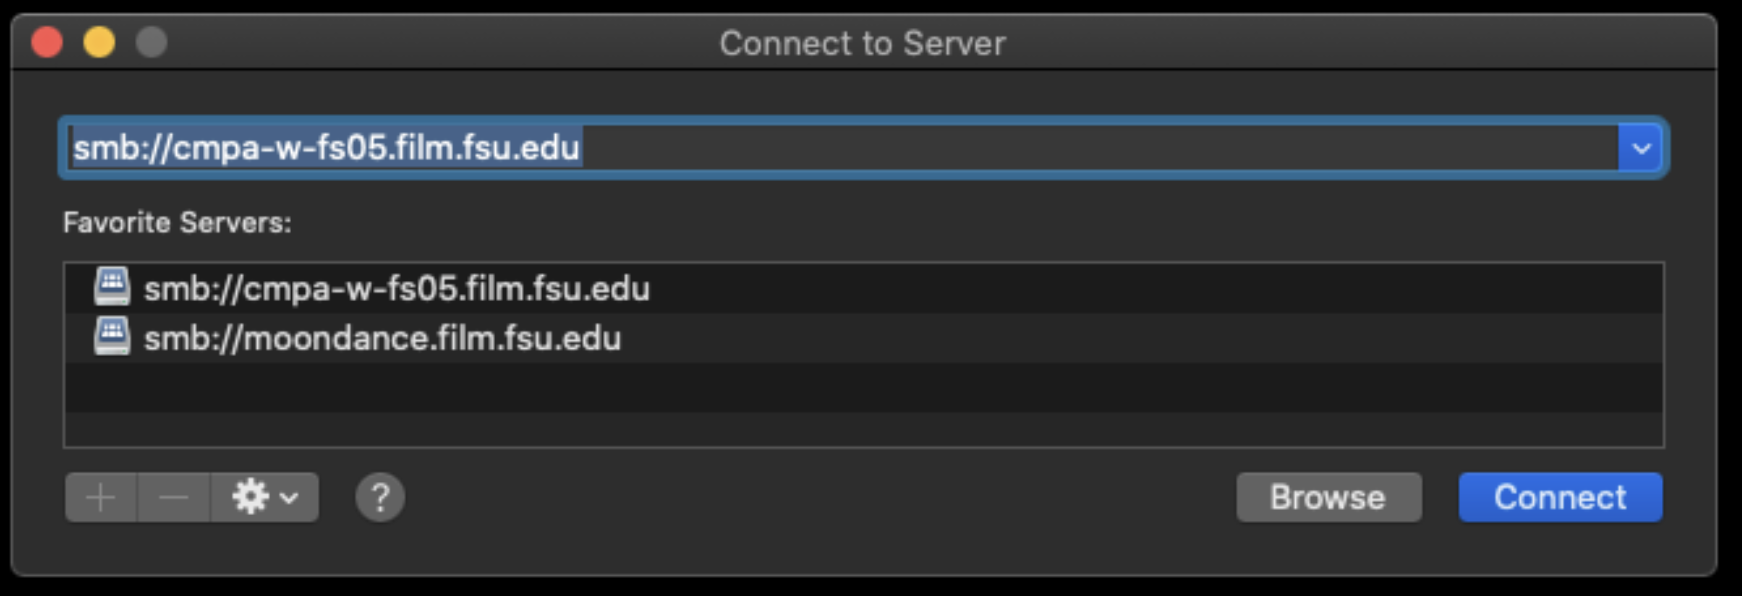
    This will bring up the “Connect to Server” prompt. Type in the address:
    smb://cmpa-w-fs05.film.fsu.edu

    Connect to Server

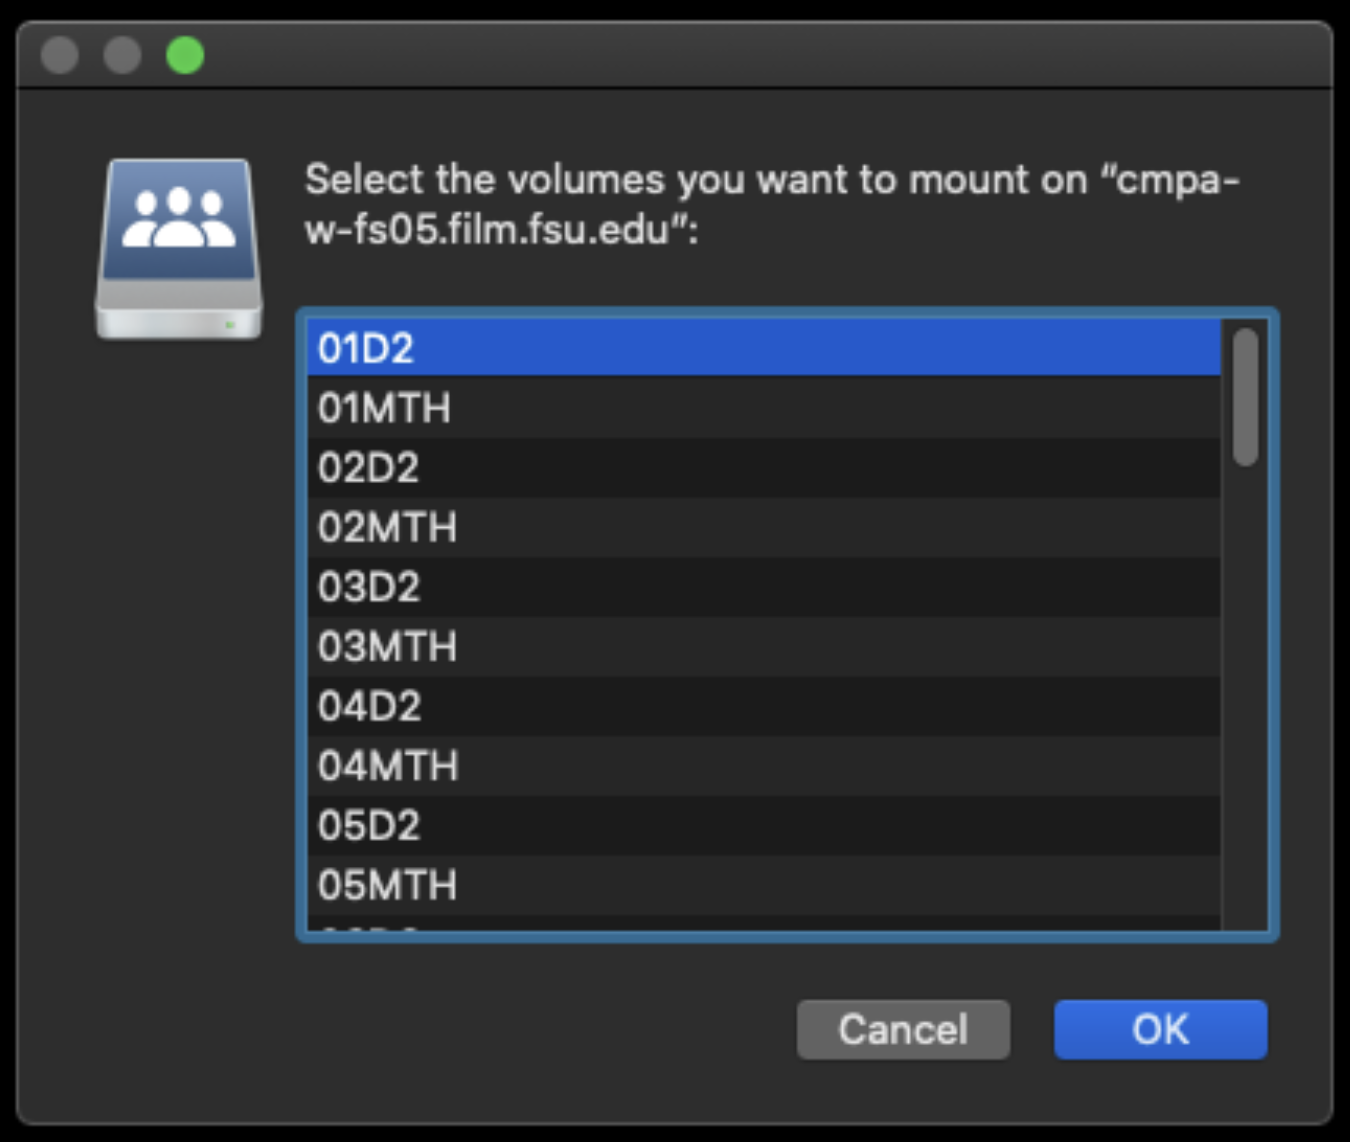
    This will show all the possible show volumes that are available to choose from. Select your show number and then hit OK.

    Select volumes to mount

    It will mount on the desktop and will look like the example below.

    Show Volume icon on desktop

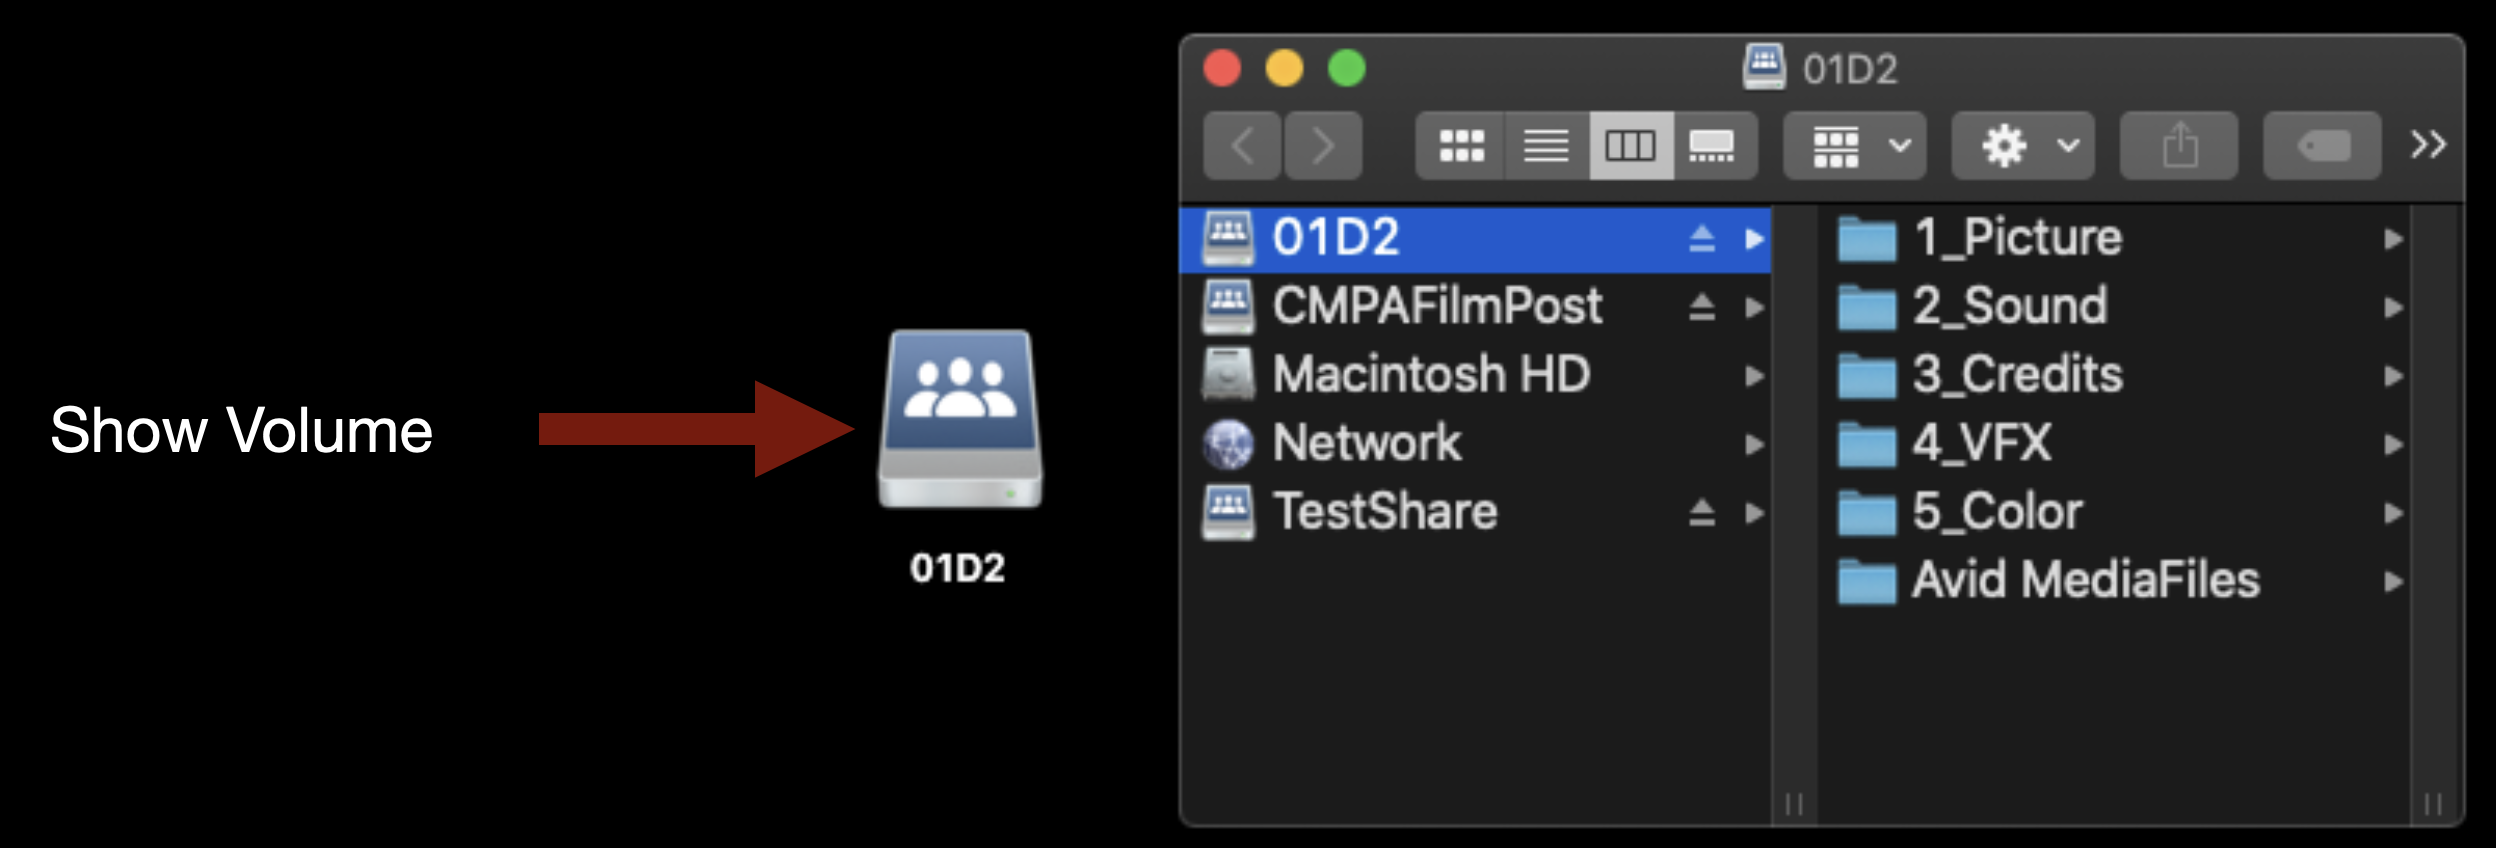
    This is the folder structure inside.

    Show Volume directory structure in Finder

    Mounting TestShare

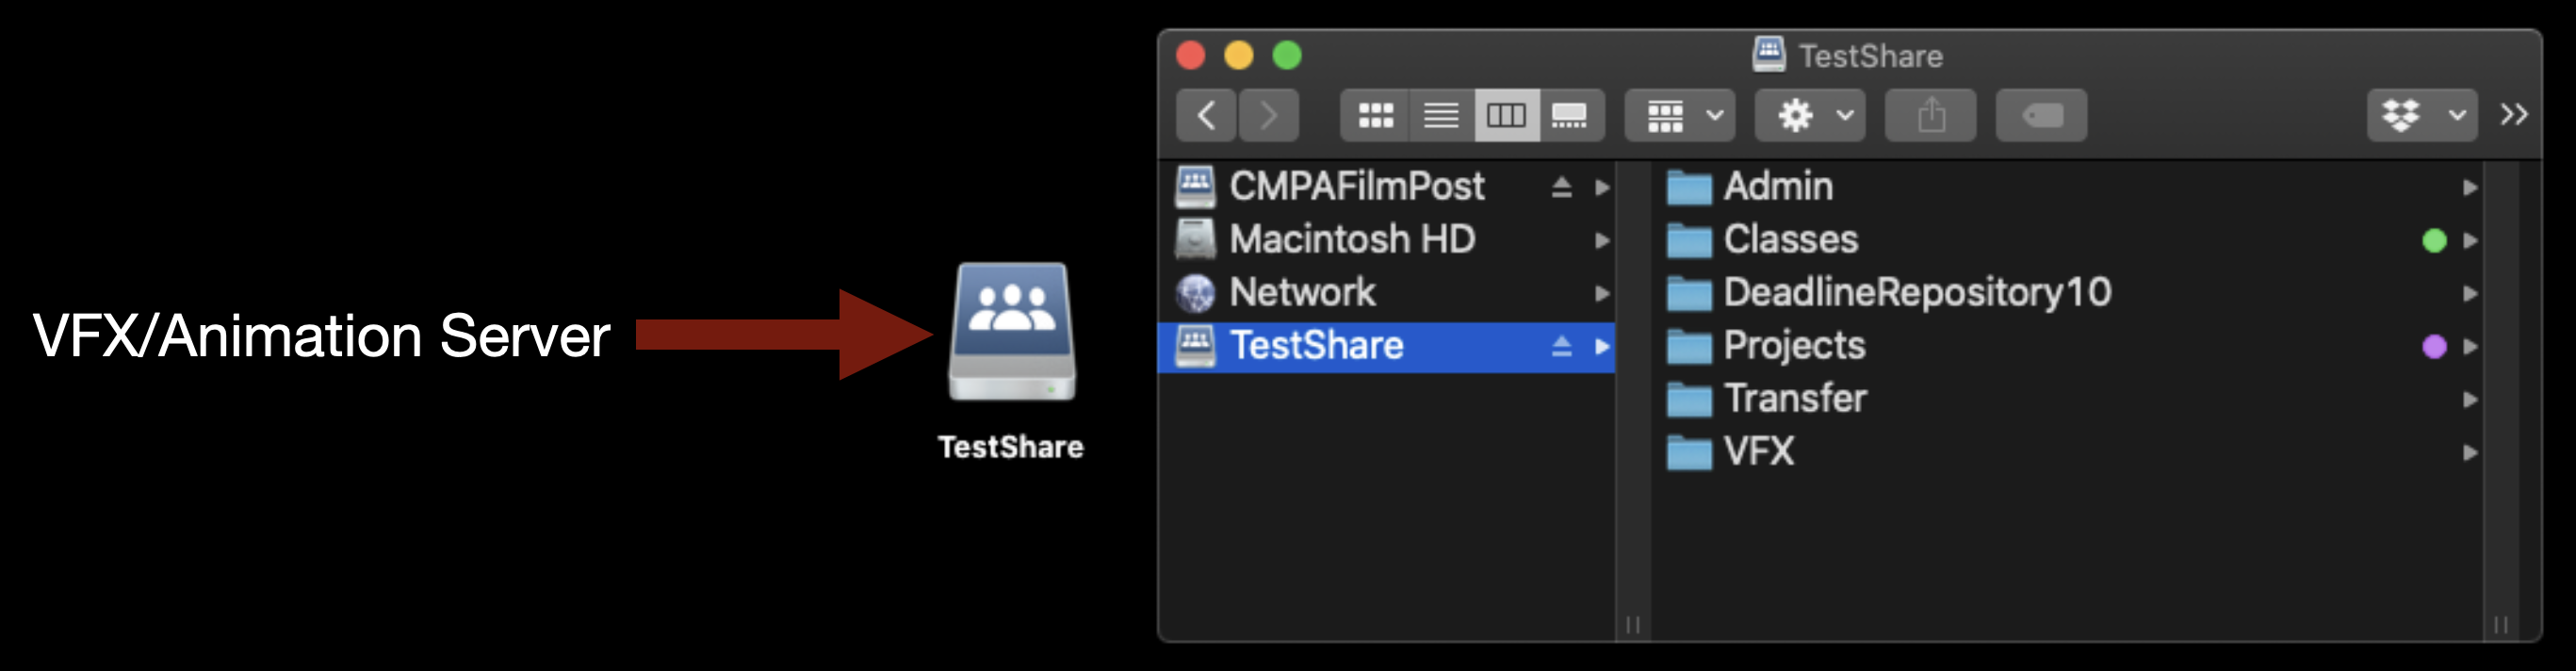
    TestShare or “the Z Drive” is the server used for VFX and Animation work. If you need to mount it type “Command” +”K”.

    Command-K on keyboard

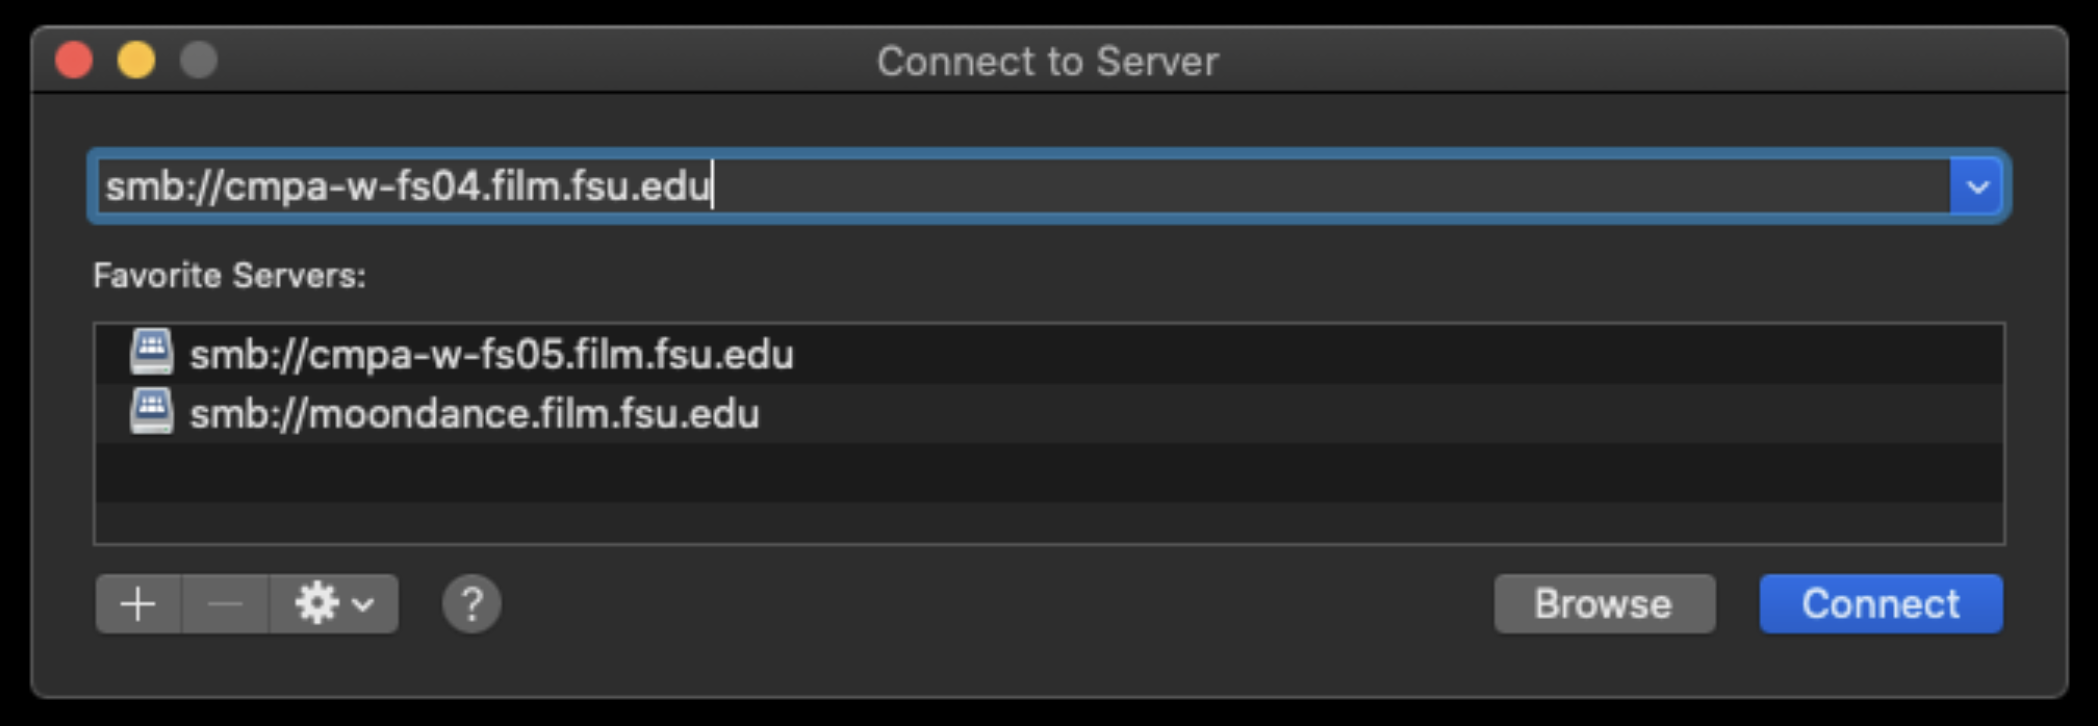
    This will bring up the “Connect to Server” prompt. Type in the address:
    smb://cmpa-w-fs04.film.fsu.edu

    Connect to Server

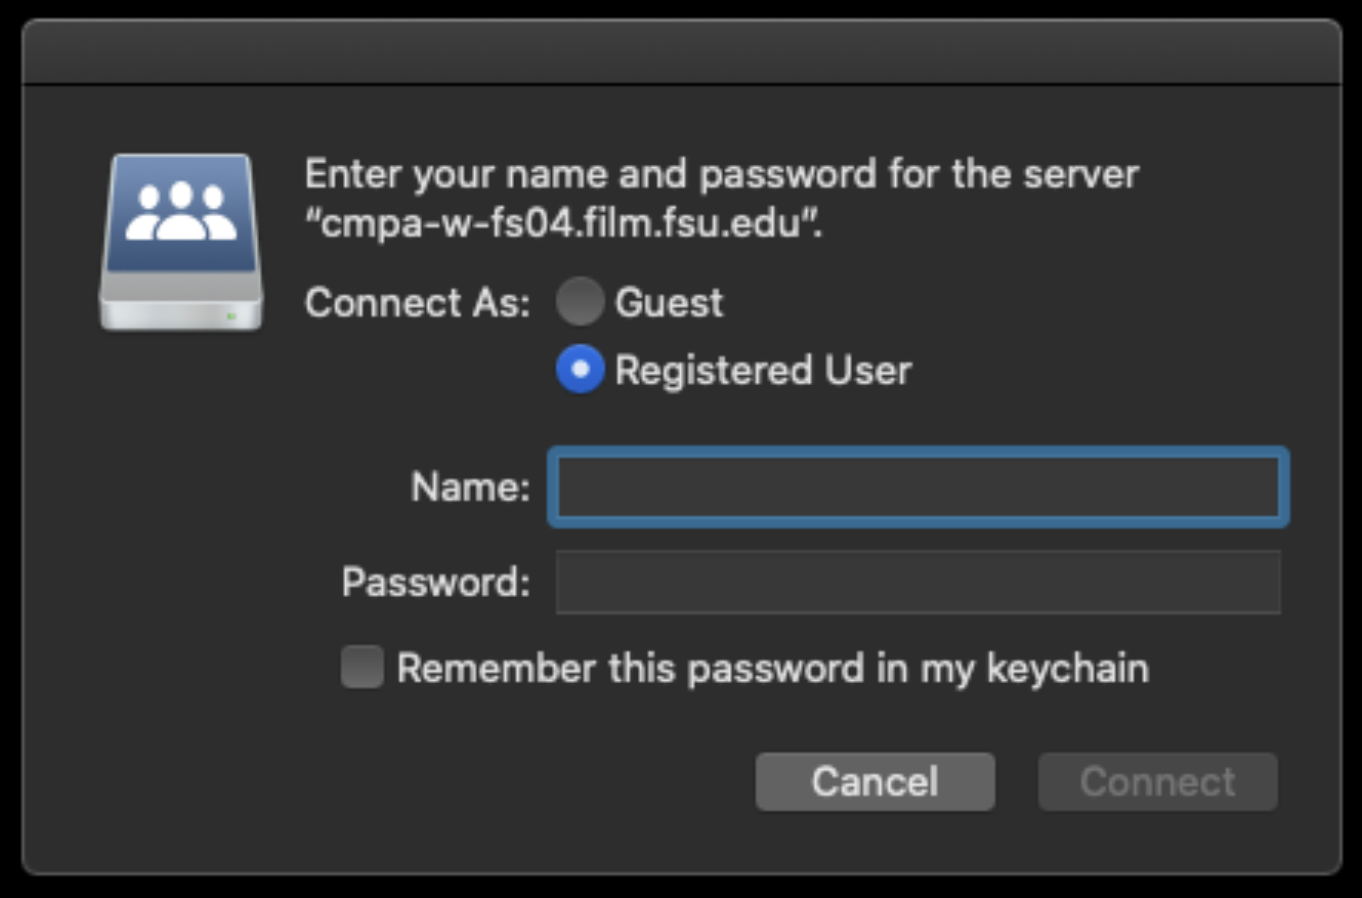
    You will need to enter your FSU ID and Password.

    Enter user name and password

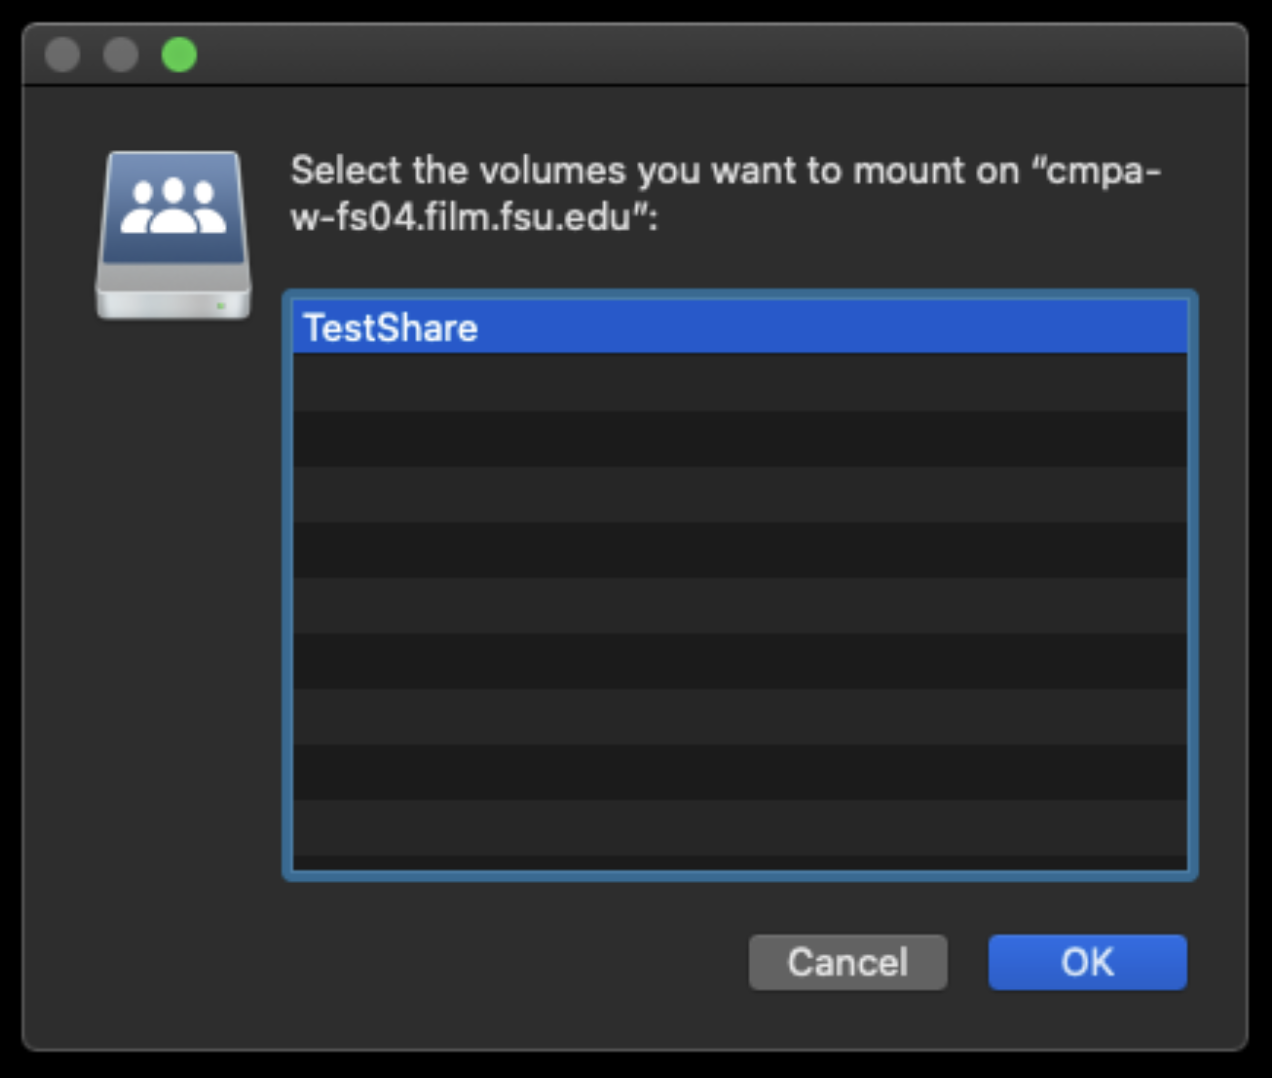
    After that it will let you choose “TestShare”. Click OK to mount it.

    Select volume to mount

    It will mount on the desktop and will look like the example below.

    Volume mounted on desktop

    This is the folder structure inside.

    Volume folder structure in Finder

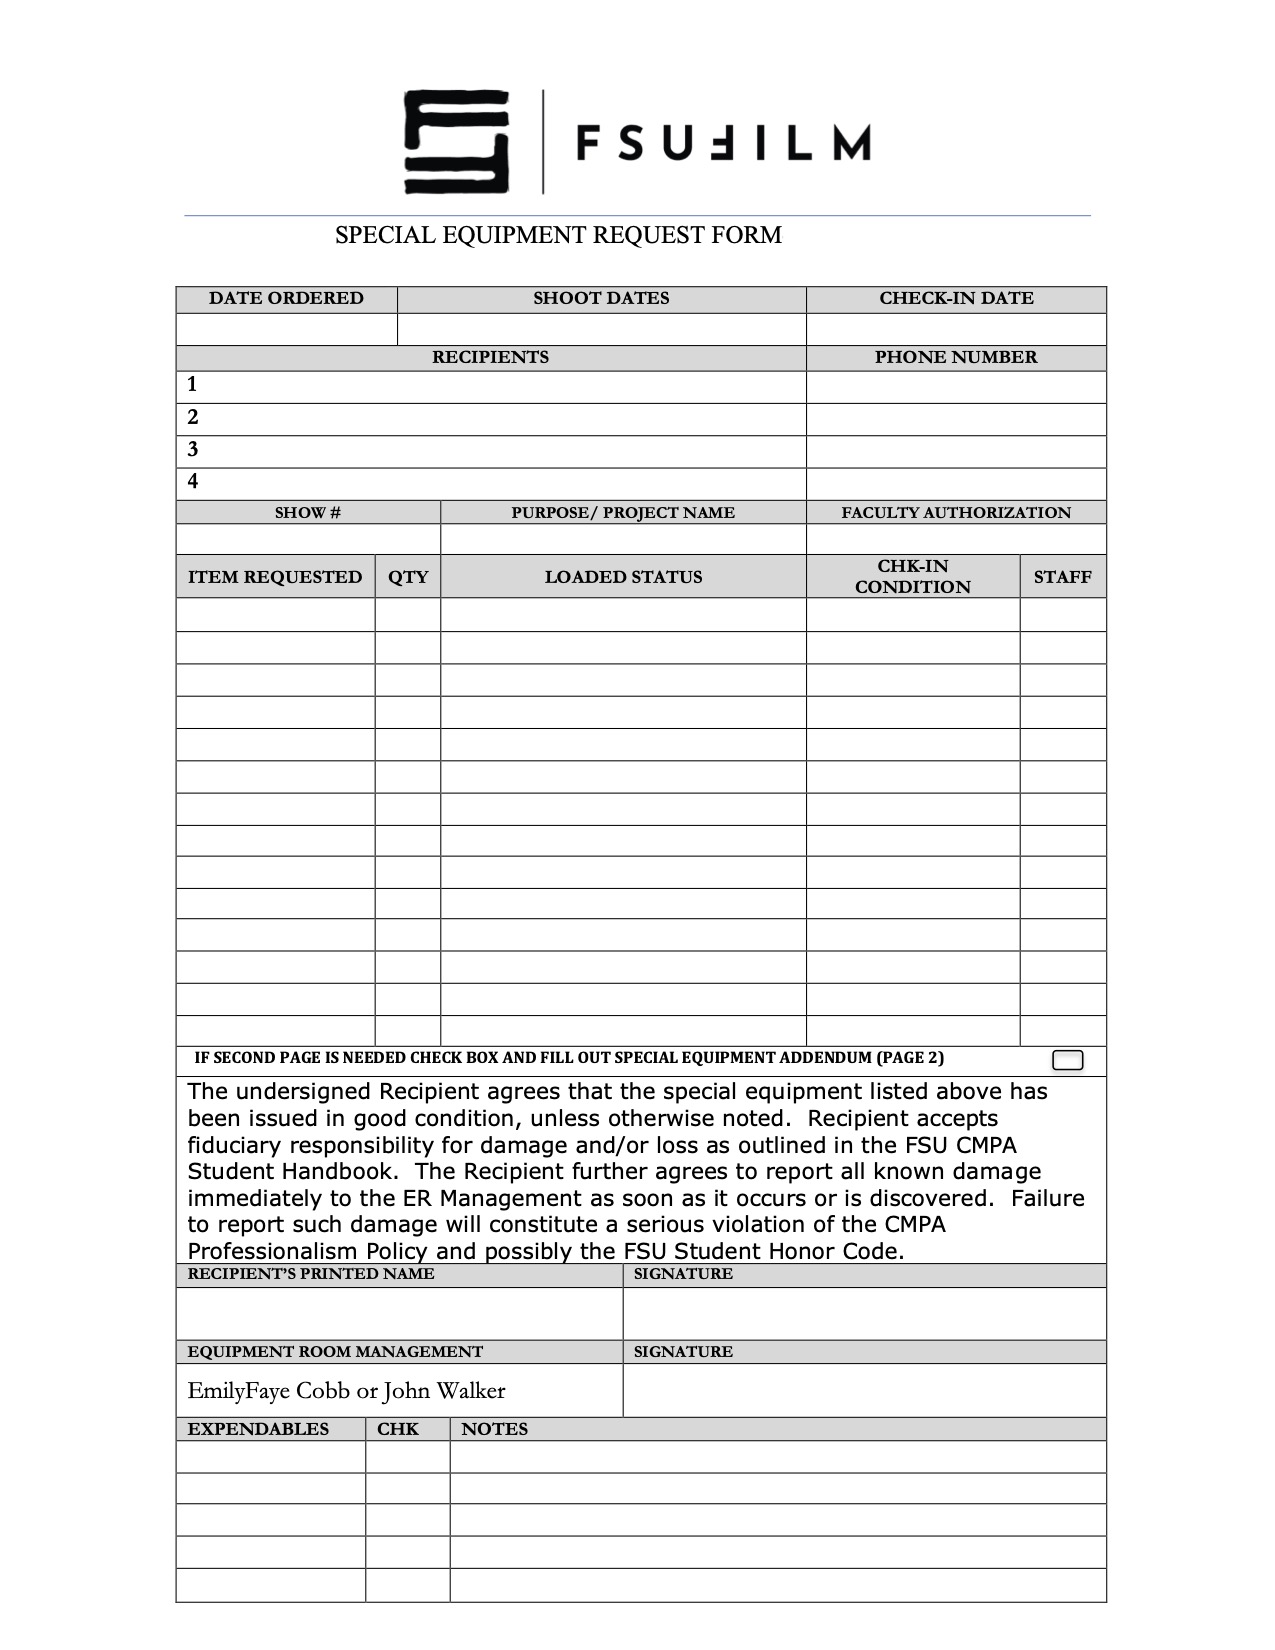
  • Special Equipment Request Form

    Overview

    The Special Equipment Request process exists to help productions gain access to tools, gear, or resources that fall outside the standard equipment packages provided by the school. This may include specialty camera support, lighting, lenses, production design materials, VFX-related tools, or other project-specific needs that require advance review and approval.

    Because equipment availability, staffing, budgets, and safety considerations are limited, requests must be carefully evaluated to ensure that resources are allocated fairly and responsibly across all productions. The request process also encourages students to think critically about whether specialized equipment meaningfully supports the creative goals of the project, rather than being used unnecessarily. Learning how to justify and plan for technical needs is an important part of professional pre-production and production management.

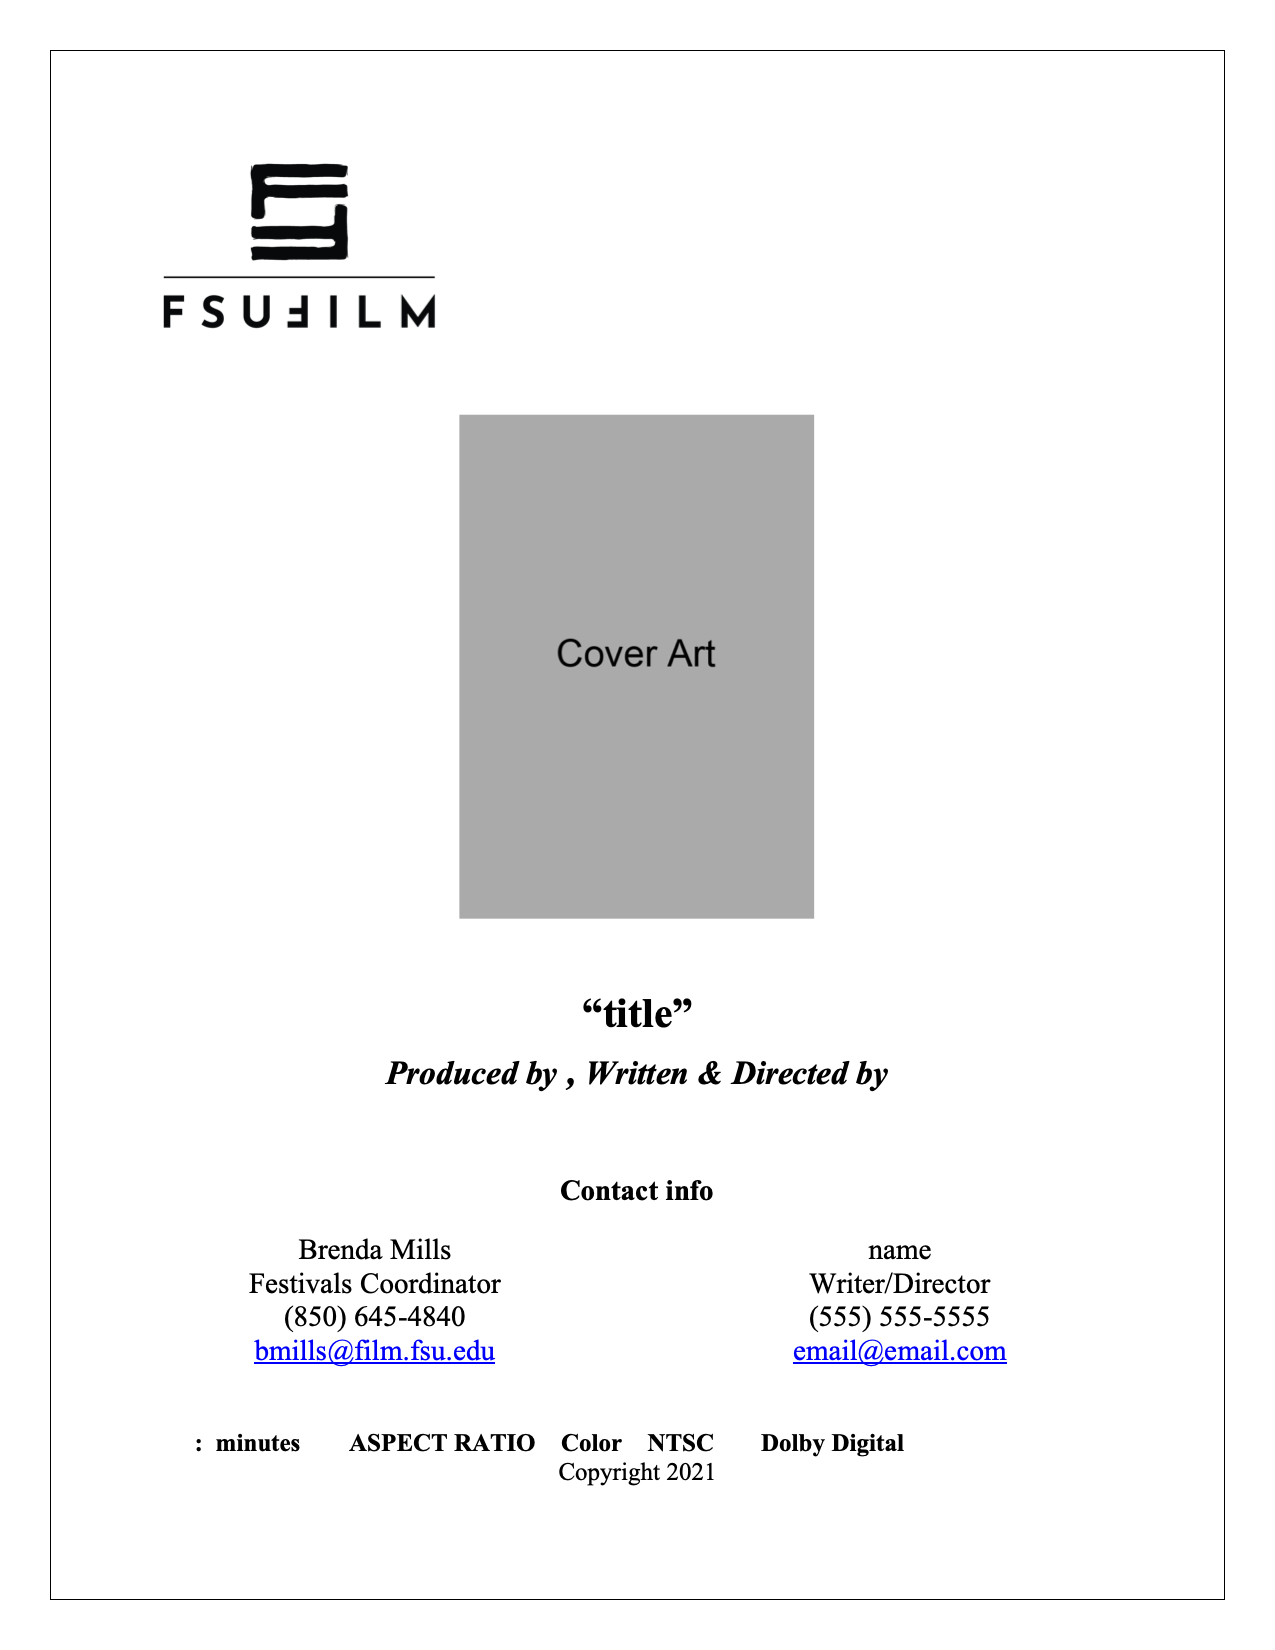
  • Press Kit Template

    Overview

    A press kit serves as a production’s professional public-facing package, providing press outlets, distributors, collaborators, festivals, and audiences with essential information about the film. This template is designed to help students organize and present materials in a clear, polished, and industry-standard format, including items such as synopses, credits, bios, stills, contact information, and director statements.

    Beyond simple promotion, the press kit helps define how a project is positioned and understood externally. A thoughtful, cohesive press kit can significantly strengthen a film’s festival presence and professional presentation. Learning how to prepare these materials is an important part of understanding the broader lifecycle of a film beyond production itself, including marketing, exhibition, and audience engagement.

  • Thumbnail Templates

    Overview

    Thumbnail images are often the first point of contact audiences have with a film online, making them an important part of a project’s overall presentation and discoverability. This post provides standardized thumbnail templates to help maintain visual consistency across school-related promotional materials and online showcases.

    The use of templates ensures that projects meet technical specifications while encouraging students to think strategically about visual communication and audience engagement. Effective thumbnails should clearly represent the tone and identity of the project while remaining legible and visually compelling across a range of screen sizes and platforms. Developing an understanding of these presentation standards is increasingly important in contemporary distribution environments.

    Production Paperwork

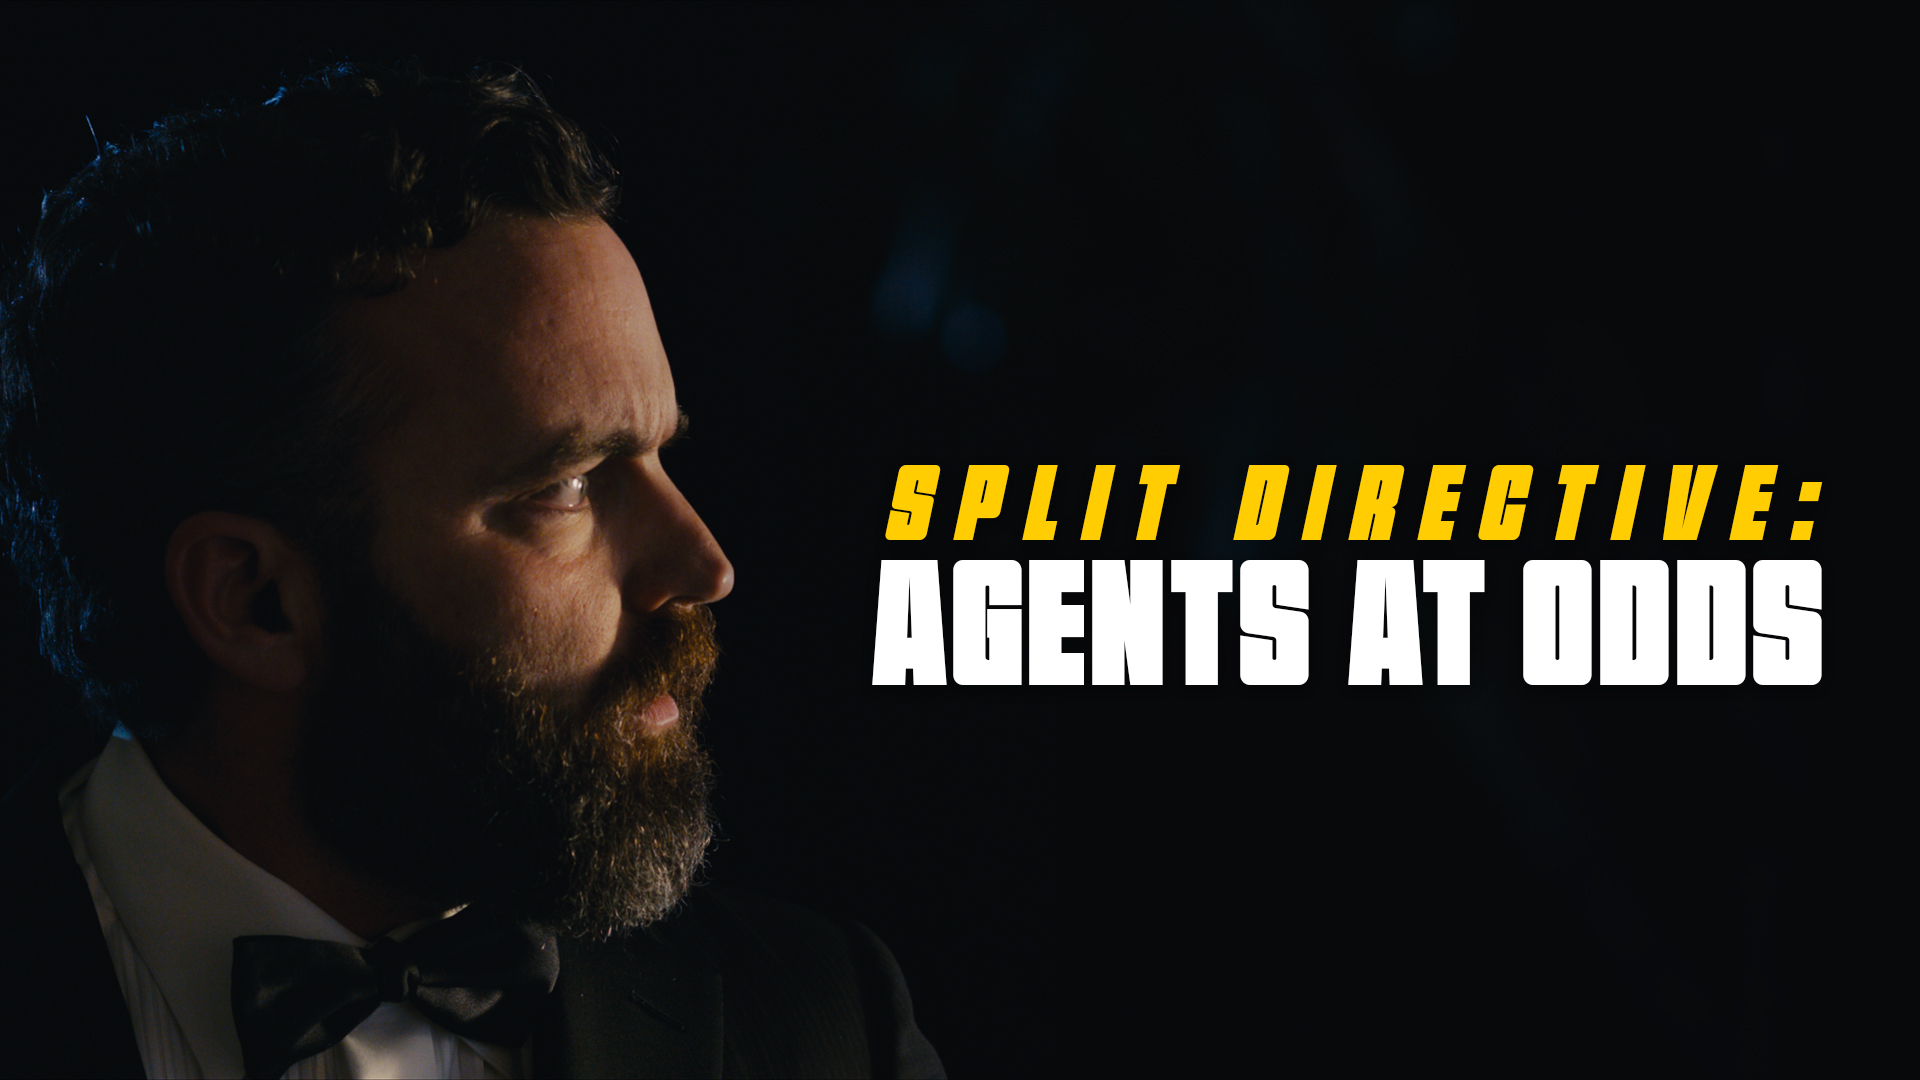
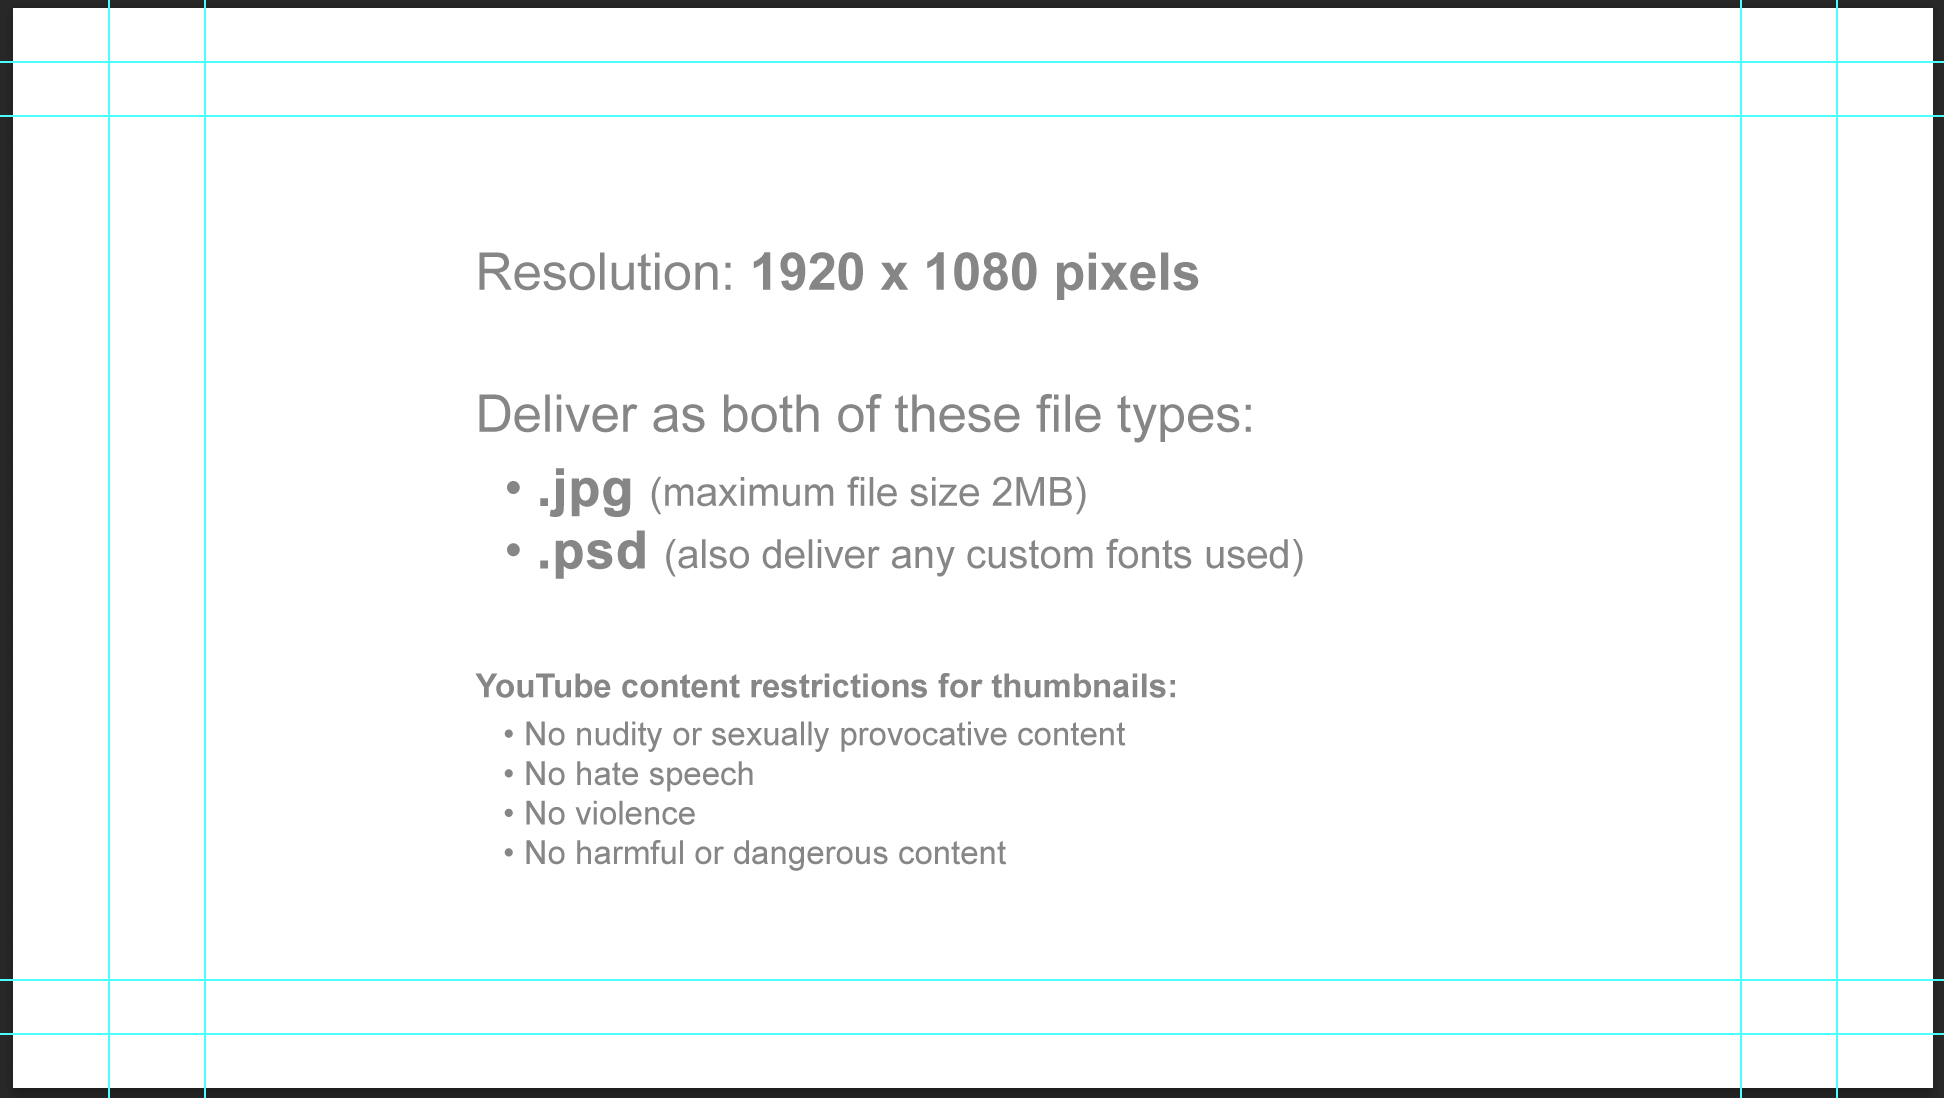
    Horizontal thumbnail template:

    Horizontal thumbnail specs

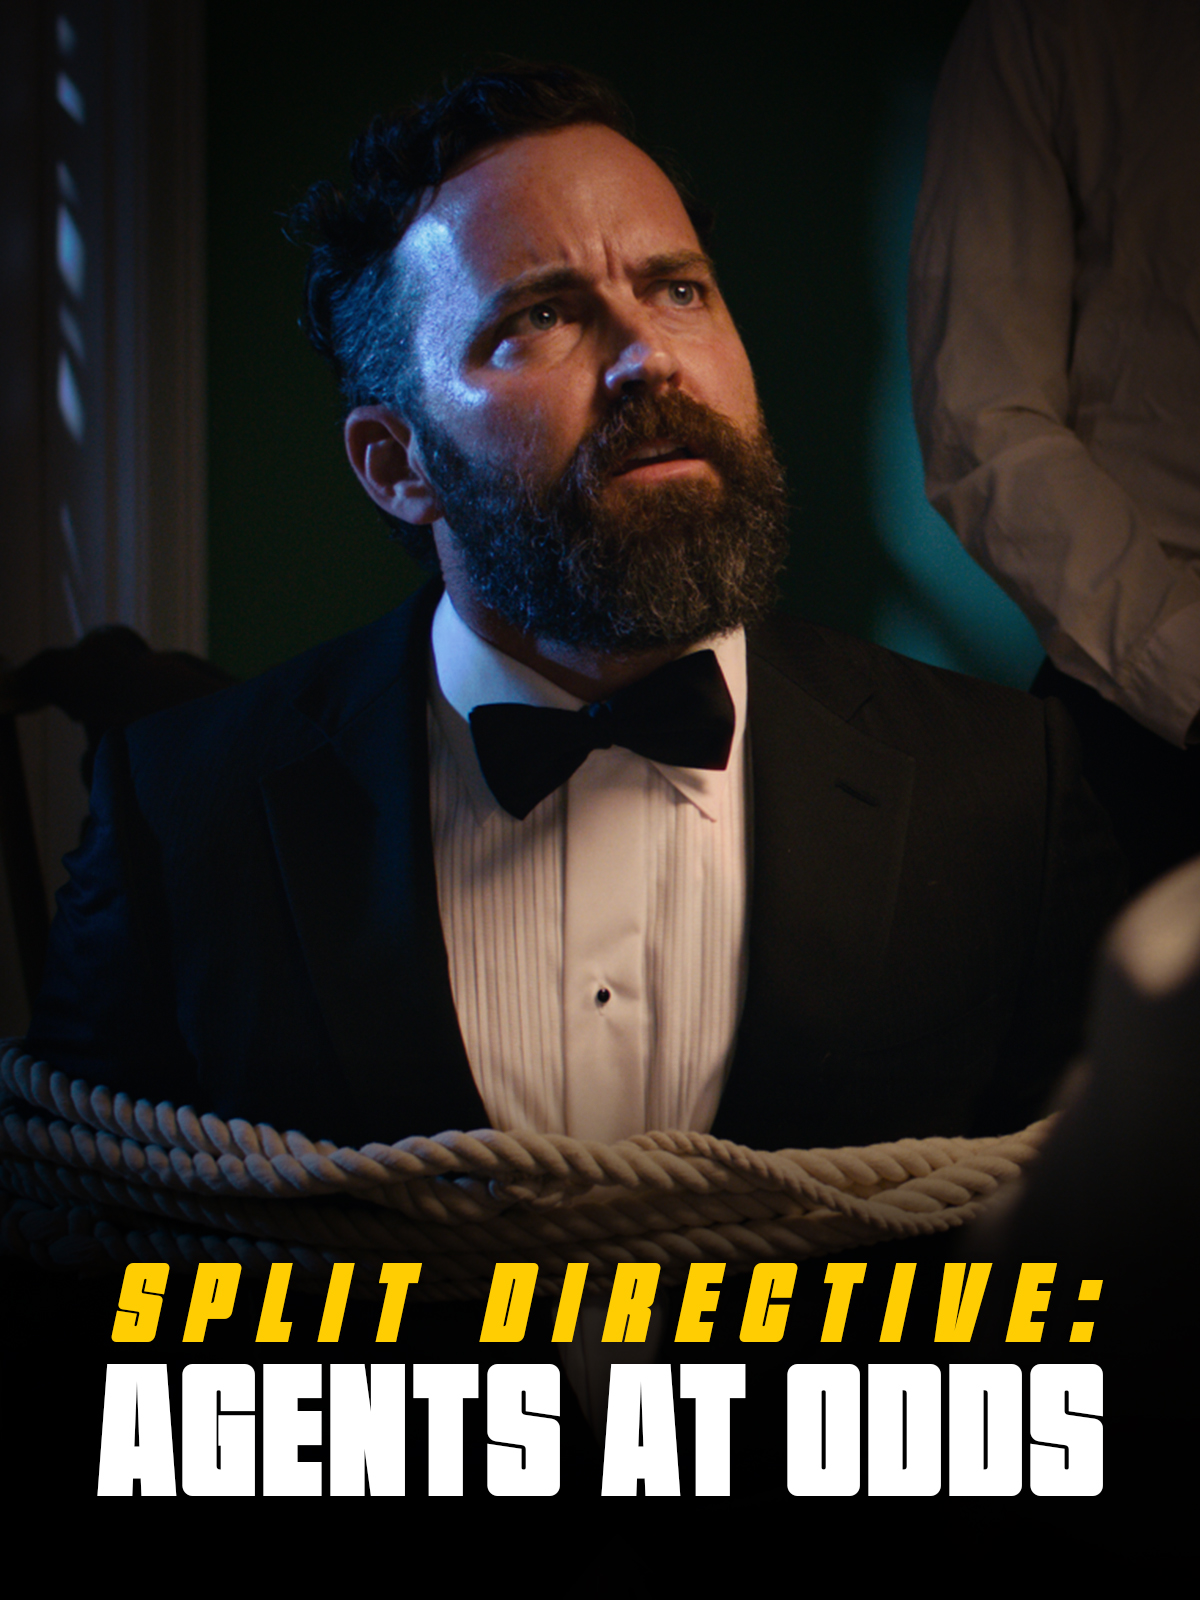
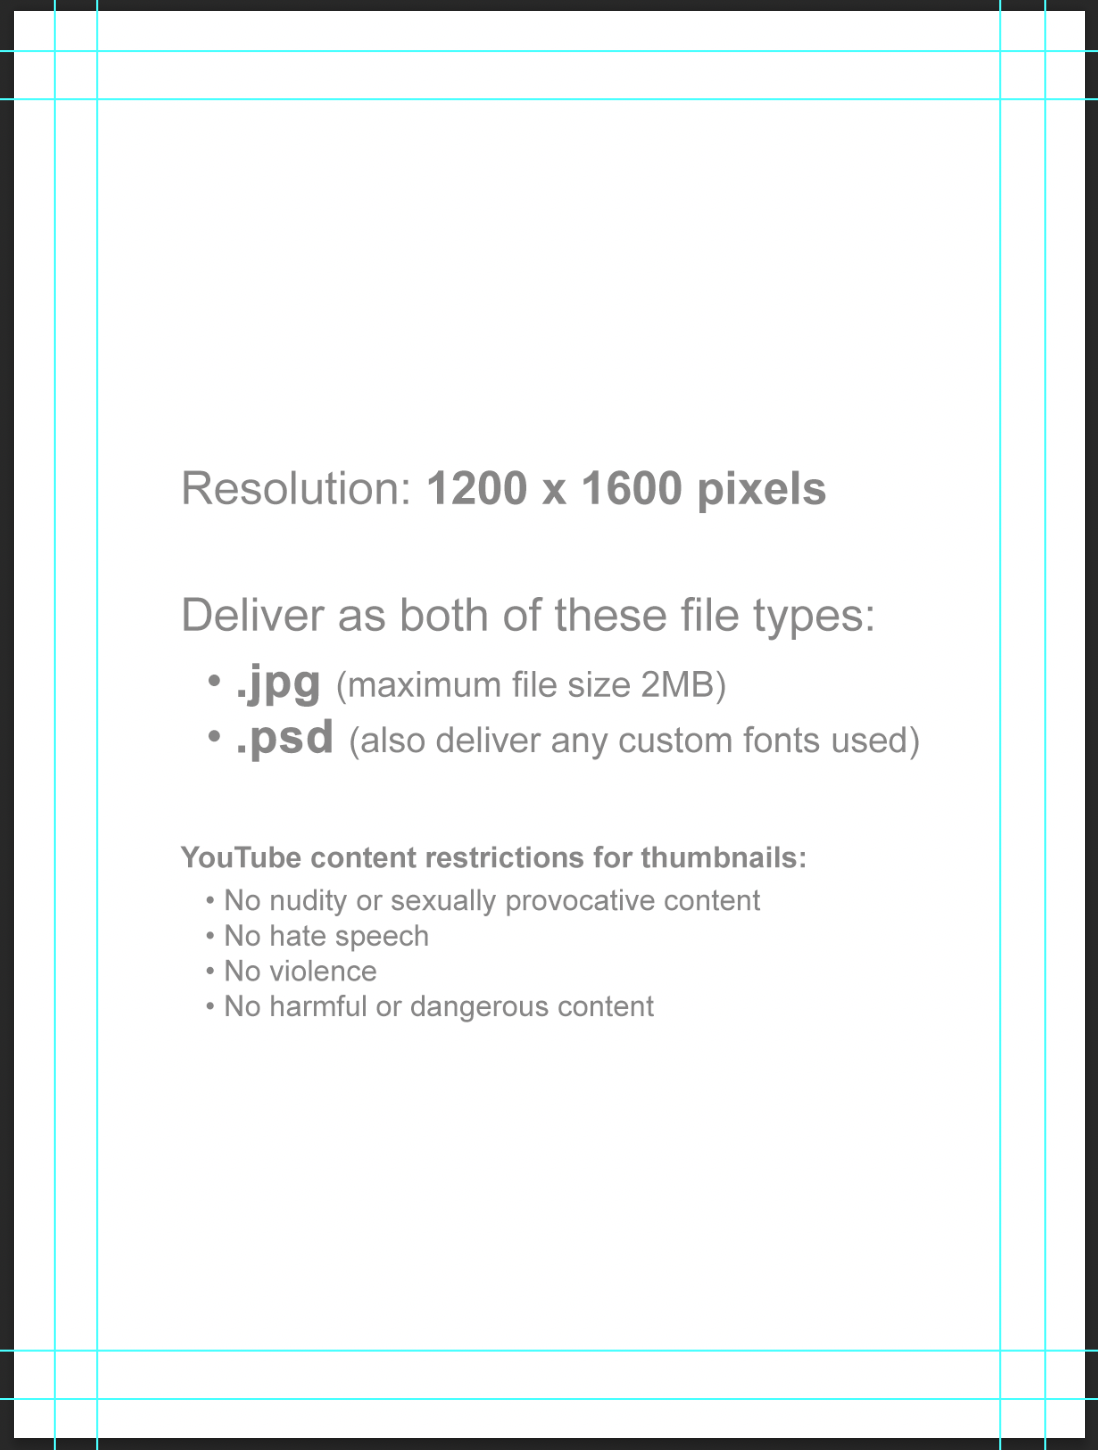
    Vertical thumbnail template:

    Vertical thumbnail specs

    Instructions

    Thumbnail images will be used in displays online (Vimeo, YouTube, etc). Since some websites use horizontal thumbnails (1920×1080) and some use vertical thumbnails (1200×1600), you will deliver one of each.

    Each thumbnail should contain two elements:

    1. A carefully selected image that fills the entire frame (i.e., no letterboxing or black bars). This image is typically derived from either the poster or one of the production stills.
    2. The title of the film. Ideally, for consistency of branding, this should match the font design of the title on the poster. No other text should appear in the thumbnail.

    Examples:

    Example of a horizontal thumbnail
    Horizontal (1920x1080px)
    Example of a vertical thumbnail
    Vertical (1200x1600px)

    Do:

    • Save a flattened JPG file (maximum file size 2MB) and a layered PSD file (also deliver any custom fonts used).
    • Keep all of your layers inside the appropriate folders, so that everything remains well-organized when you deliver the final Photoshop file. Make sure all of your layers have appropriate names, so that someone else could make sense of what each layer is.

    Do Not:

    • Do not adjust the dimensions or resolution of the file. It’s set up to meet the specs needed for online viewing.
    • Note these online content restrictions for the thumbnails:
      • No nudity or sexually provocative content
      • No hate speech
      • No violence
      • No harmful or dangerous content
  • Additional Photography Request

    Overview

    Requests for additional photography involve seeking approval for filming that takes place outside the scheduled production period. This may include inserts, establishing shots, VFX plates and elements, or any other supplemental photography needed to complete the project successfully.

    Because additional photography affects scheduling, equipment access, staffing, facilities, and administrative coordination, these requests must be reviewed carefully before approval is granted. The process helps productions evaluate whether additional filming is necessary, realistically achievable, and supported by an appropriate production plan while reinforcing the importance of preparation and efficient production management during principal photography.

    Instructions

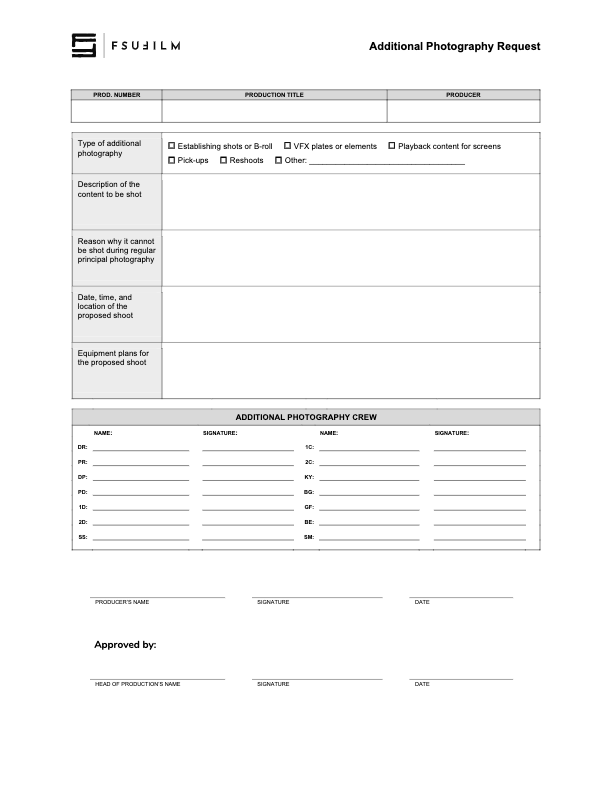
    This form should be used by Producers to make a request to the Head of Production for additional photography outside of the regularly scheduled shooting days on the crew grid. Since additional photography involves time and resources, requests will not be approved automatically. Approvals will only be granted if the time and resources are available and if students make a compelling case for why the footage cannot be shot during regular principal photography.

    Indicate on the form the type of additional photography that is being requested:

    • ESTABLISHING SHOTS OR B-ROLL
      Check this box if the request is for 2nd Unit shots that cannot easily be scheduled during regular principal photography. Typically these would be for shots that need to be shot at a discrete location without the involvement of principal actors, such as establishing shots at an inconveniently place location or B-roll of events that are occurring outside the regular production window.
    • VFX PLATES OR ELEMENTS
      Check this box if the request is for background plates or other photographic elements that are needed to complete visual effects shots.
    • PLAYBACK CONTENT FOR SCREENS
      Check this box if the request is for video content that would need to be shot in advance of regular principal photography in order to be played back during production.
    • PICK-UPS
      Check this box if the request is for pick-up photography. Only FC and MC shows may request pick-ups.
    • RESHOOTS
      Check this box if the request is for the reshooting of a scene where circumstances beyond the students’ control resulted in footage becoming unusable. Typically, trying to solve the problem through editorial fixes will need to be explored before a reshoot is approved.
    • OTHER
      Check this box if the request is for something different than the above examples, and provide a brief description of the type of additional photography that’s being requested.

    Requests for additional photography must also include the following information:

    • the exact nature of the subject content to be shot;
    • the reason why it cannot be shot with the first unit crew during principal photography;
    • the date, times, and location of the proposed shoot;
    • a summary of the equipment plan for the shoot, including any requests for school equipment;
    • the crew required for the proposed shoot, including names and signatures (you’ll need to determine how many crew members you need and you’ll need to recruit them).
    • any additional supporting documentation can also be attached as needed.

    Submit the completed request form to the Head of Production. Leave adequate time for the Head of Production to review the request and be prepared to make adjustments if any concerns need to be addressed. The Head of Production’s decision on whether to approve or deny the request is final.

  • Contingencies for Absent Crew

    Overview

    Film productions operate on tight schedules with highly interdependent crews, meaning that even a single absence can significantly affect the day’s work. This protocol outlines the procedures for communicating absences, redistributing responsibilities, and maintaining continuity when a crew member is unable to participate in production activities.

    The purpose of these guidelines is not only to protect the production schedule, but also to reinforce the professional expectation that filmmakers must communicate proactively and help ensure the stability of the larger team. Student productions depend on collaboration, flexibility, and accountability. Establishing clear contingency procedures helps minimize disruption while teaching students how professional productions adapt to unexpected staffing challenges.

    F3 Protocol

    If a crew member is unable to report to work during principal photography, they must contact the show’s Producer and the Head of Production as soon as possible, and no later than two hours before call time. 

    The Producer and the Head of Production will then work through the following steps in sequence to determine the most appropriate solution:

    1. If the Director is unable to work, advance to Step 7.
    2. Check to see if having a smaller crew and consolidating positions will work. If that is not viable, then…
    3. Check to see if there are any BFA2 Production students who are not assigned to any crew positions or “days off” that day. If there are not, then…
    4. Check to see if one of the students in a “days off” slot is willing to fill in. If not, then…
    5. Check to see if a BFA3 is able to fill in. If not, then…
    6. Postpone or cancel the shooting day, reworking the schedule as needed.
  • Goodwill Letter

    Overview

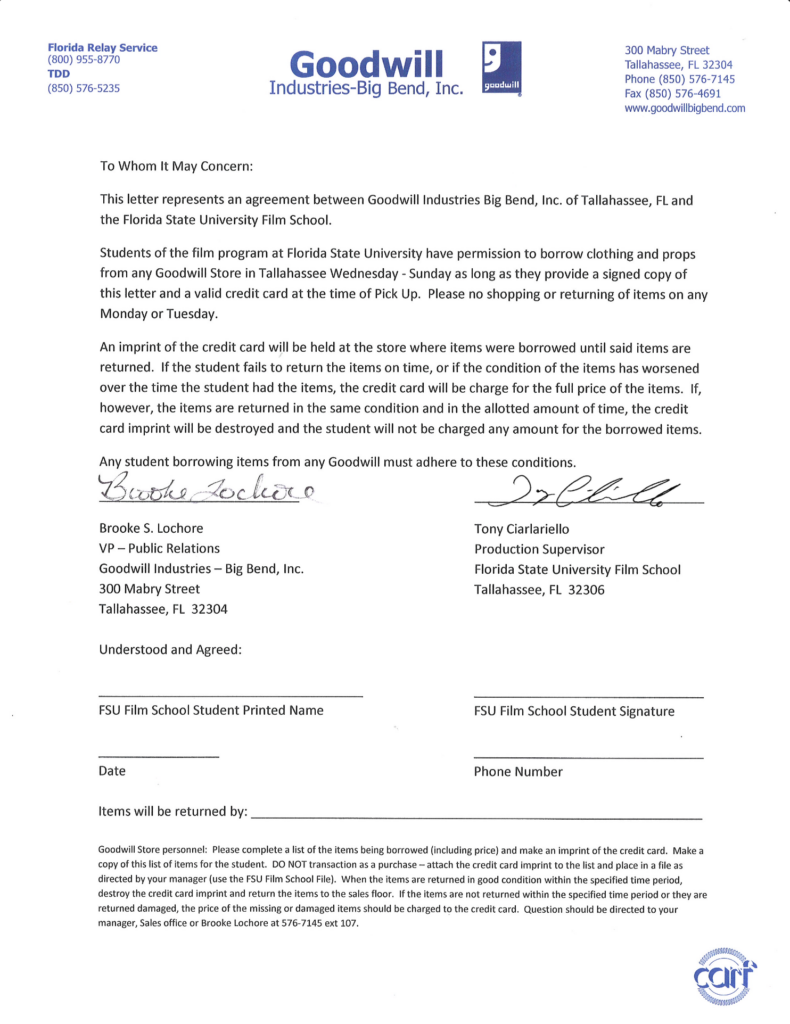
    This page provides a letter that students may present to participating Goodwill stores when requesting the temporary loan of items for use in a production. The letter is intended to help communicate the nature of the arrangement and verify the production’s affiliation with the program, but individual store locations retain full discretion over whether they choose to participate or loan items to a production.

    Instructions

    This letter may be used as an agreement between a student and Goodwill for the borrowing of clothing or props from a Goodwill store.

    Students must present a signed copy of the letter and a valid credit card at the time of pick-up. Goodwill keeps the credit card on file until all borrowed items have been returned. The credit card is only charged if items are returned in a worsened condition or if items are not brought back by the agreed upon return date. In such circumstances, students are liable for the full cost of the item.

    Please note that individual Goodwill stores are not obligated to loan out items, and may choose at their discretion whether to enter into an agreement with a student.

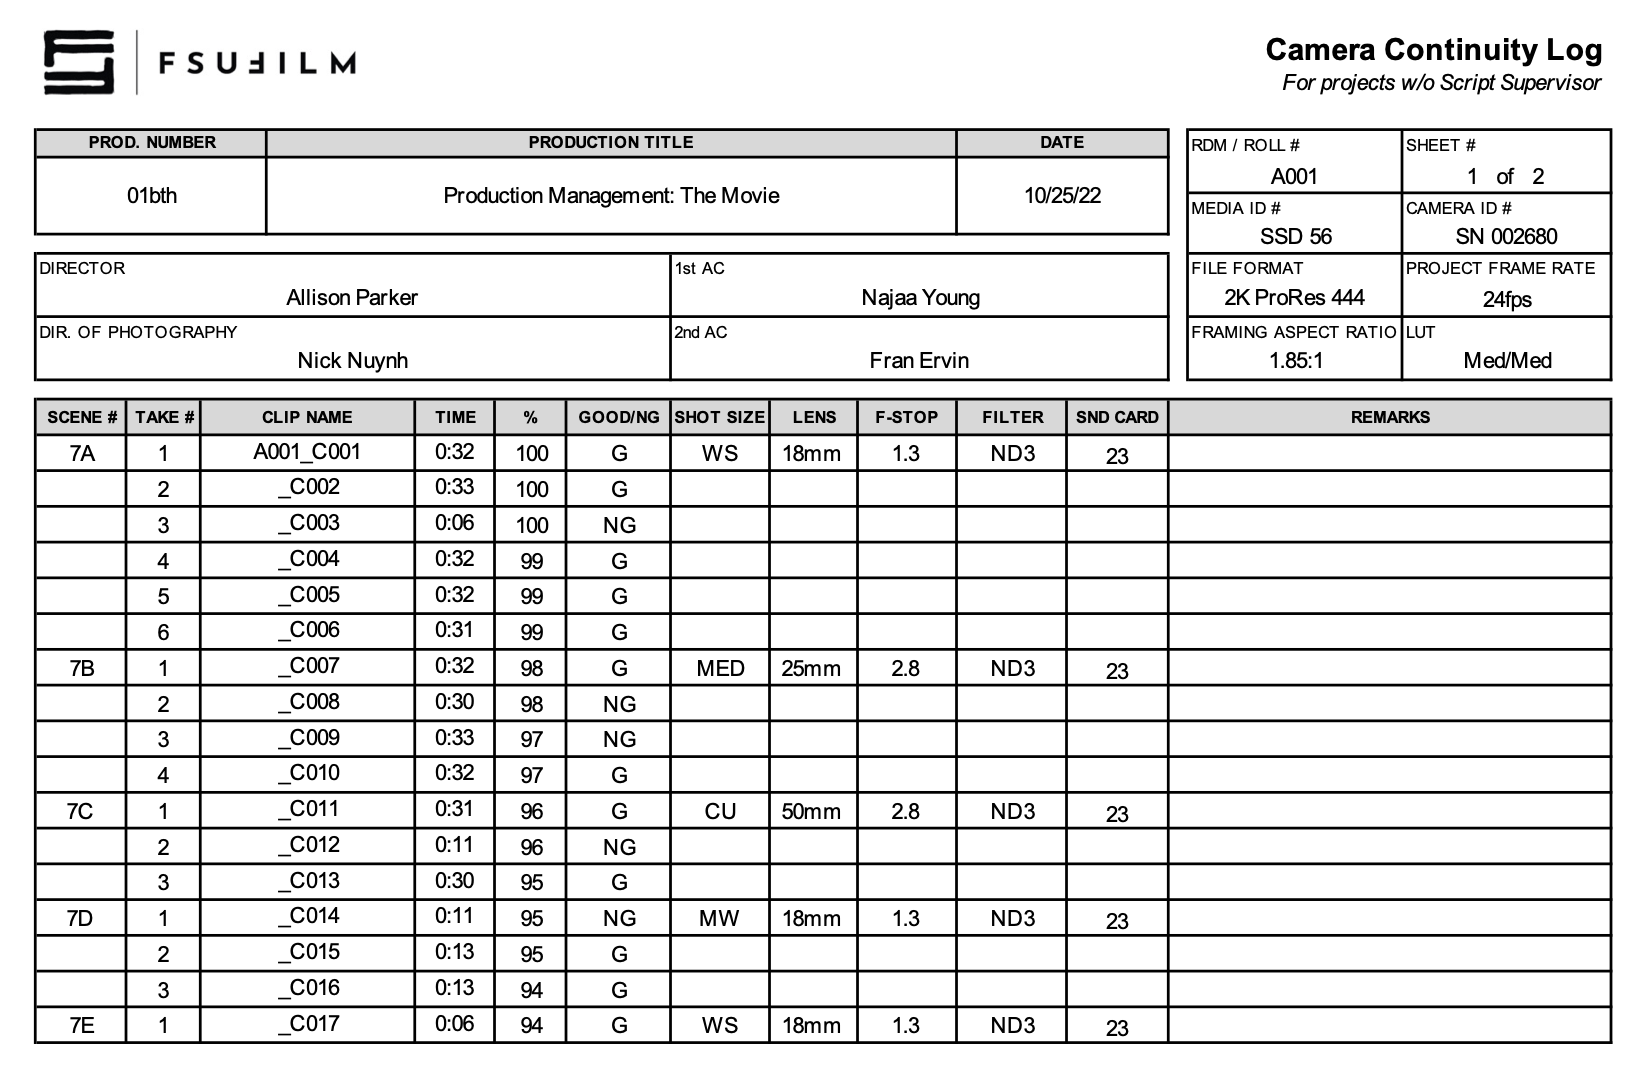
  • Camera Continuity Log

    Overview

    The camera continuity log documents important technical and organizational information related to recorded footage throughout production. This includes details such as scene and take information, camera settings, lens and filter data, media tracking, and other production records associated with camera operations. The log is for projects without an assigned script supervisor.

    Accurate continuity logging helps editorial and post-production teams organize footage more efficiently and reduces confusion when reviewing large amounts of material across multiple shooting days. Consistent logging practices also reinforce the importance of communication, organization, and technical record-keeping within professional production workflows.

    Instructions

    The Camera Continuity Log is to be used only on shows that do not have a Script Supervisor. The report is completed by the 2nd AC. If the project does have a Script Supervisor, then the 2nd AC should use a Camera Report instead.

    Sample

    Here’s a sample of what the completed form should look like:

    Sample of a completed form