Overview
At the end of the picture edit cycle, the Editor and Director will be assigned a time to formally lock picture. This means that the Lock Sequence must be completed by that time and the appropriate fields must be filled out in Motion. Your editing instructor will be the person who deems your show “Locked” after checking the running time and making sure all notes have been addressed.
Once picture locking is complete and all the parameters laid out in this guide are met, the Editor and Director will work with the Post Staff to prep the film for the next phases of the post-production chain, which includes turnover for sound design and color correction.
Create the Locked sequence
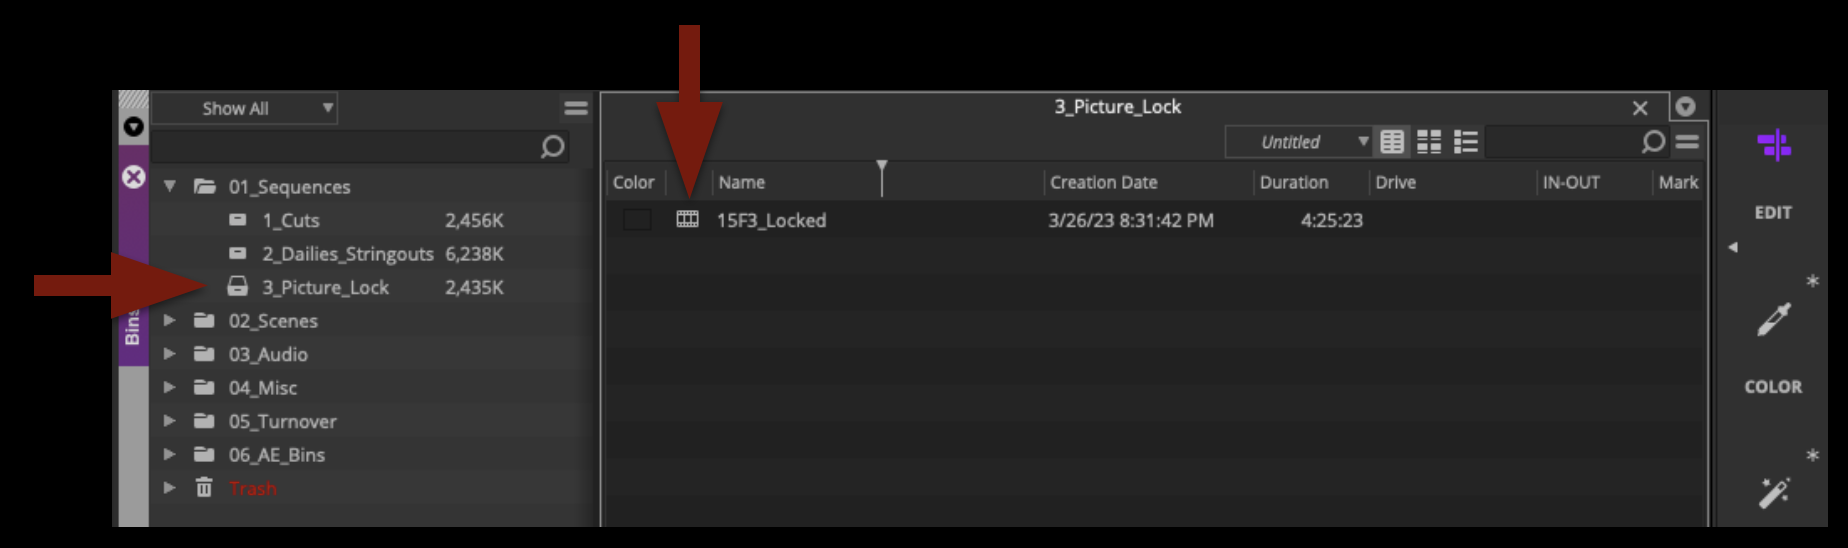
In Media Composer, correctly identify your locked sequence and save it in the Picture Lock bin as Show#_Locked:
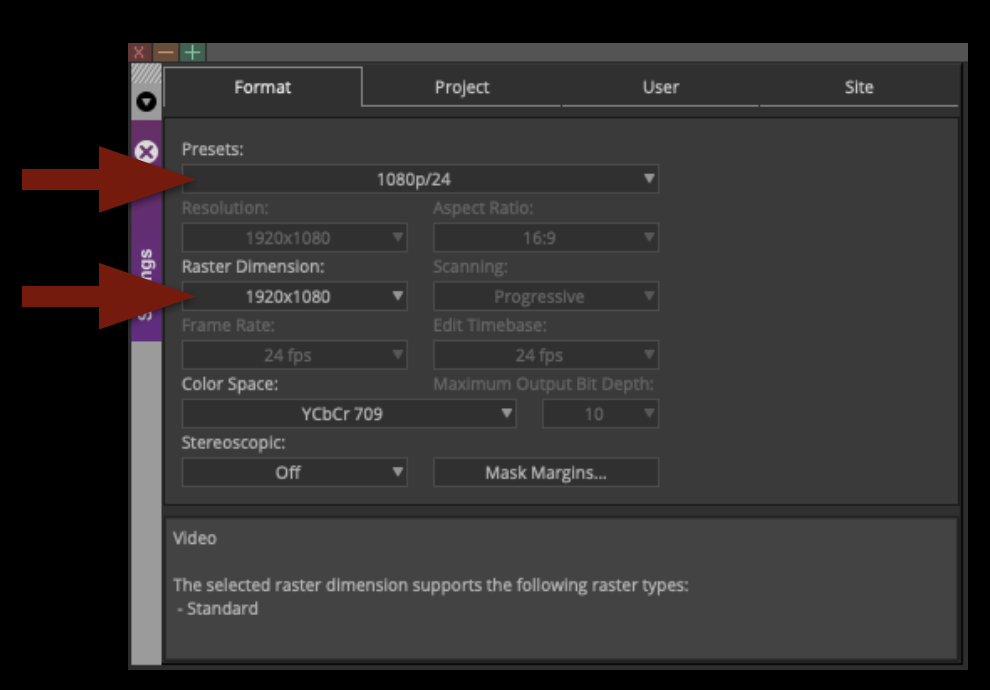
Double-check the project settings by going to Preferences. In the Format tab, the settings should be as follows:
Check the Front Sequence
All locked sequences must have a “front sequence” at the start of the timeline, which must be formatted to SMPTE standards. This involves setting the sequence timecode to begin at 01:00:00:00 and building a front sequence that includes the SMPTE Countdown Leader with the slate information filled in and the FSU Film leader.
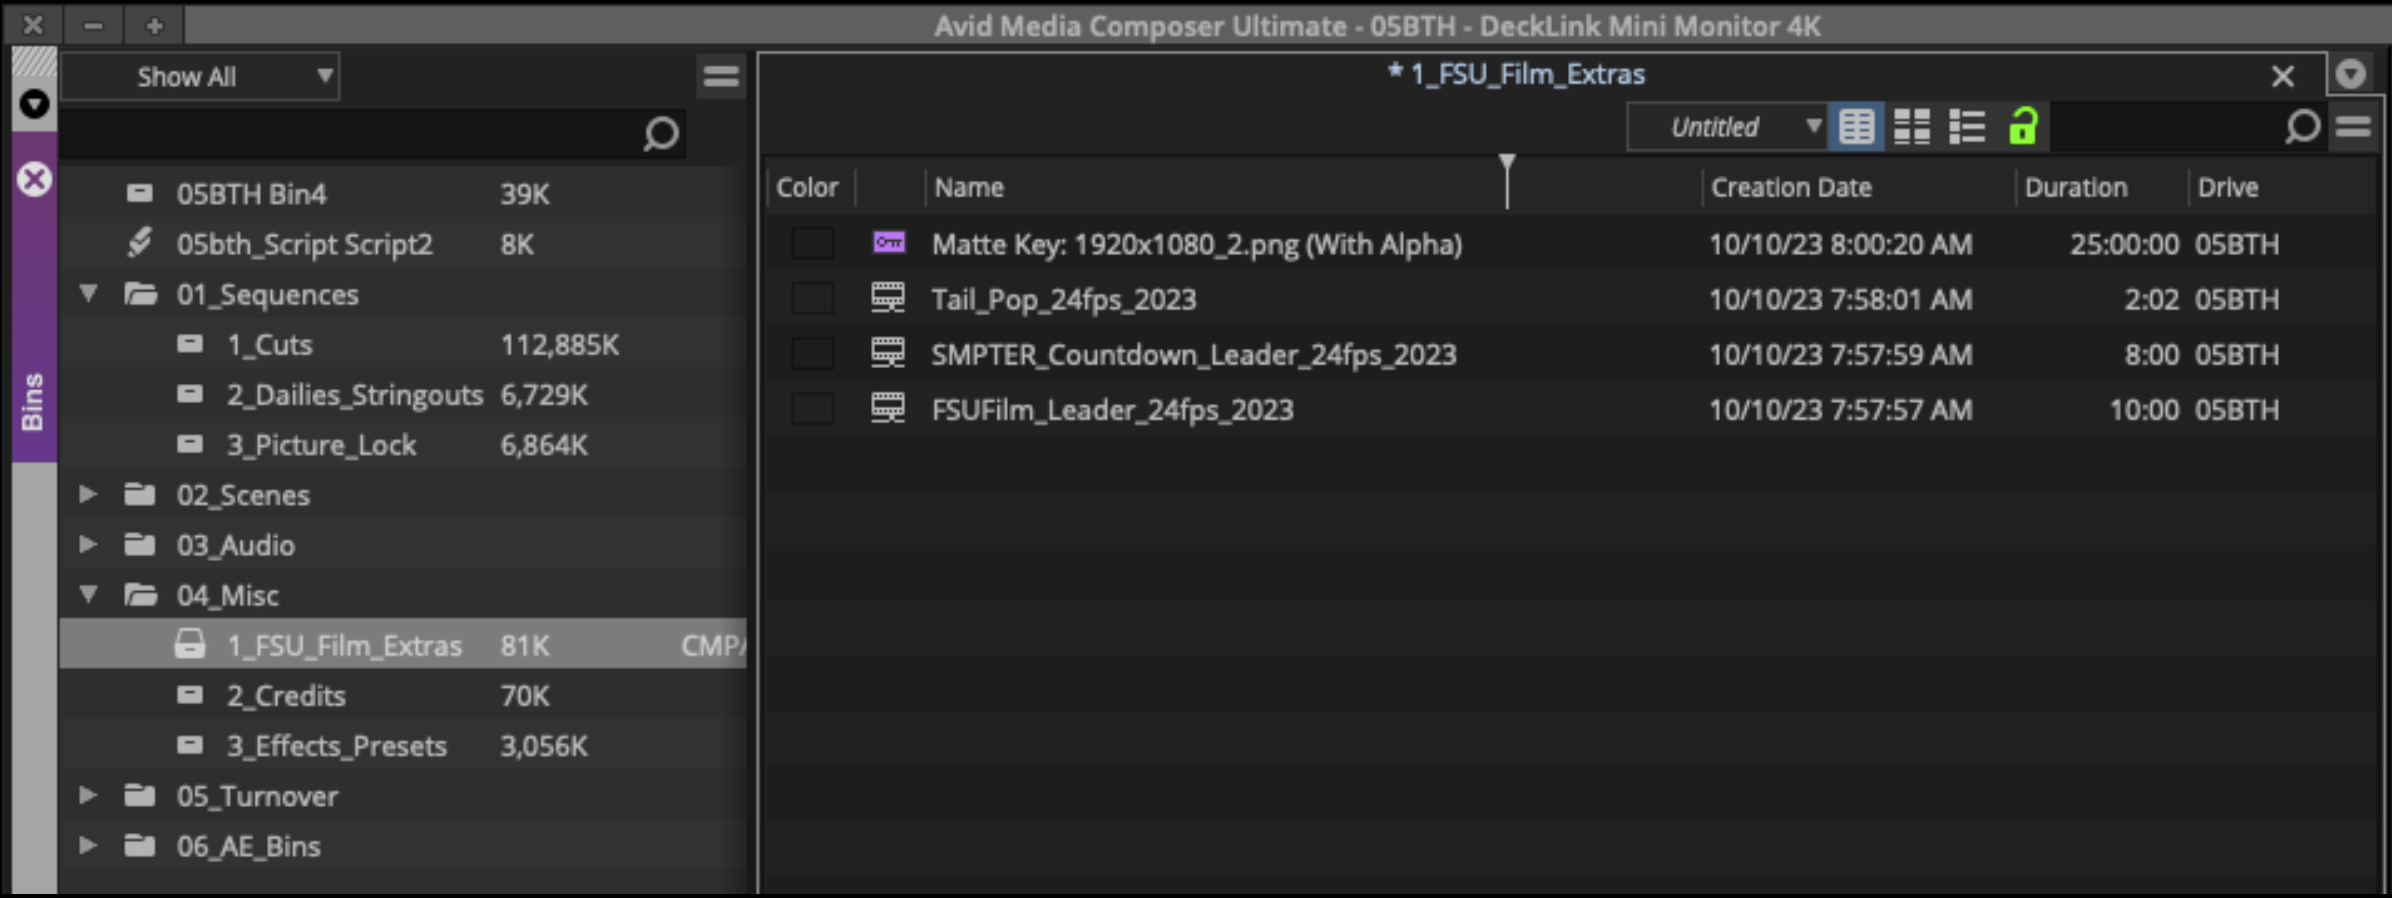
The correct front sequence should have already been set for you in the standard project template. If for some reason it’s no longer there, all the media for the front sequence can be found in the FSU_Film_Extras bin inside the 04_Misc folder.
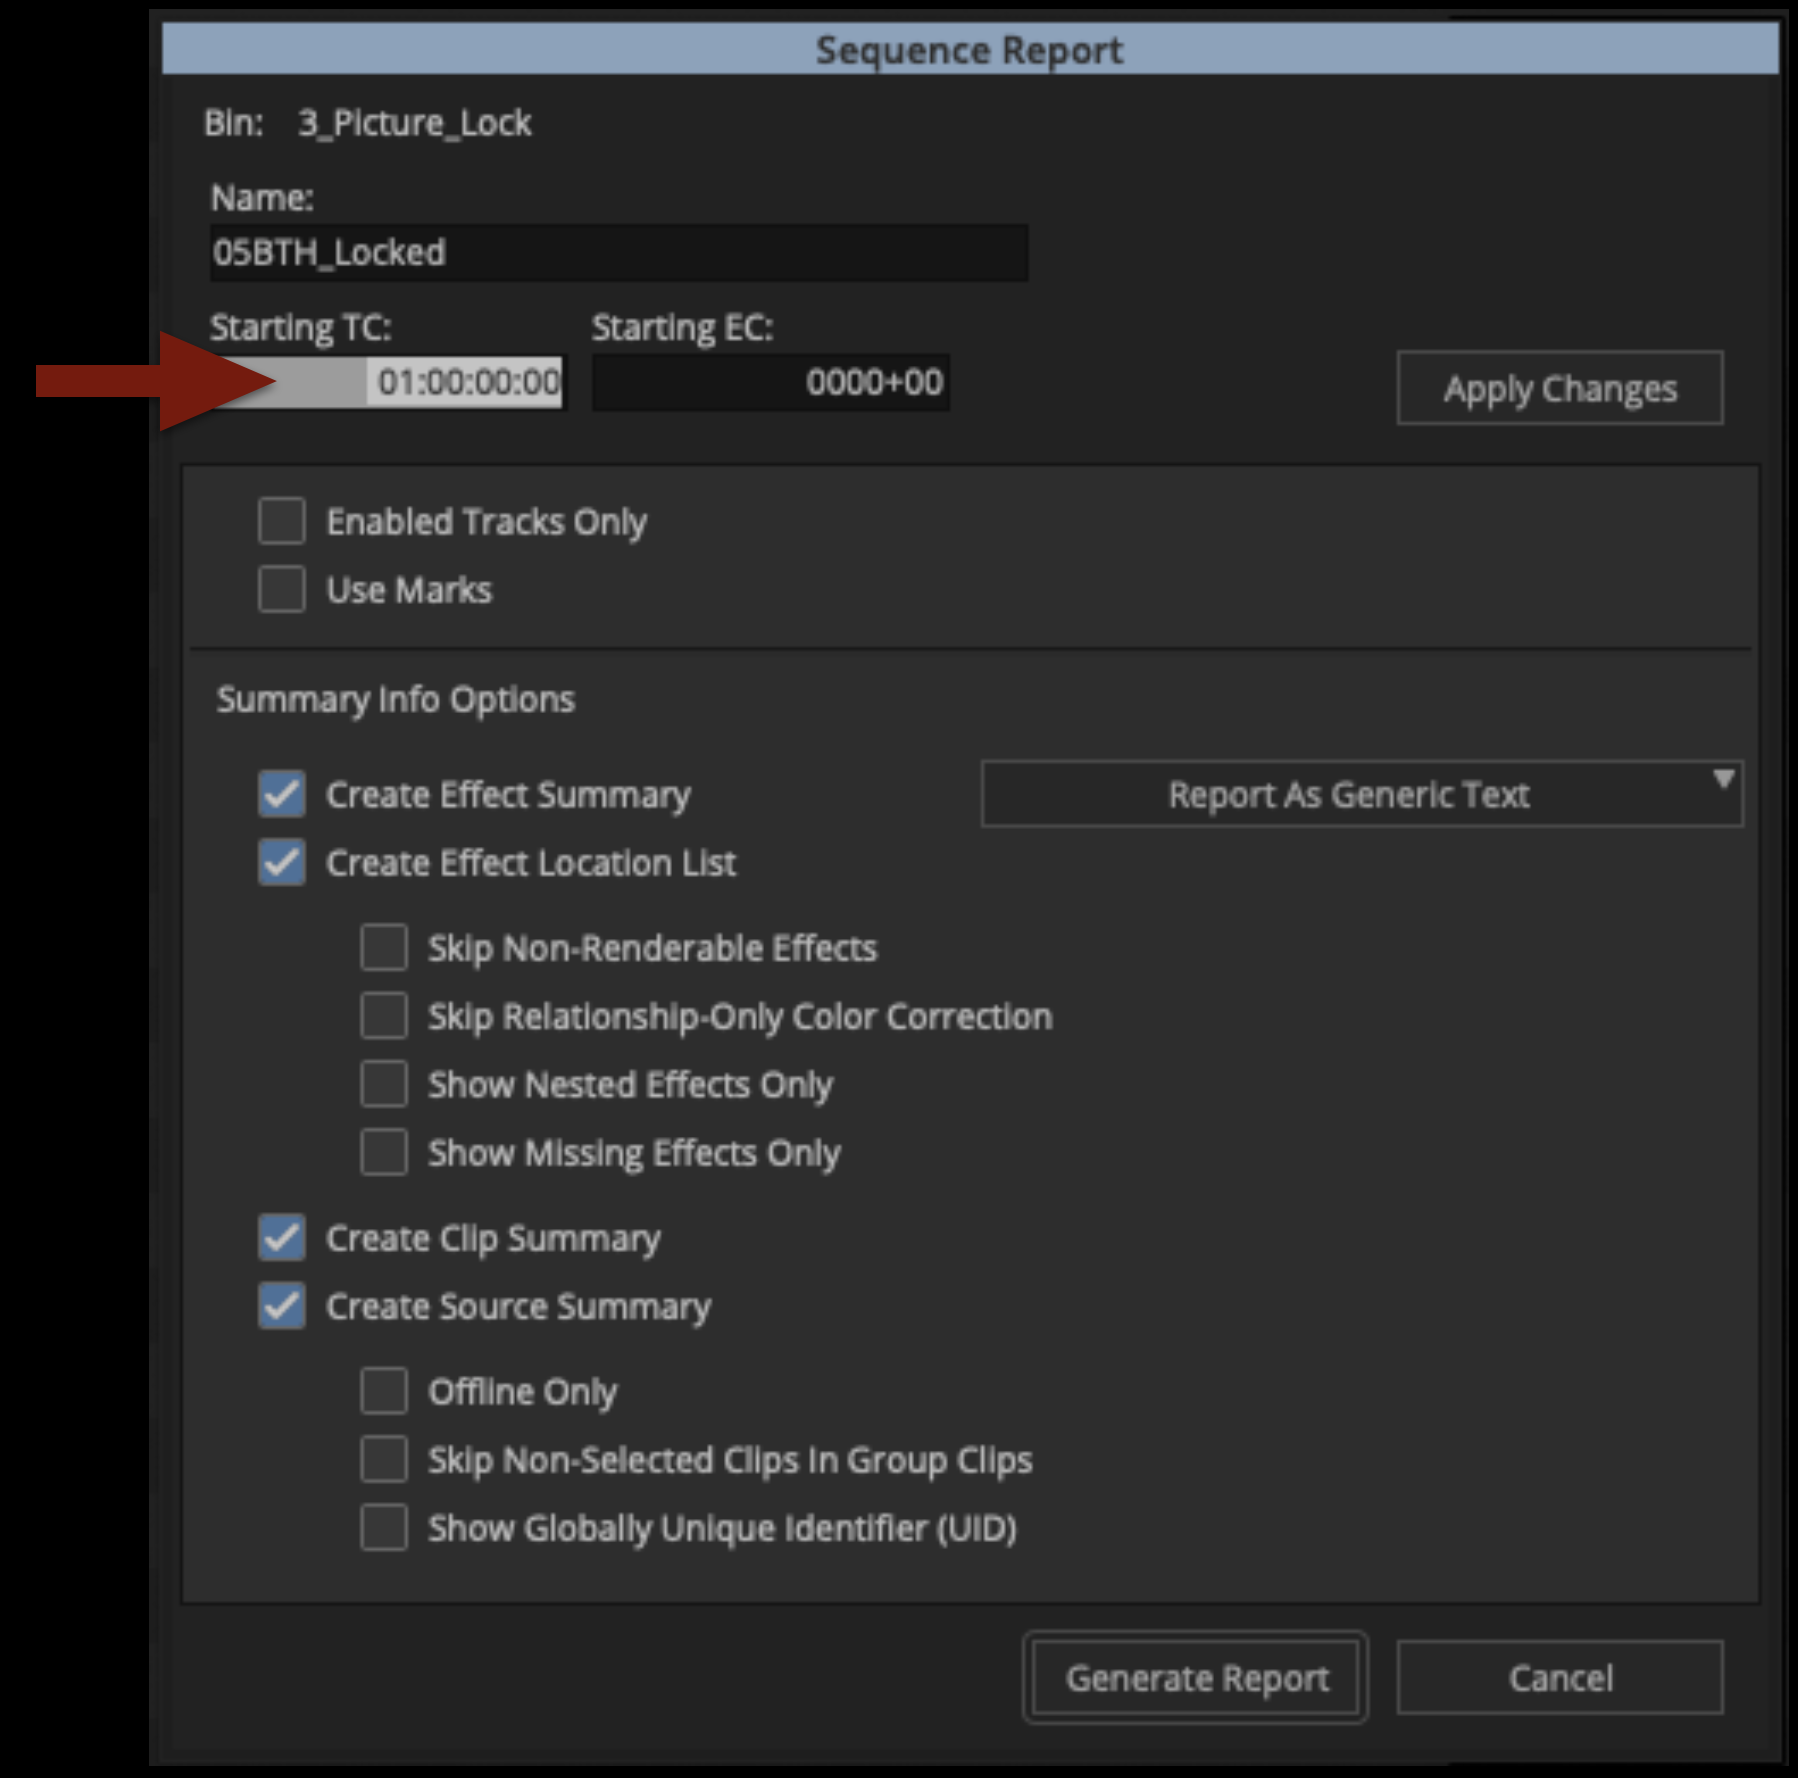
Your sequence should be set to start at timecode 01:00:00:00. If for some reason your sequence no longer starts at this timecode you can change it now. To do this, click in the Record Monitor and select “Sequence Report”. This will allow you to modify the Starting TC:
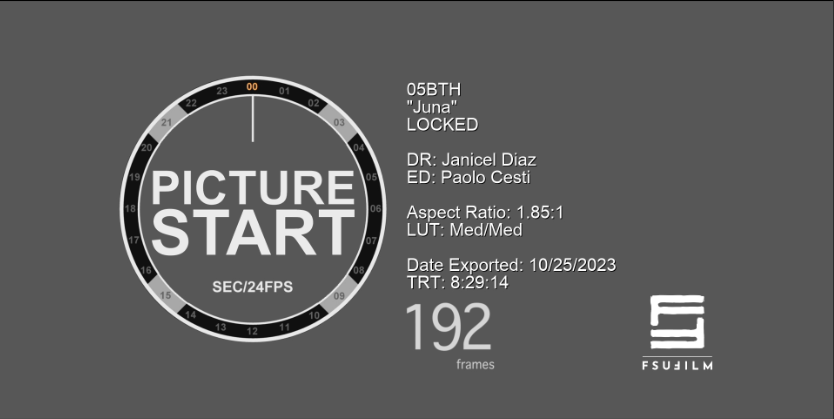
The slate should already have a template laid out for all the information you need to provide. Using the Titler+ tool in Media Composer, fill out the slate with all the information shown below. Keep this slate professional.
Double-check the the timing of the front sequence:
- SMPTE Countdown begins at 01:00:00:00. If everything is put together correctly, the “two-pop” on the countdown leader will fall exactly on 01:00:06:00. (This is very important!)
- FSU Film Leader begins at 01:00:08:00
- First frame of picture content begins at 01:00:18:00
Your front sequence should match the example below:
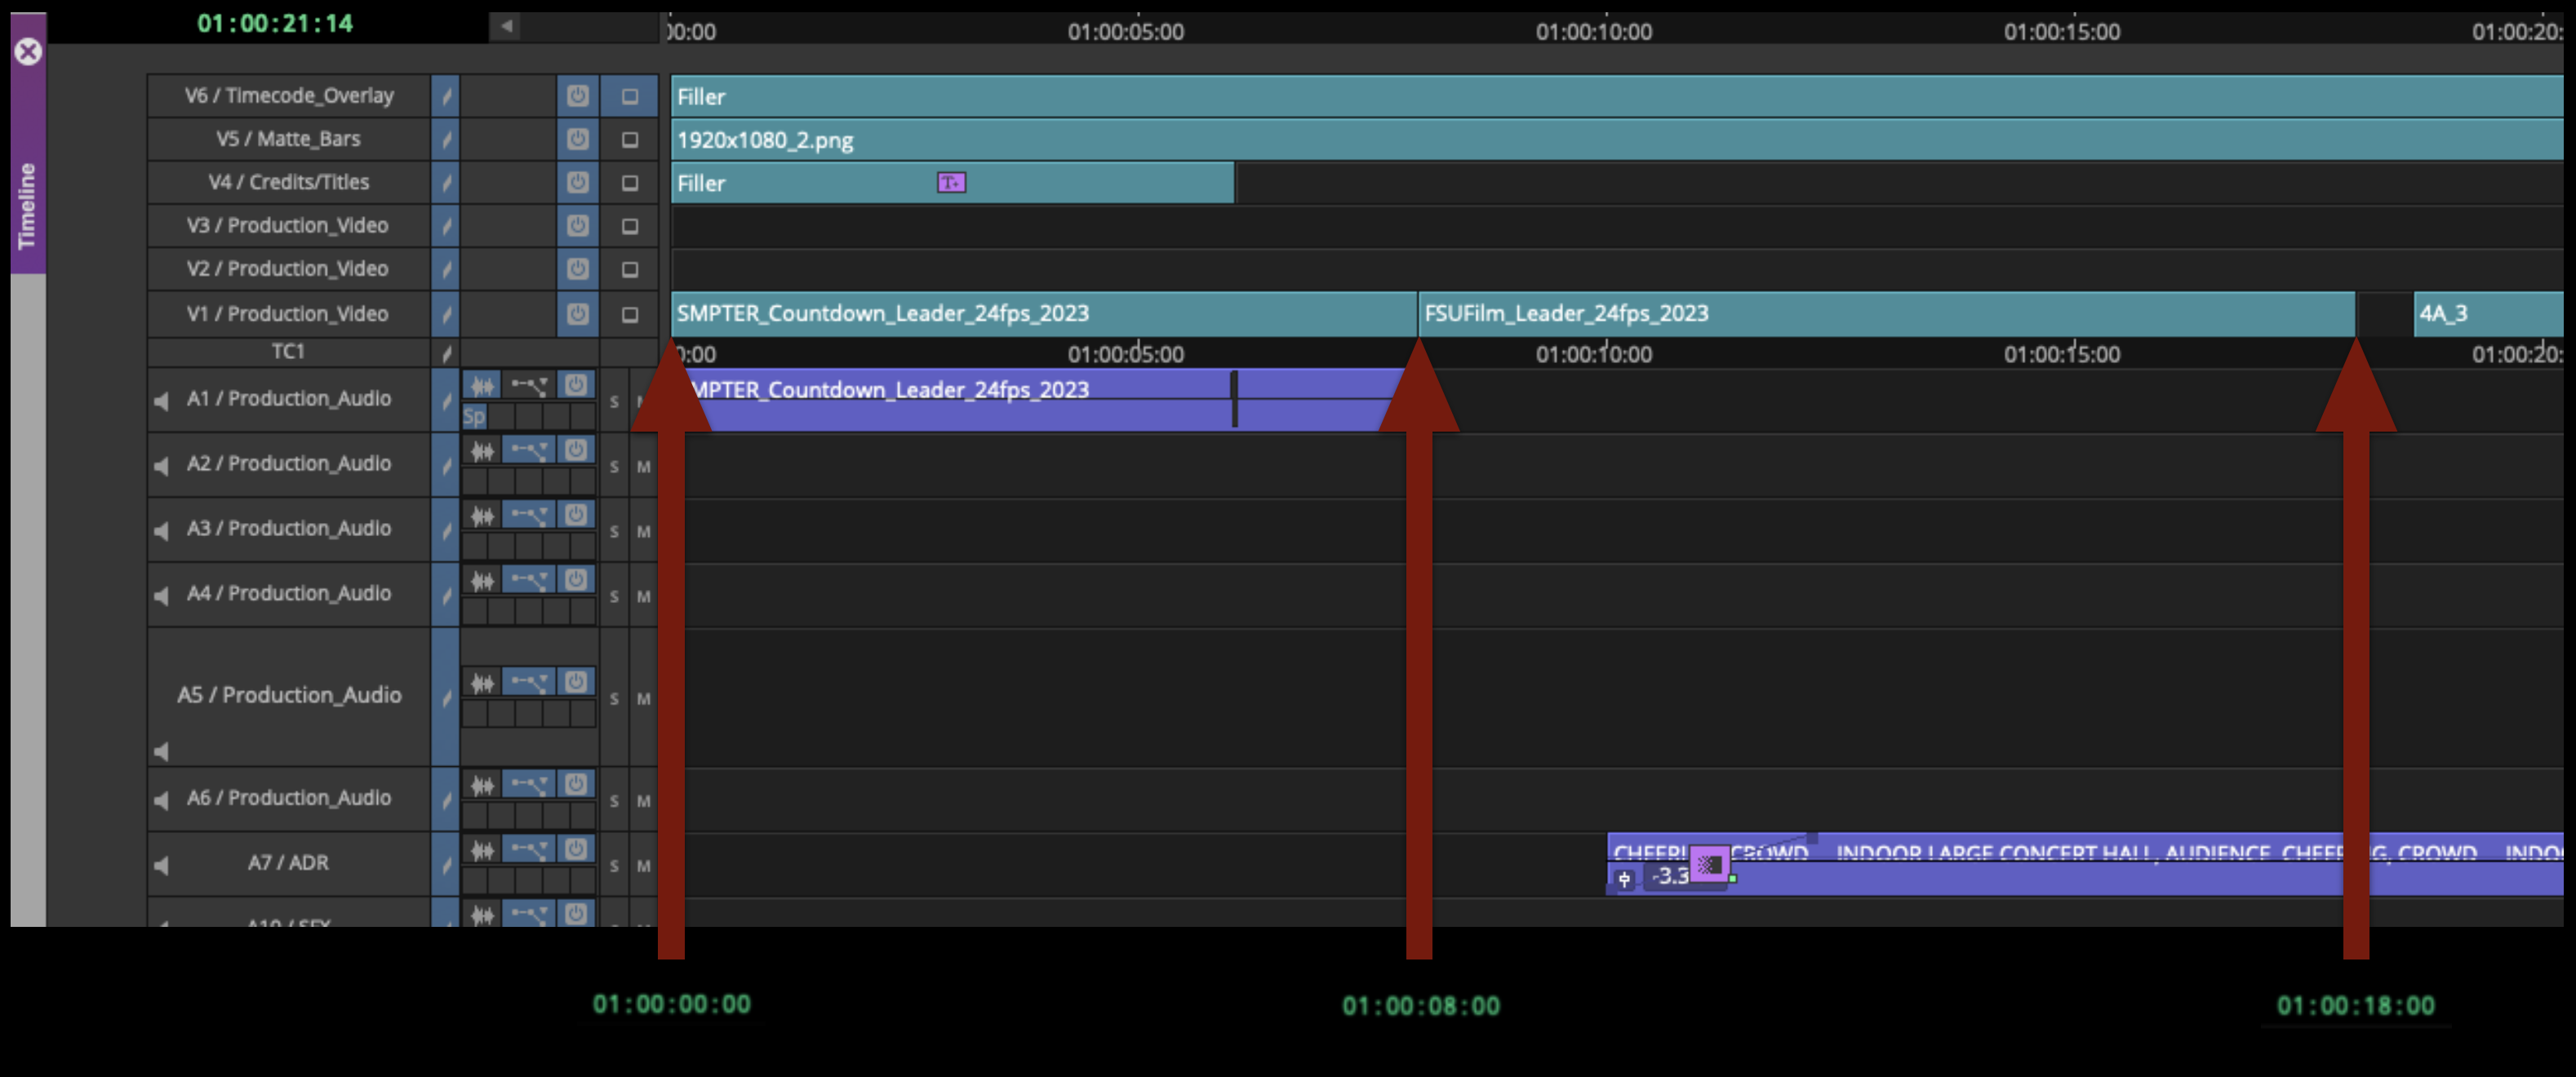
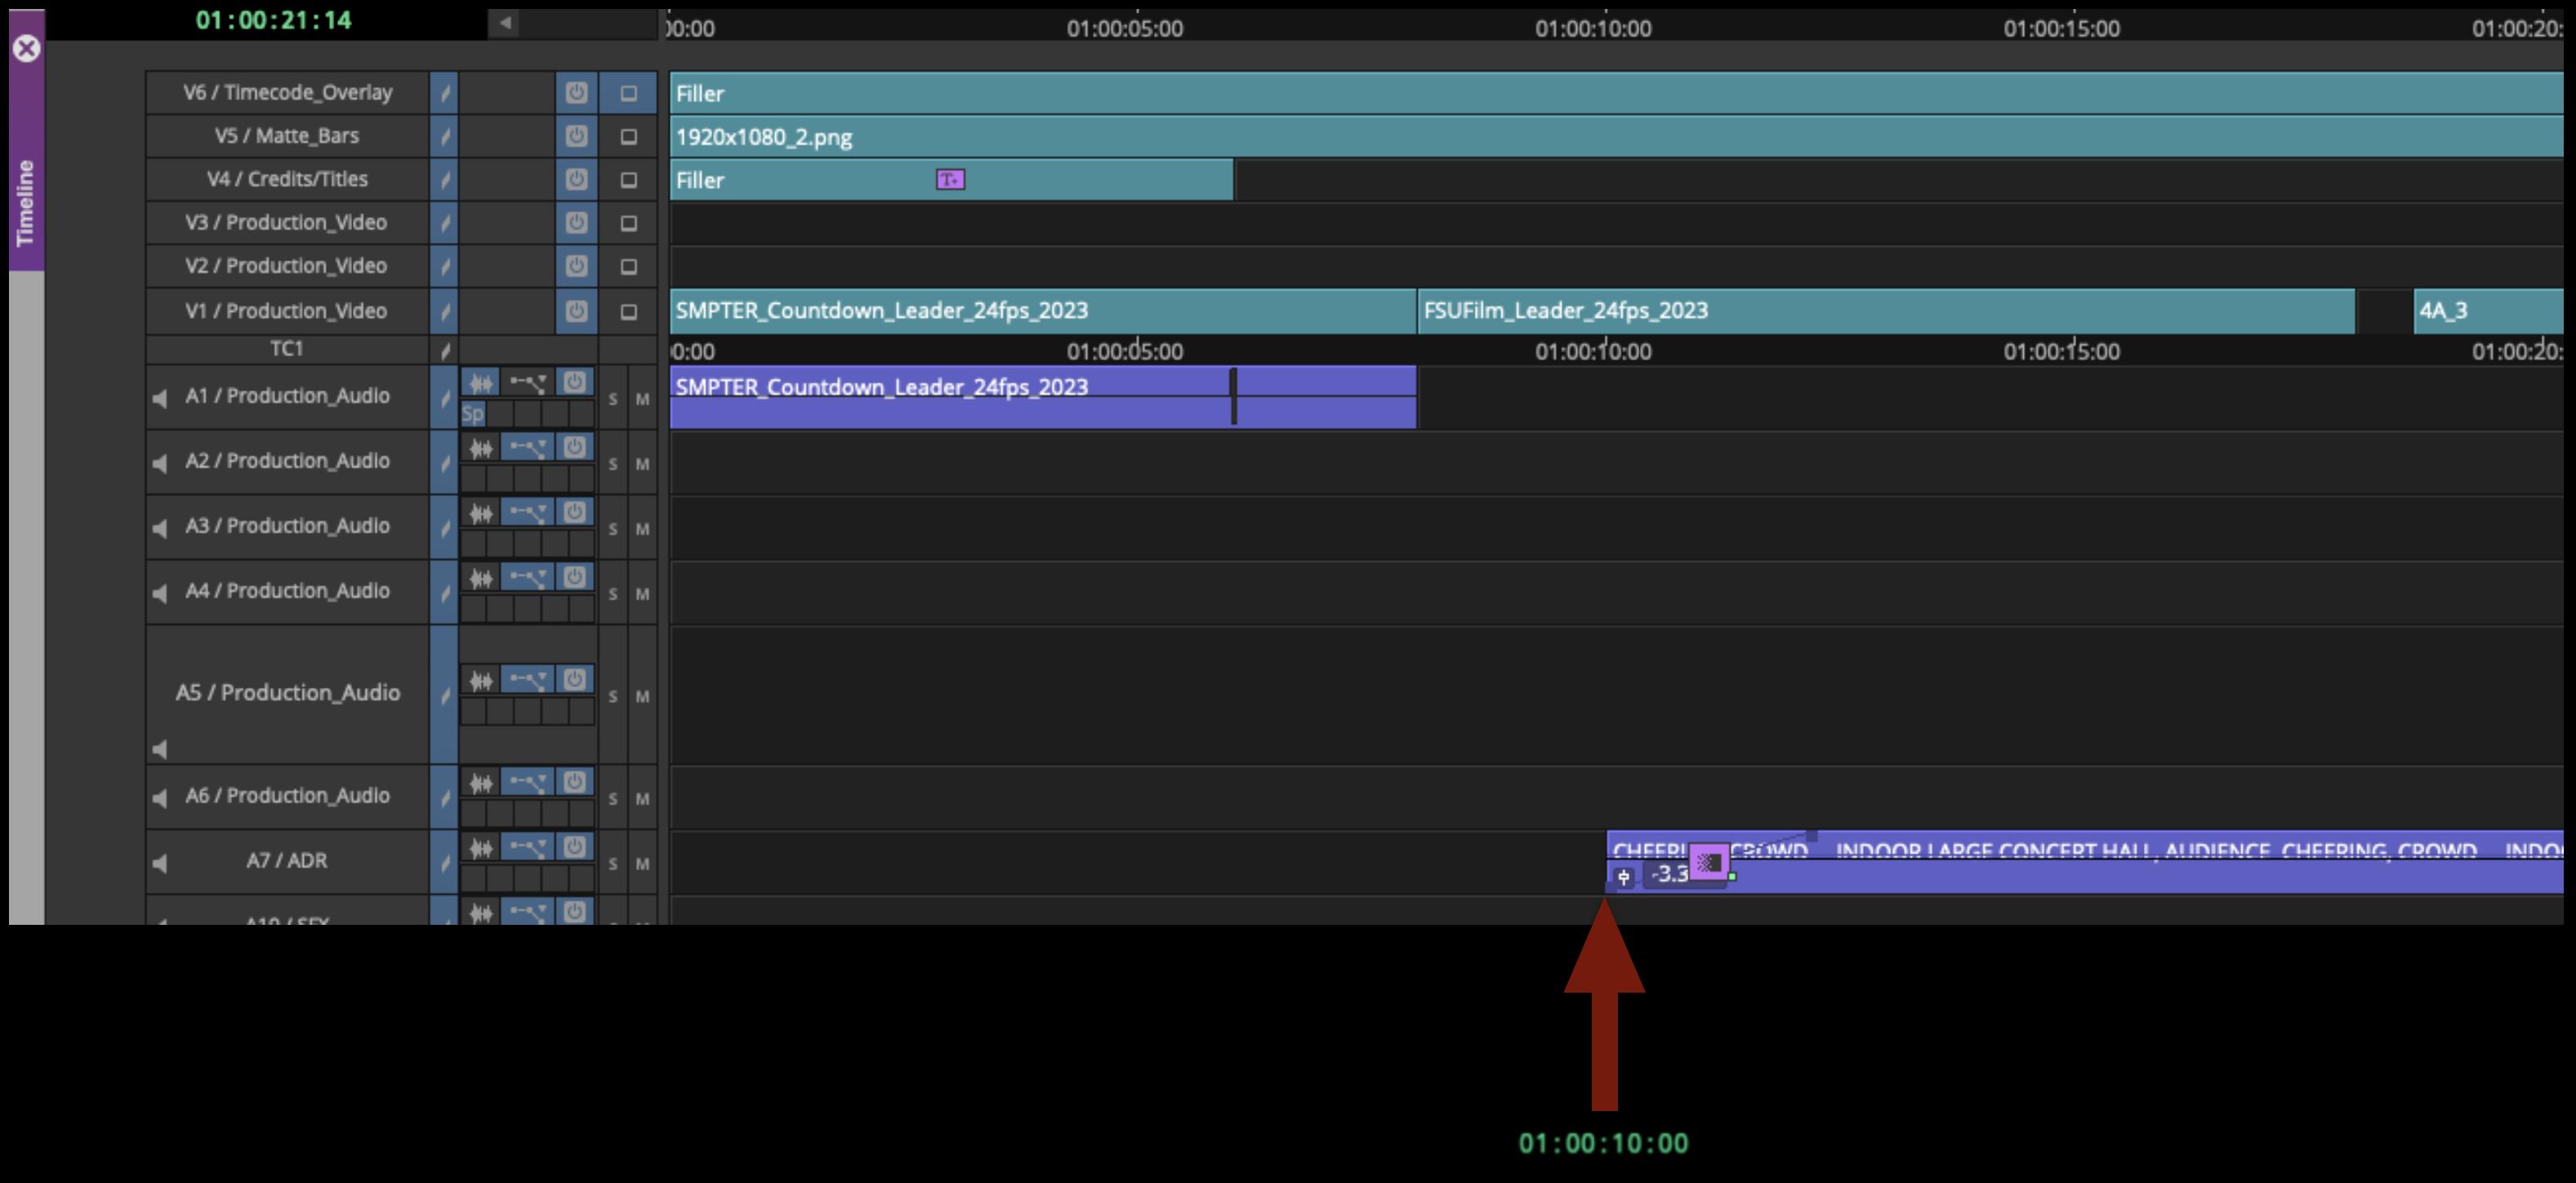
While checking the correct timing of your front sequence, also make sure to check that NO sound from your film starts before 01:00:10:00. There should be exactly 2 seconds of silence after the Countdown has finished.
Add Titles and Credits
The College has strict requirements for how titles and credits need to be formatted. Before building your titles, read the requirements here.
The finished titles and credits must be in at picture lock, cut into the correct video track. The credit sequence should be one continuous image sequence, properly labeled. Do not cut up your credit sequence inside Media Composer. The export from After Effects needs to be correct, so that no further adjustments are required inside Media Composer.

Condense Video Tracks
To prep your timeline for coloring, your video tracks (not your audio tracks) need to be condensed onto as few video tracks as possible. It’s understood that, due to the nature of how some video dissolves are built, more than one video track is sometimes necessary. The idea is to reduce the amount of tracks and media as much as possible.
Your sequence would go from looking like the example below with video on tracks V1 – V3 that needs to be brought down…

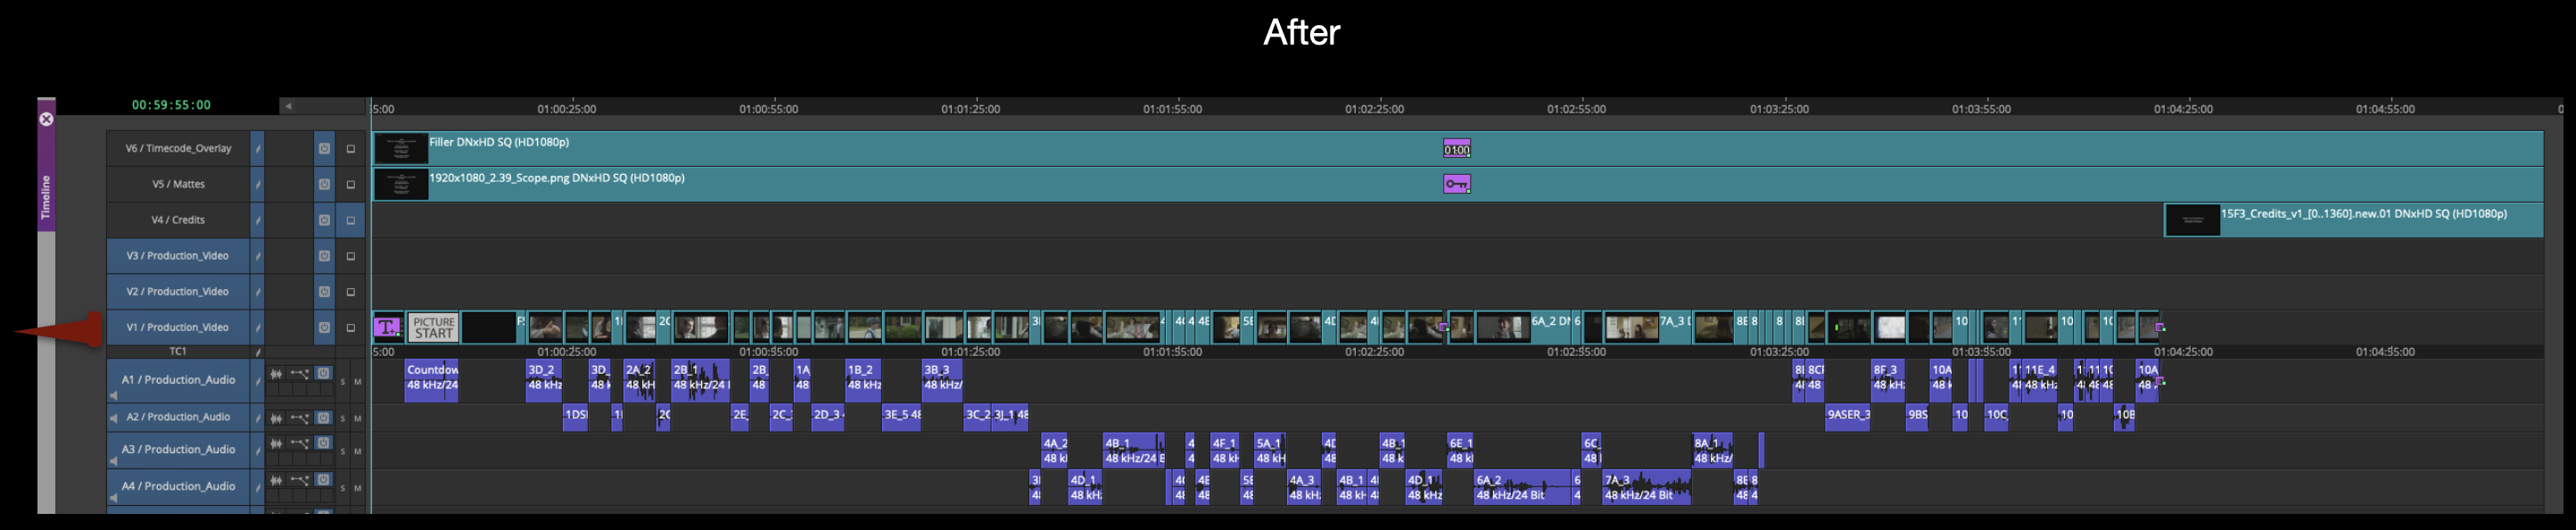
…to your sequence looking like the example below with everything consolidated onto one track:
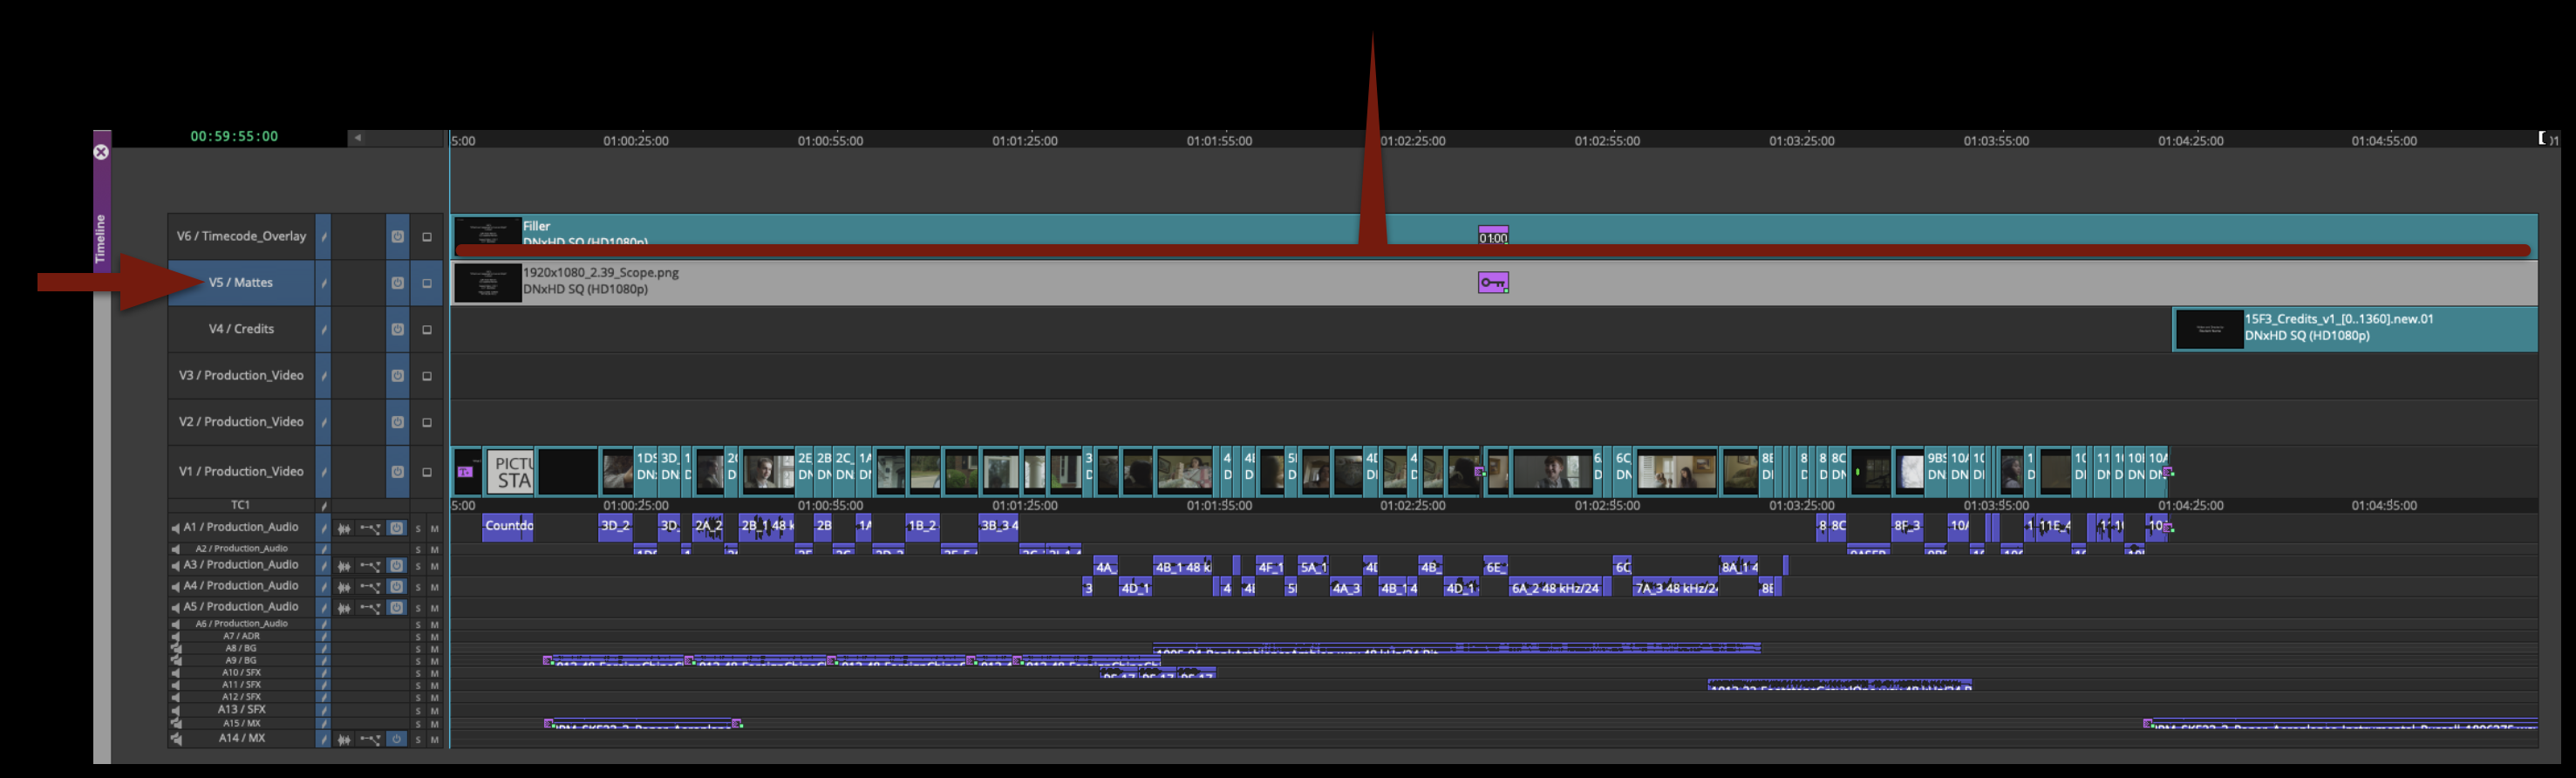
Apply Masking
Video Track 5 should have the proper aspect ratio matte (which was chosen during production and notated on the camera reports) applied over top of the entire film (including the credits).
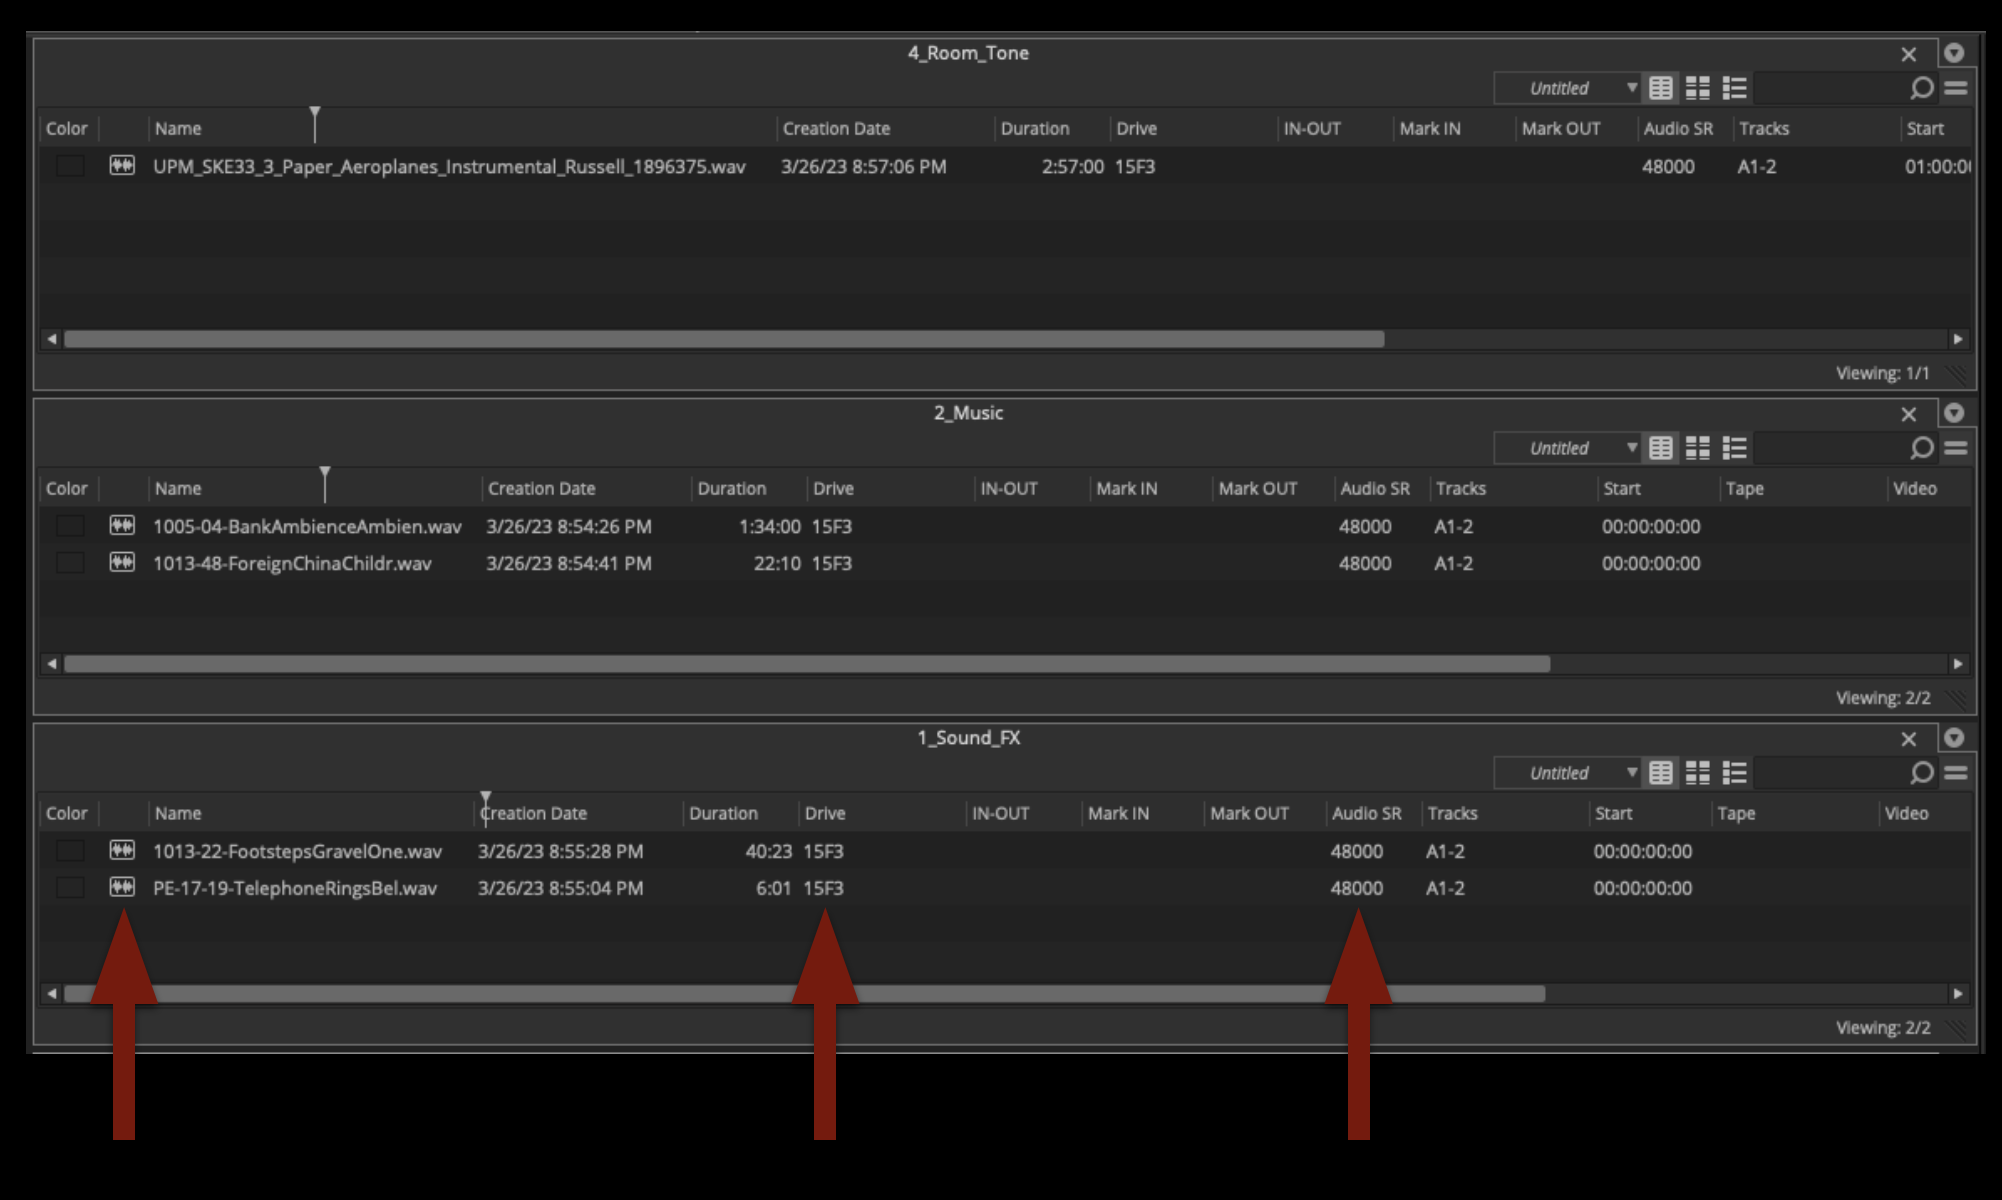
Check Sound Organization
During picture editing, a great deal of sound work should have been accomplished. It may not be the exact music and effects that will be in the finished mix, but the Editor should have taken a good polish to the locked sequence. To make sure all the Editor’s sound work will translate over to ProTools when the locked sequence is turned over, check all the sound media that may be in your locked sequence.
- Everything must be transcoded (nothing should be linked)
- The Audio Sample Rate for all Music, Backgrounds, and SFX should match at 48000
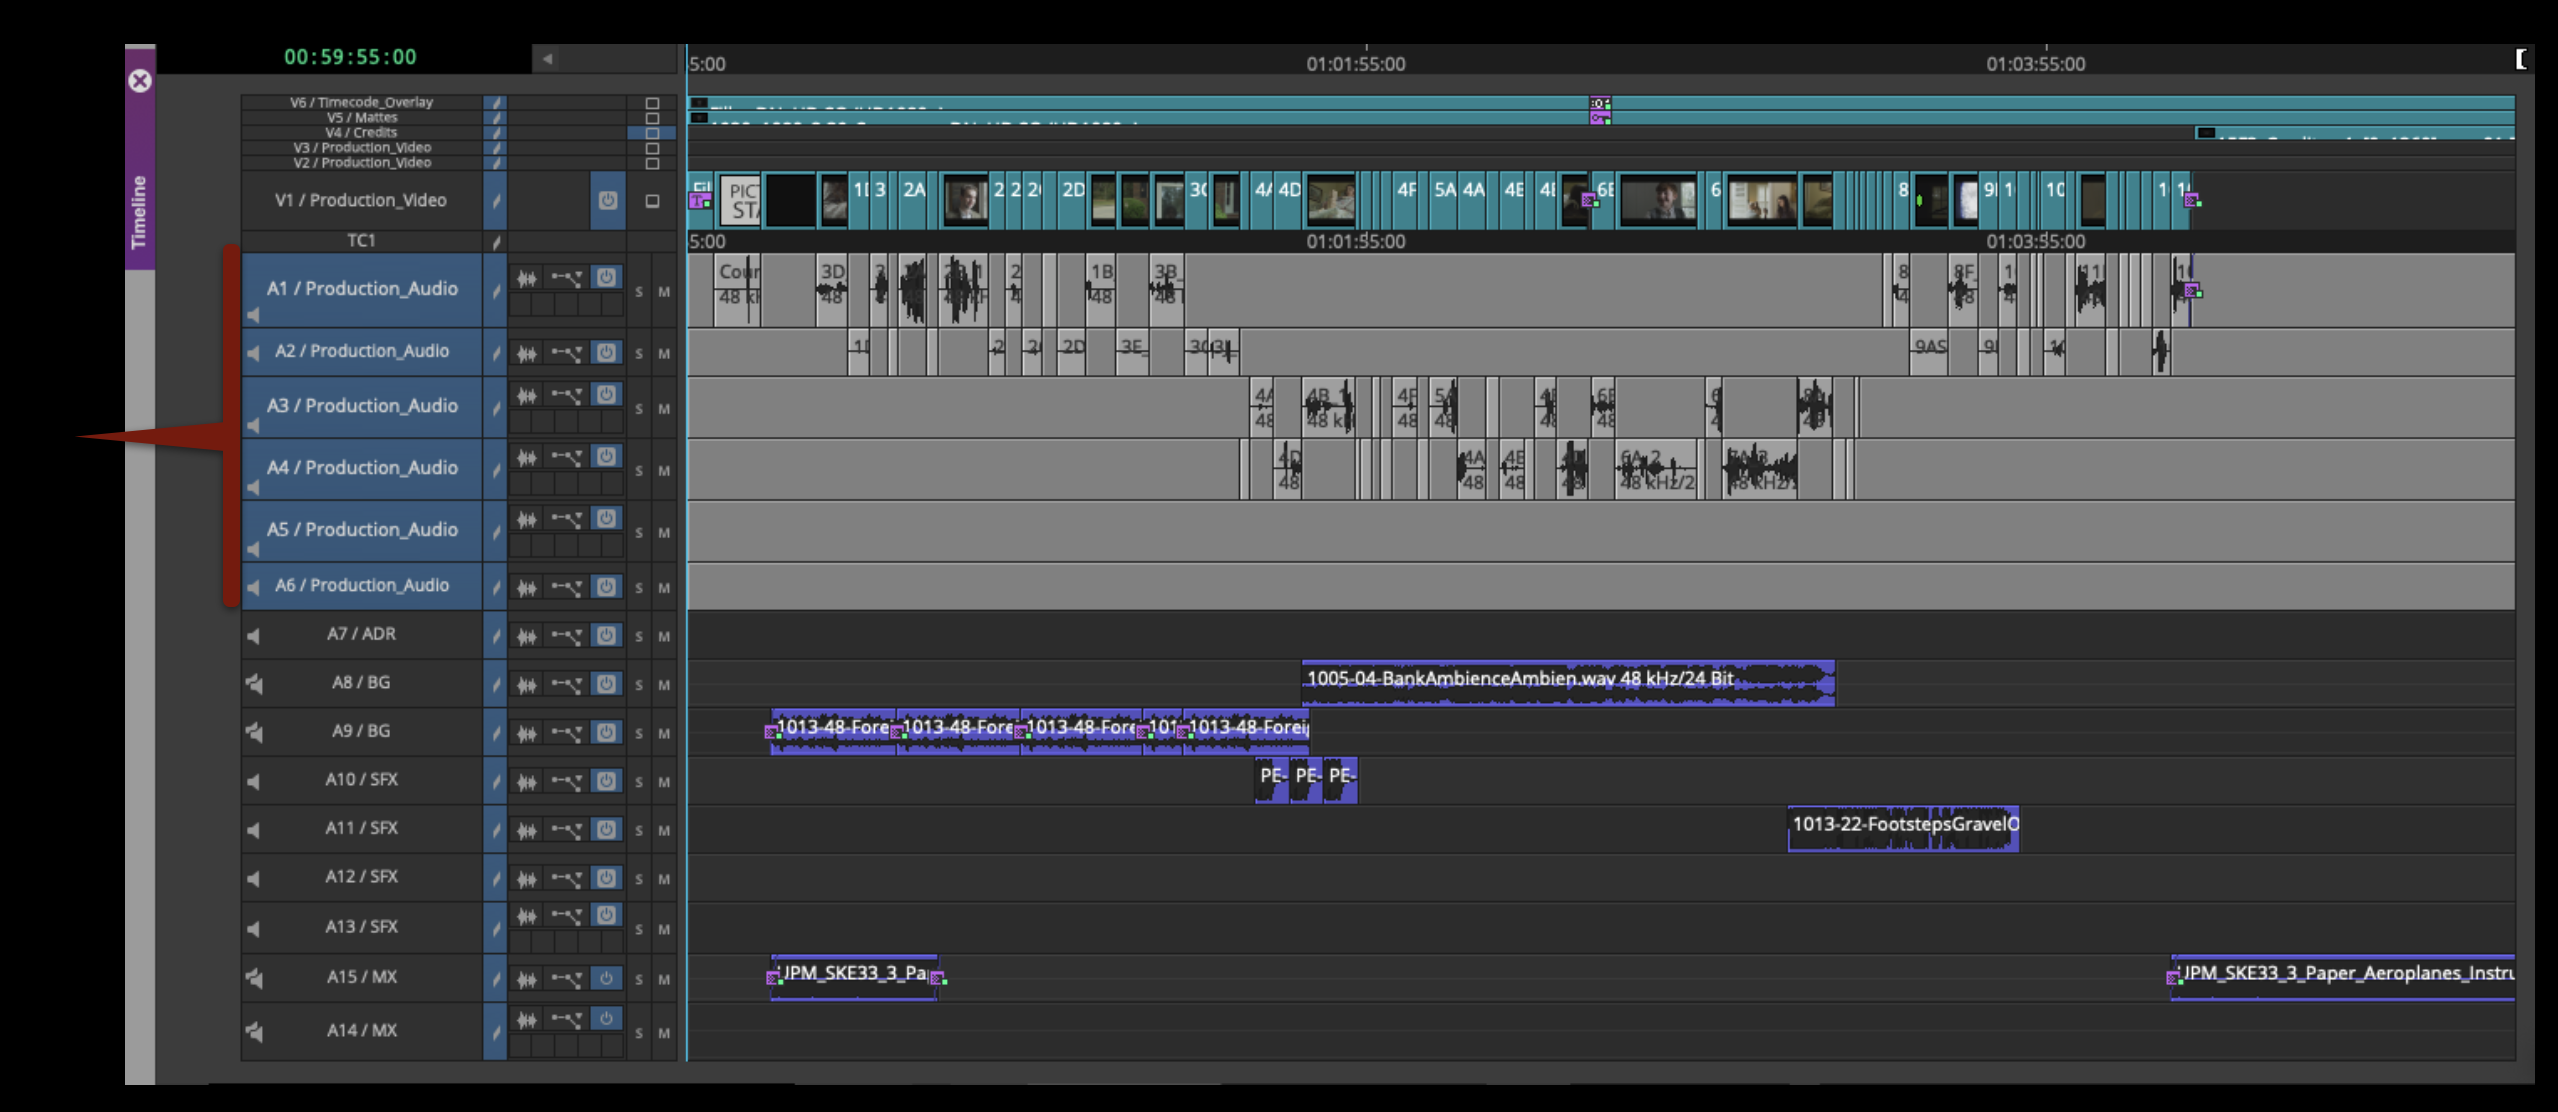
The Production Audio should all be in the Audio Tracks (A1-A6):
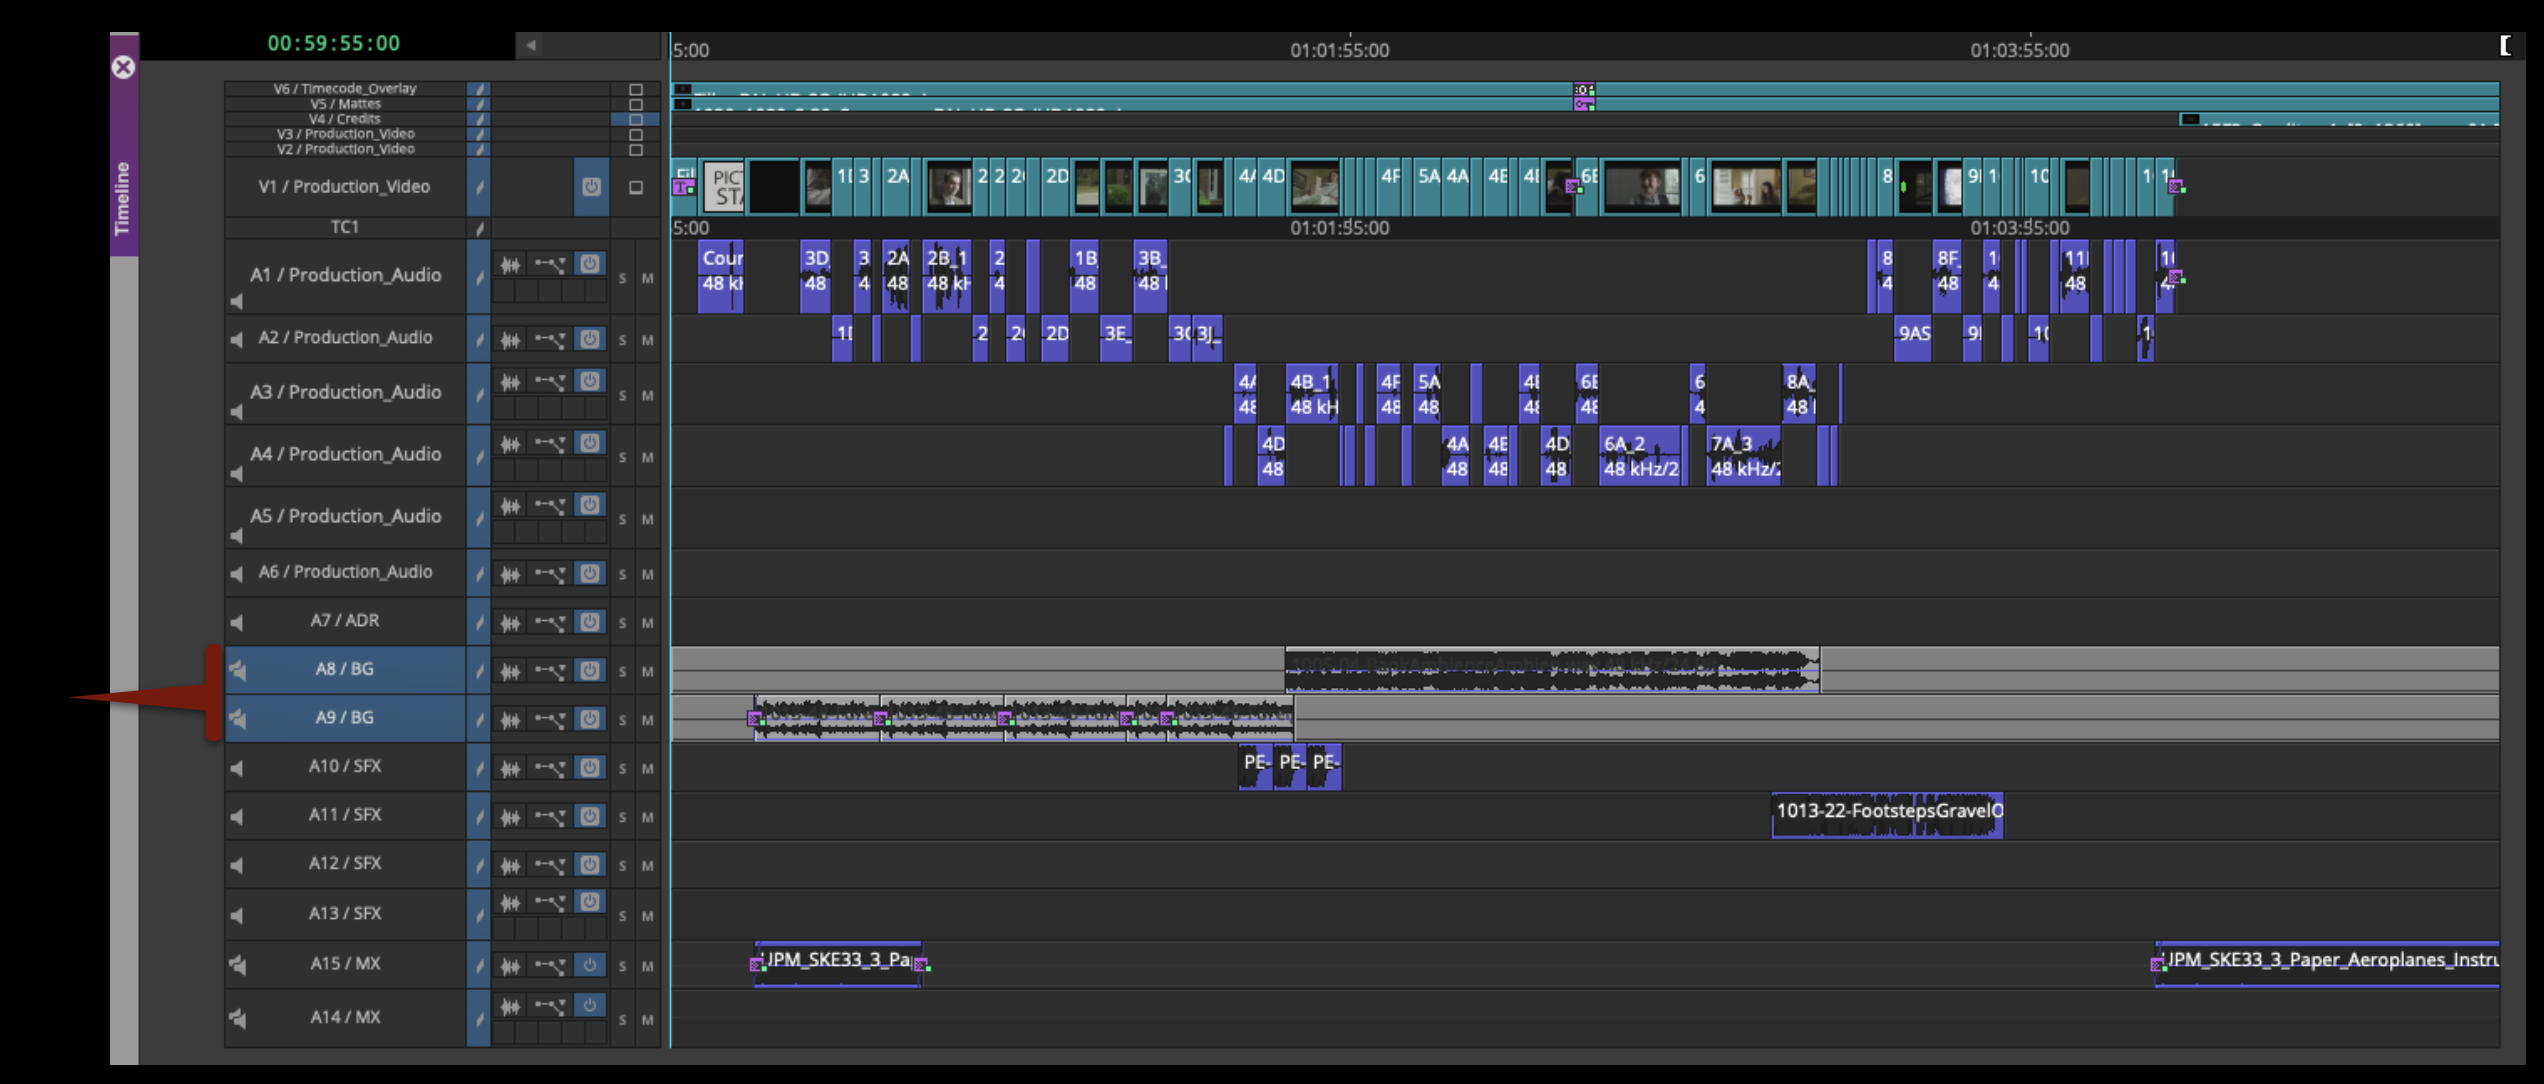
The Backgrounds should be in Audio Tracks (A8-A9). This should be stereo media in stereo tracks:
The SFX should be in Audio Tracks (A10-A13):
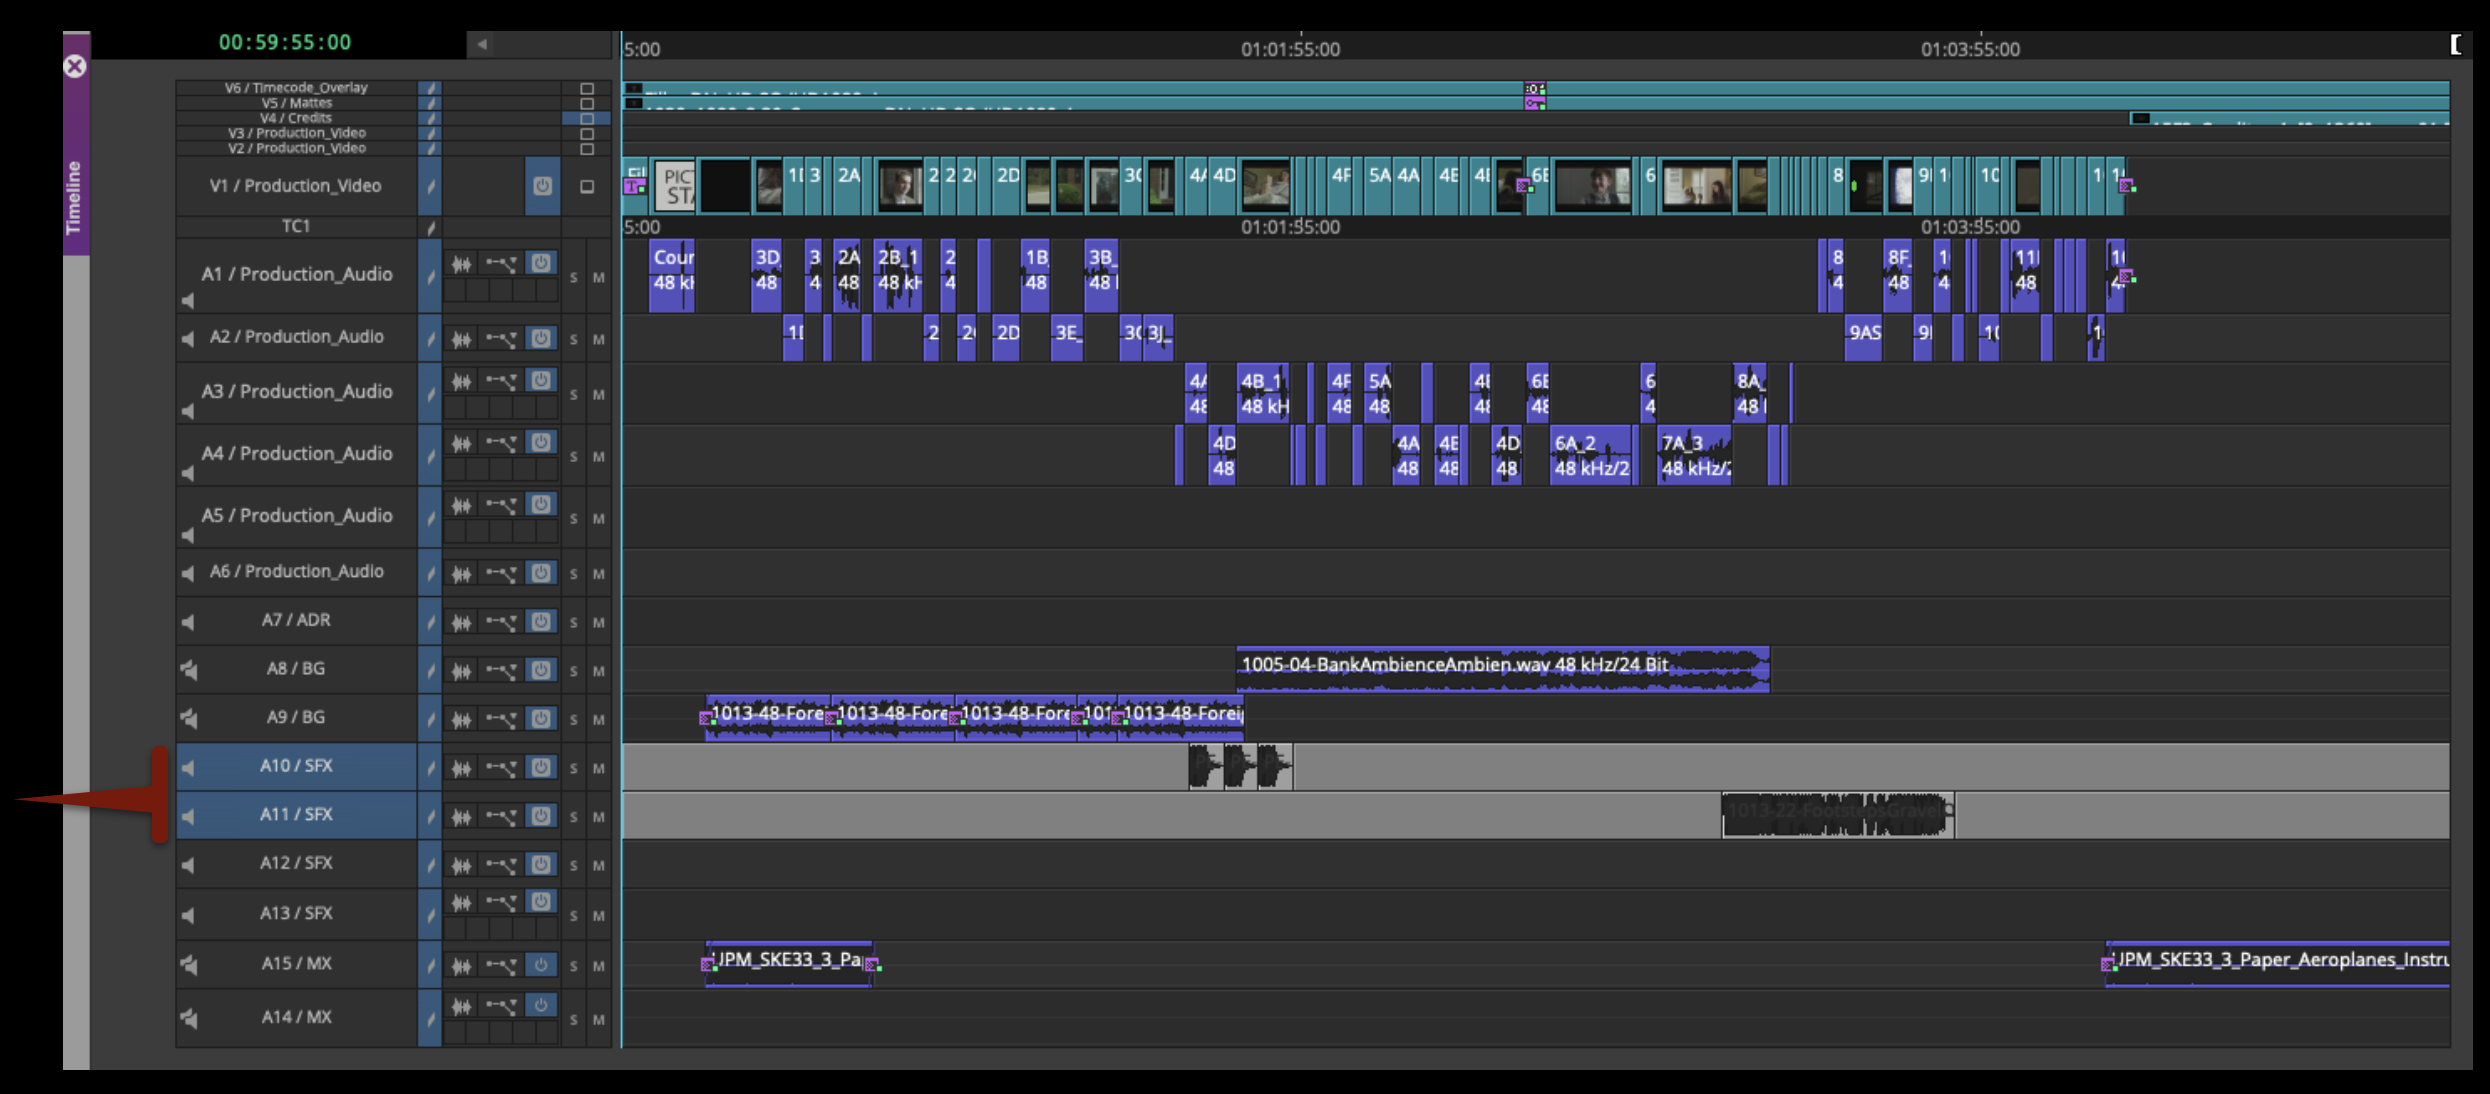
The music should be in Audio Tracks (A14-A15). This should be stereo media in stereo tracks:

Apply Timecode Overlay
The Timecode Burn-In Effect should be applied to Video Track 6 and cut over top of the entire sequence:

The default Timecode Burn-In Effect in the template may need to be modified slightly.
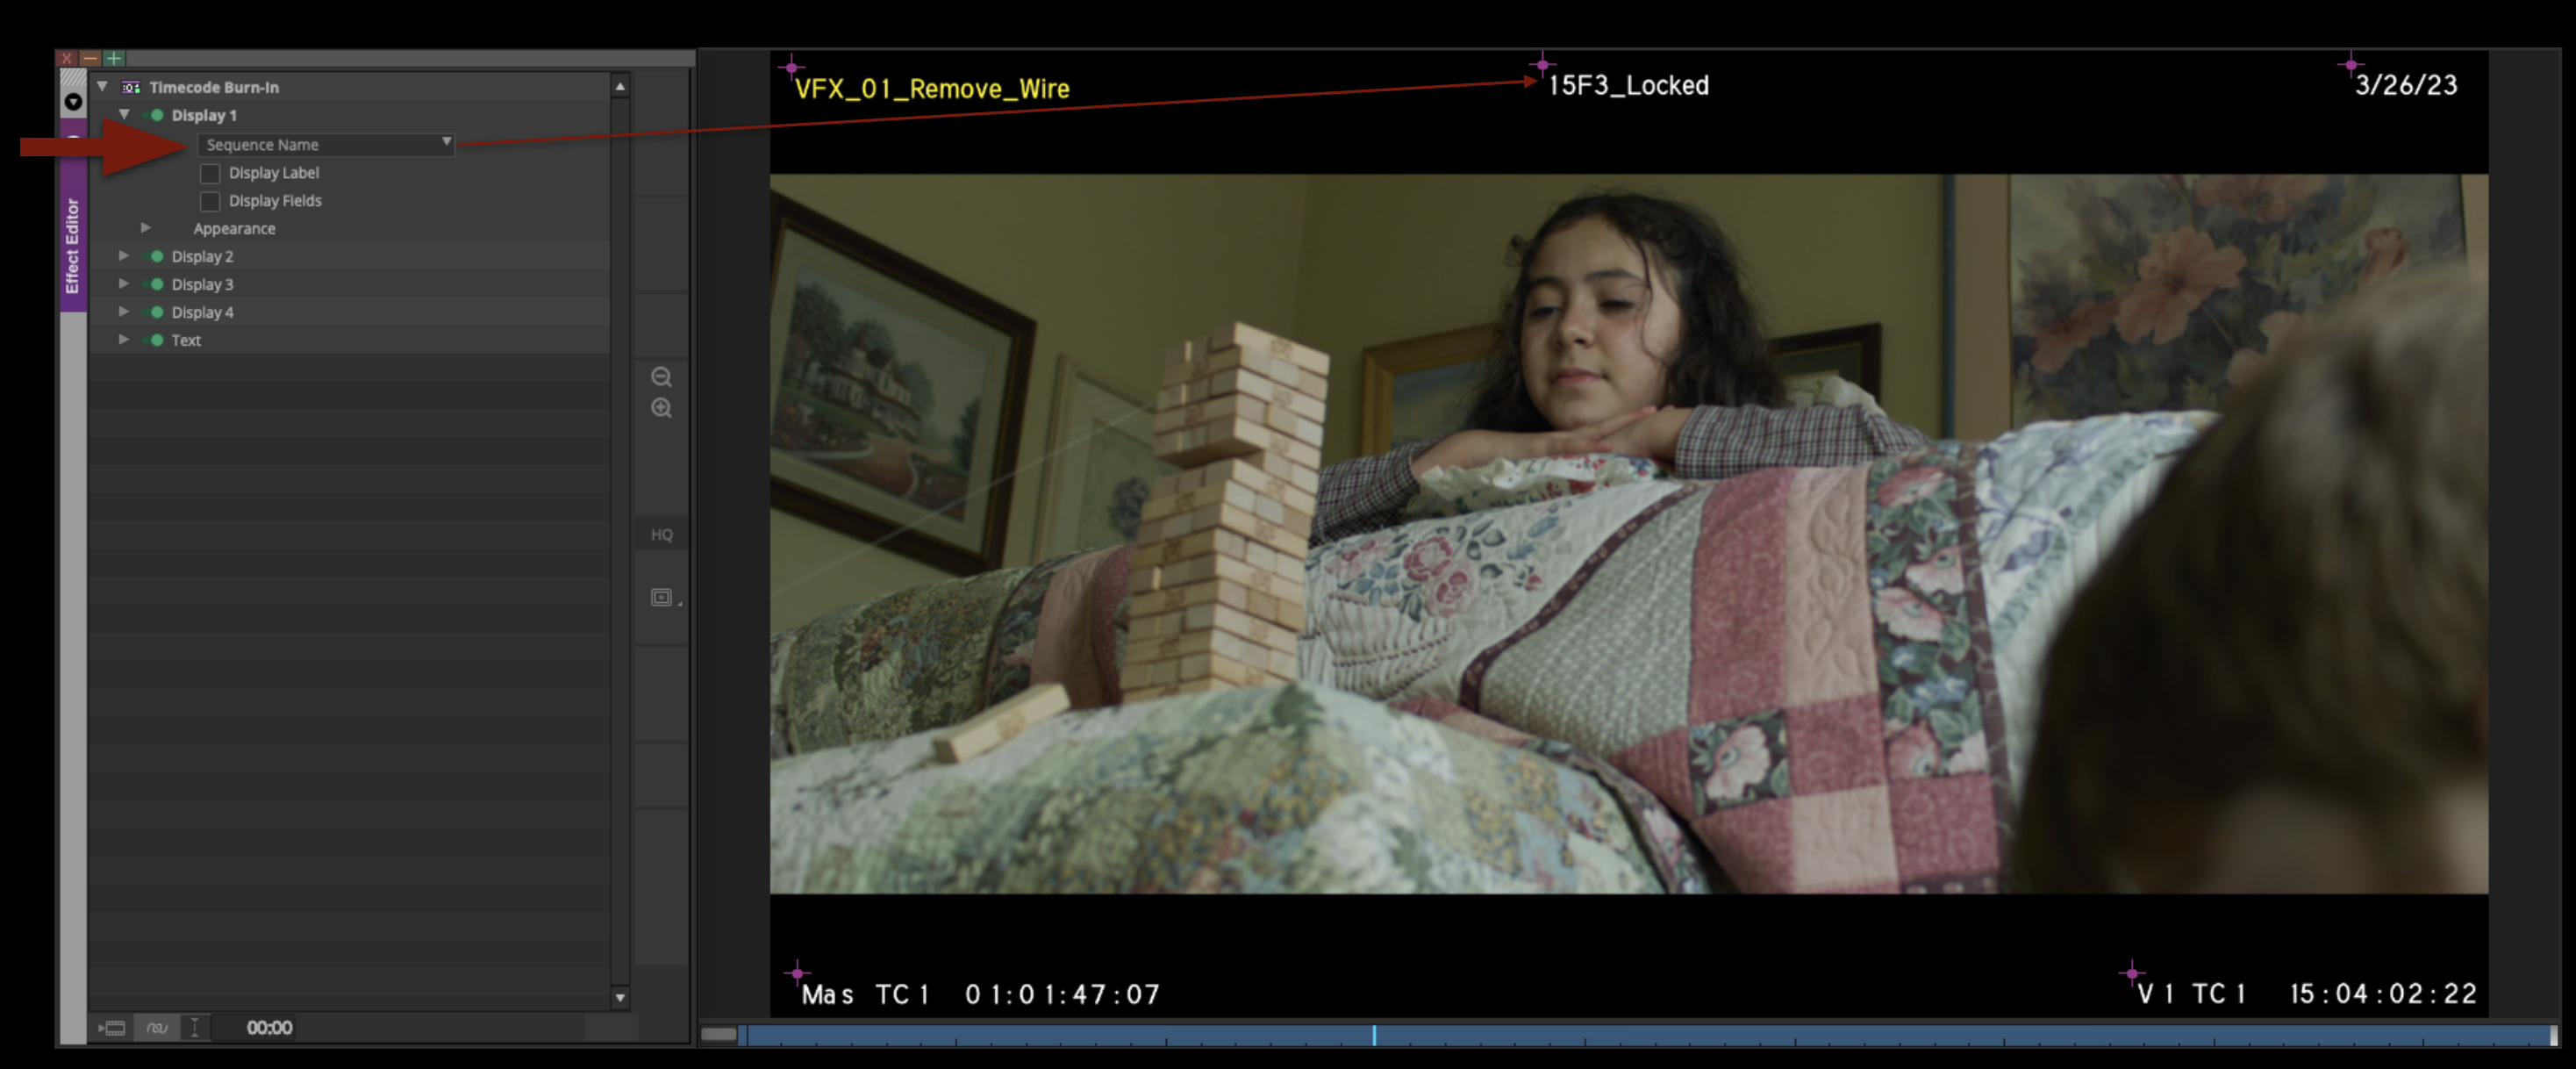
Display 1 should be set to “Sequence Name”. This should be placed in the top-center so that it displays as shown in the example below. This is so that, when it is exported as a video file, it is easy to identify which show it is and that it is locked.
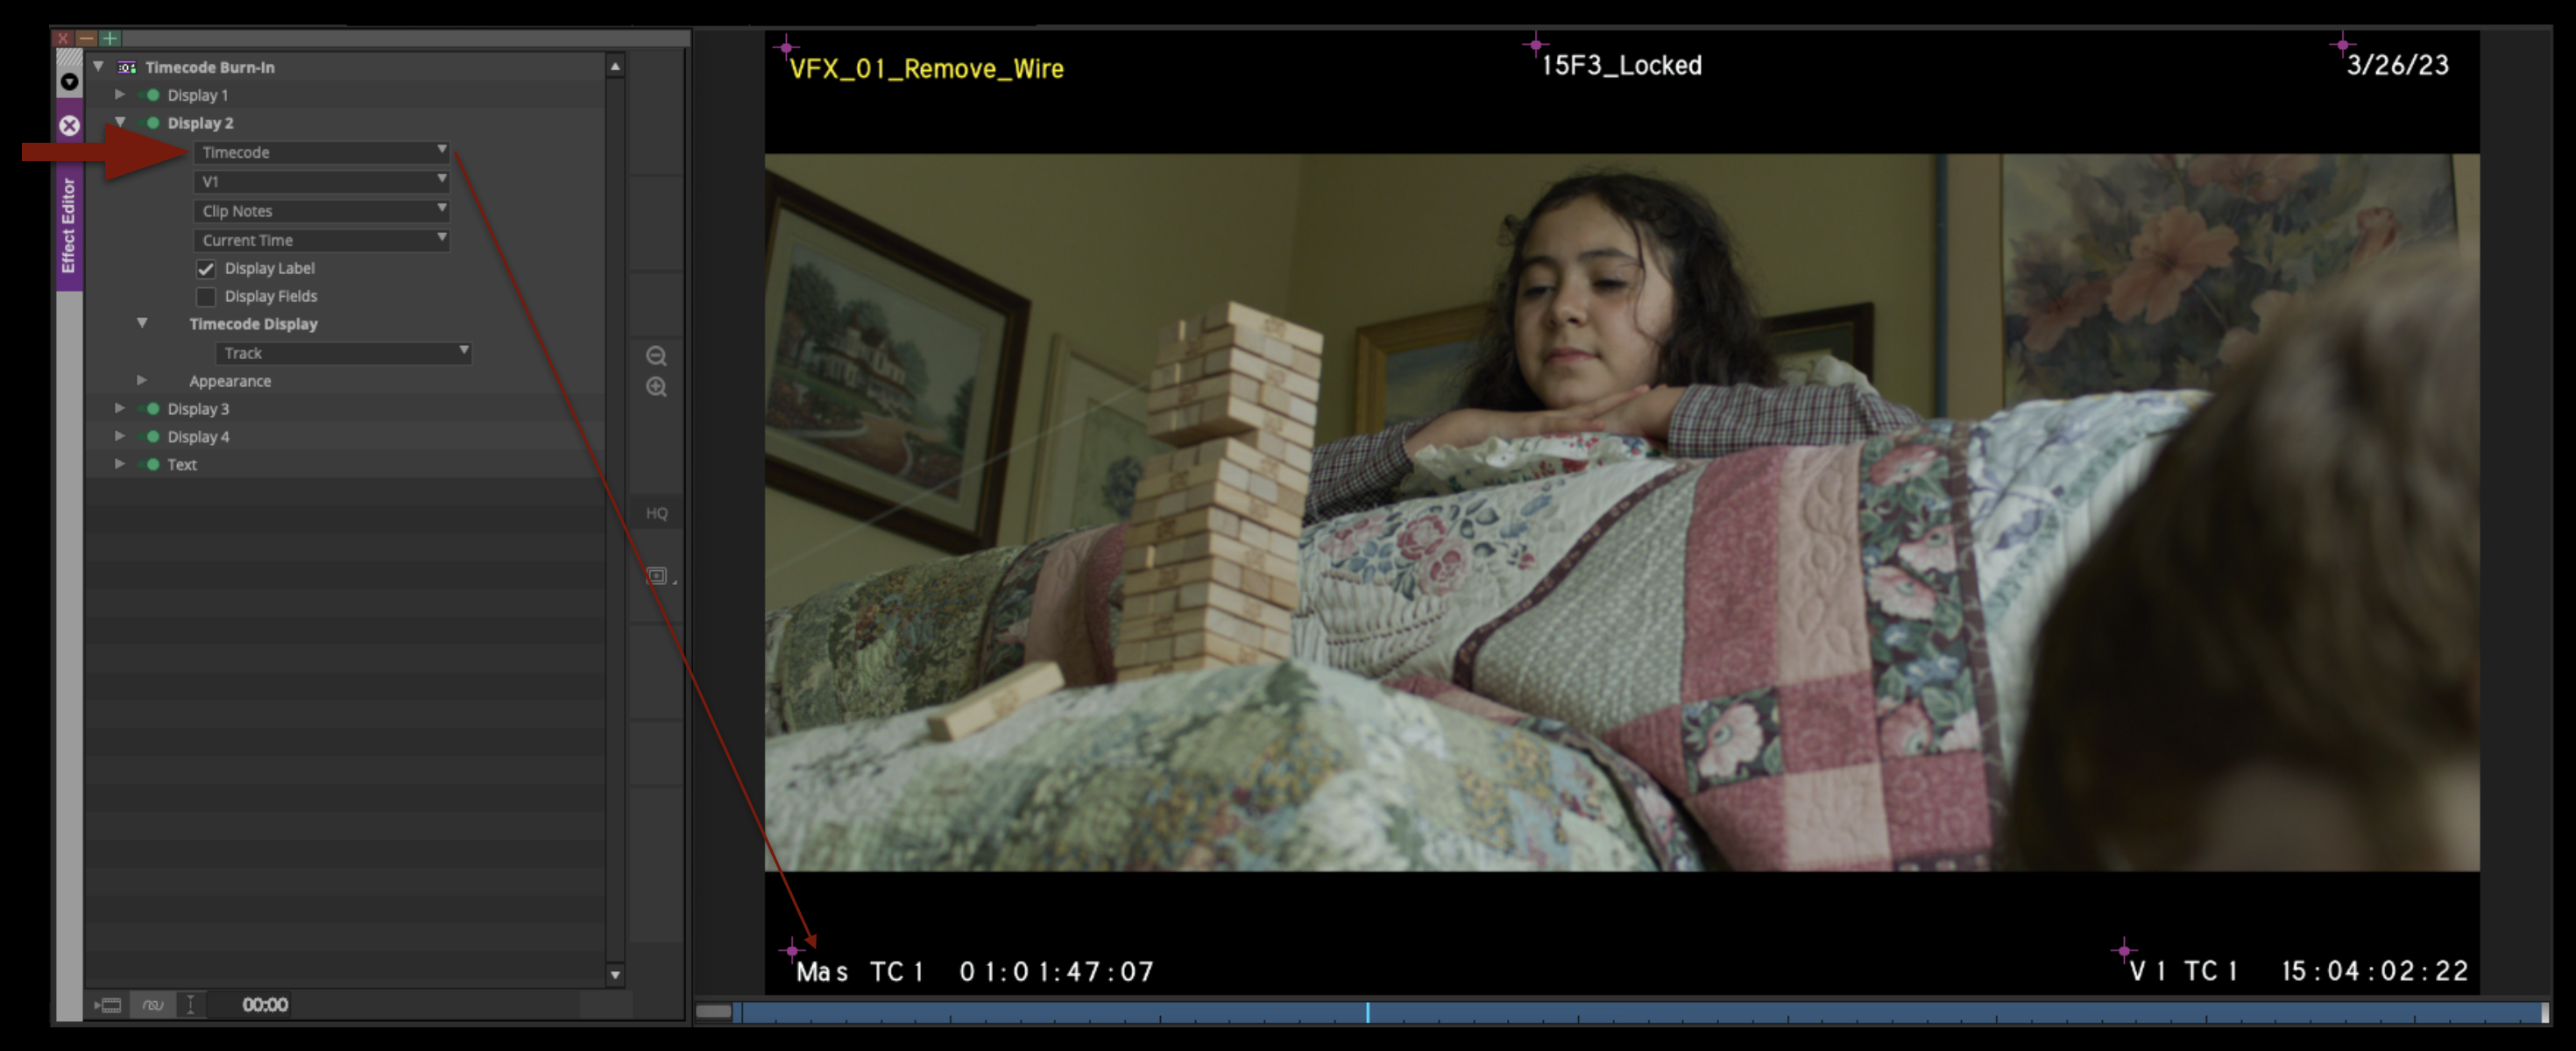
Display 2 should be set to “Timecode” and “V1”. This should be placed in the bottom-left corner so that it displays as shown in the example below. This timecode matches the locked sequence.
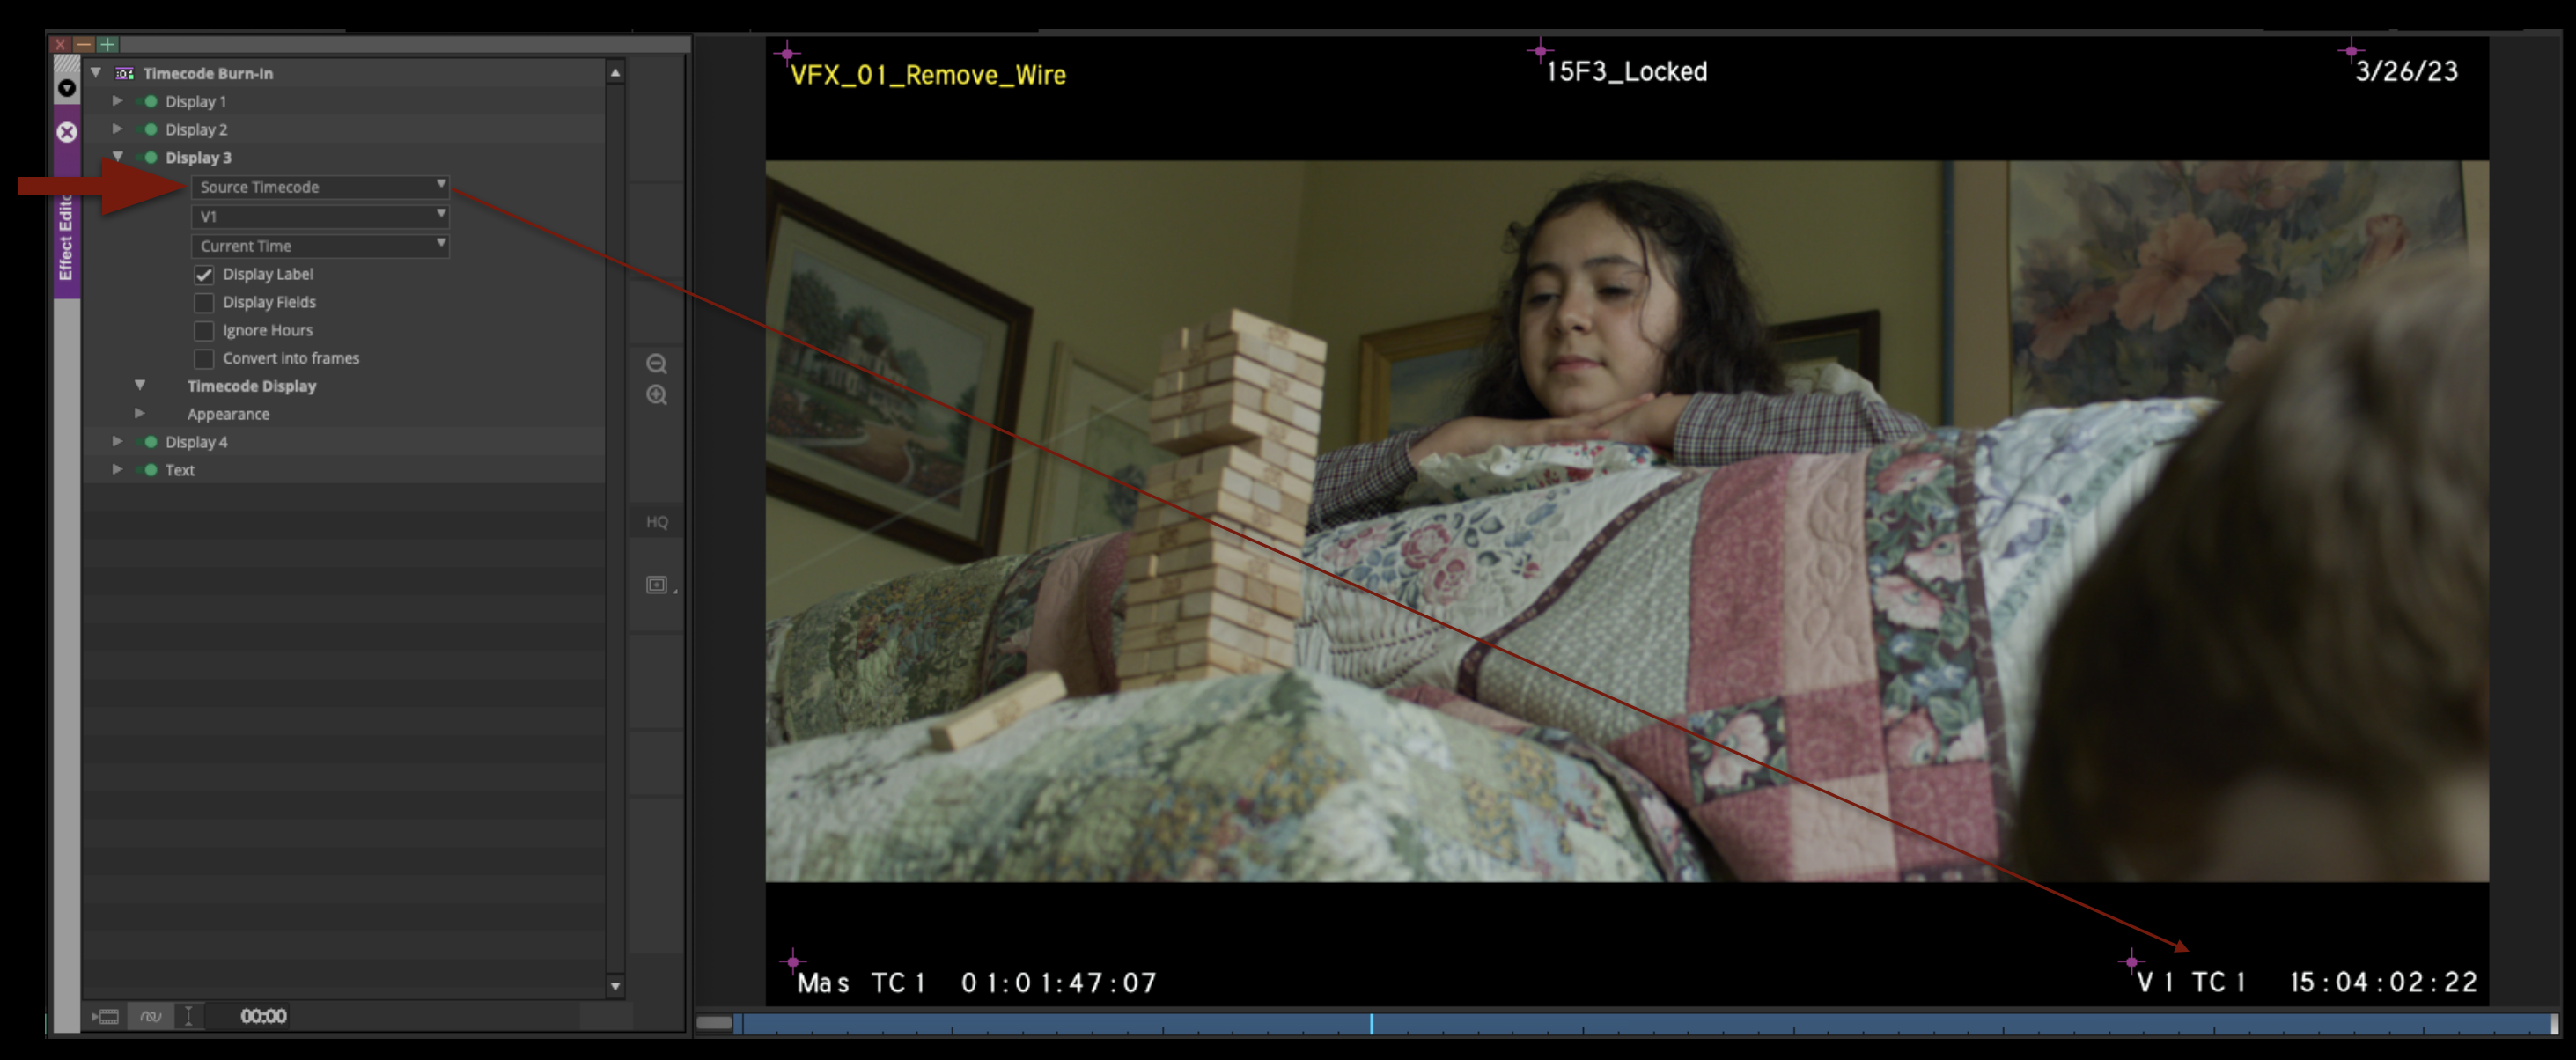
Display 3 should be set to “Source Timecode” and “V1”. This should be placed in the bottom-right corner so that it displays as shown in the example below. This timecode matches the media in the locked sequence.
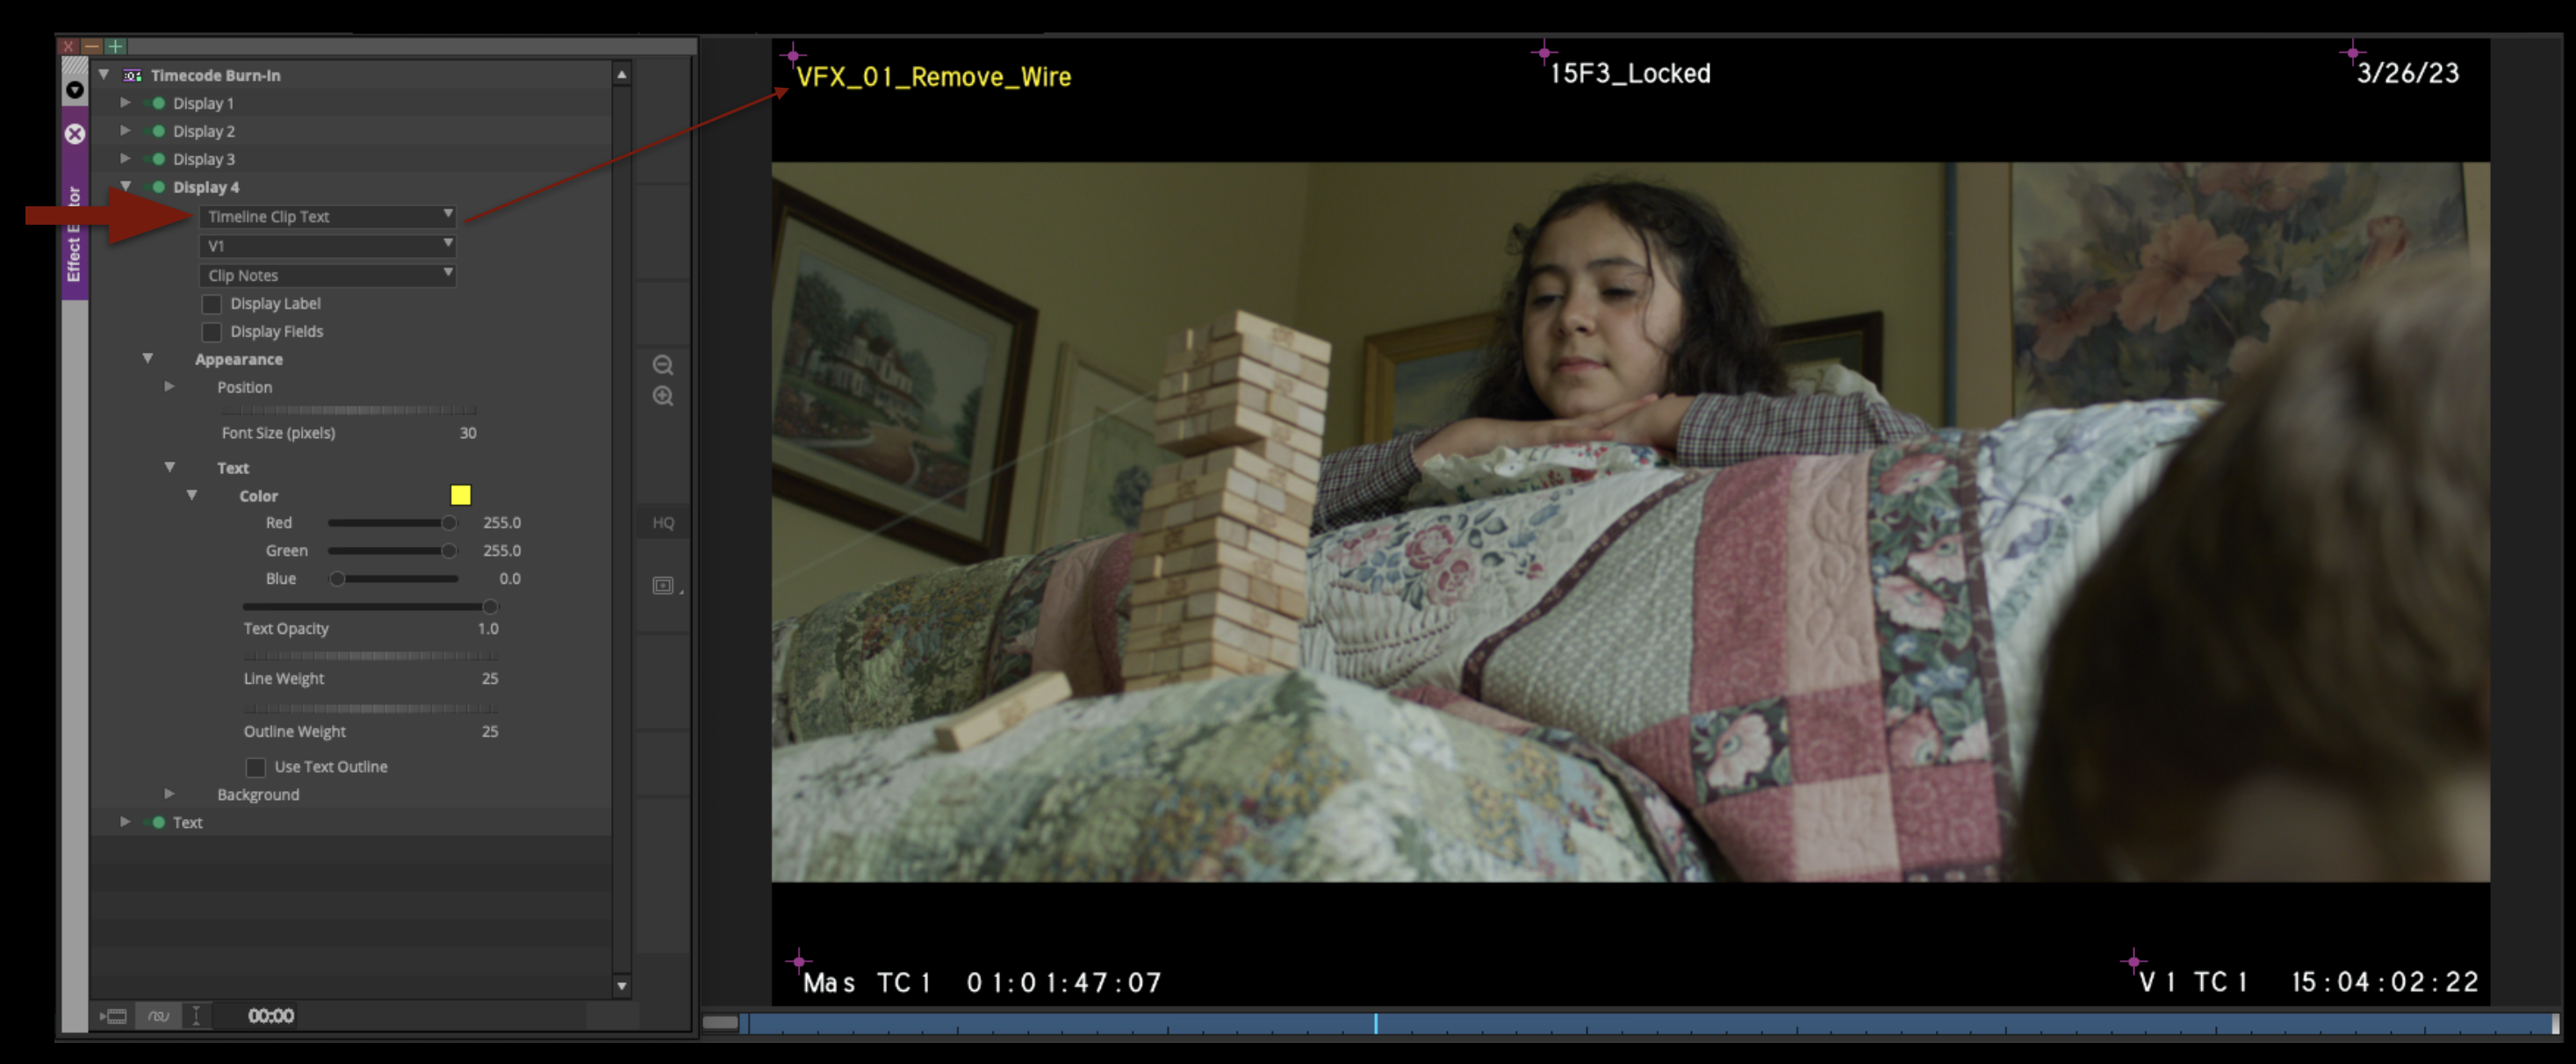
Display 4 should be set to “Timeline Clip Text” and “V1”. The color of the text should be modified to be yellow and be placed in the top-left corner so that it displays as shown in the example below. These burn-ins are helpful for keeping track of which shots are VFX shots.
Display 5 should have the date of picture lock typed in. This should be placed in the top-right corner so that it displays as shown in the example below. This is helpful for keeping track of when the show locked.

QC the locked sequence
The Director and Editor should watch the film one last time, looking for black frames or any other problems. This is your last chance to make any changes. Once your picture is locked, it is locked!
Save the project
Finally, once you are confident that your locked sequence is formatted correctly, make sure to save your Picture Lock bin.