Overview
This guide is only necessary if your show has approved VFX shots.
In the industry, the process of keeping track of VFX shots in editorial is normally the responsibility of an assistant editor or VFX editor in the editorial department. In our workflow, this responsibility rests on the editor. This guide lays out the steps necessary to properly label VFX shots in Media Composer so that they can be tracked during editorial and then turned over after picture lock. It also shows how to create a VFX Turnover Sheet at picture lock to make the VFX Turnover process easier.
Adding Markers
Every approved VFX shot in your edit needs to be marked and labeled in the order that they appear in the edit. Markers are helpful because you can easily navigate between them by hitting “A” and “S” on your keyboard. They are also very helpful later on when it comes to turning over your VFX elements because they translate over to Resolve.
These markers are how you will assign “names” or “shot codes” to your individual VFX shots. It is important that the naming convention is clear, consistent, and never repeats. This is the naming convention for VFX shots that must be followed:
show#_vfxshot#(example:09mc_vfx010)
If 09MC had five VFX shots they would be labeled as follows:
09mc_vfx01009mc_vfx02009mc_vfx03009mc_vfx04009mc_vfx050
Notice that everything is in lowercase. There are no spaces, only underscores. The first shot is labeled “010” instead of “001”. VFX shots should be labeled in “tens”. This is in case a VFX shot is approved and added later; if it comes between two shots, the naming convention will still sort properly.
In the example below is a highlighted clip that has been approved to have a sign digitally removed. You will need to add a yellow marker to the first frame of the shot.
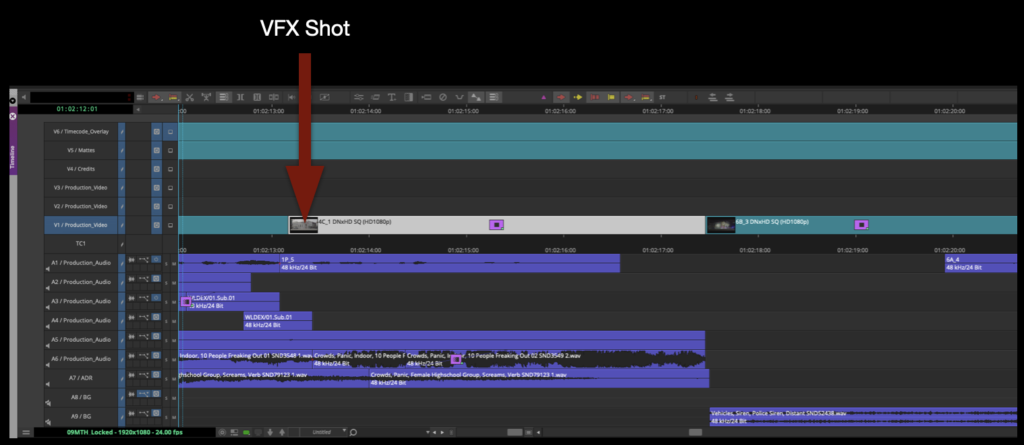
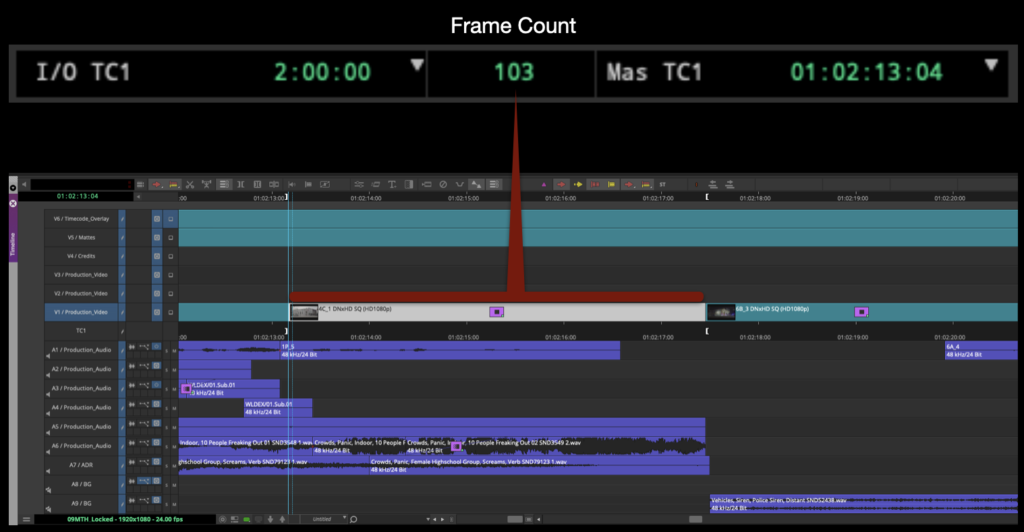
Place the playhead at the first frame of the VFX shot. Make sure only the track with the VFX shot is highlighted and hit “T” on the keyboard. This will add IN and OUT markers around the clip. After the IN and OUT markers are added, you can look at the time code readout above the composer window. The center box will always display the time between IN and OUT markers. If it is displaying in timecode, click it once and it will switch to displaying frames. Once that is done you have the information you need to add the yellow marker.
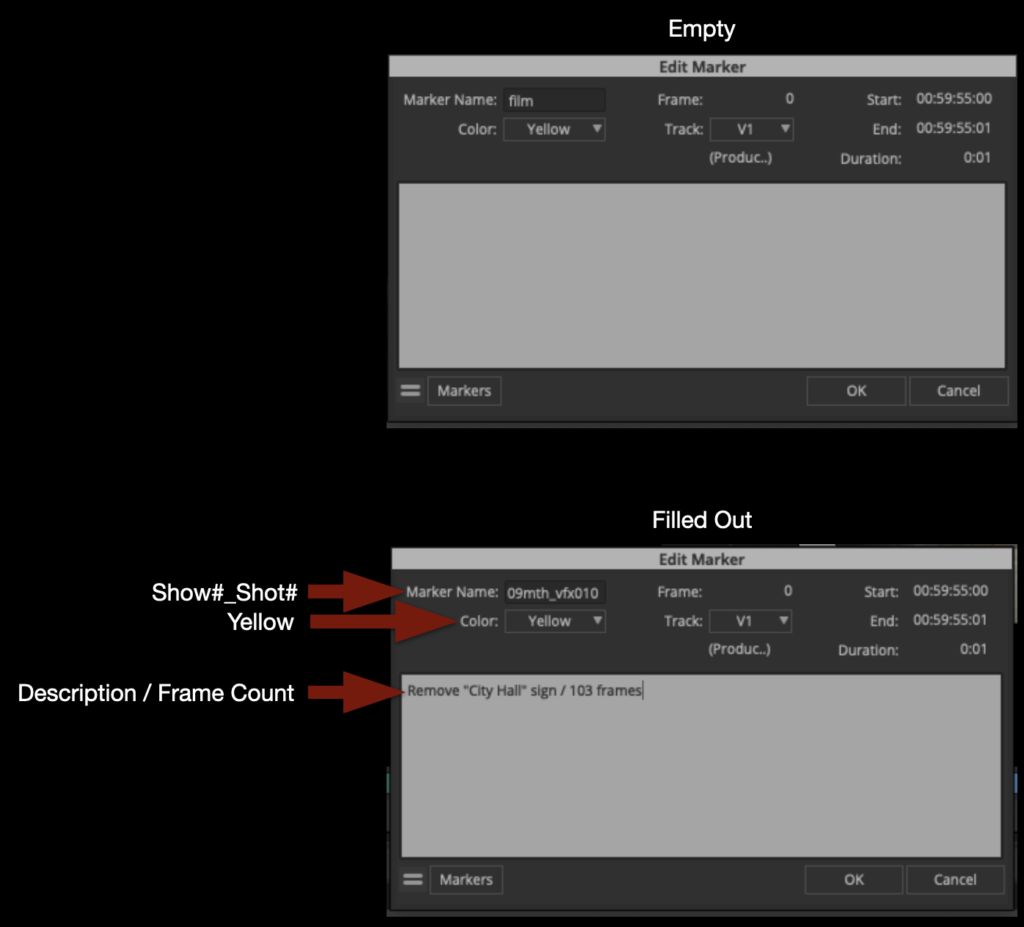
Hit “3” on the keyboard to add the yellow marker to the first frame of the clip. The “Edit Marker” box will appear and you will need to fill it out as shown bellow.
- Marker Name:
show#_shot# - Color: Yellow
- Description: Write a brief description of the effect / the frame count
Click “OK”.
After clicking “OK”, you will see that a small yellow marker has been added to the first frame of the VFX shot. If your playhead is directly on top of that marker, the marker color and description will appear below the record monitor.
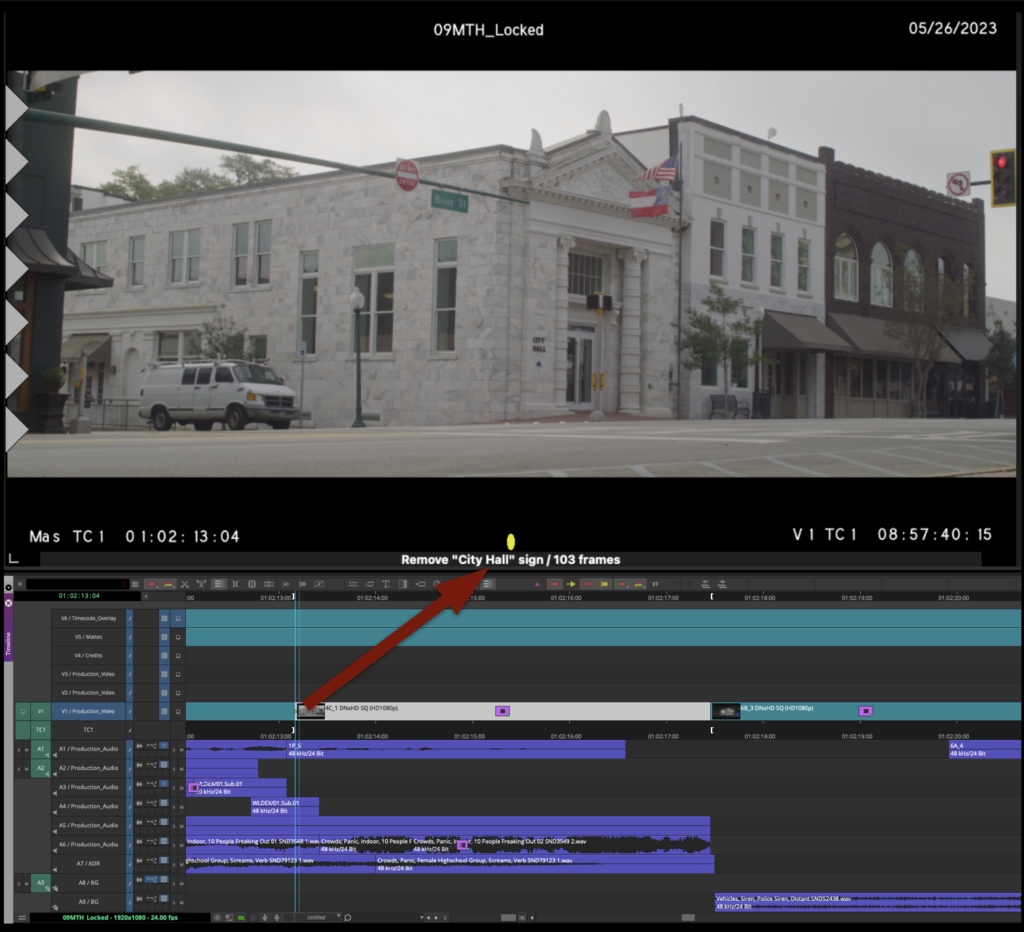
Repeat this process for all other VFX shots in your sequence in order.
Adding Timeline Clip Notes
After you have finished adding markers to all the VFX shots, you will want to label them another way as well. Your VFX shots need to have “burn-ins” using the Timecode Overlay Effect as described in the Picture Lock document. Using Timeline Clip Notes is the best way to do this.
Navigate to each of your VFX shots, right-click on it, and from the dropdown menu choose Add Timeline Clip Note…
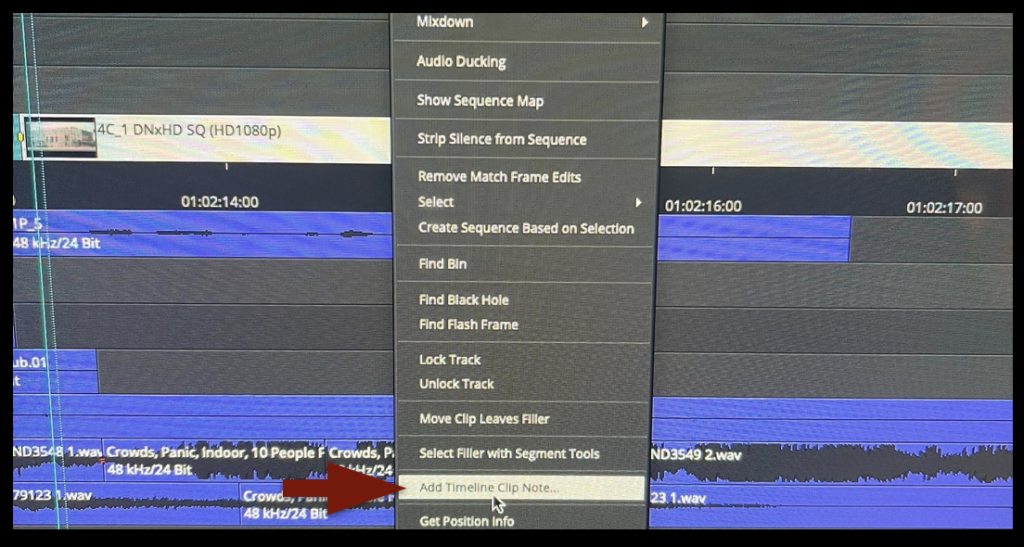
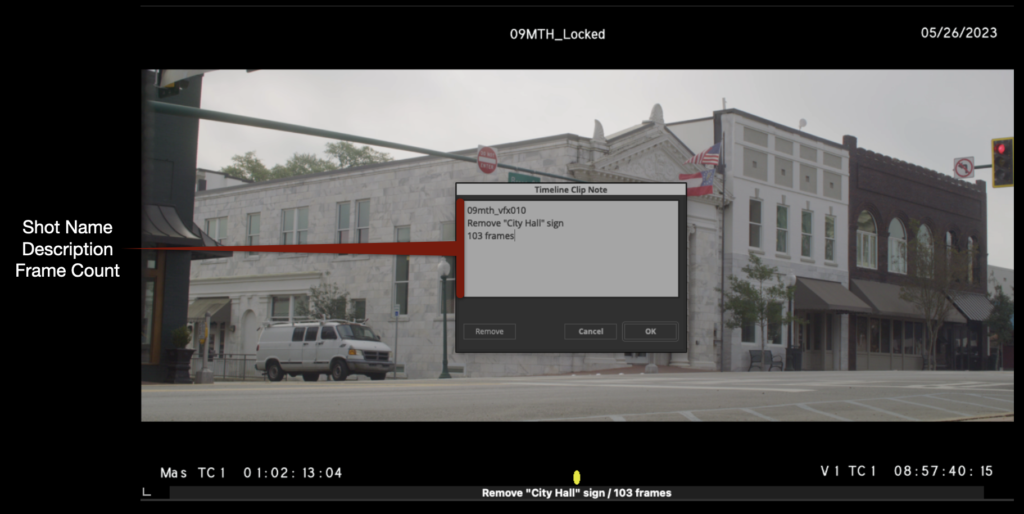
A box will appear that you will need to fill in with the same information that you added to the marker. If your playhead is directly on the marker, it will be easier to do this because the description and frame count will be visible. Format your clip notes exactly as below.
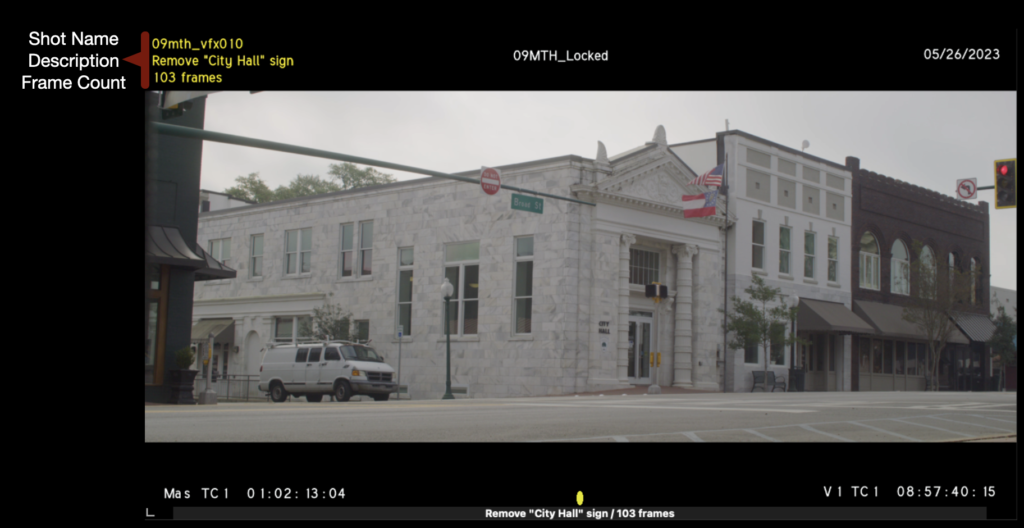
After you click “okay”, if you have the correct Timecode Overlay effect applied, your Clip Note will appear in the upper left corner in yellow as shown in the example below.
VFX Turnover Sheet
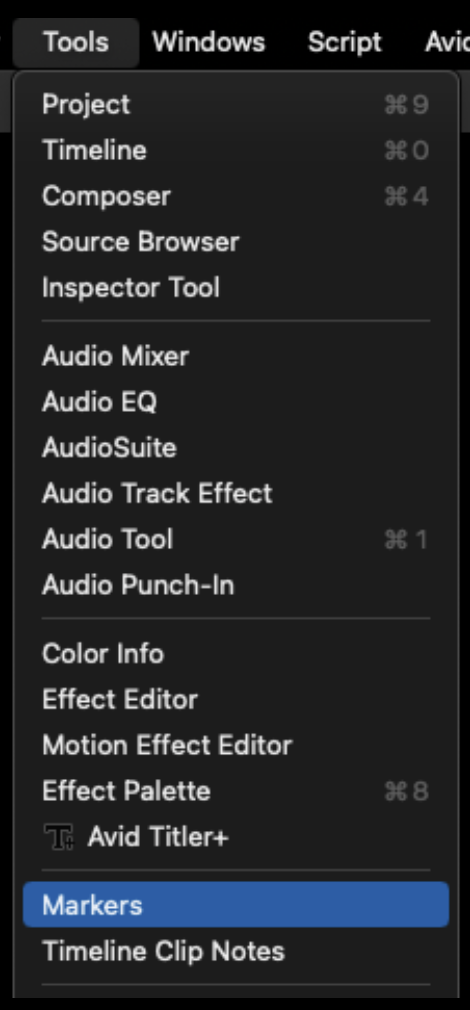
At picture lock, if your show has approved VFX shots you will need to double-check all of your VFX markers and Clip Notes to make sure they are up-to-date in your Locked Sequence. After you have done that, you can export a VFX Turnover Sheet. From the task bar, select Tools > Markers.
With the Markers tab, open you will see all of your markers laid out in a bin view with several columns across the top. These columns can be sorted and hidden like a normal bin. If you have other Markers displayed here you will need to delete them. For the VFX Turnover Sheet to be accurate, you need to make sure the only markers in your Locked sequence are yellow VFX markers.
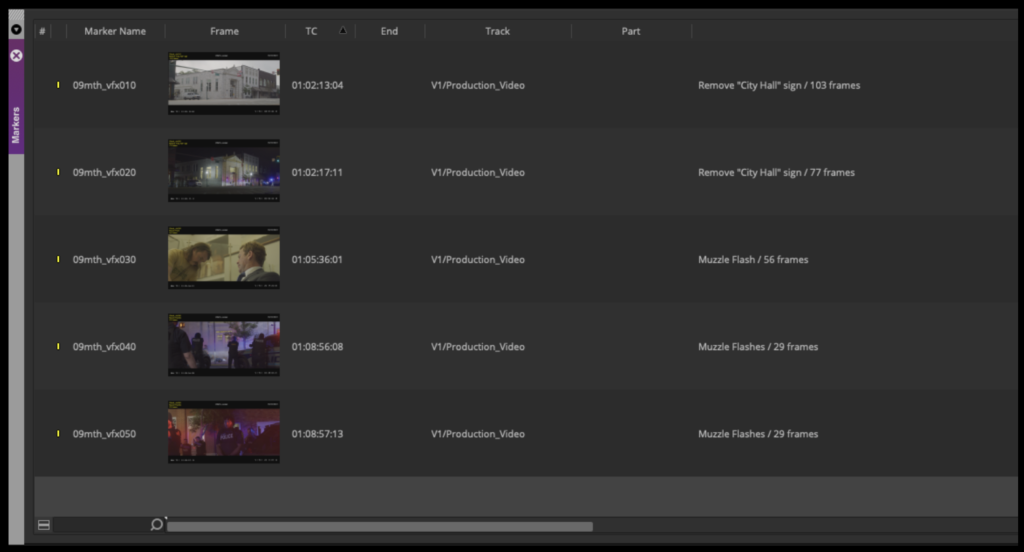
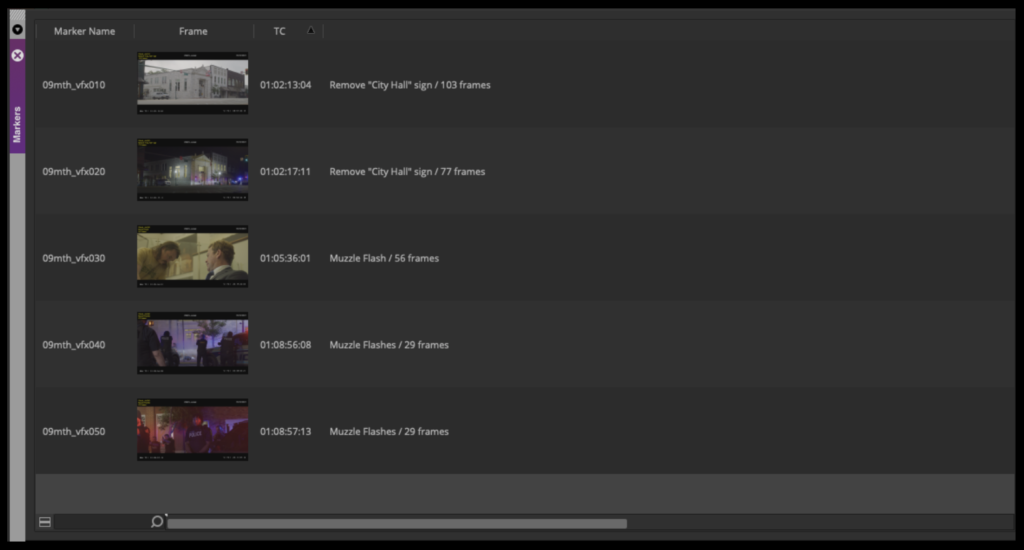
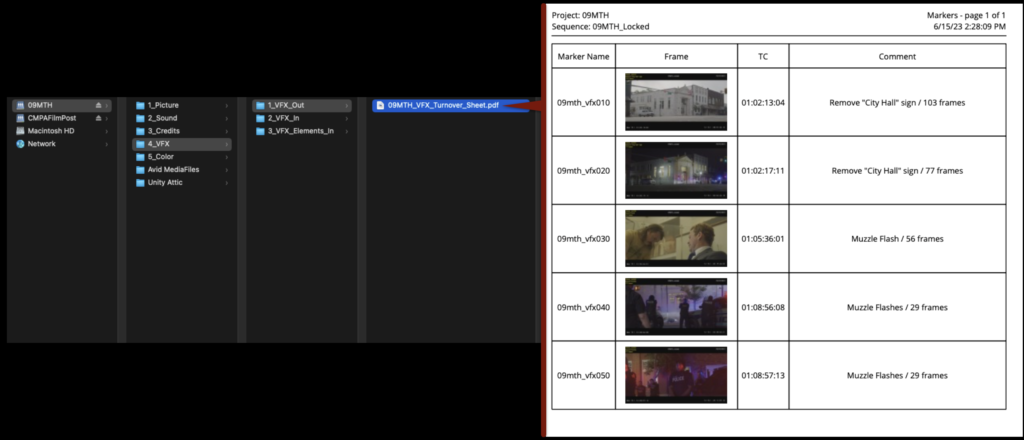
Arrange the columns as shown below. Hide all of the other columns leaving only Marker Name, Frame, TC, and Description (in that order). Sort by the Marker Name column so that your VFX shots are in numerical order.
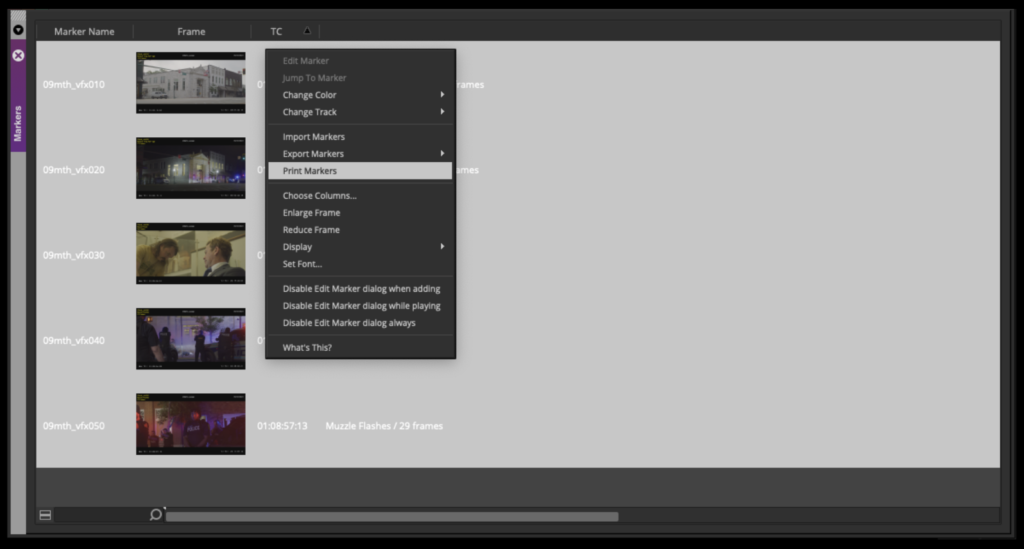
Right-click and select “Print Markers”
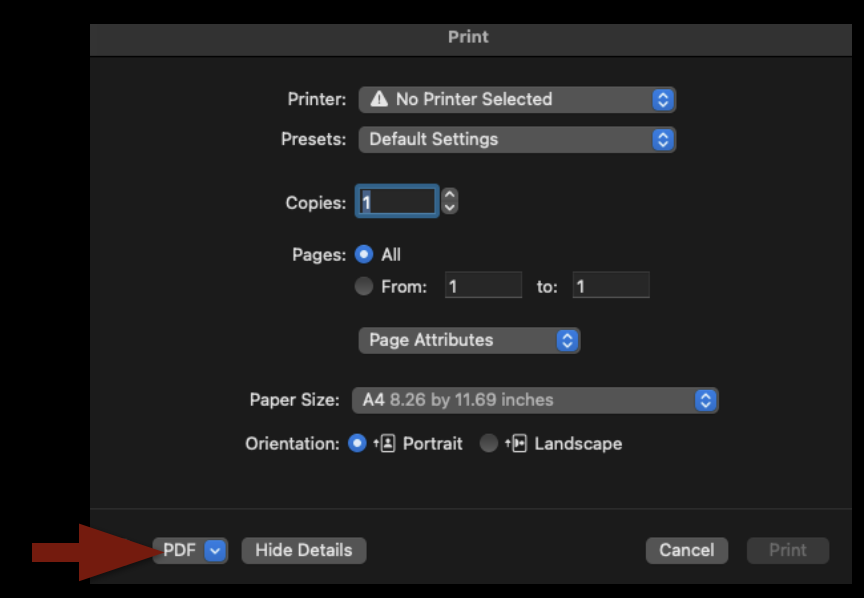
In the Print menu, ignore all the printing options and select “PDF” in the lower-left corner.
A Finder window will appear so that you can give your PDF a name and location. Label the PDF show#_VFX_Turnover_Sheet and save it in the VFX > VFX Out folder on your show volume.
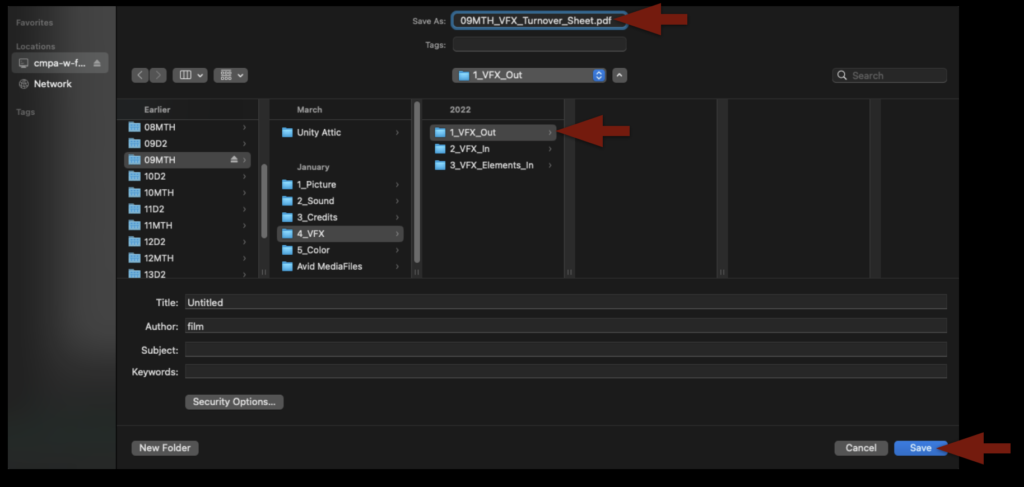
When you click “Save”, a window will appear asking about Print Scale. The default is 100%. Leave it like that and click “OK”. The PDF that you made should be saved in the folder shown below and when you open it in Preview should appear formatted like the example.
Continue with the instructions for Picture Lock.

