Set Up the Sequence
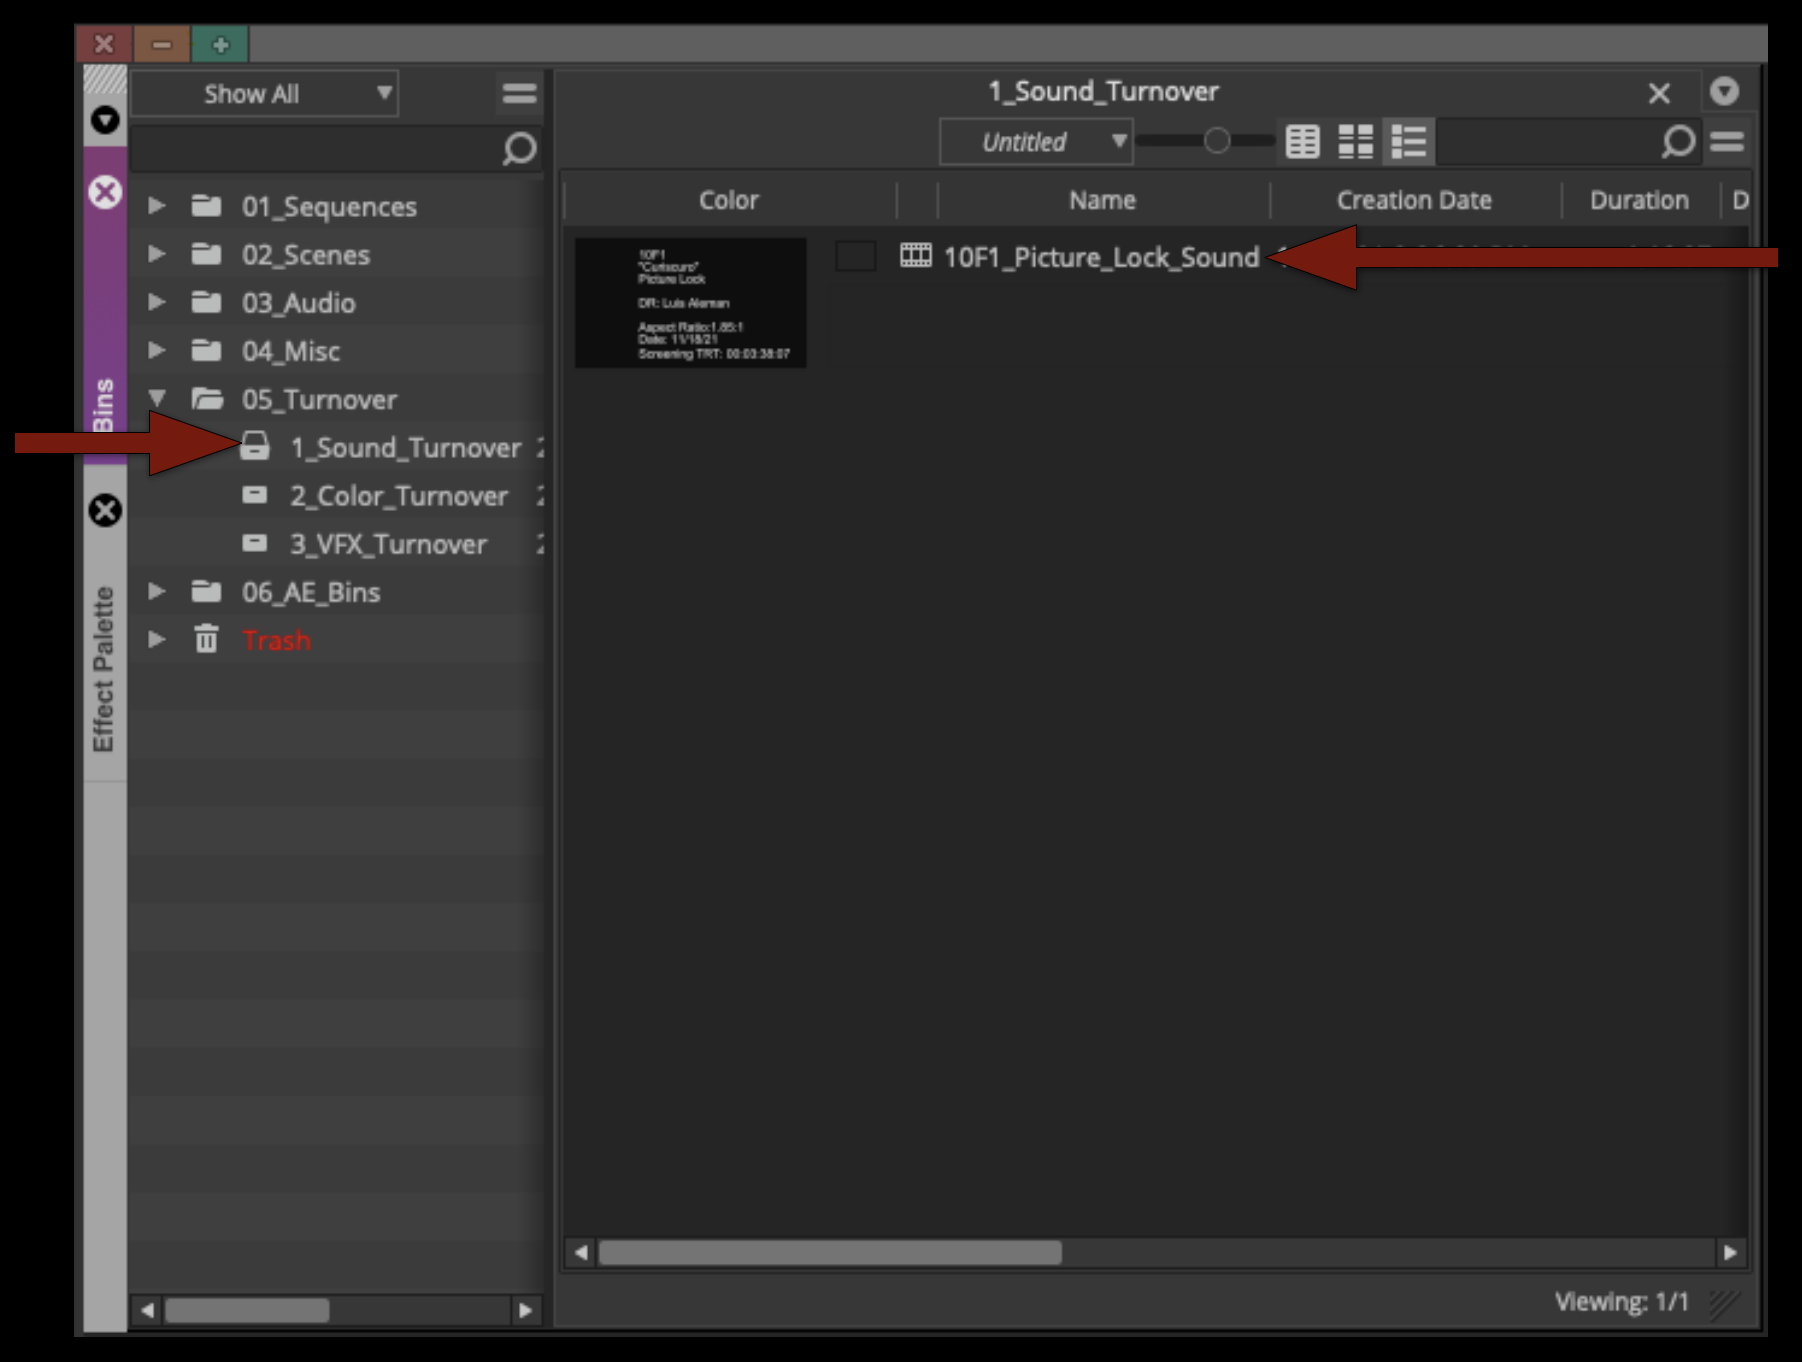
At the start of your Sound Design day duplicate your “Picture Lock” sequence. Rename the new sequence “XXF1_Picture_Lock_Sound” and move the sequence to the “Sound_Turnover” bin.
Production Audio
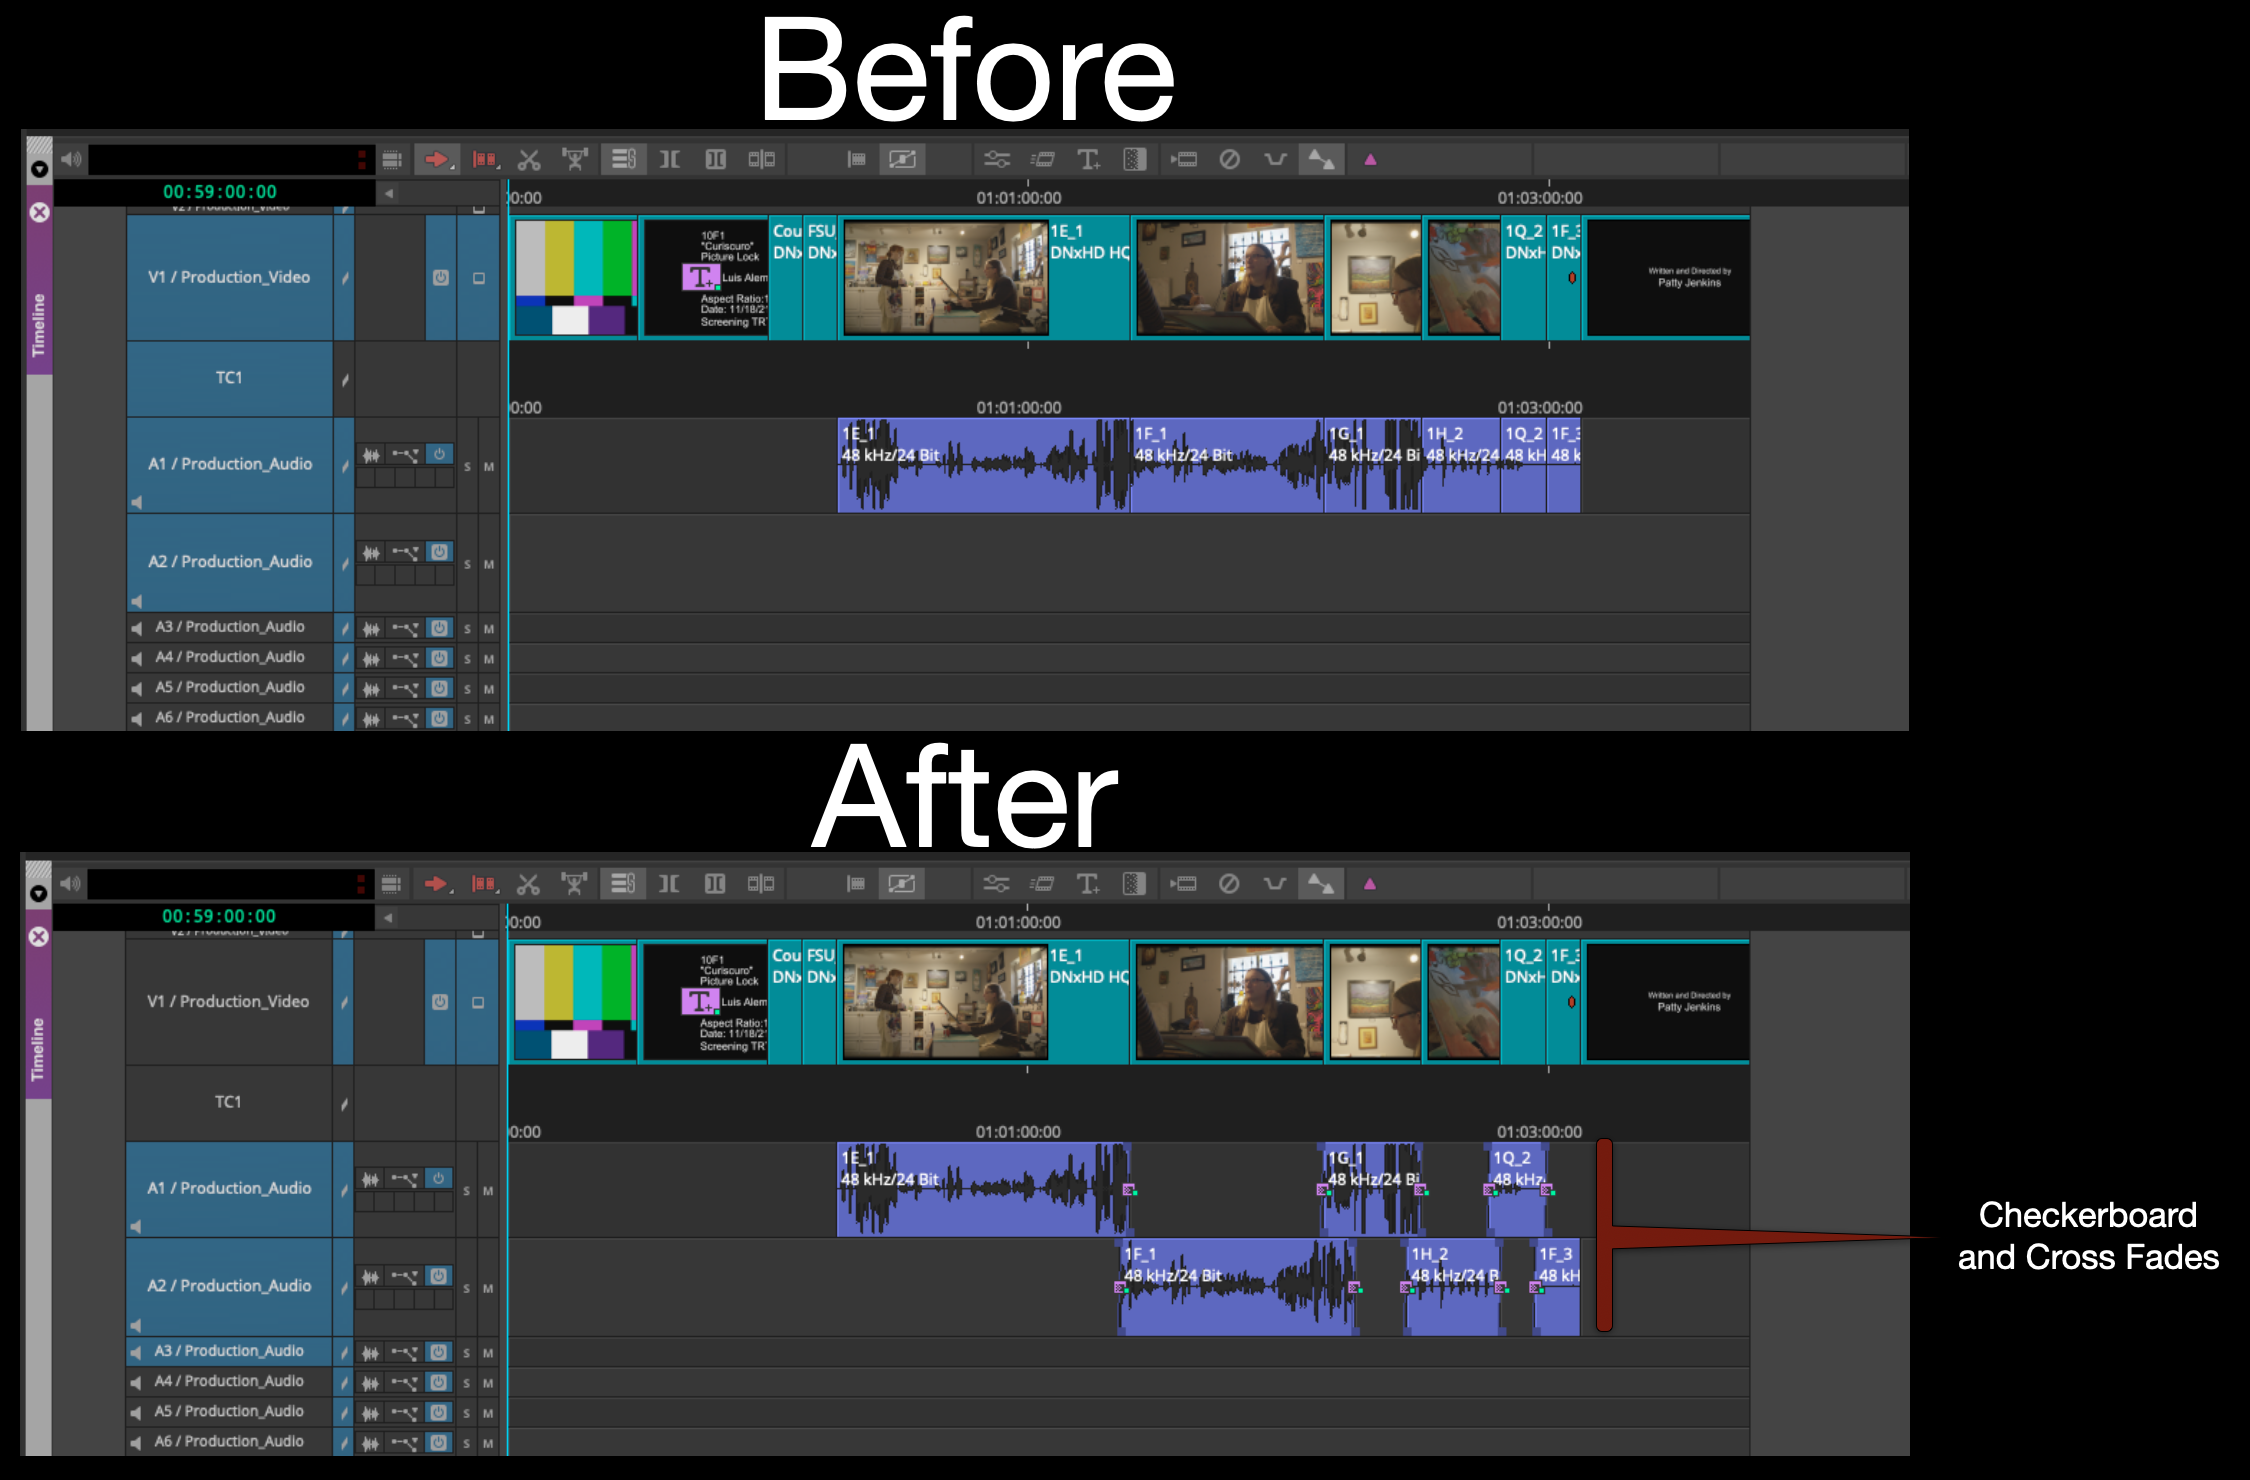
If you haven’t already been doing this during your picture editing time, now is when you would want to make sure your production audio tracks are checkerboarded and have cross fades on everything. This is also when you may need to cut in some room tone to fill any gaps.
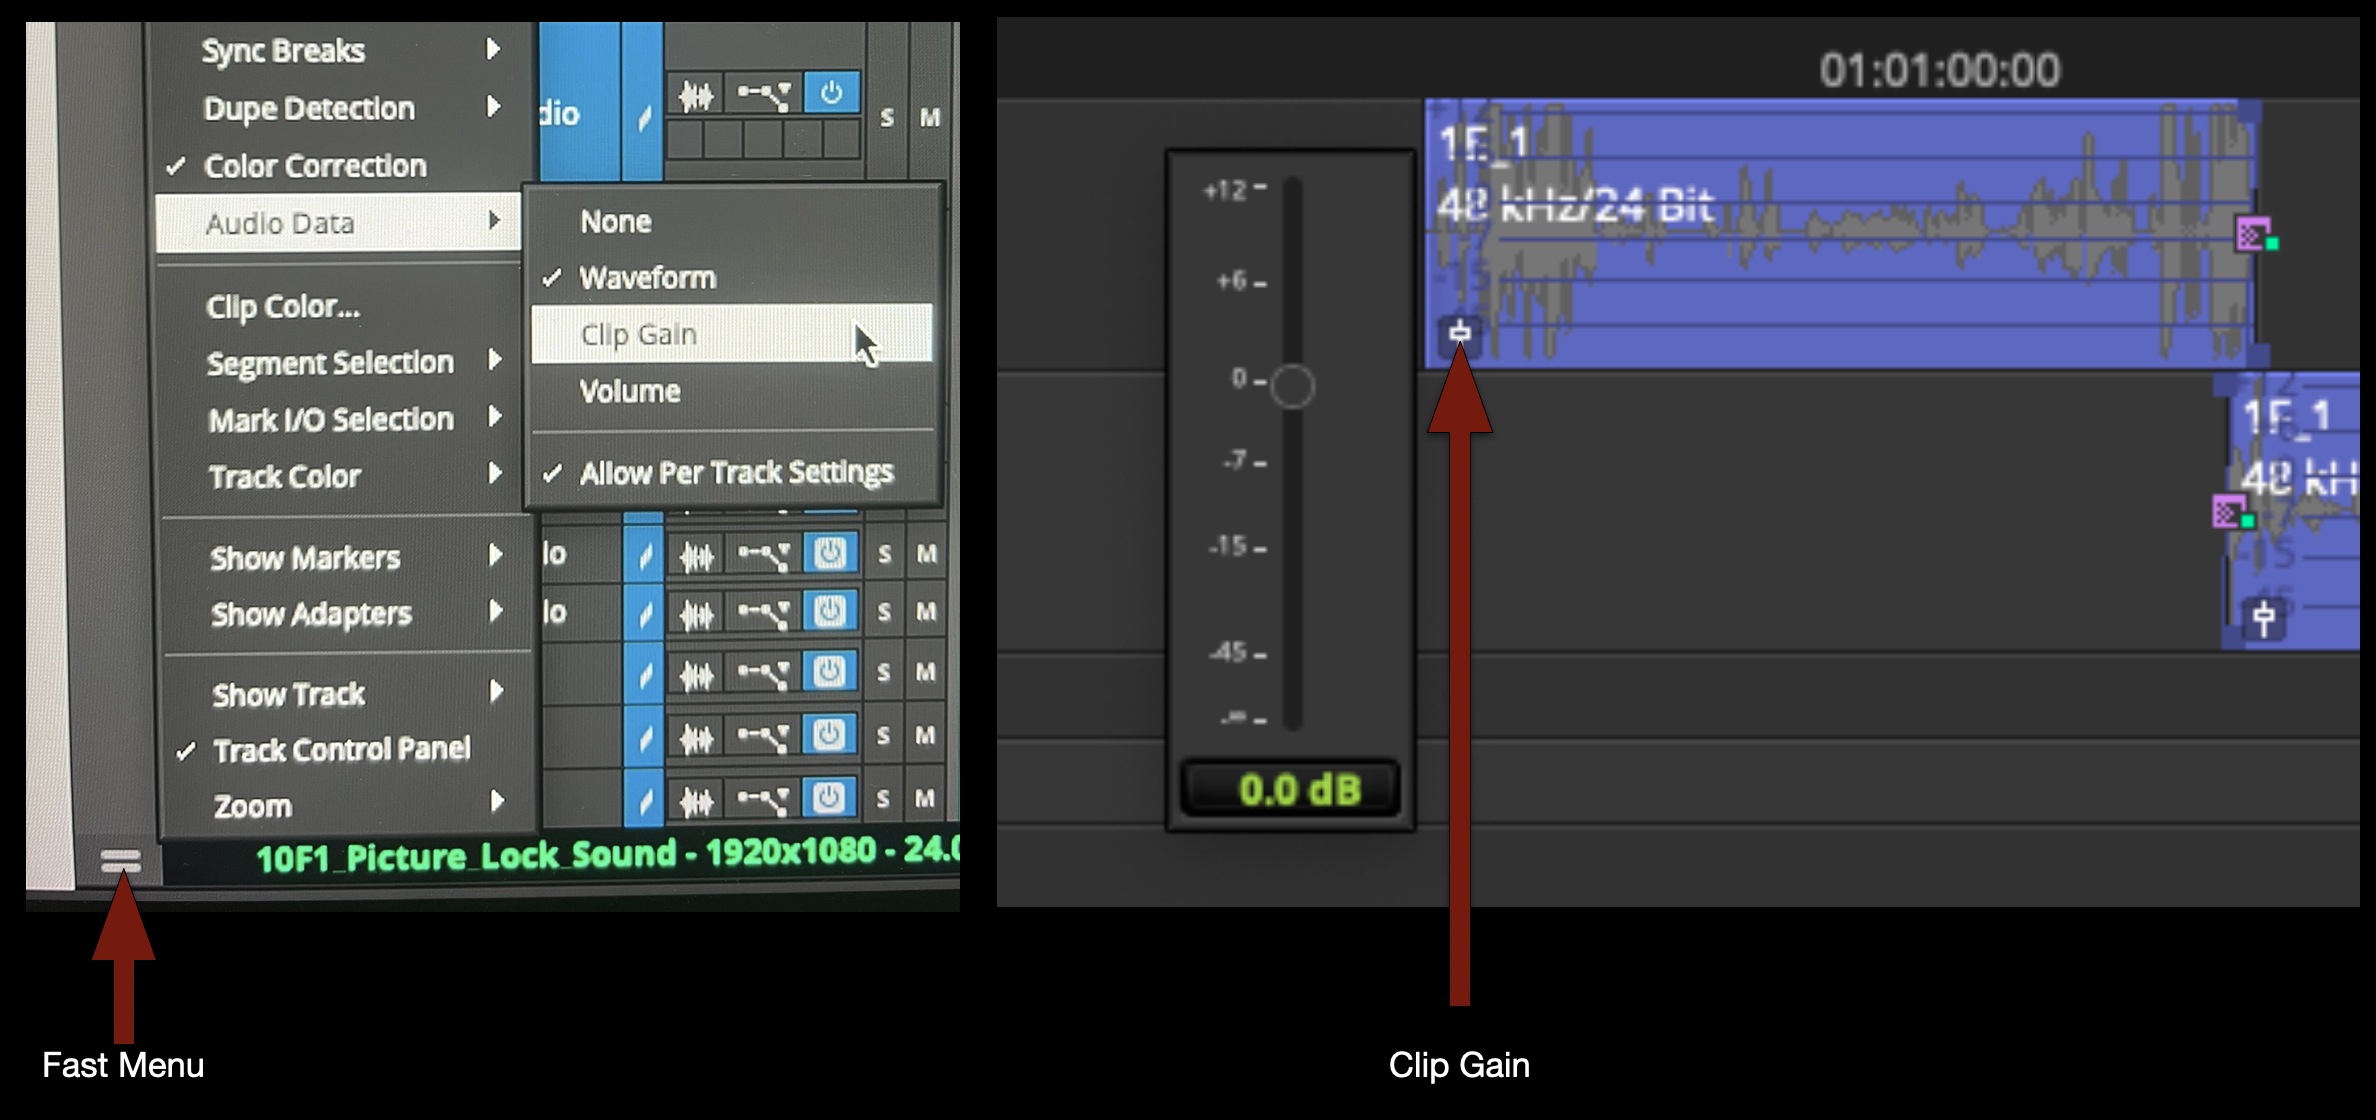
If you need to turn the Clip Gain up or down the easiest way is to us the “Fast Menu” to give you access to the control on the clips in the timeline.
If you need finer control use the fast menu to switch to “Volume” and then you can use keyframes to automate any volume changes.
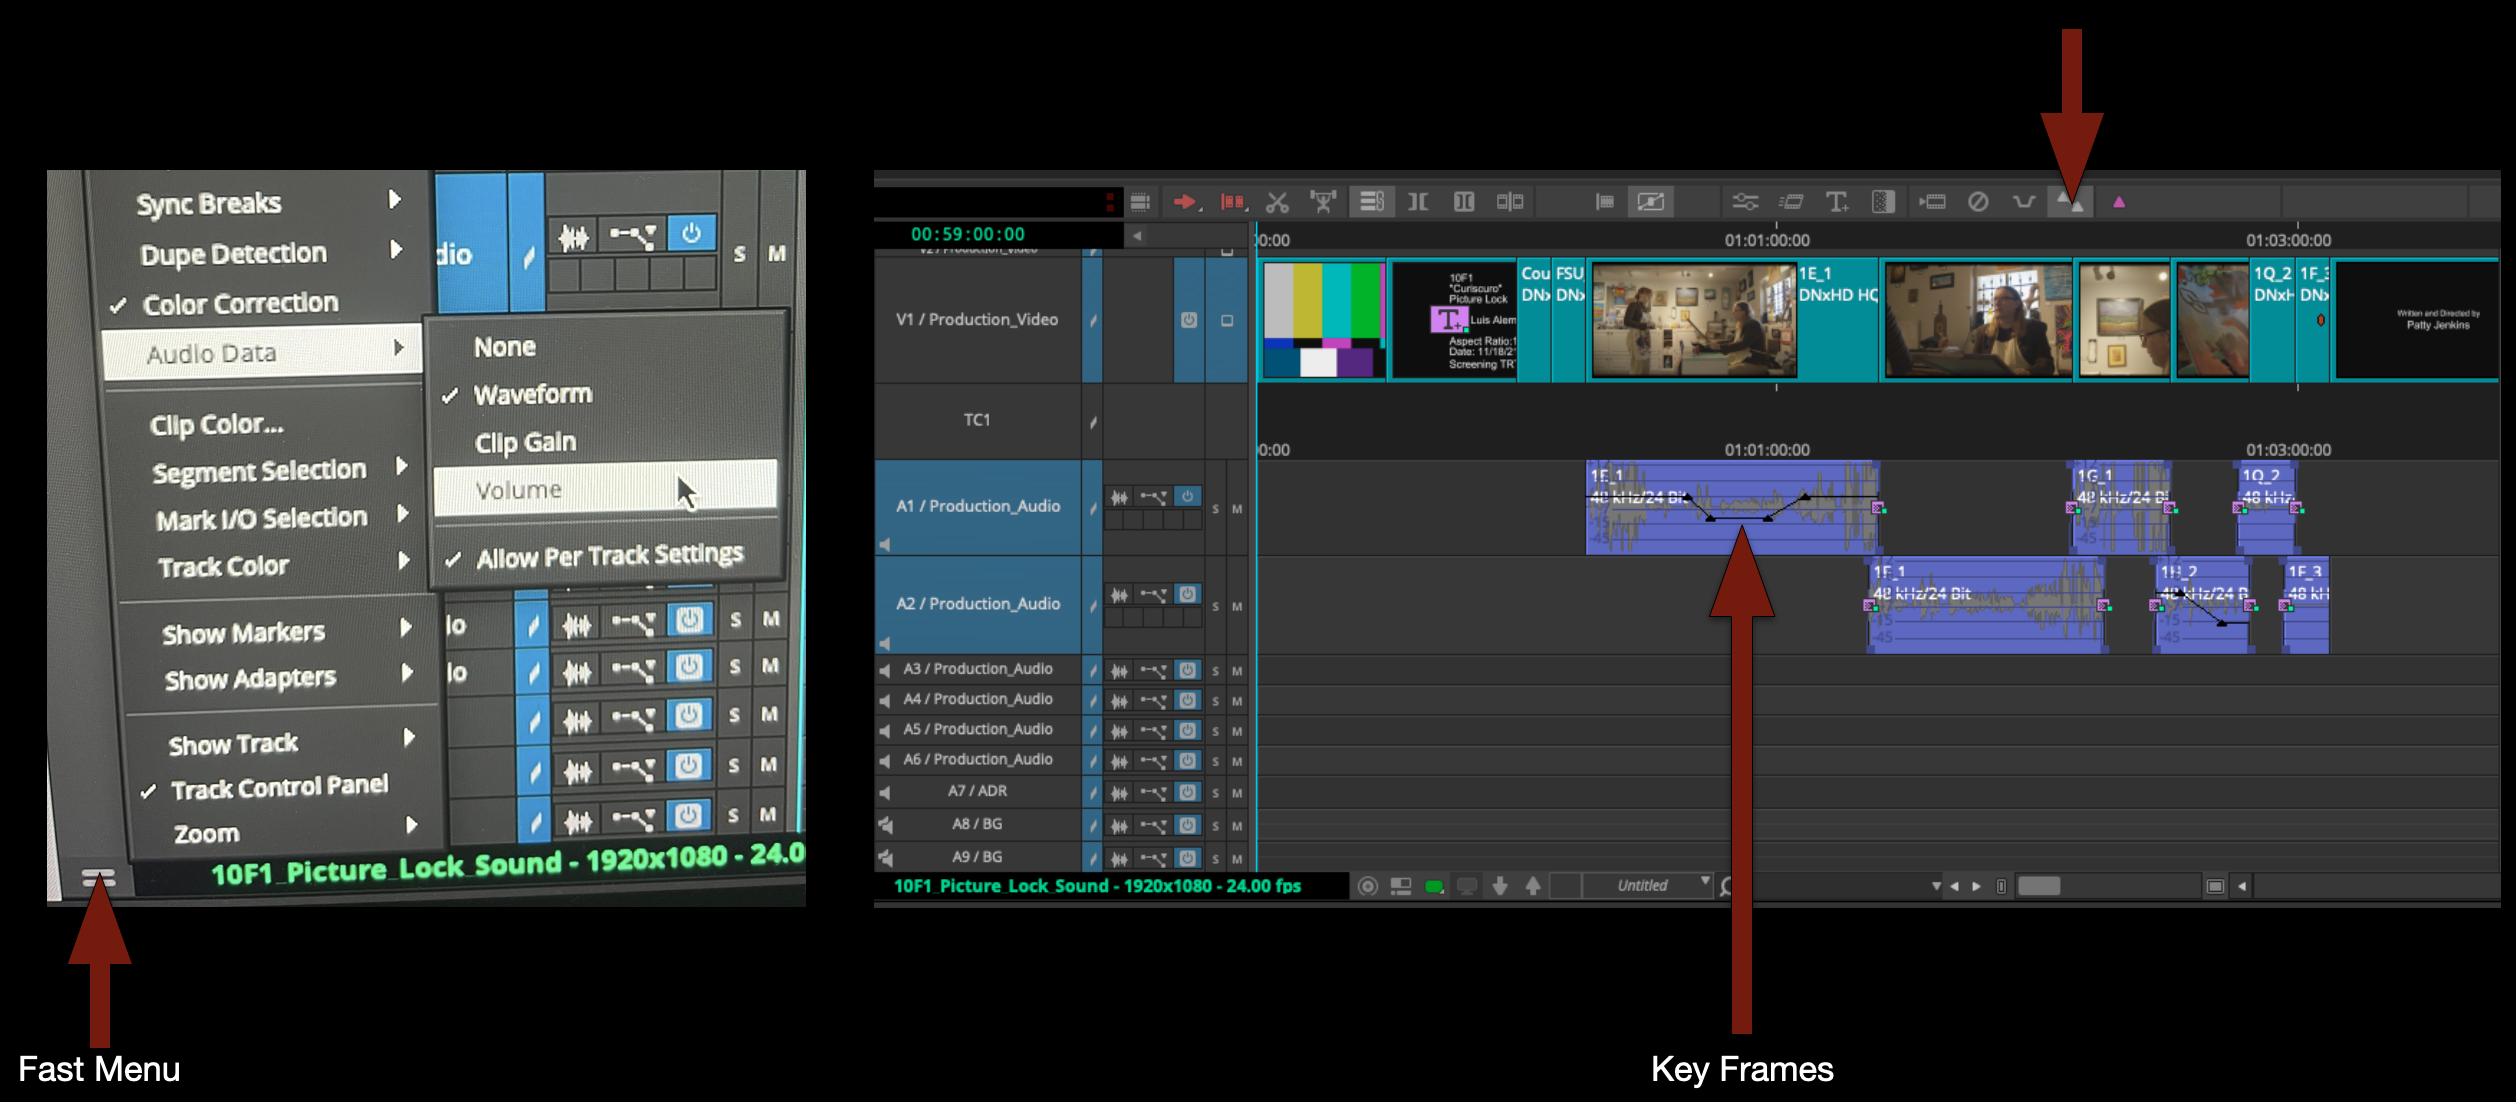
To make this go faster use the default keyboard shortcut for adding keyframes.

Also remember that “option” key is your friend for being able to lasso and manipulate the keyframes once they are created.
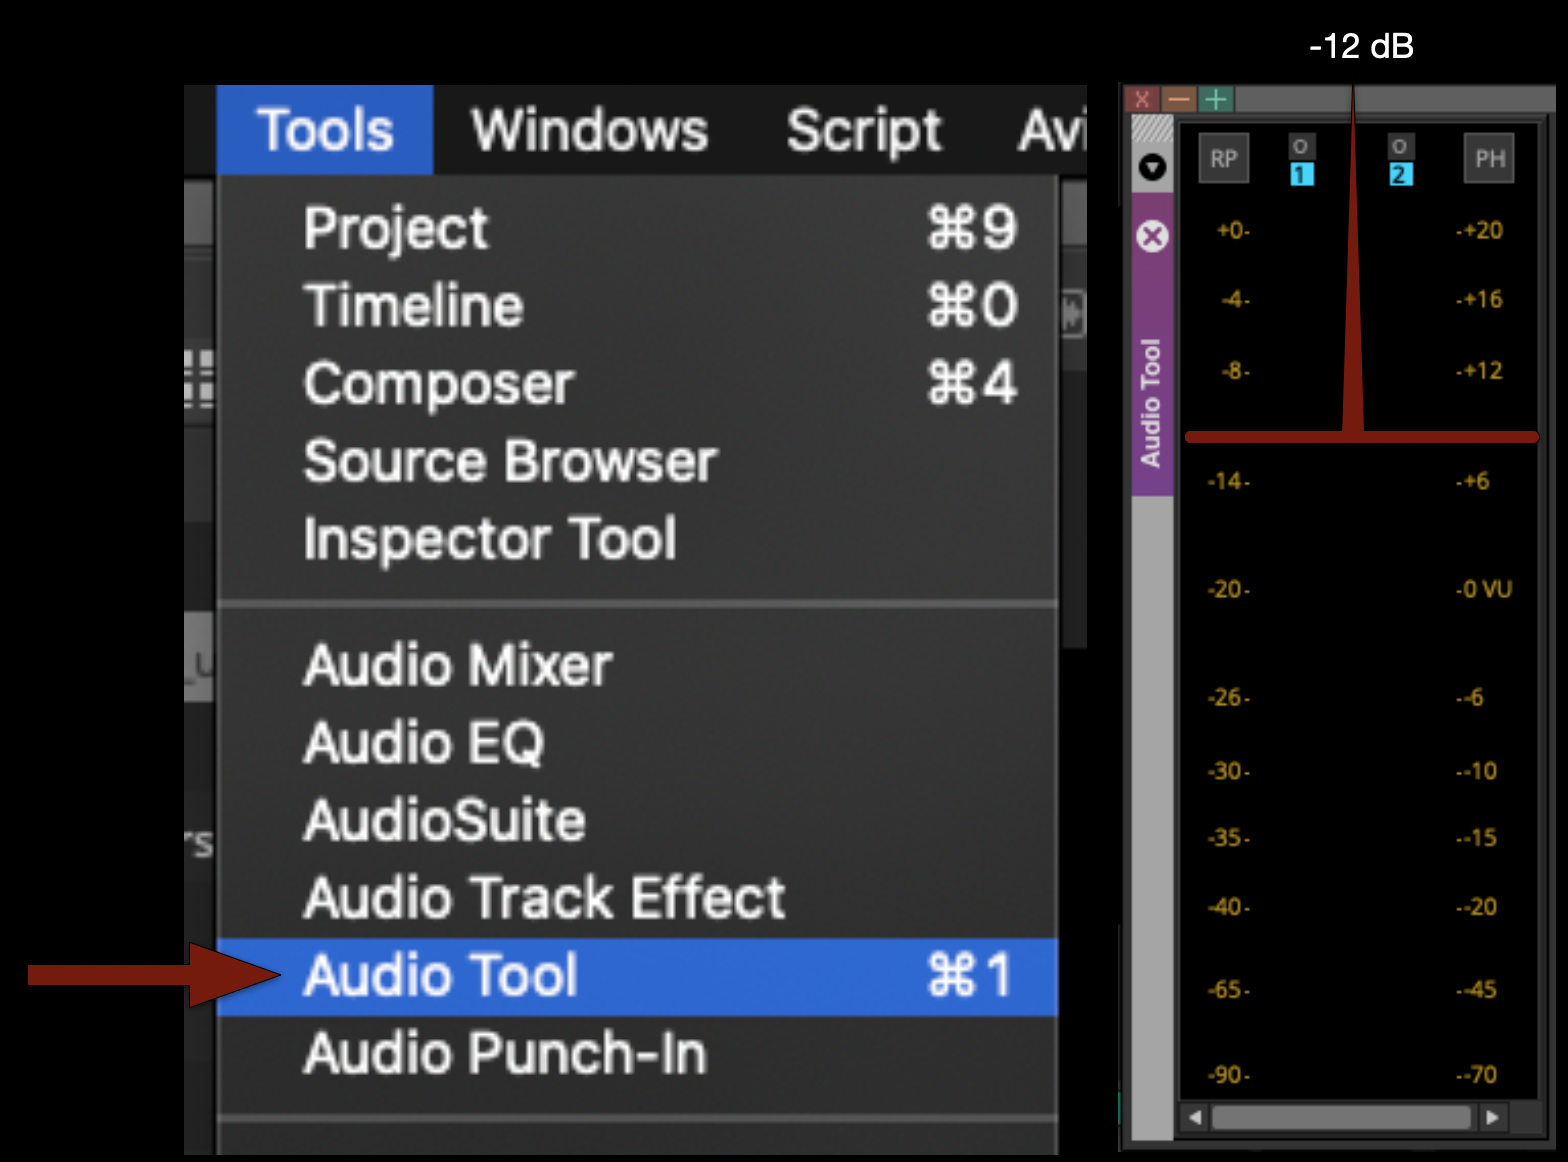
For reference a normal speaking voice should hit at about “-12dB”. To monitor this you can pull up the “Audio Tool”.
If a character is yelling it would be above that and if a character was whispering it would be below that.
Music
If you need music for your F1 remember that you have access to the Universal Production Music website.
You can ask for the login username and password, and your instructor can send it to you.
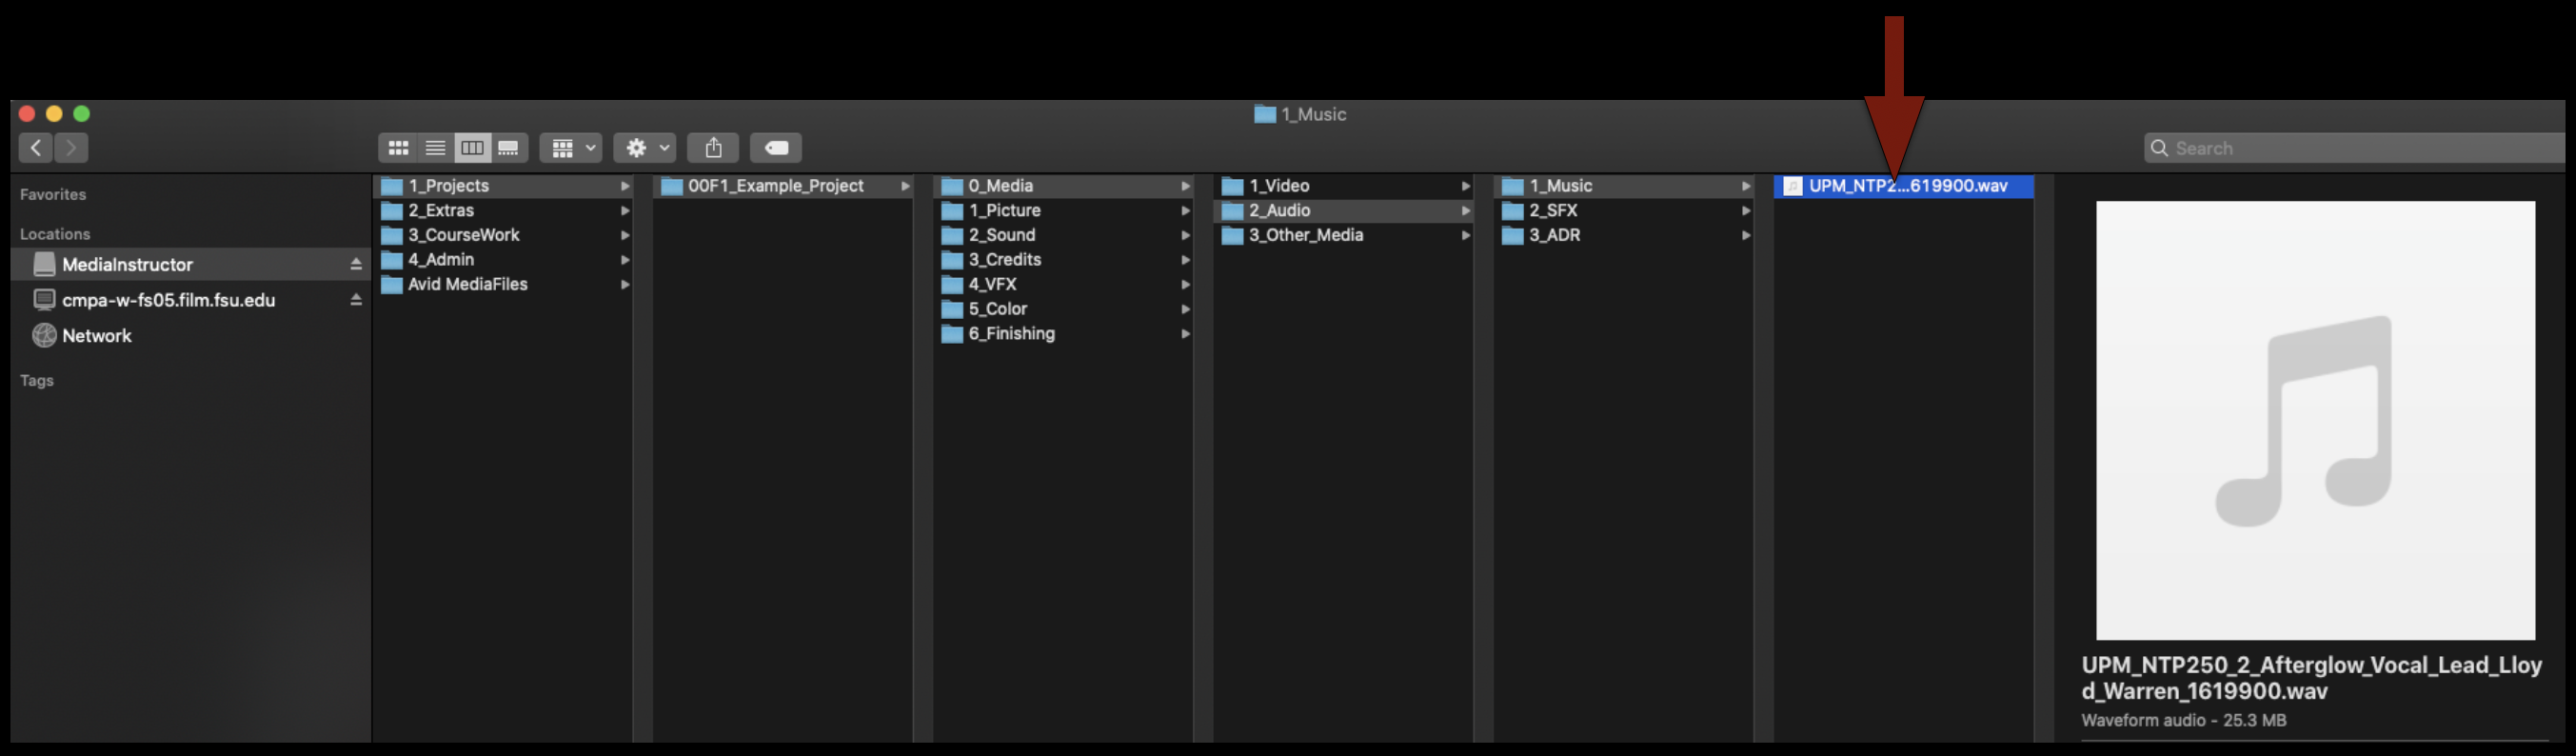
When you download tracks from the website by default they will be saved in your “Downloads Folder”. DO NOT leave them there. Instead move them to the appropriate music folder in your shows audio folder as shown in the example.
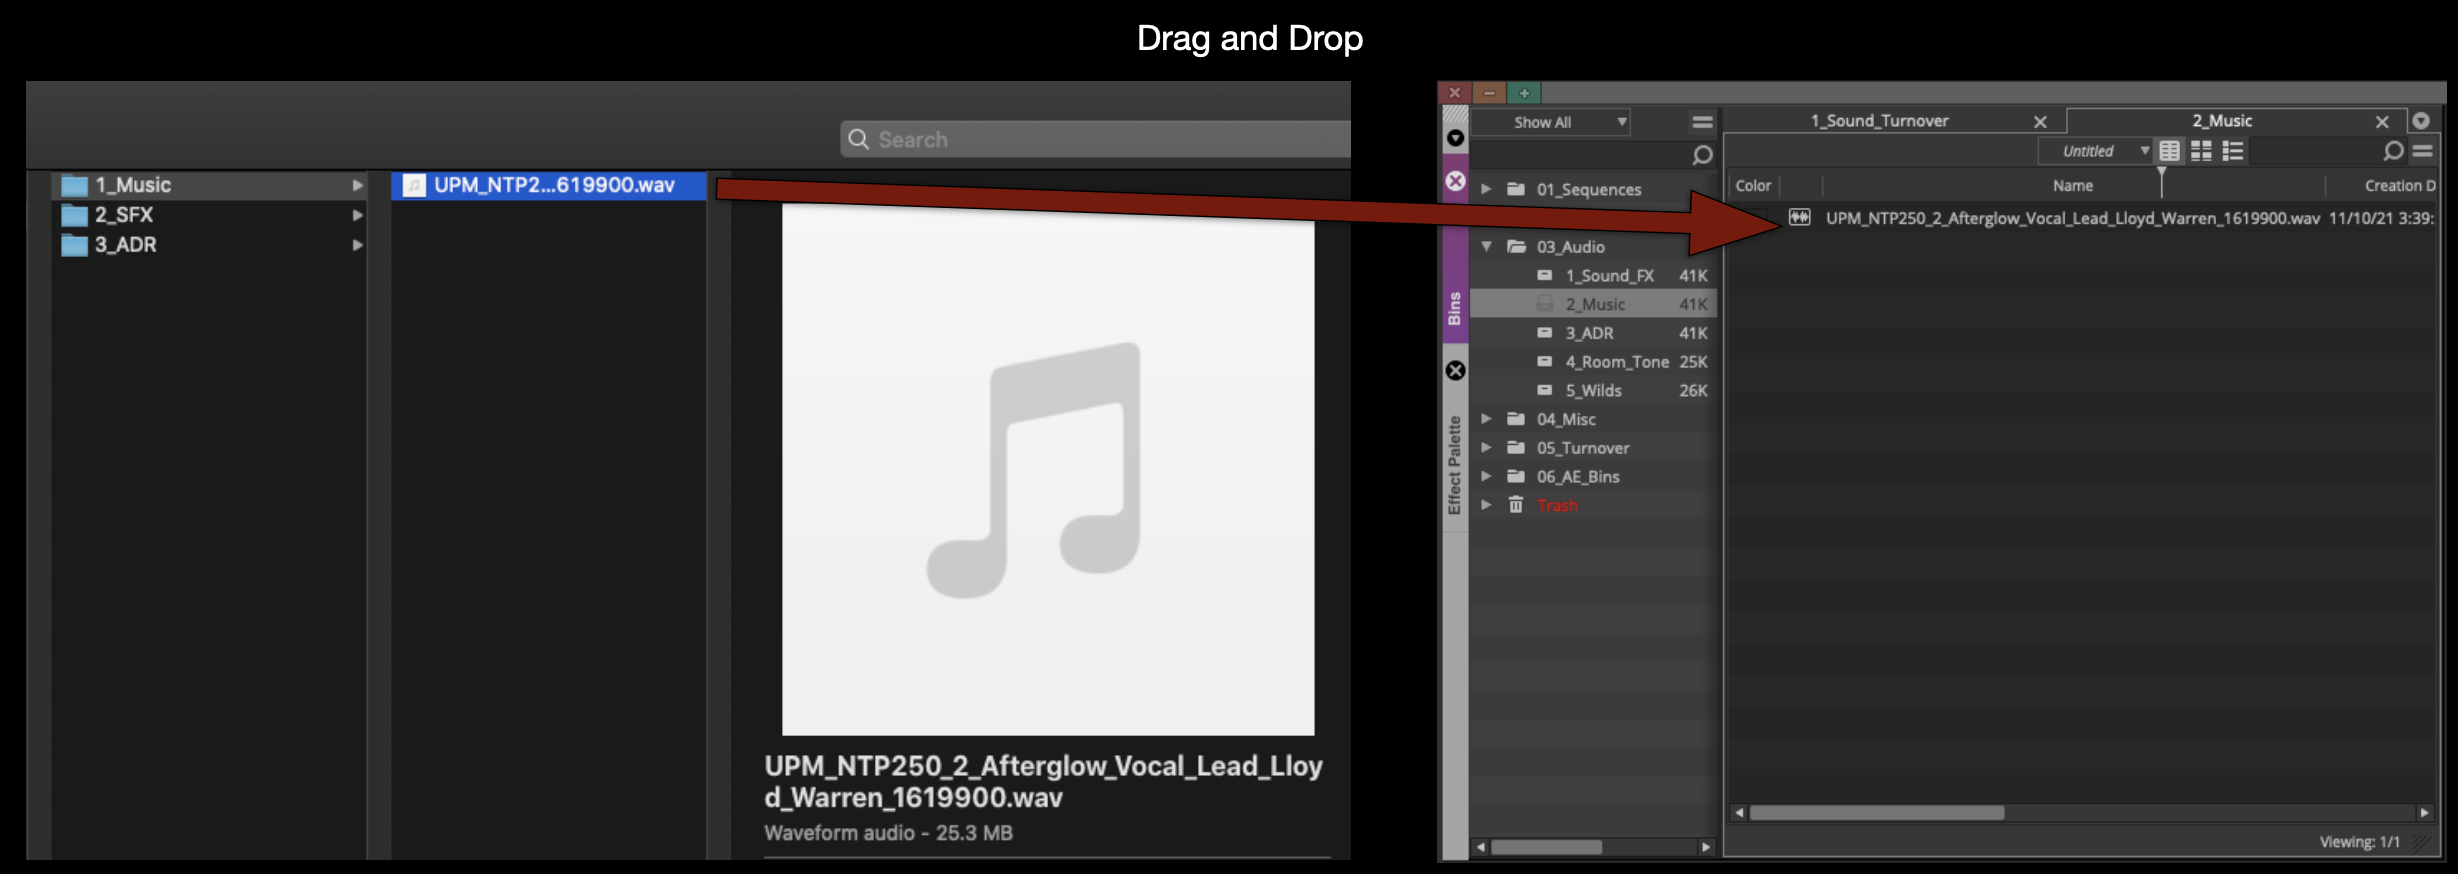
The to import any music into Media Composer, assuming you have your “Import Settings” set properly all you have to do is drag and drop it into the proper bin and it will import it.
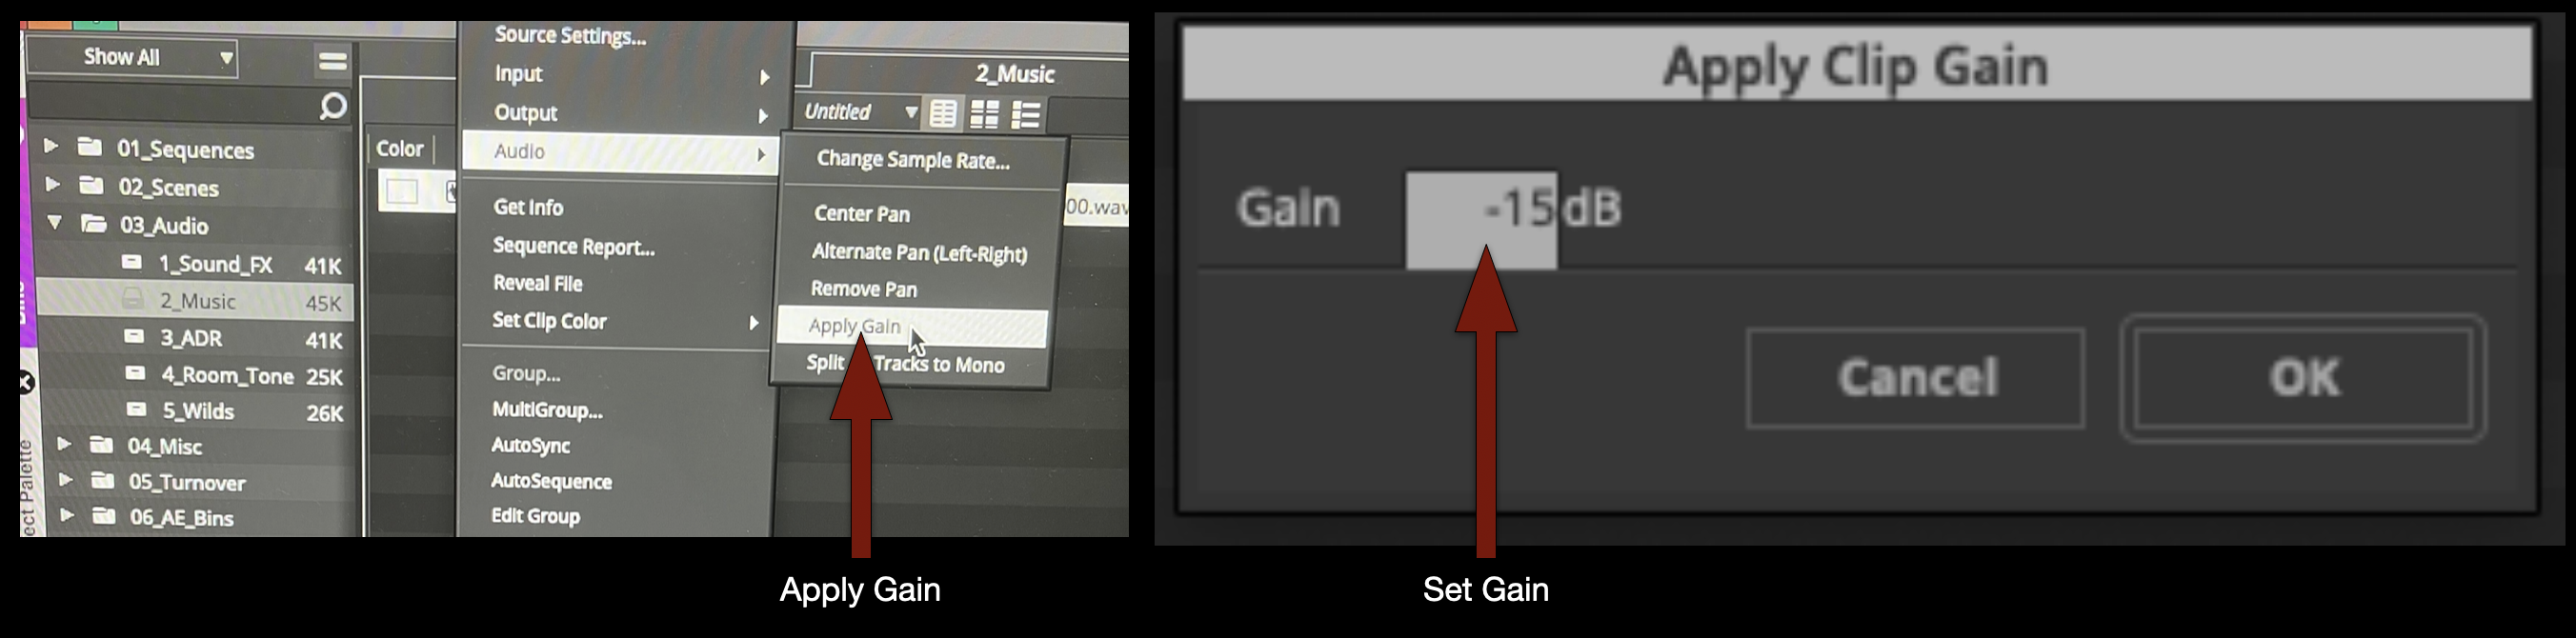
By default most music comes in very loud so you may want to lower the volume of audio while its still in the bin before you cut it into your sequence. To do so, select all the files you want to effect, right click and select “Apply Gain”, then you can type in “+” or “-” how much you want to turn it up or down.
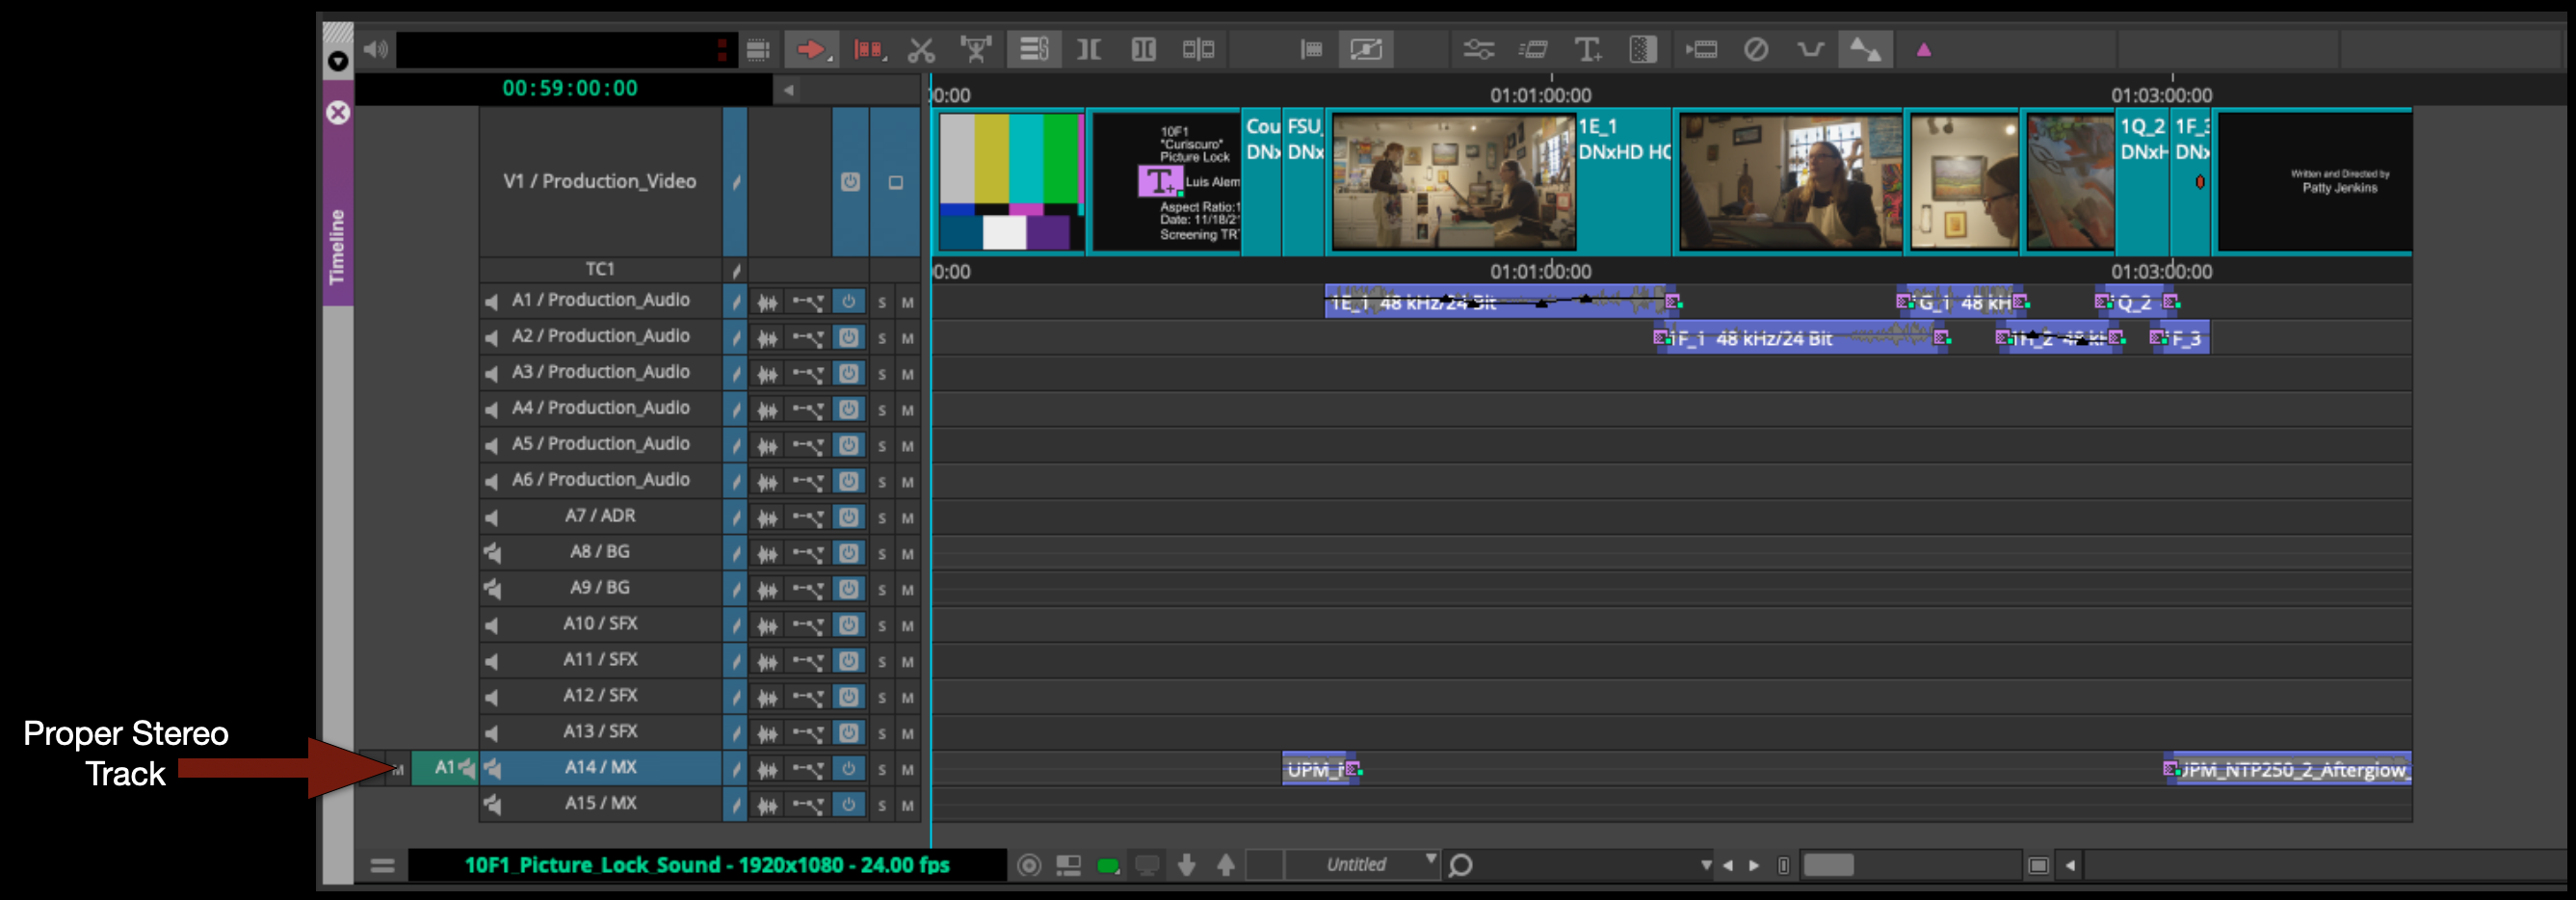
Your music will need to go into one of the “stereo” tracks in your timeline so make sure its set to stereo and then cut it.
Sound FX
For sound FX for your F1 you should use the Soundly app to search through the sound FX library.
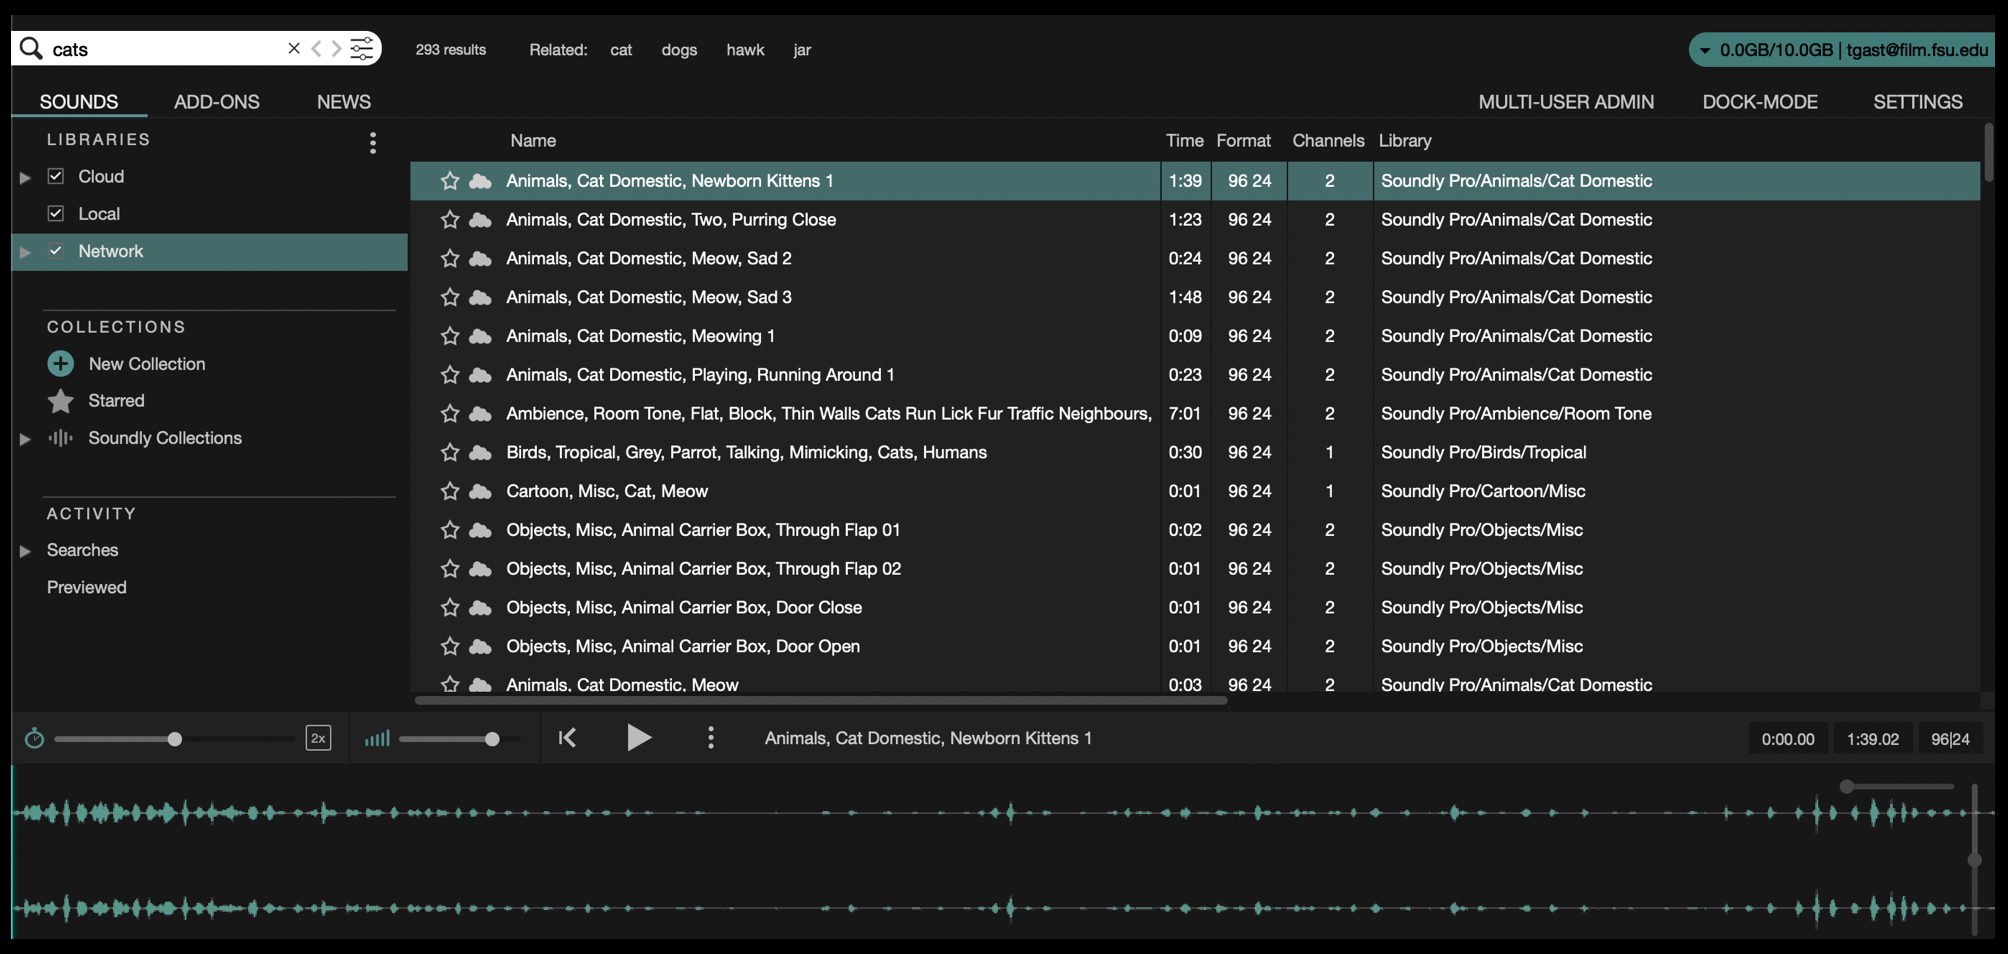
Just like with music, as long as your import settings are set properly in preferences you can simply drag and drop the sound FX you want into the proper “Sound FX” bin in Media Composer.
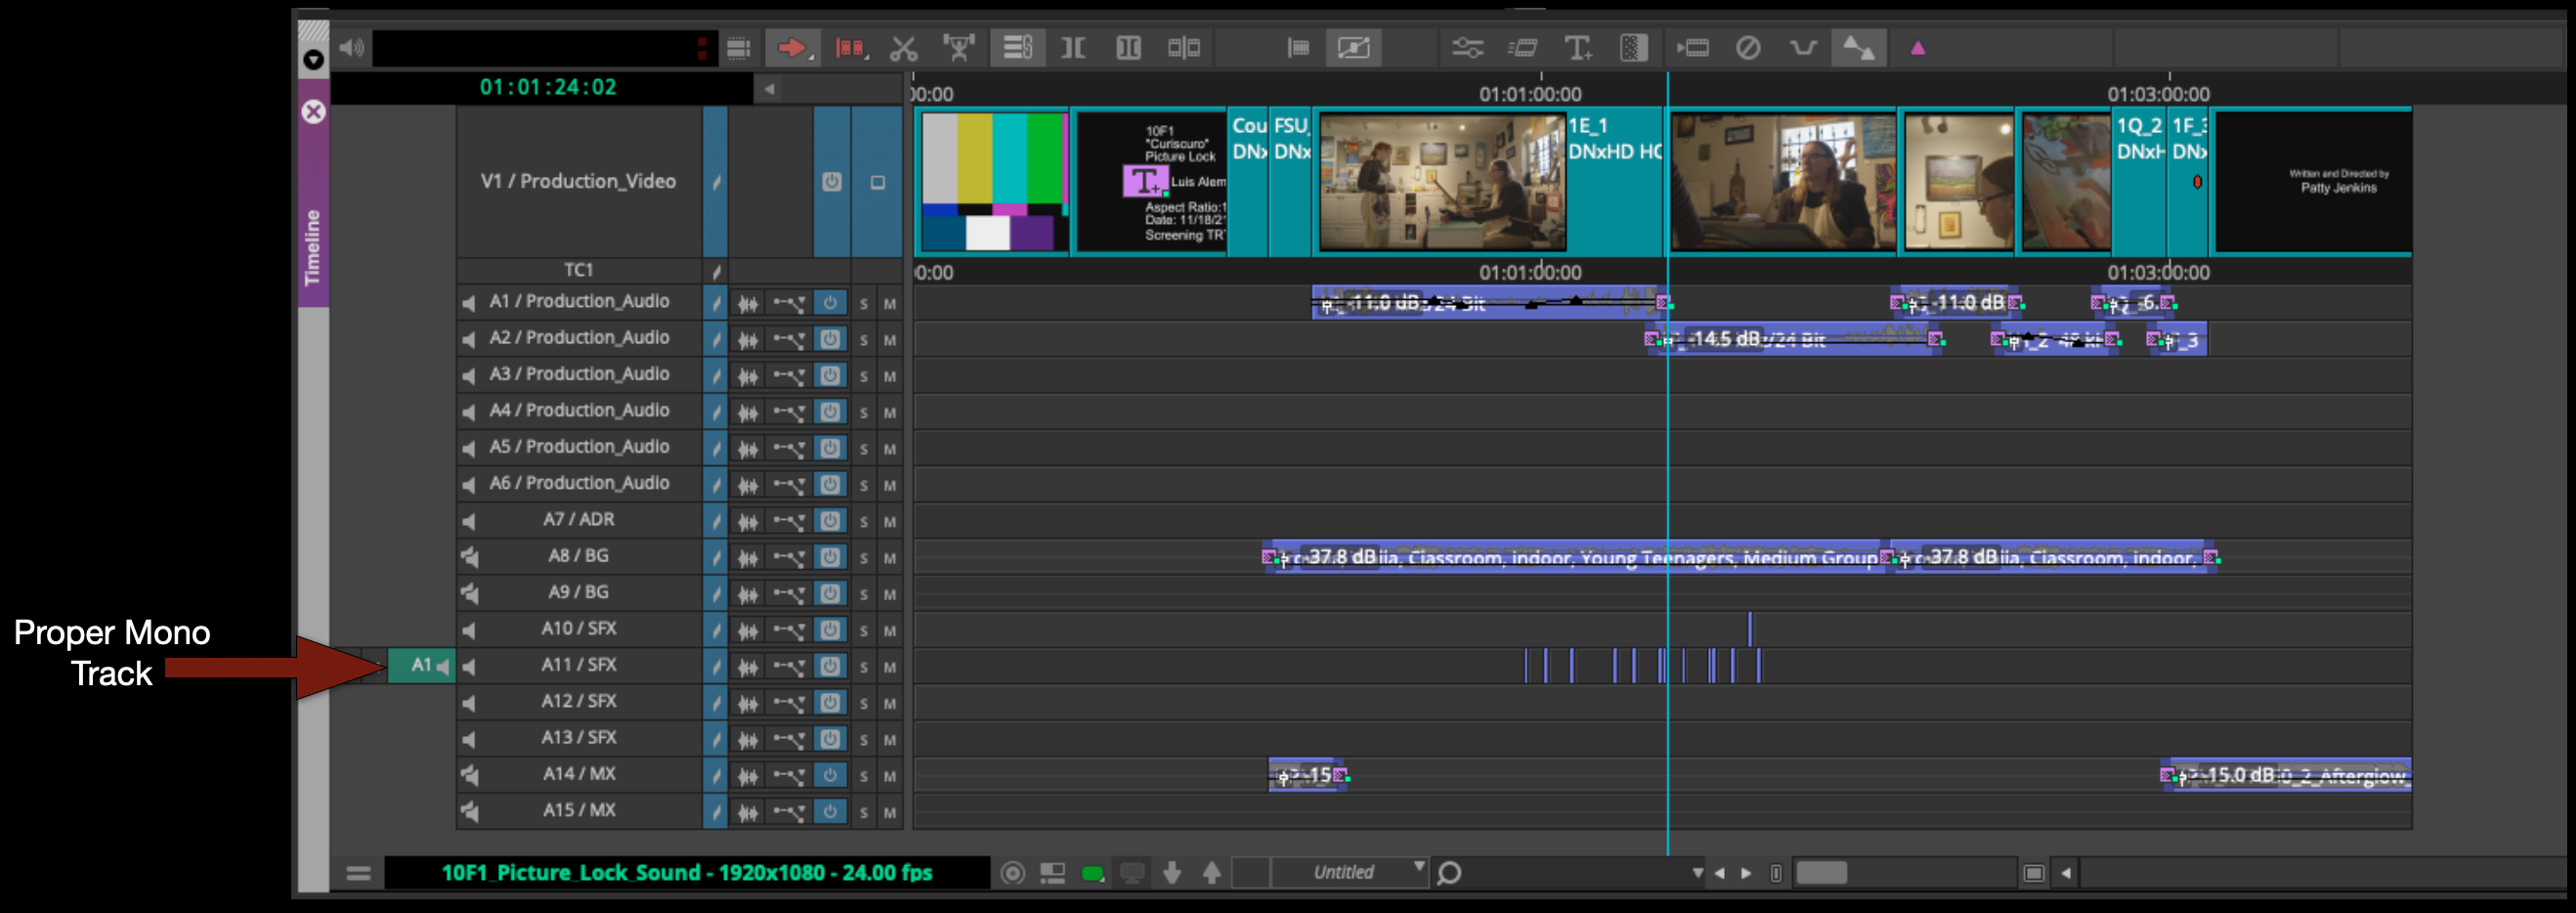
Also, just like with music you need to pay attention to whether the audio is stereo or not. Make any adjustments necessary and then cut it into the proper track in your sequence.
Exporting Stereo Mix
At the end of your sound design day when you done working you will need to export a stereo .wav file that will be imported into Resolve and sunc up with picture.
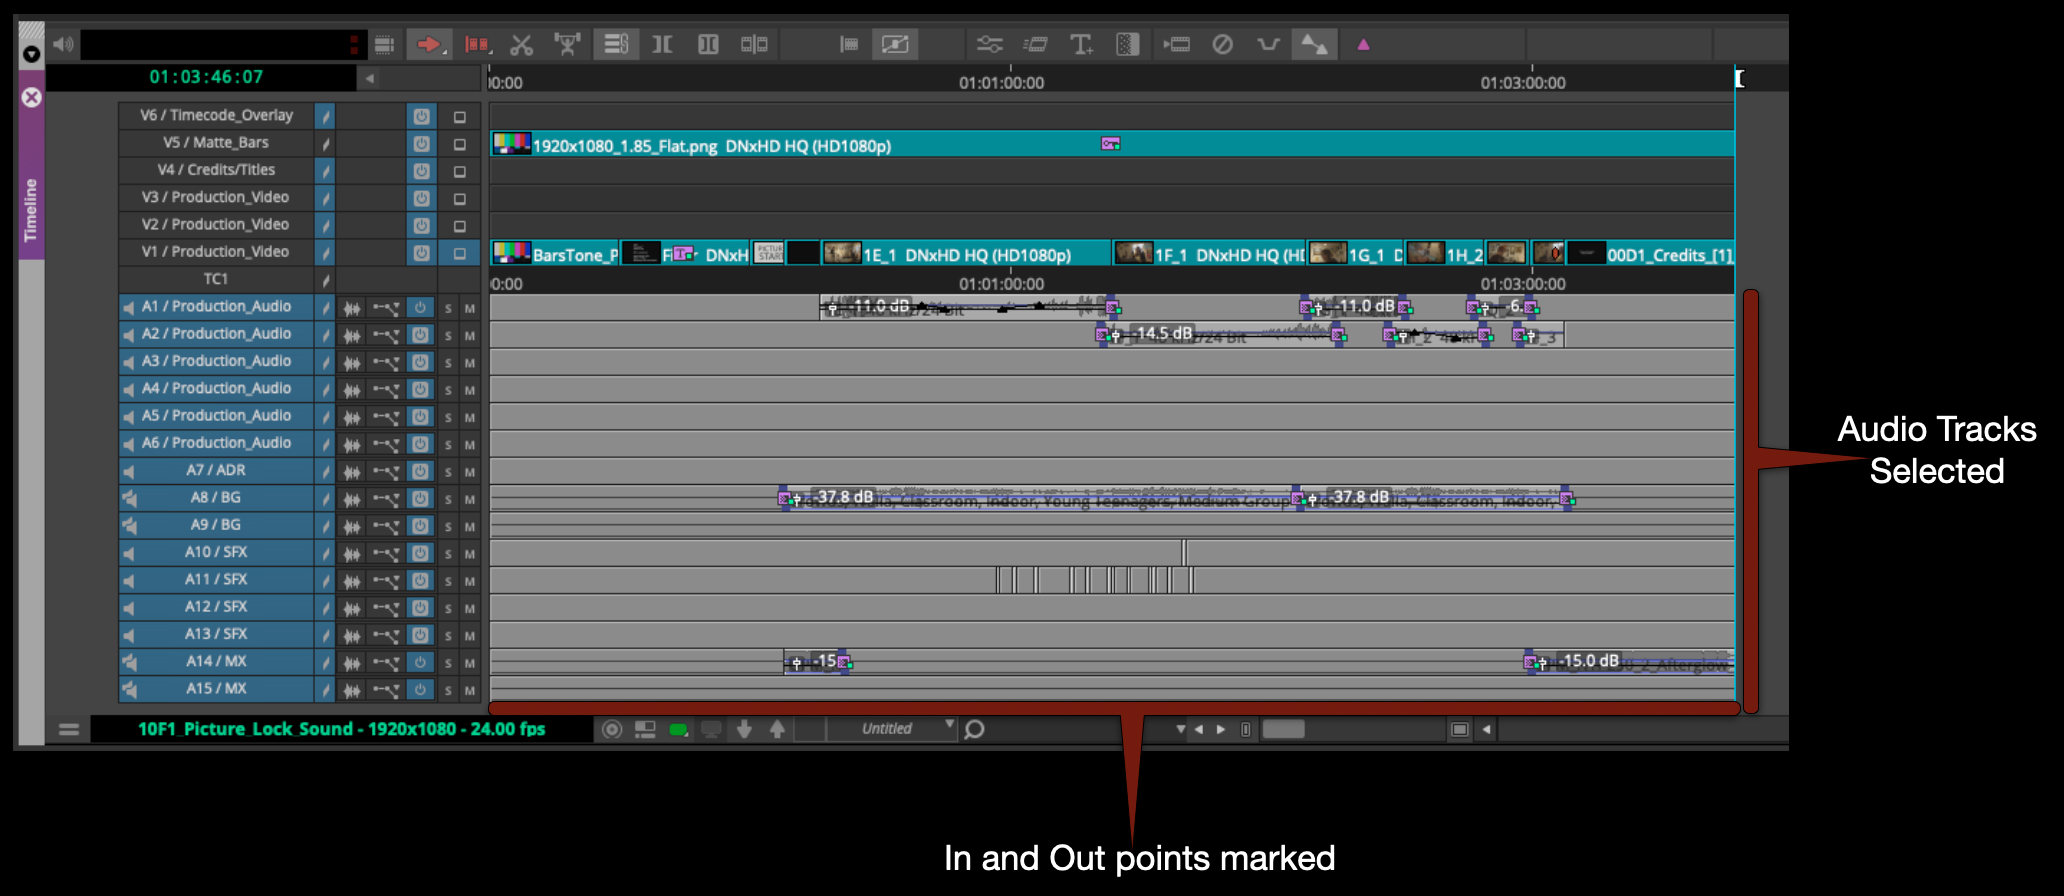
Mark in at the very beginning of the sequence and out at the very end of the credits. IMPORTANT include the entire front sequence not just the content. Then select all of the audio tracks.
Right click in the program monitor and select export.
Check that the name of the file is correct, that its going the proper folder and that you are using the correct export setting.
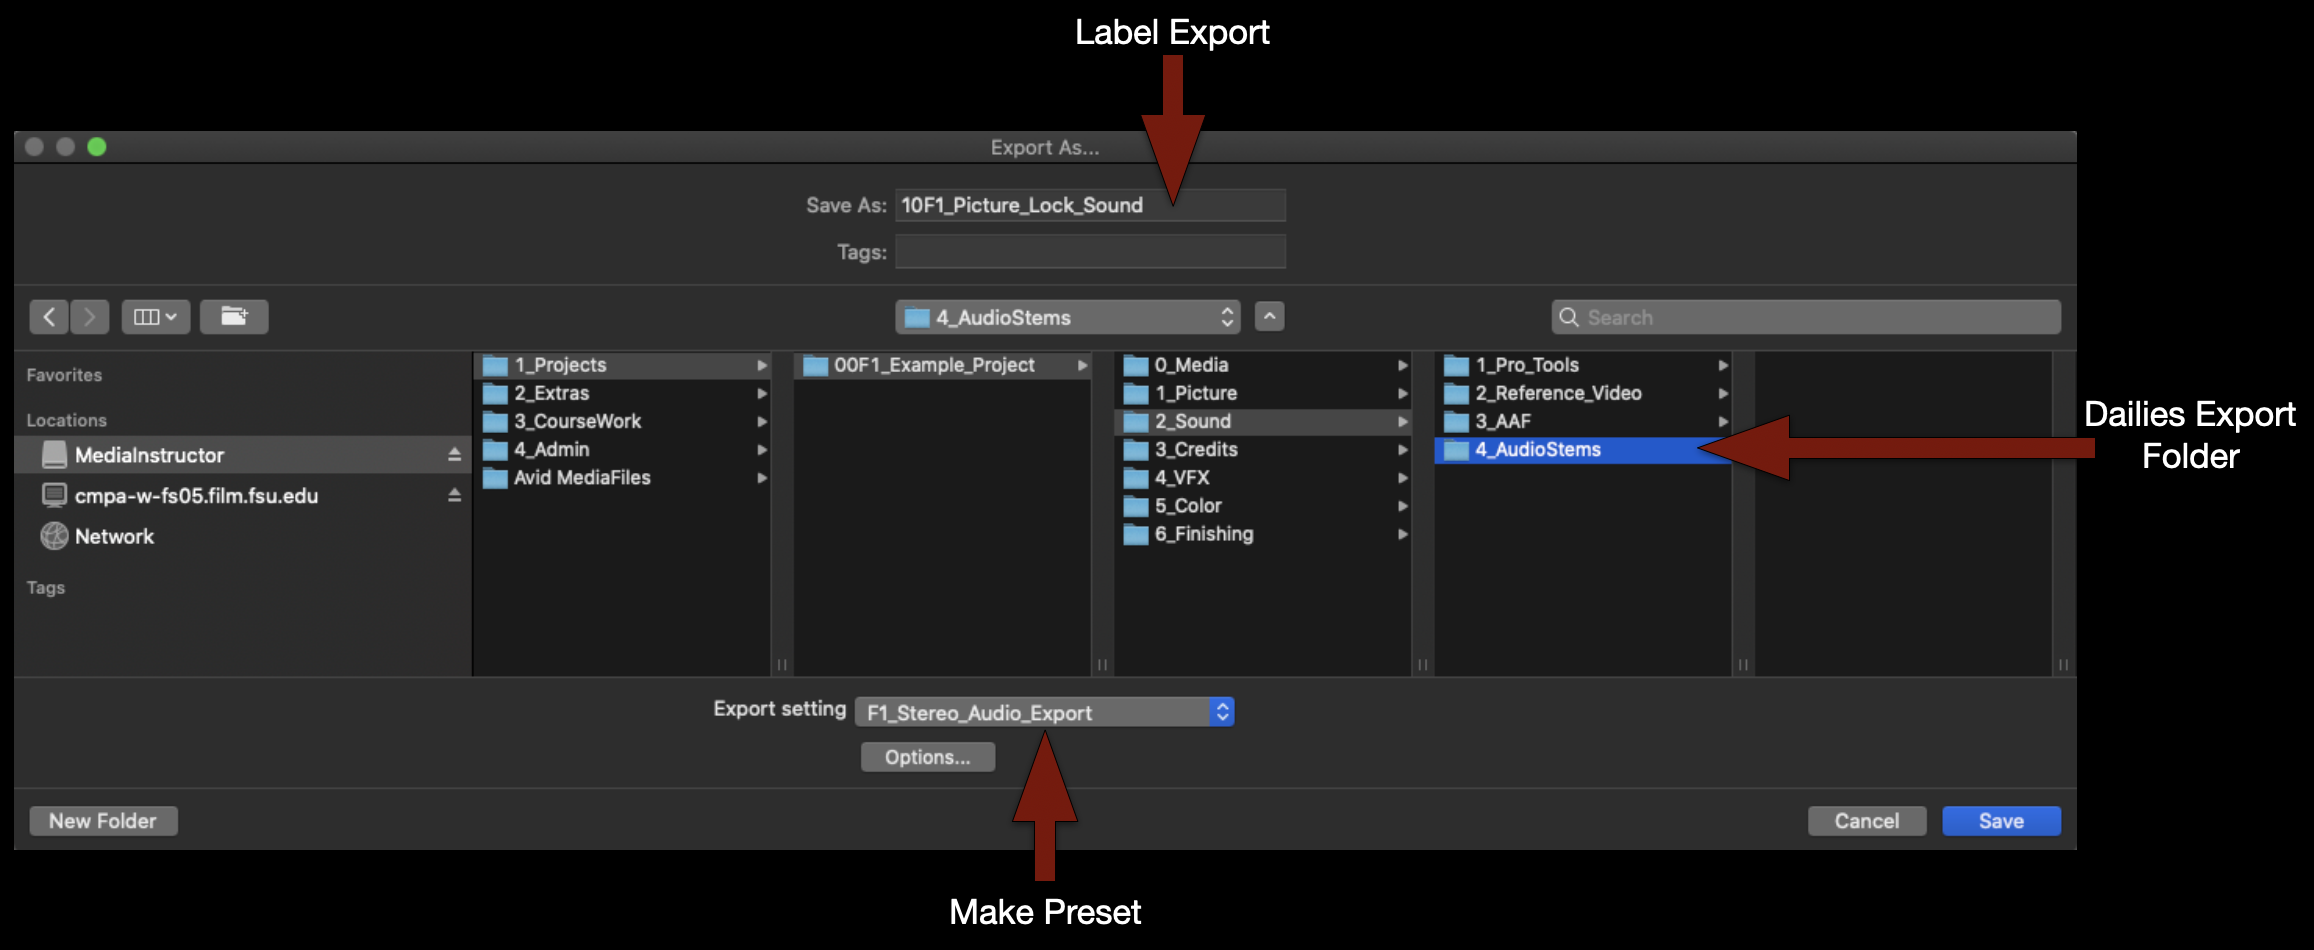
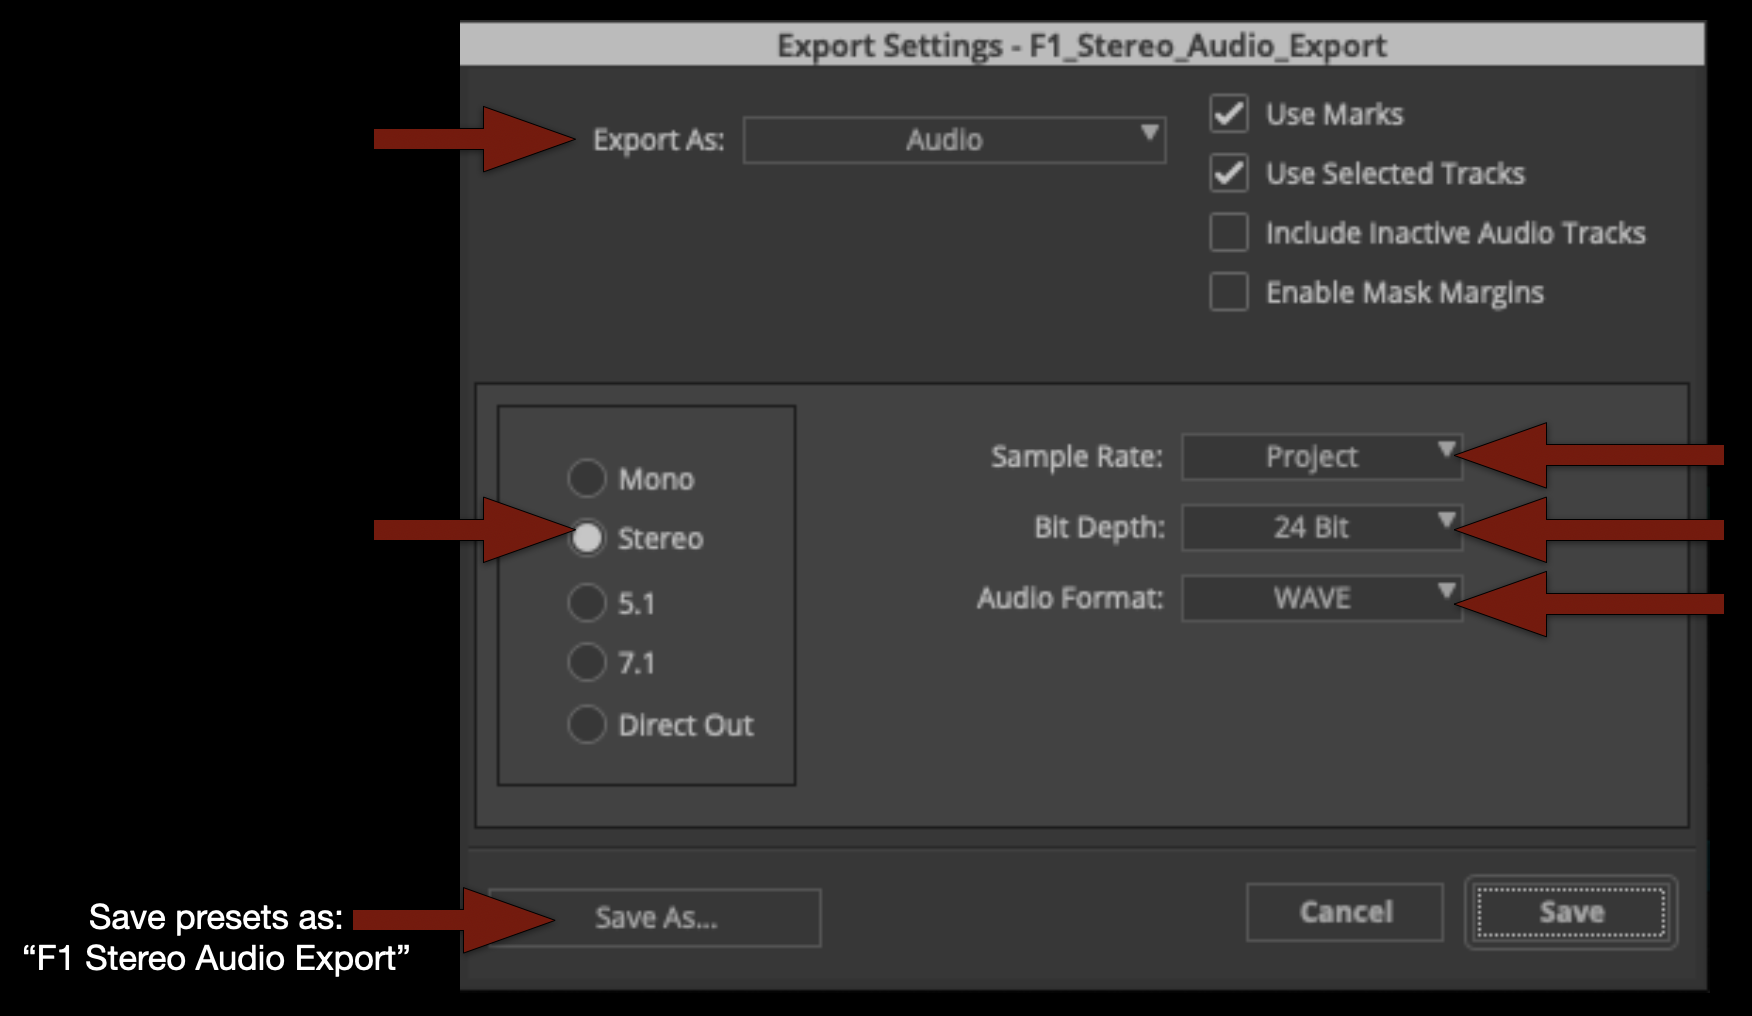
If you don’t yet have a “F1_Stereo_Audio_Export” preset make one using these settings.
When the export is complete you can listen to the .wav file to make sure it’s all there. If everything sounds good save your bins and close Media Composer.