Overview
This guide is only necessary if your show has approved VFX shots.
In the industry, after a VFX vendor has finalized a shot and received the director’s approval, the shot is sent back to editorial to be cut back into the film. This handoff is between a VFX Coordinator on the vendor side and a VFX Editor or Assistant Editor on the picture editing side. When the VFX shots are received by editorial they are checked to make sure they meet the delivery specifications and the agreed upon frame count. In the industry, VFX shots are often finalized at different times by different vendors and sent to editorial to be cut into the film throughout the editorial process.
In our workflow, all VFX shots approved by the director during VFX will be turned back over to editorial all at once. Since the original editor of the show may now be working on another project, it is the primary responsibility of the director to do the work described in this guide. (If the editor is available during this time, they are encouraged to be present.)
Receiving VFX Delivery
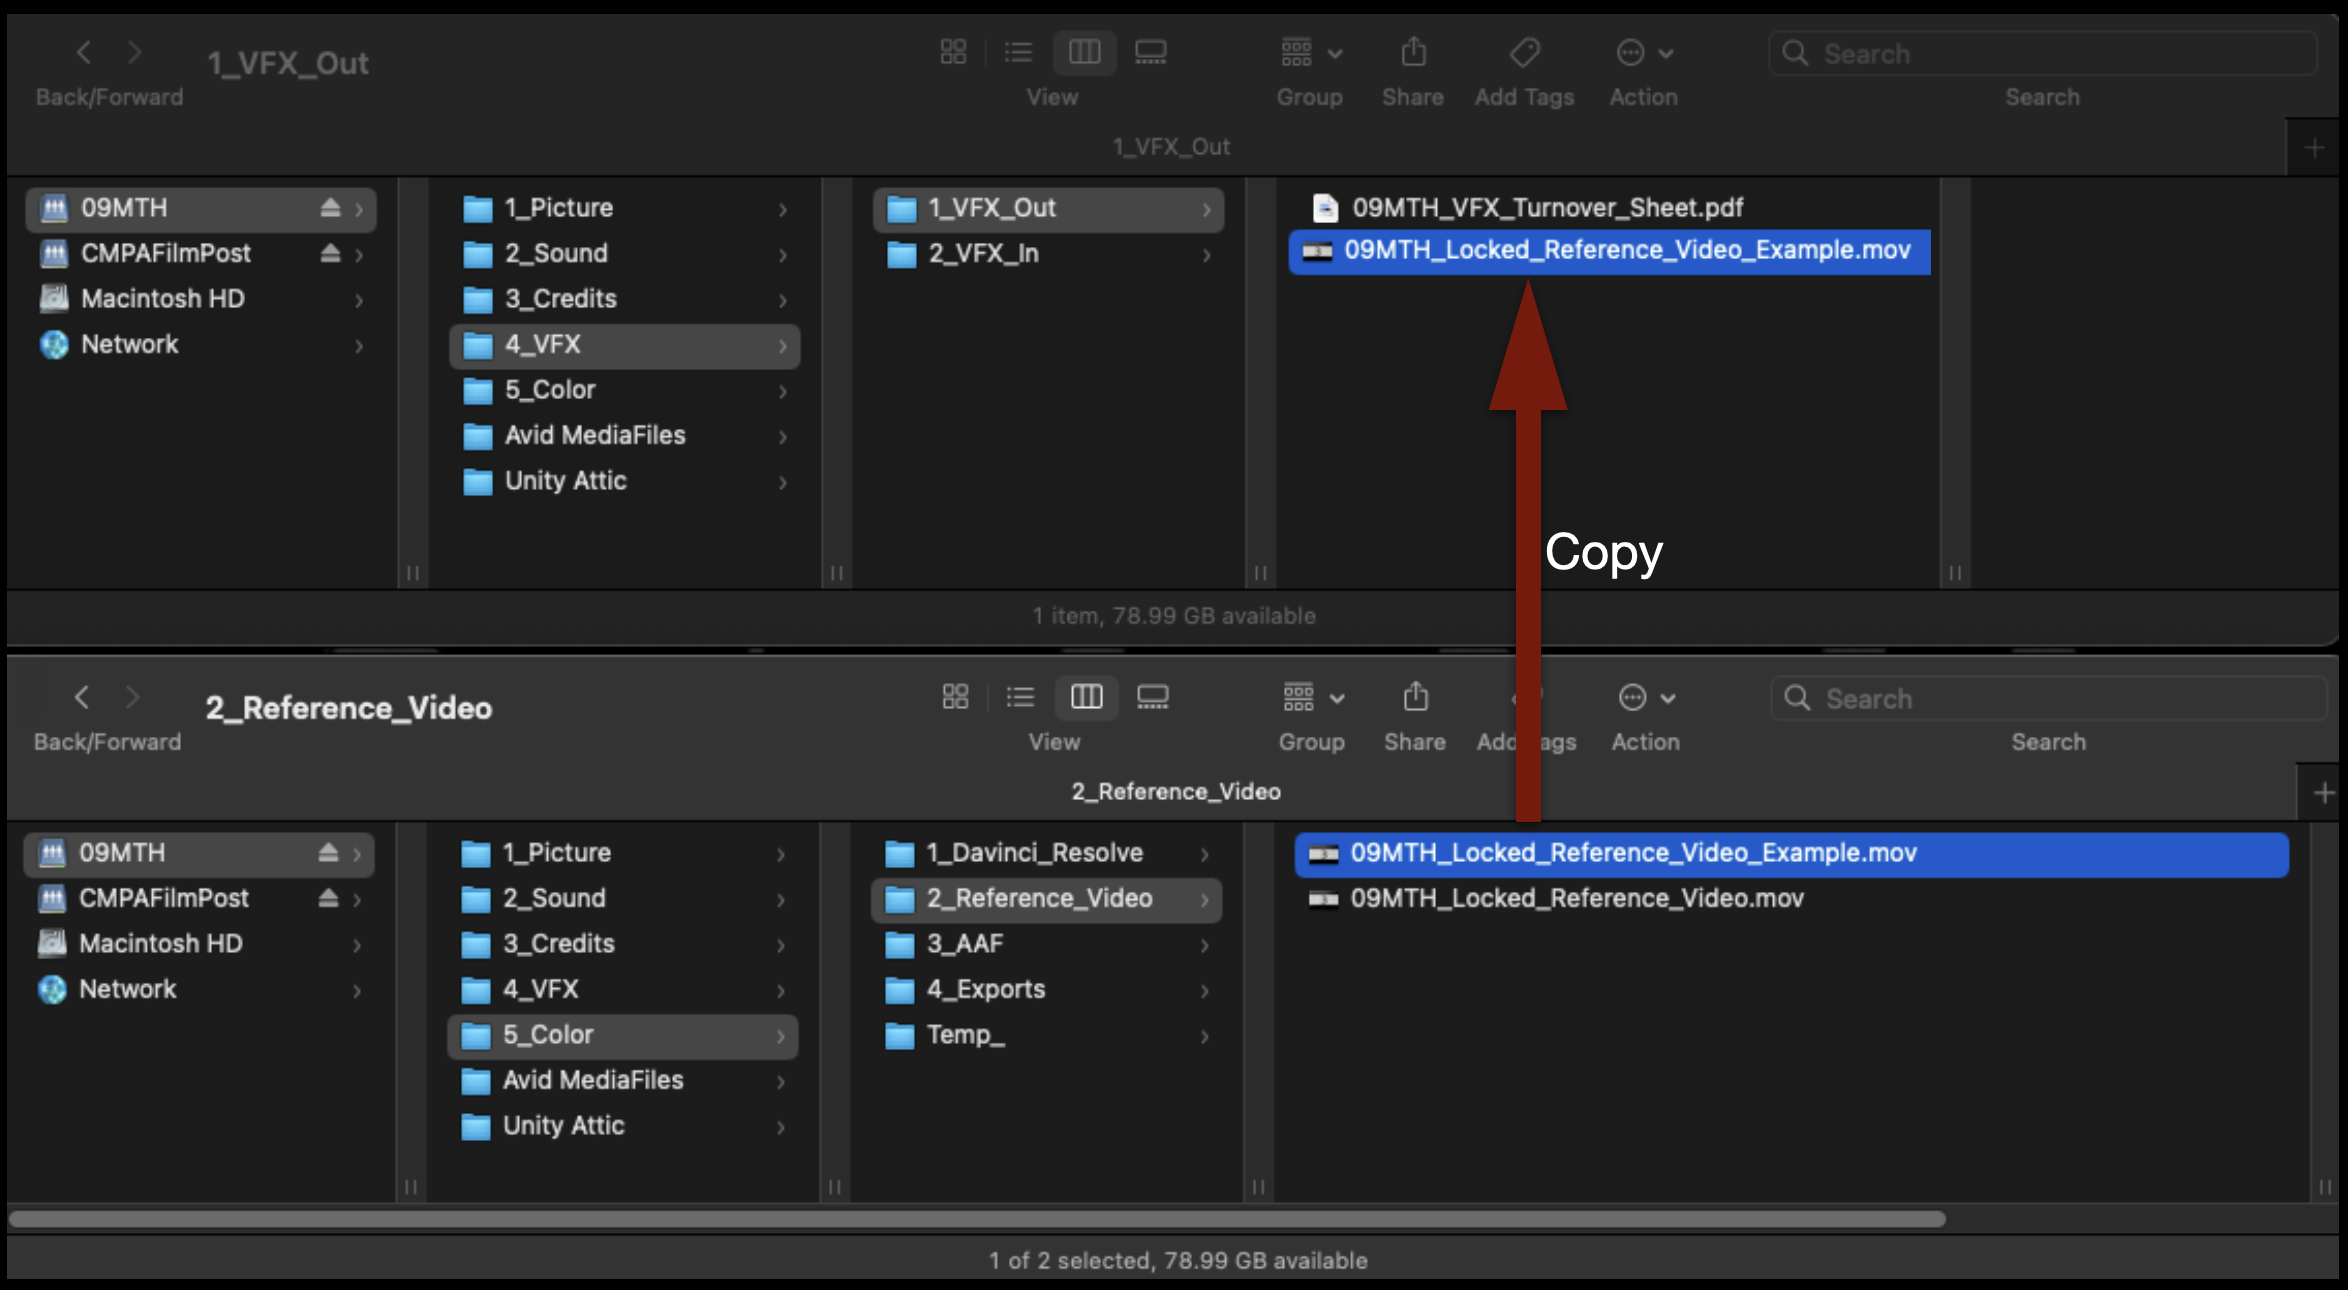
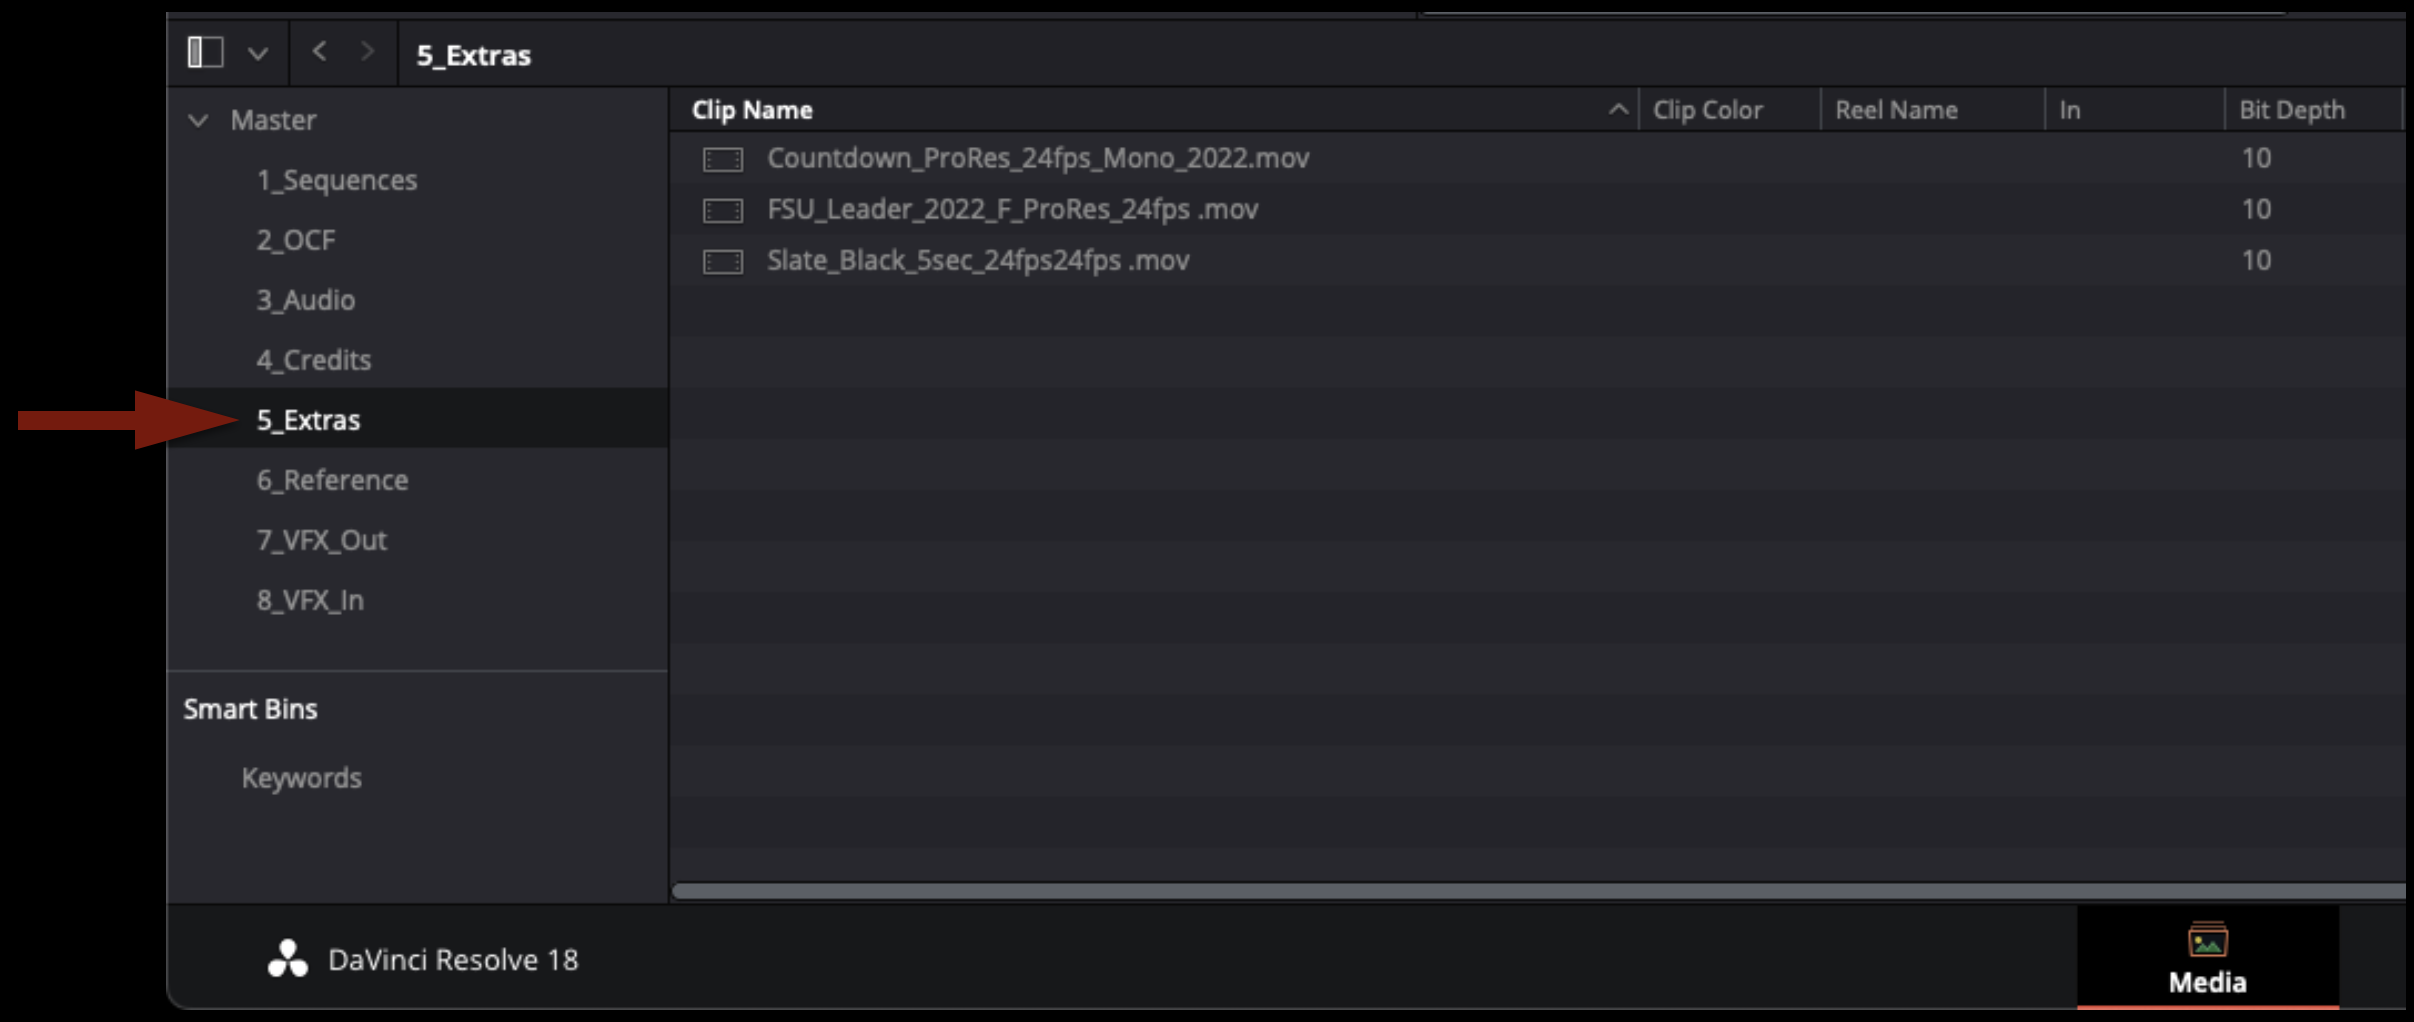
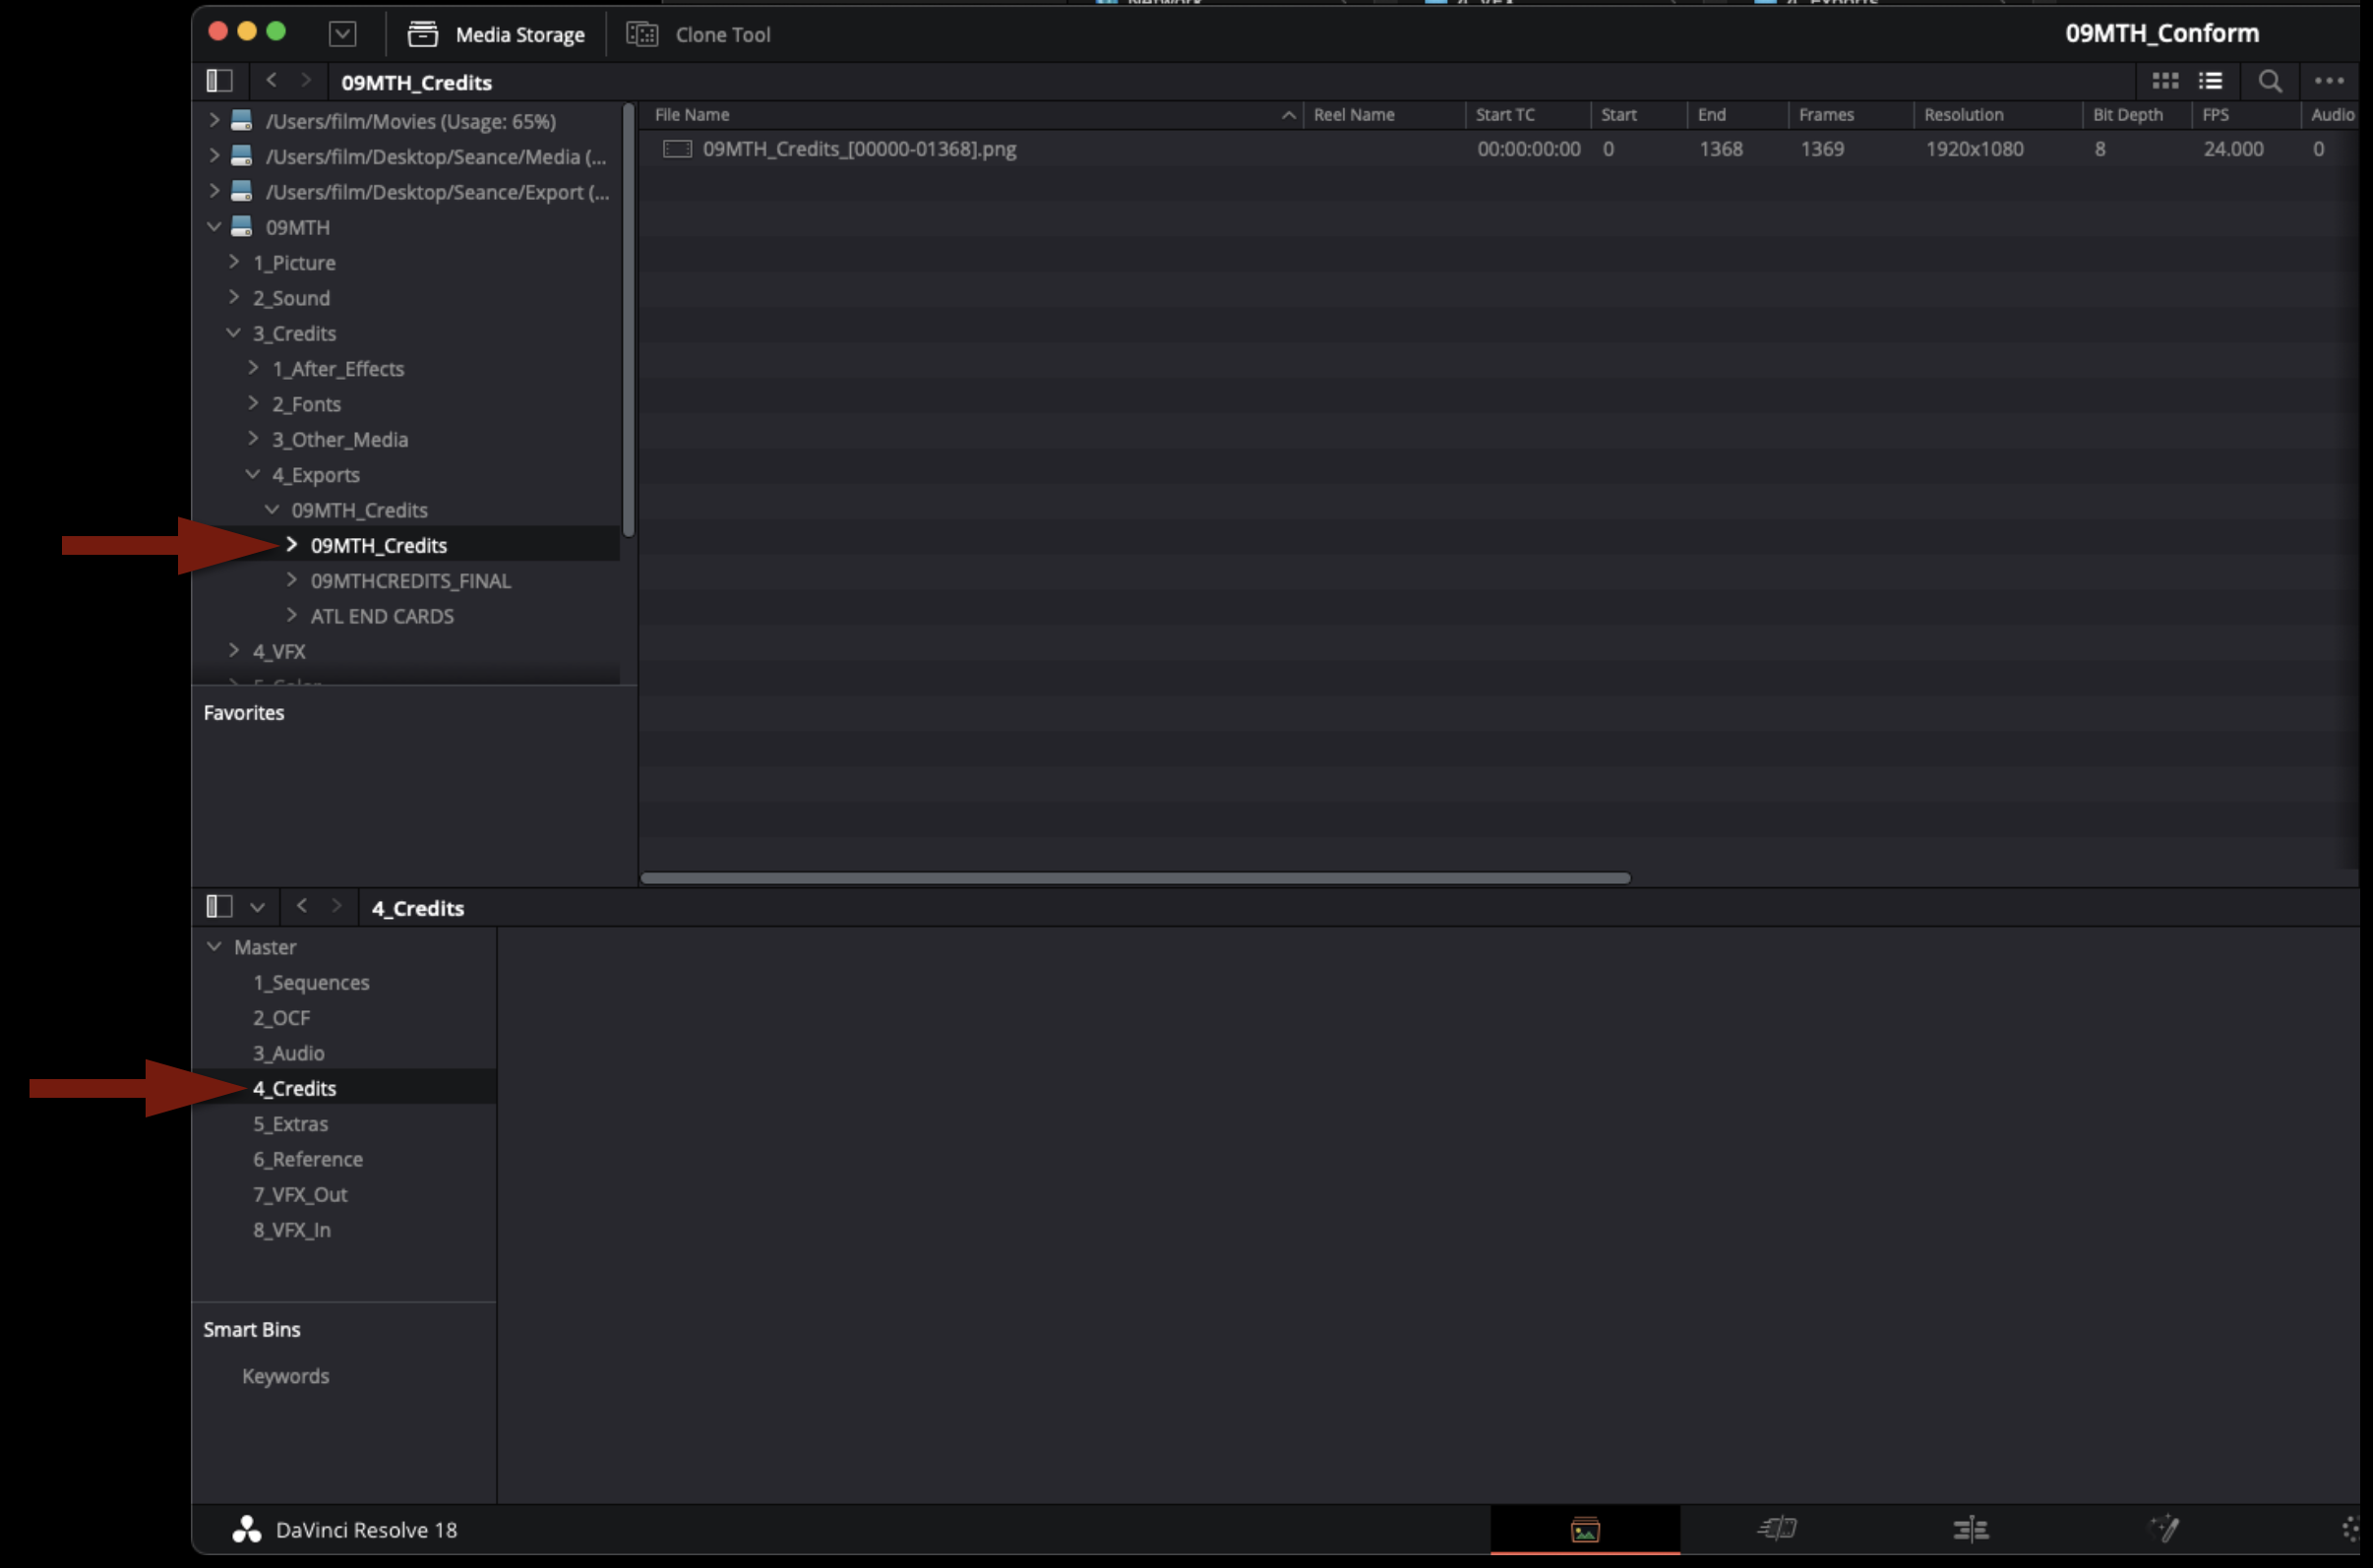
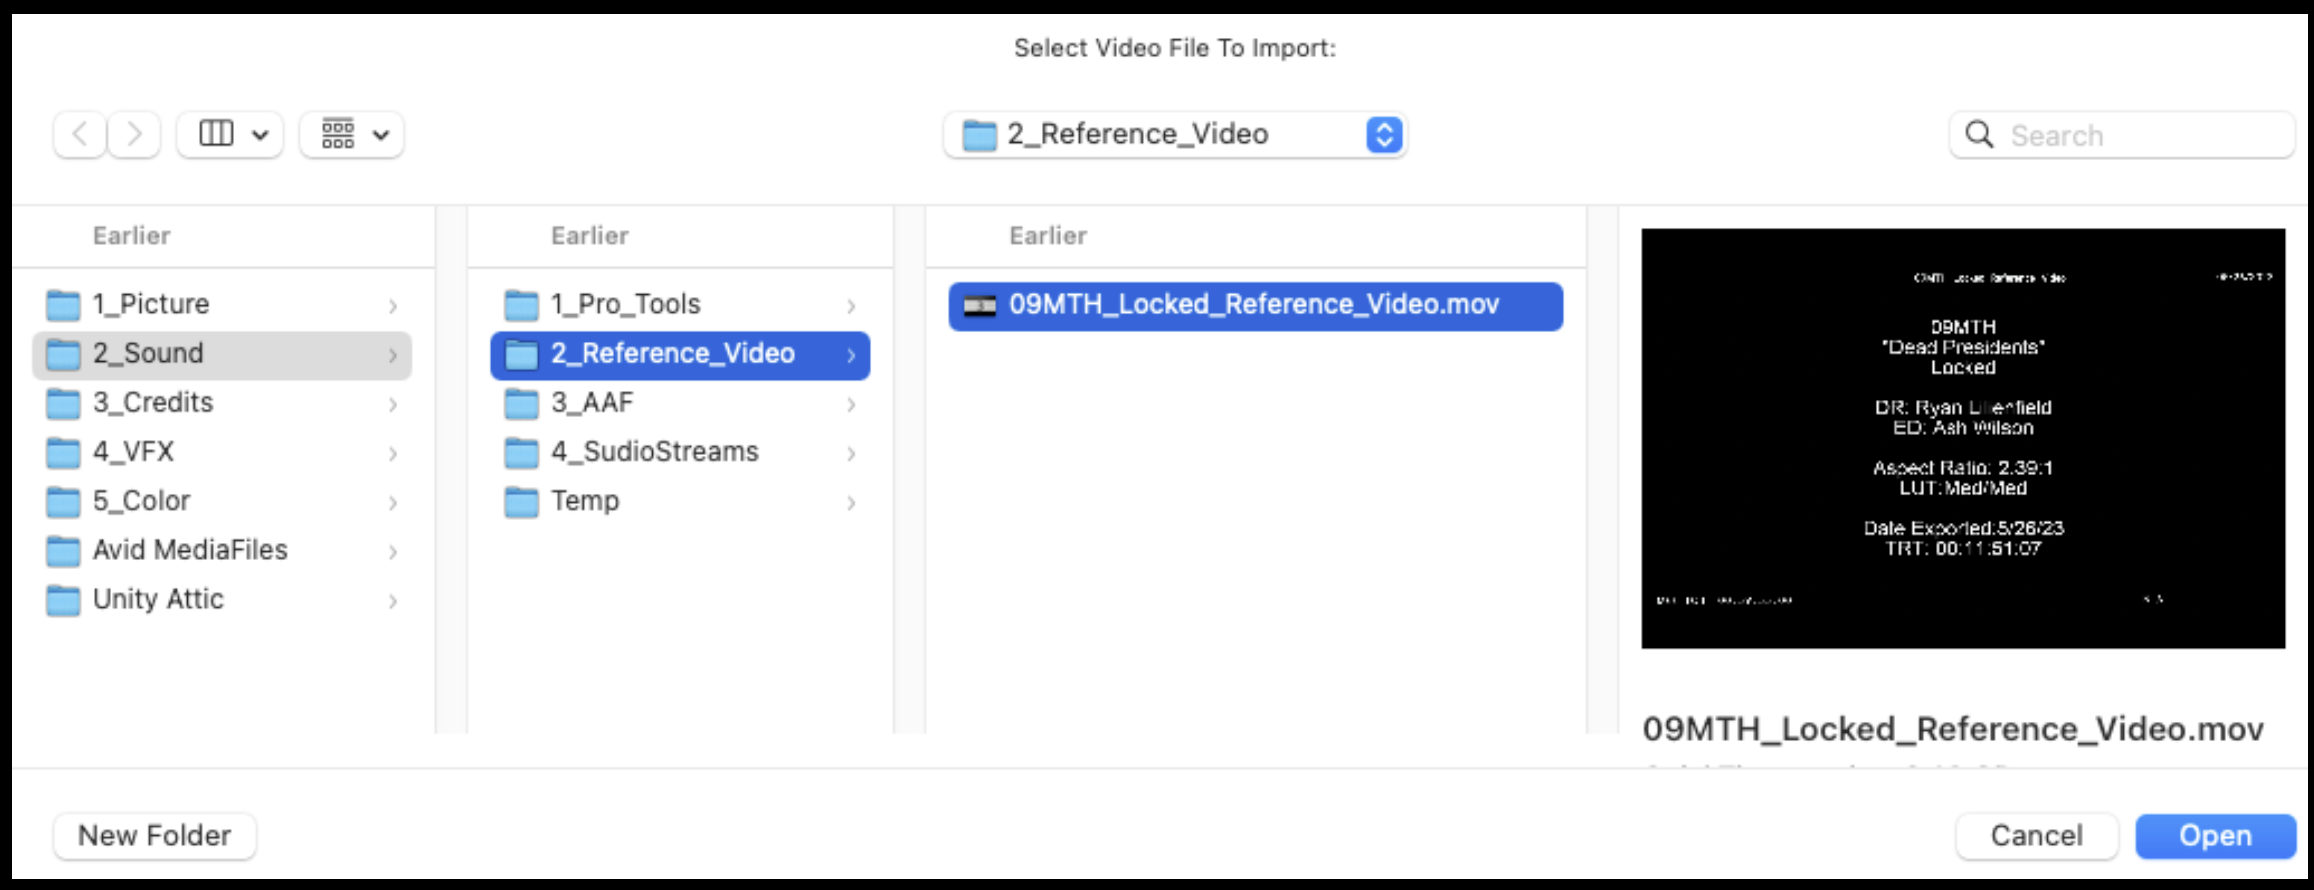
The VFX shots should already be delivered to your show volume in the VFX In folder. The only files in this folder should be the final version of each shot. They should be labeled show_shot#_comp_version. If the files are labeled in any other way or if you have more than one version of each shot in the VFX In folder, contact the person who completed the VFX shots so that they can fix anything necessary before proceeding.

Cut in VFX
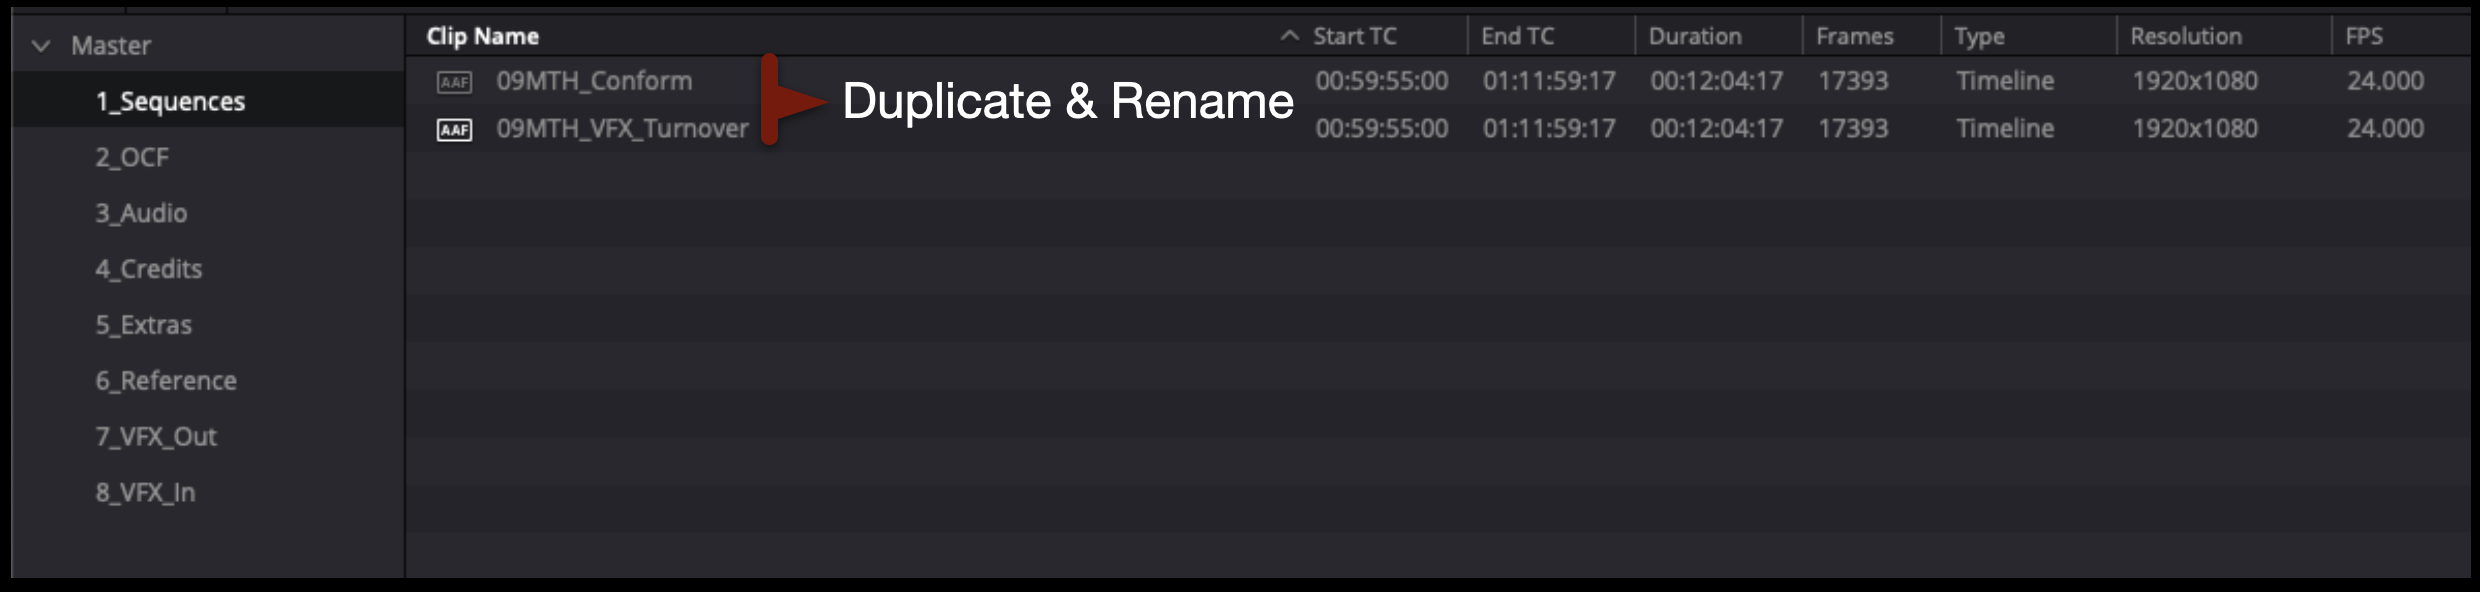
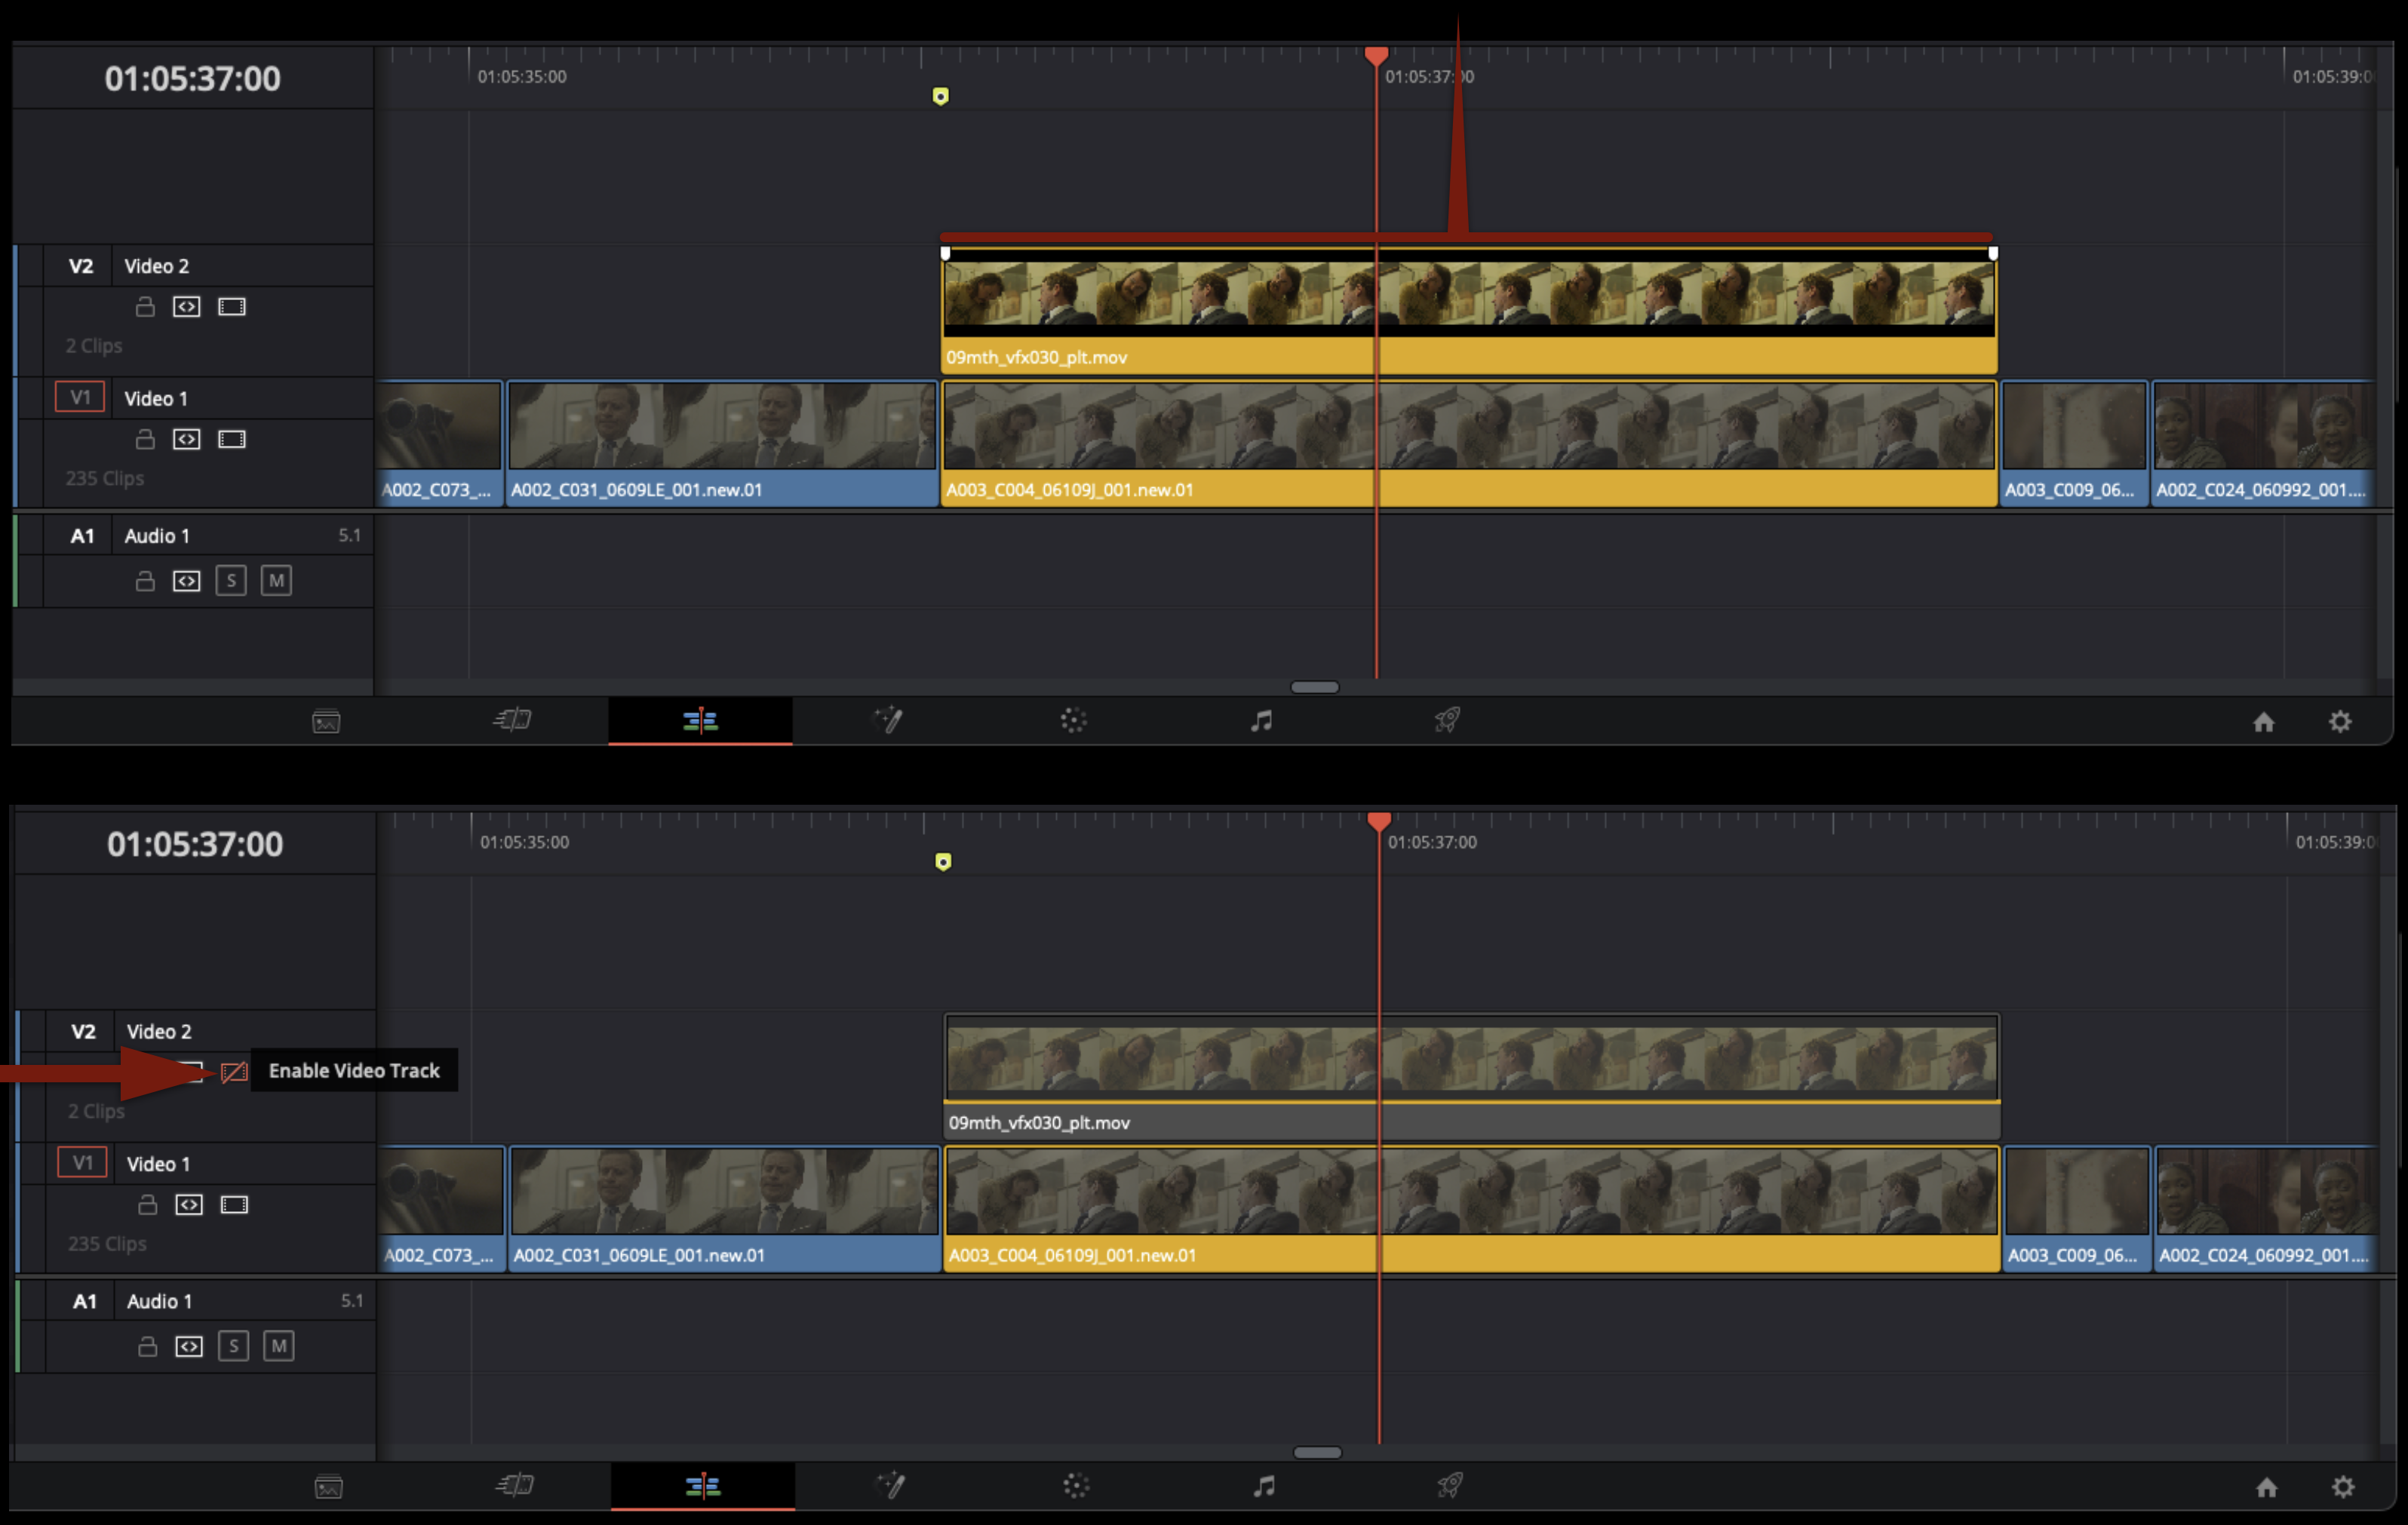
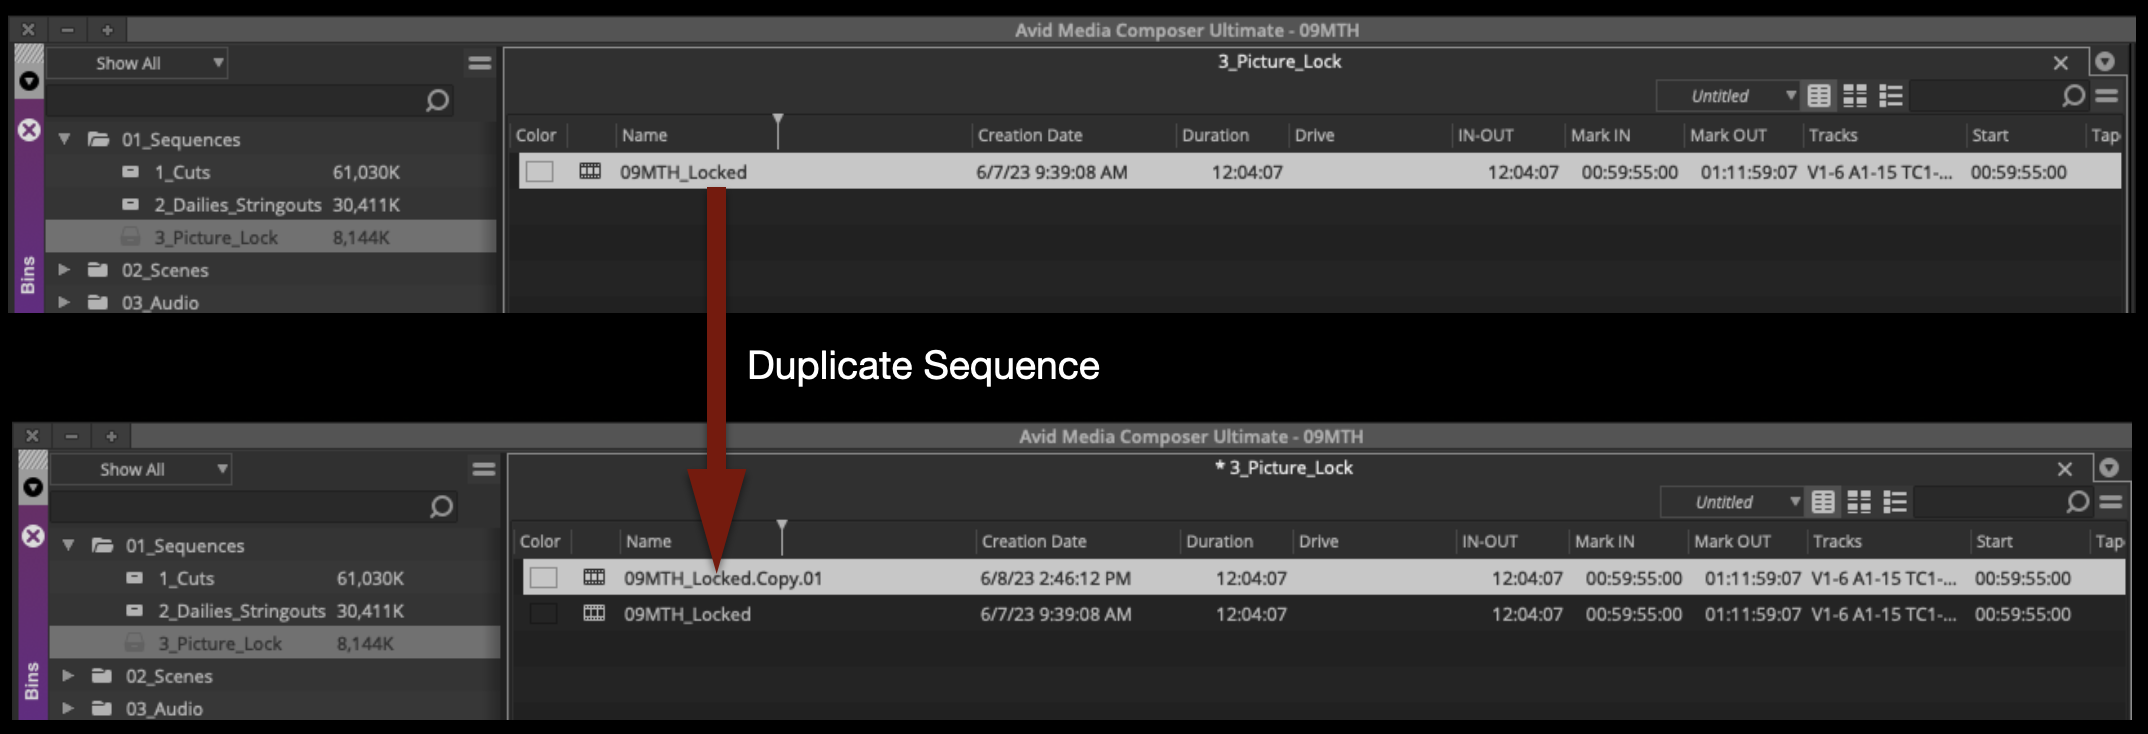
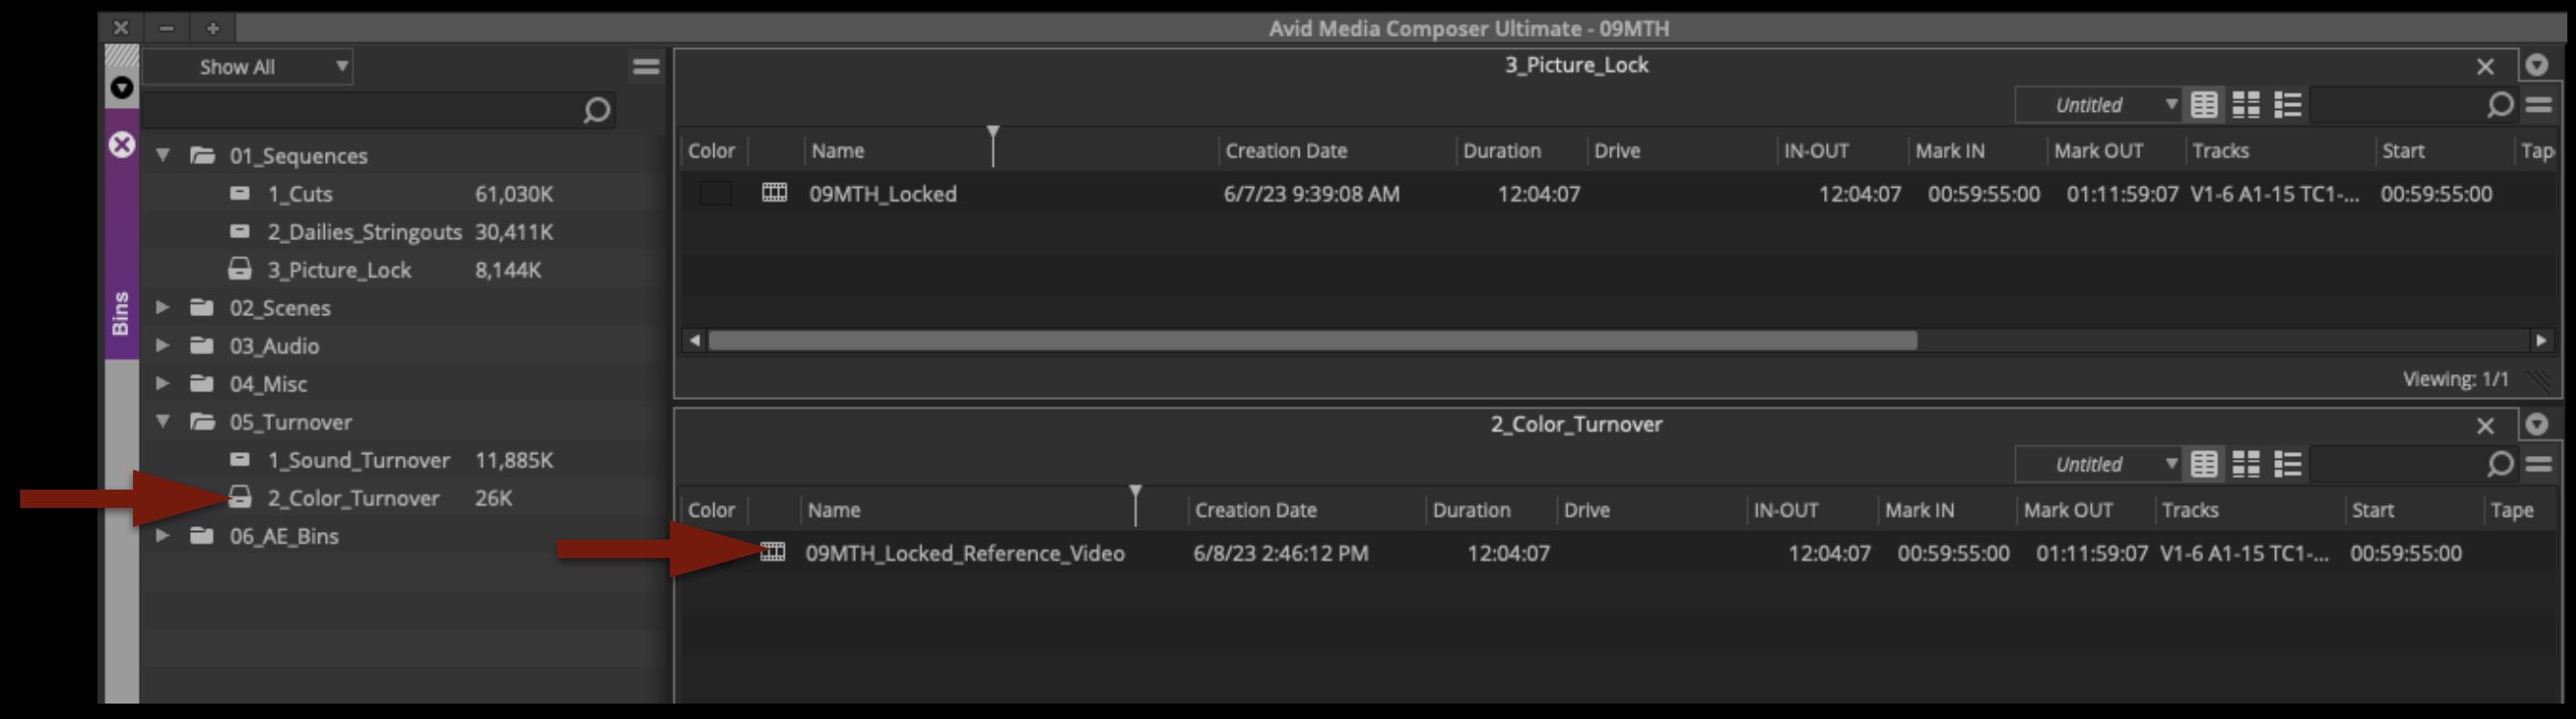
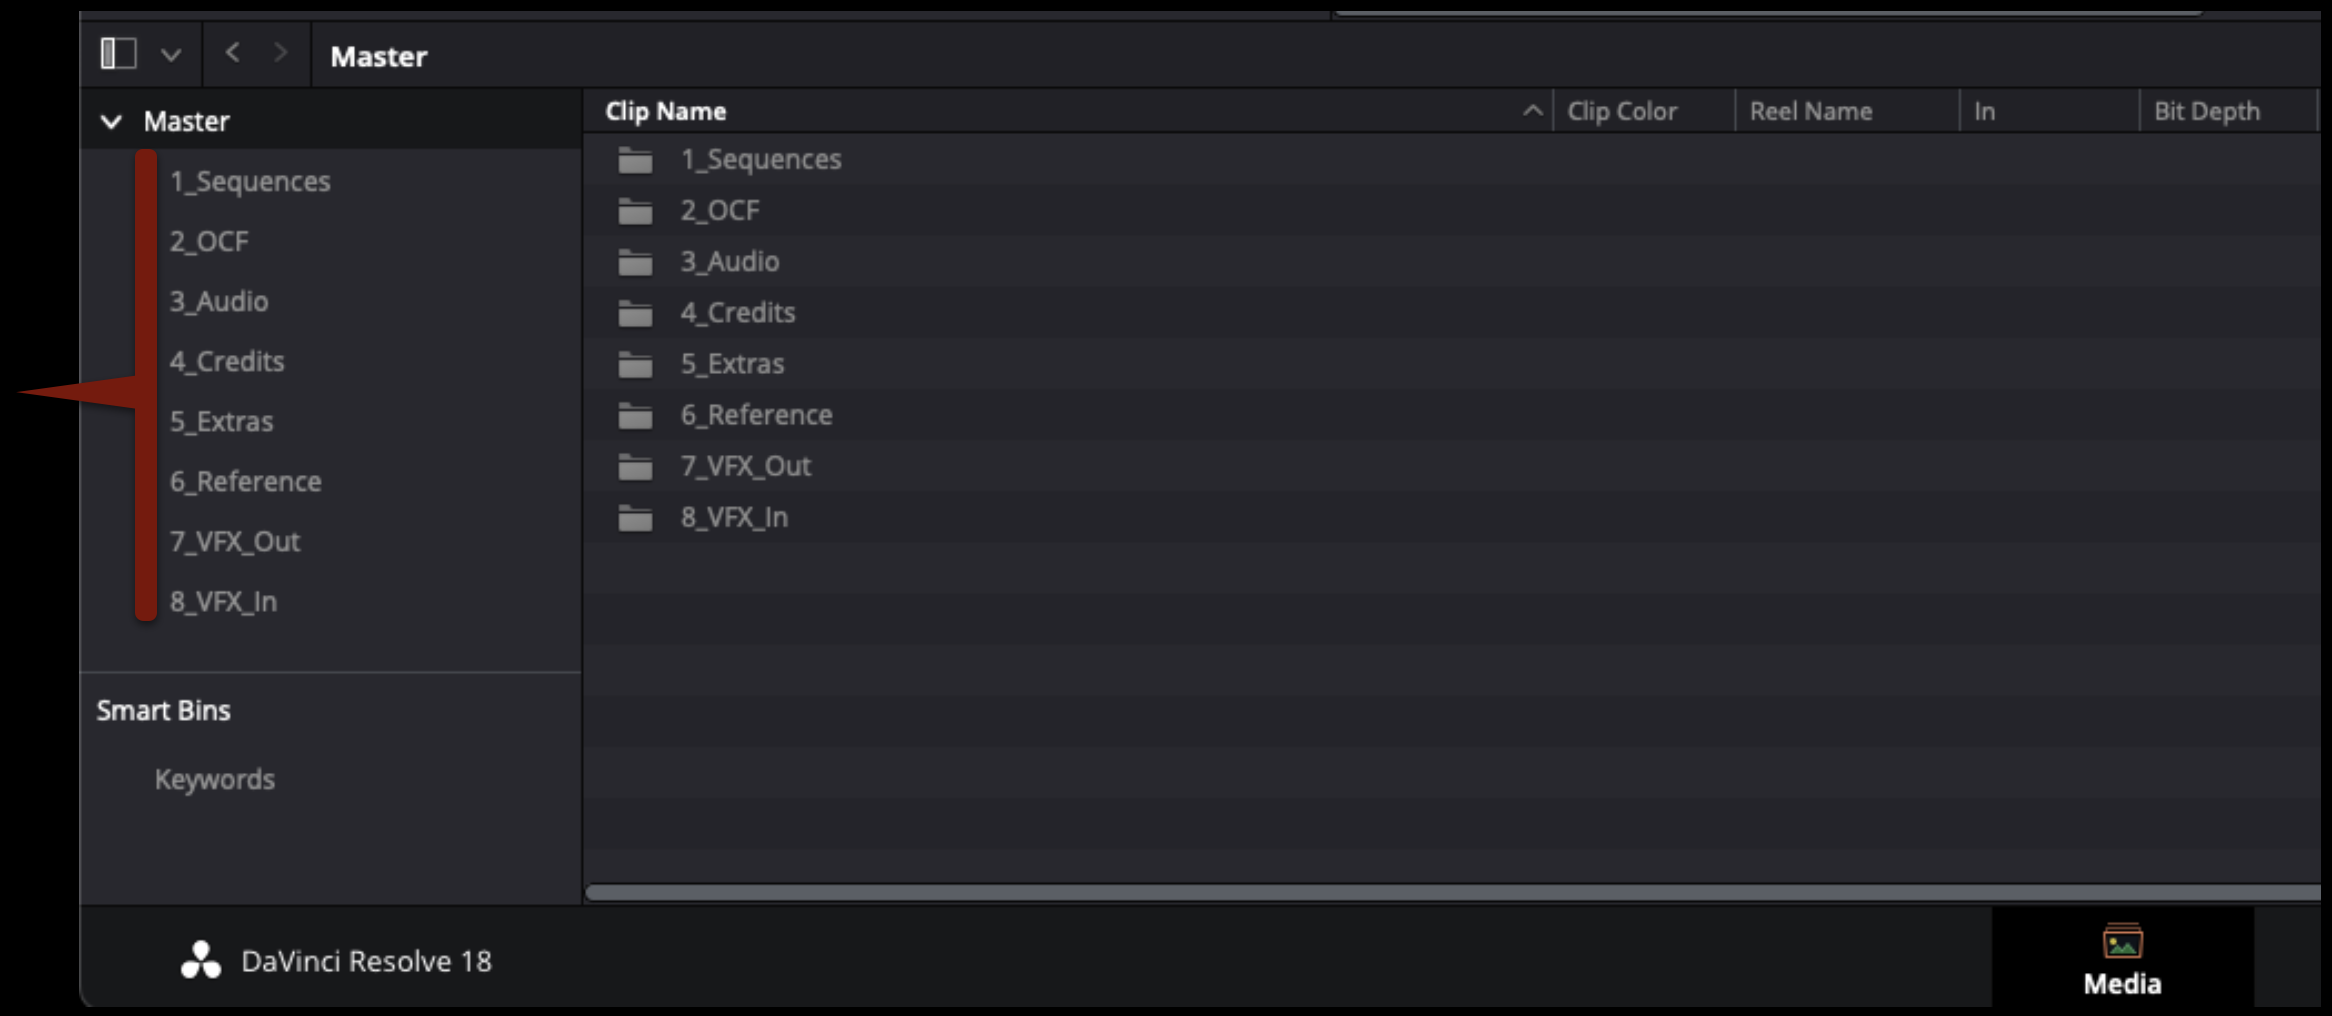
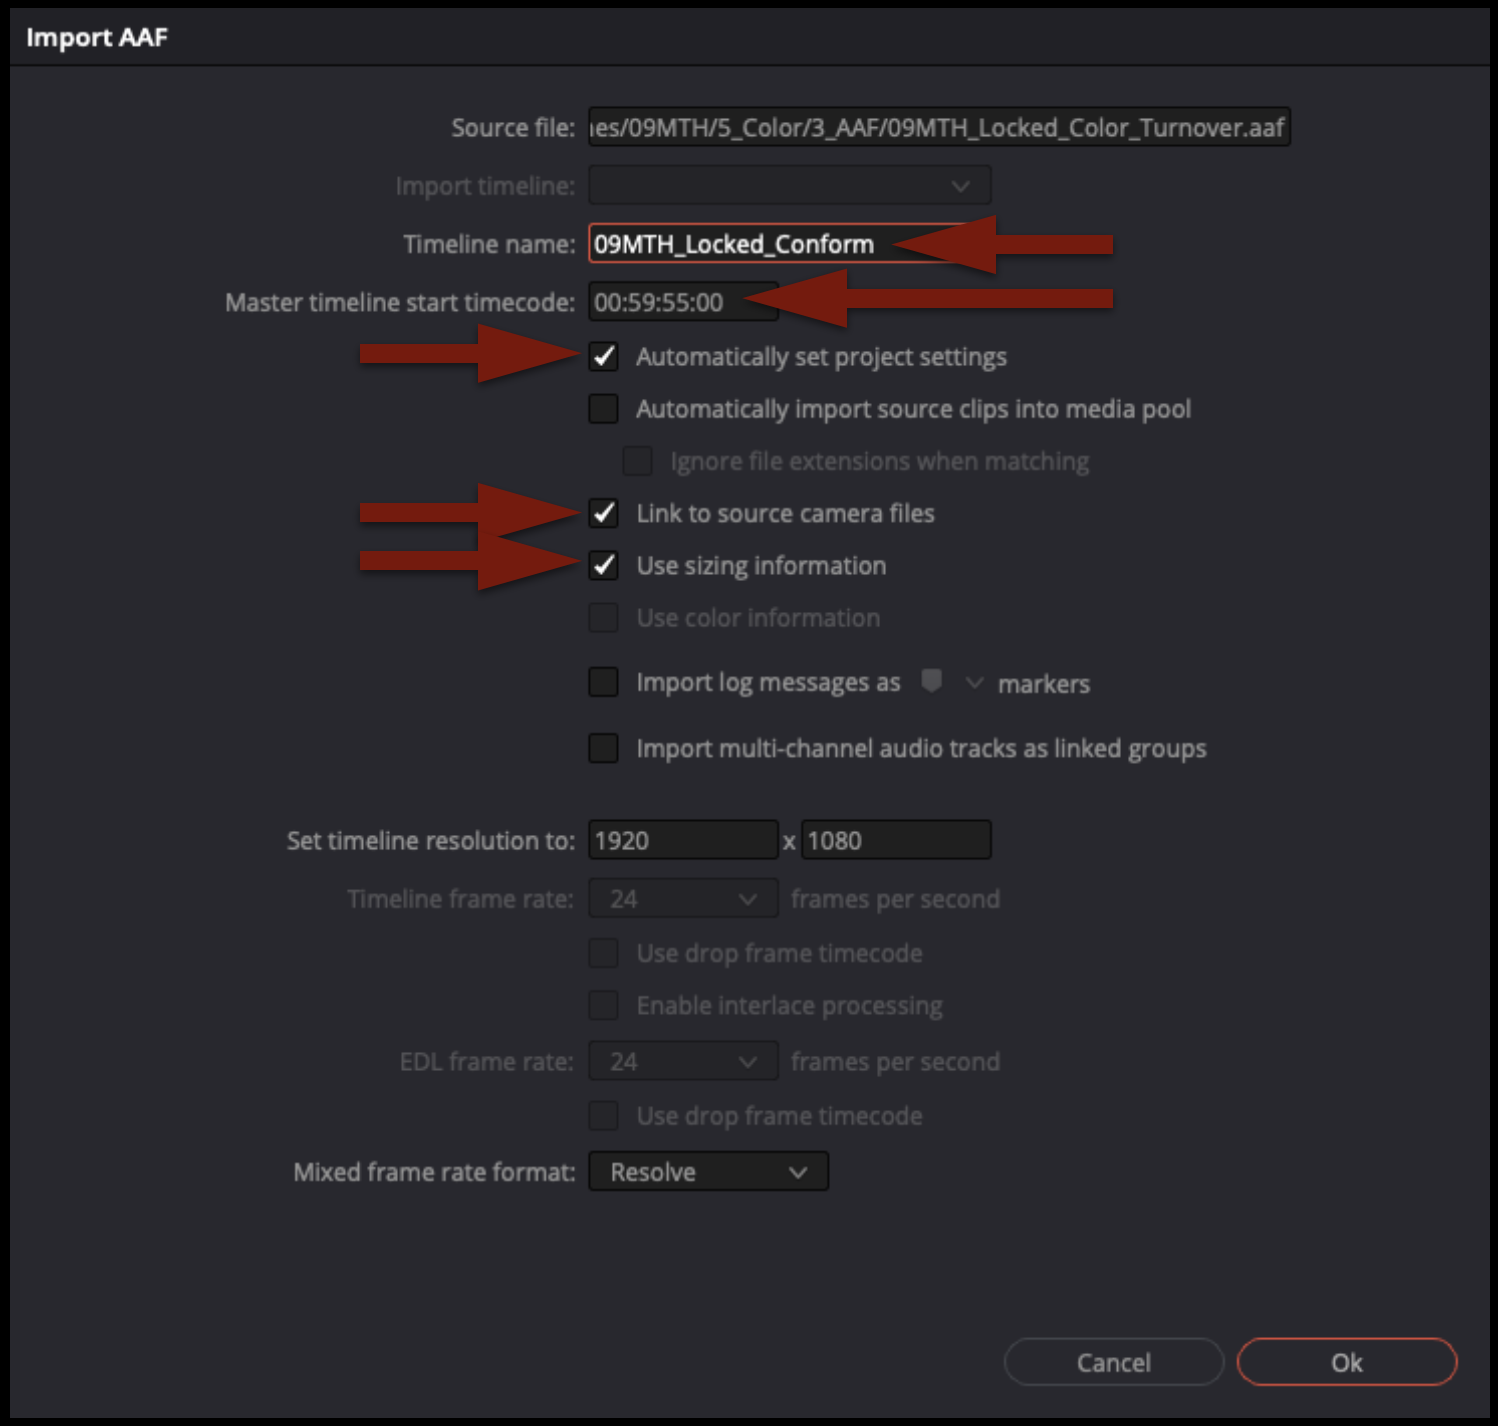
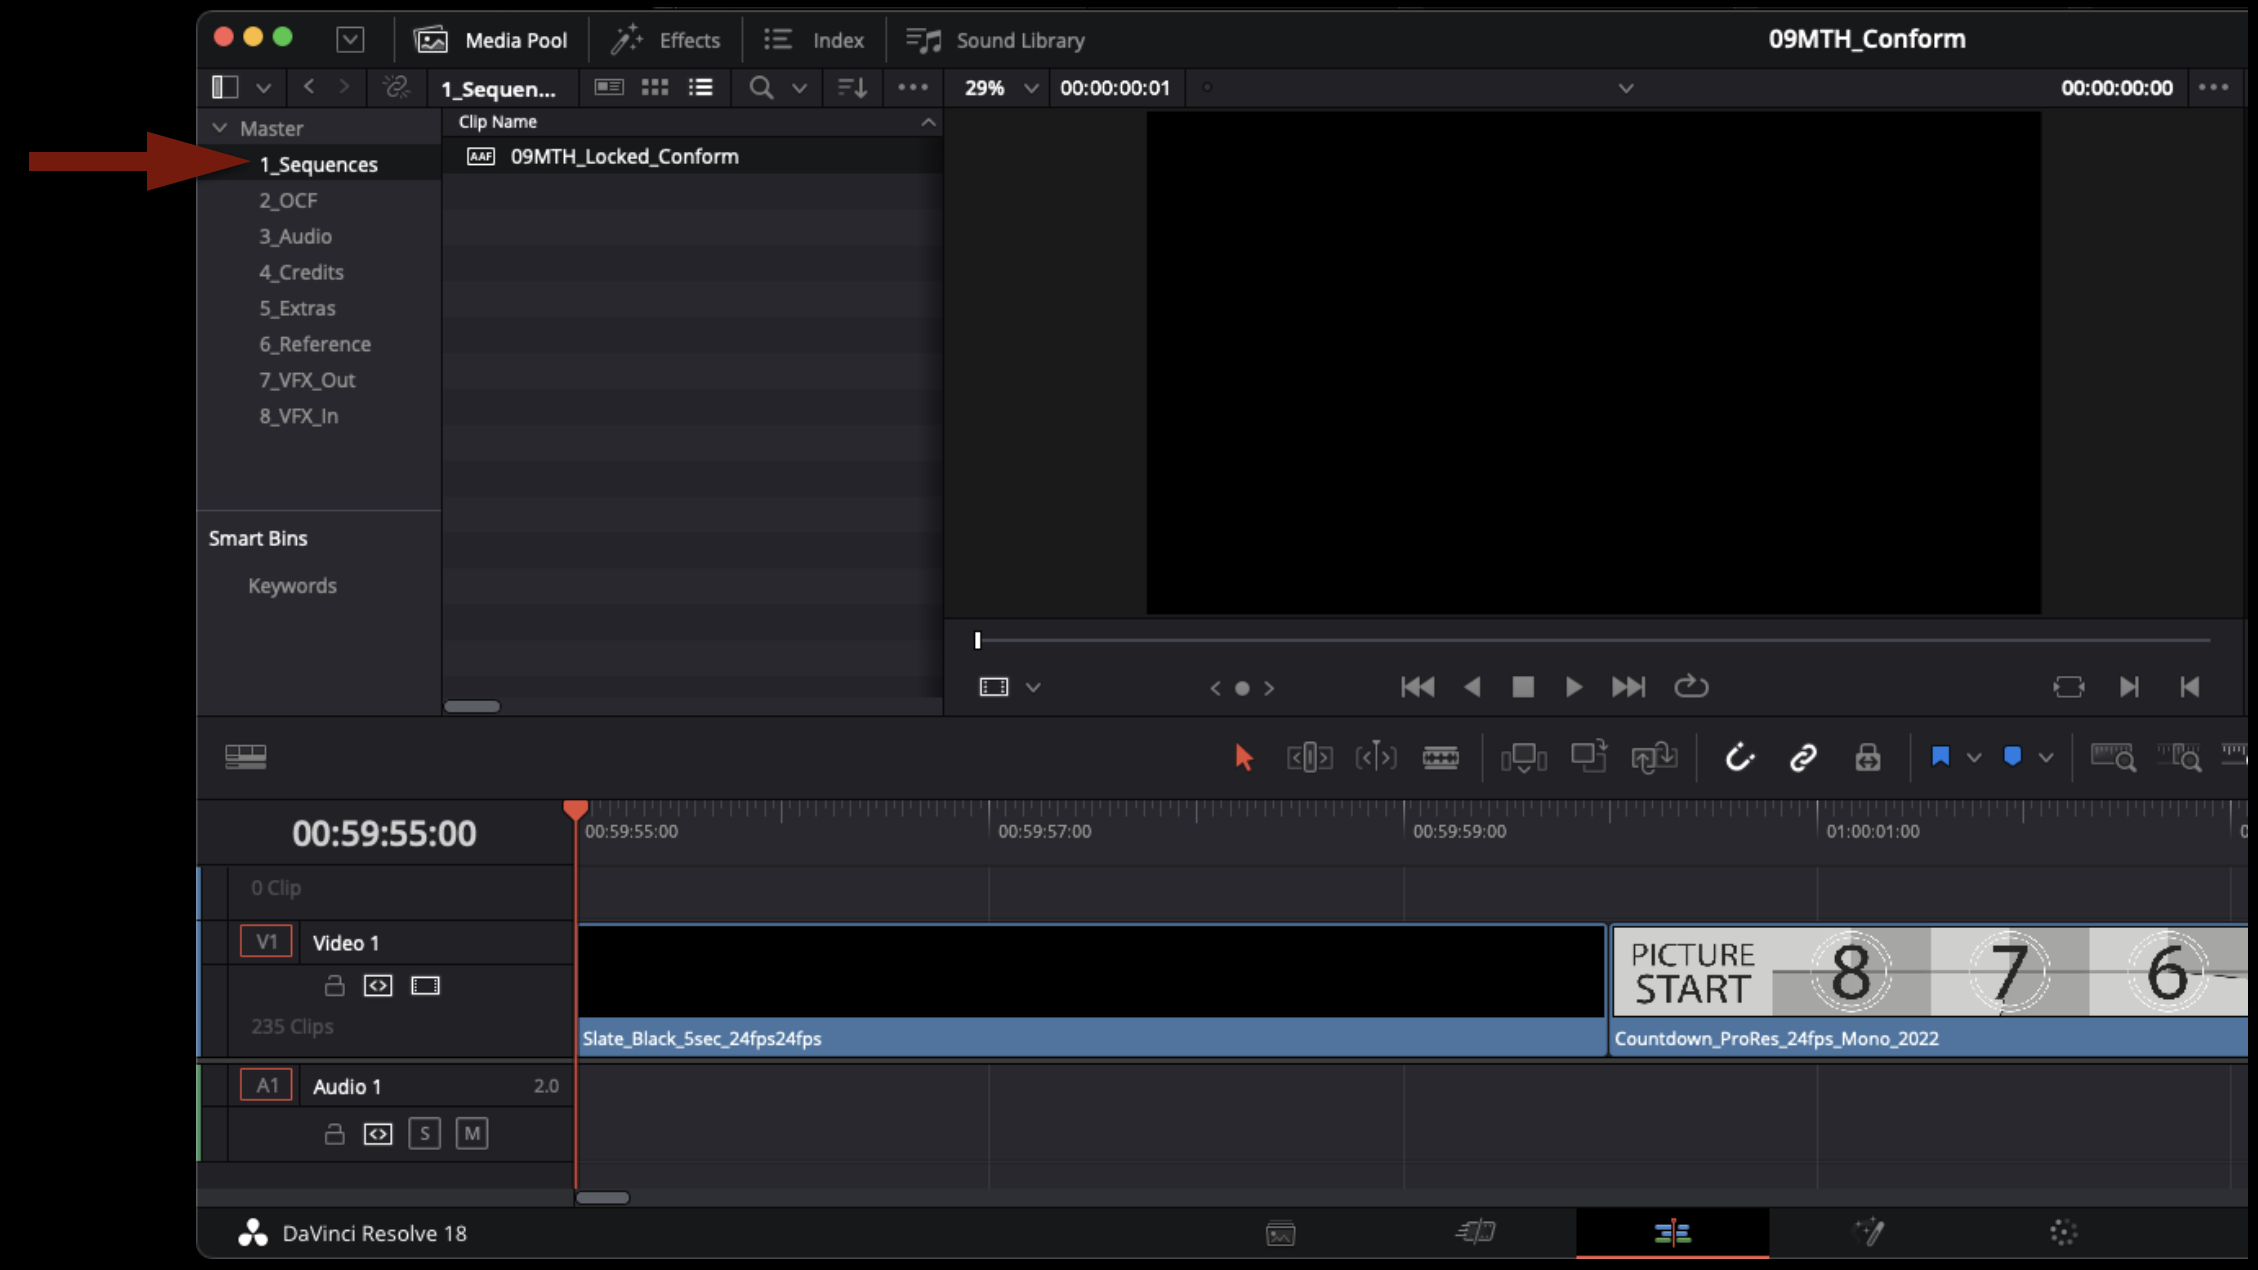
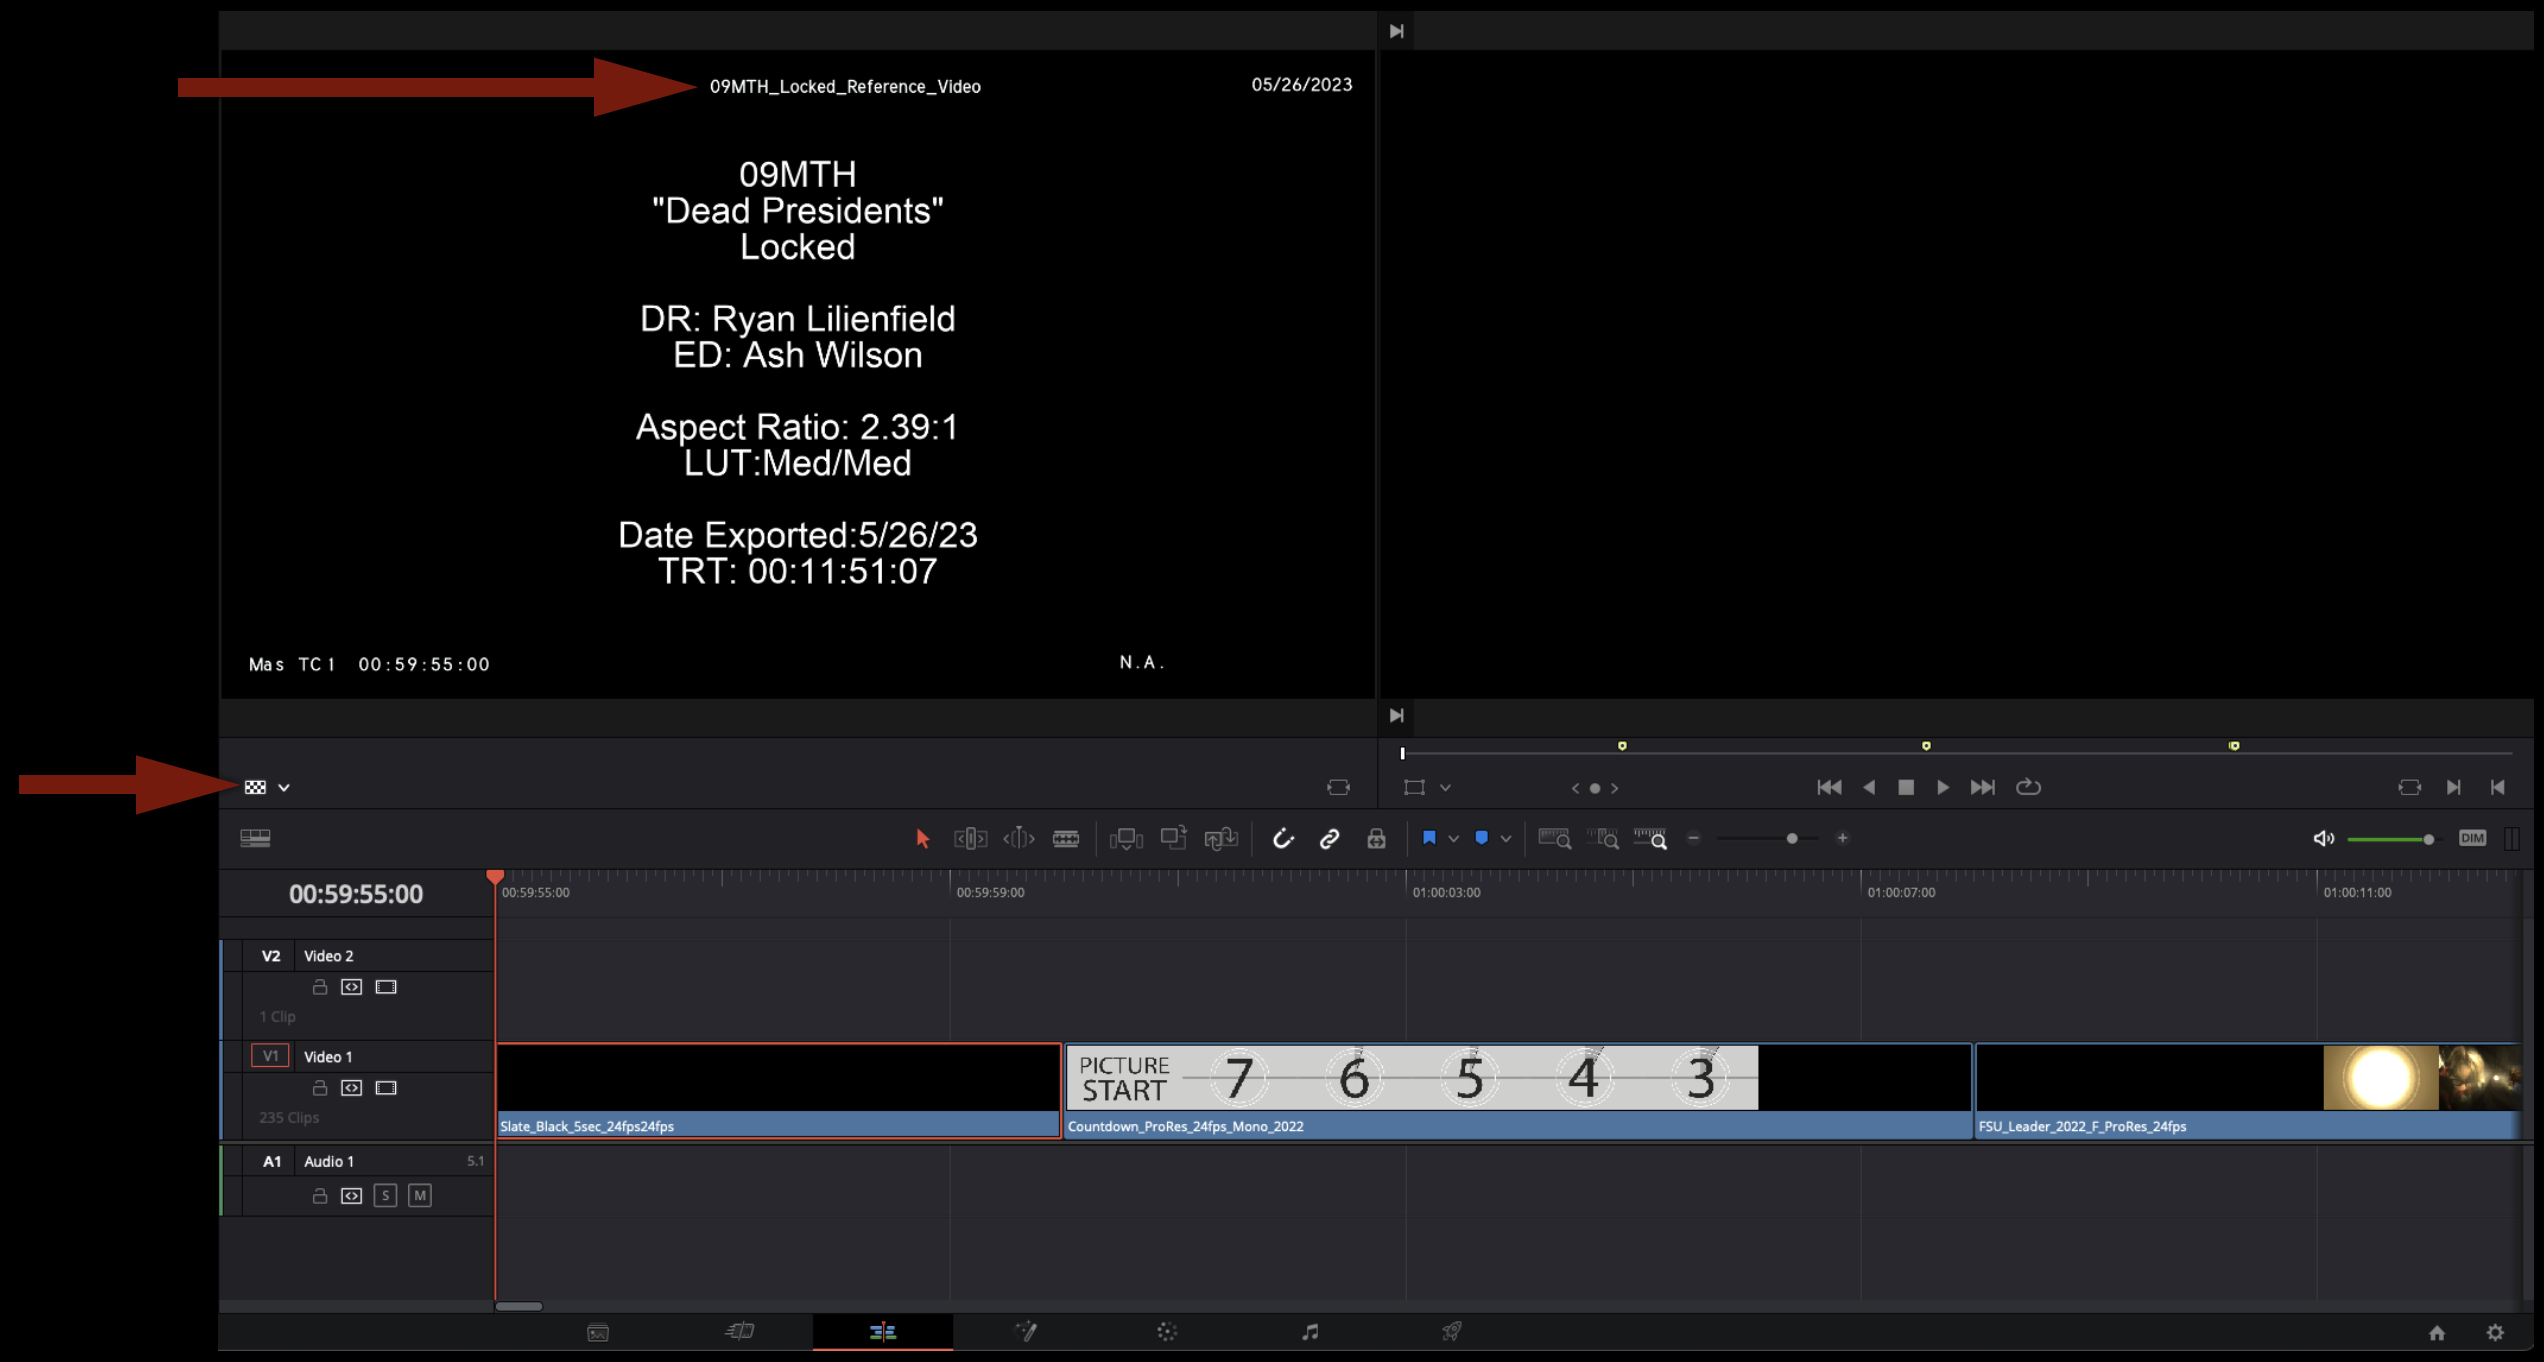
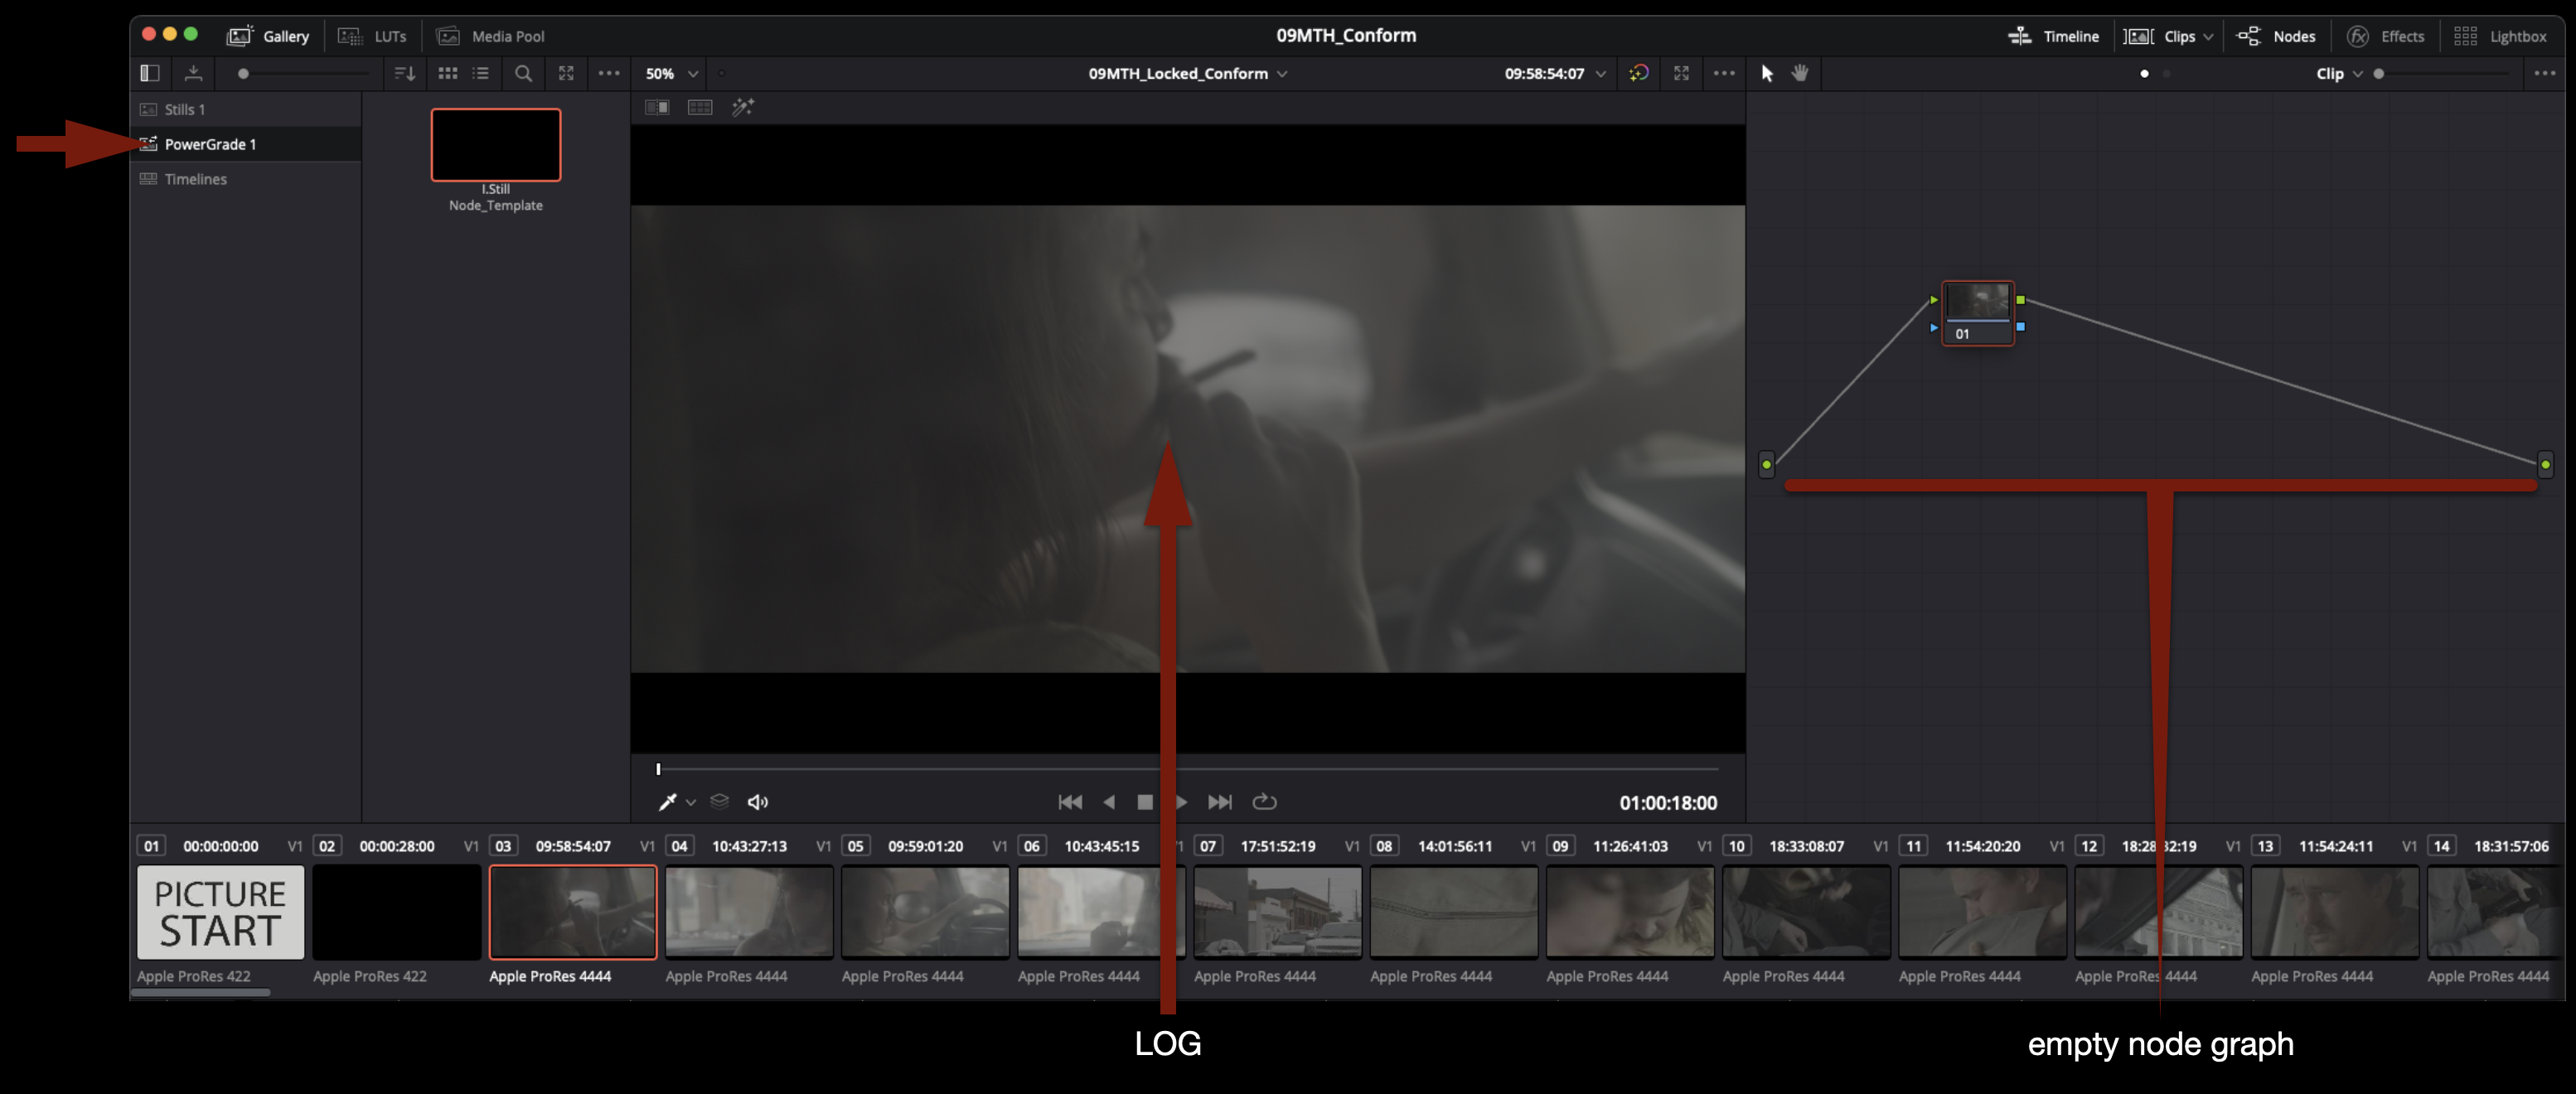
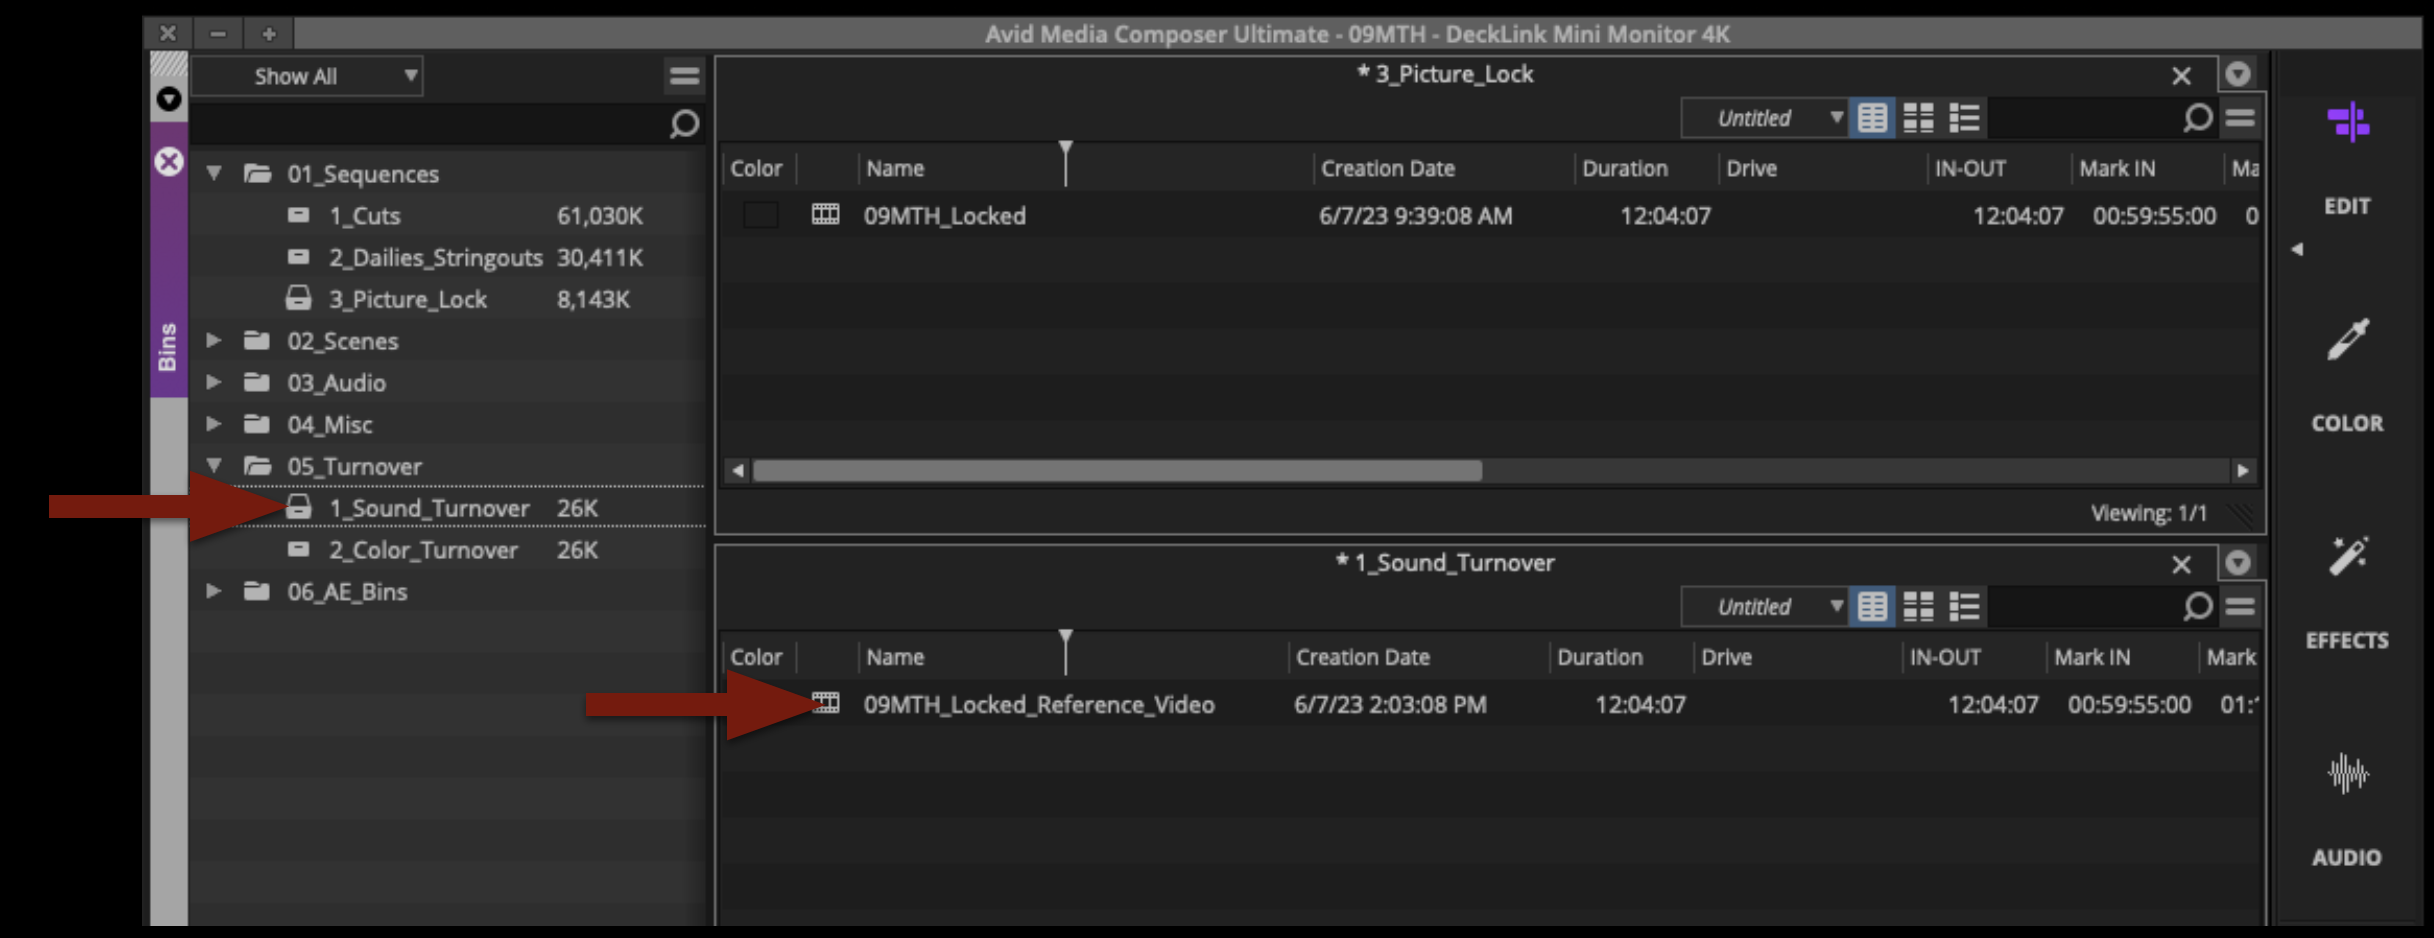
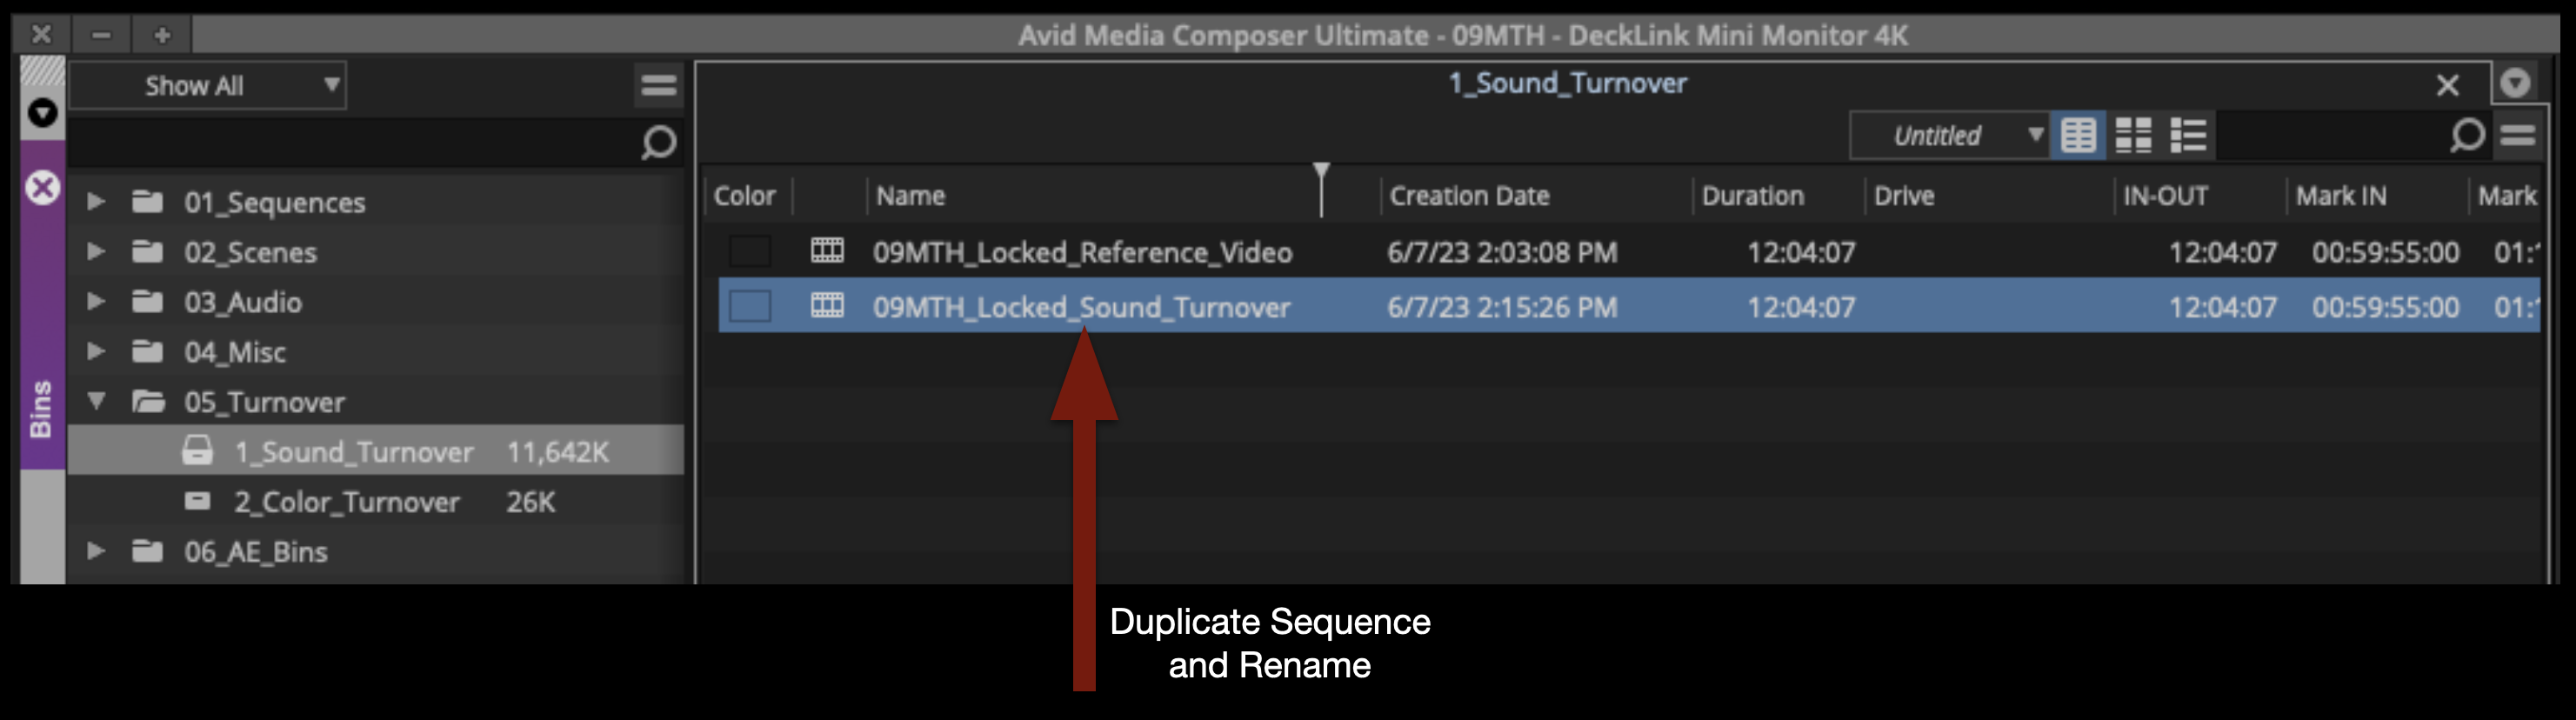
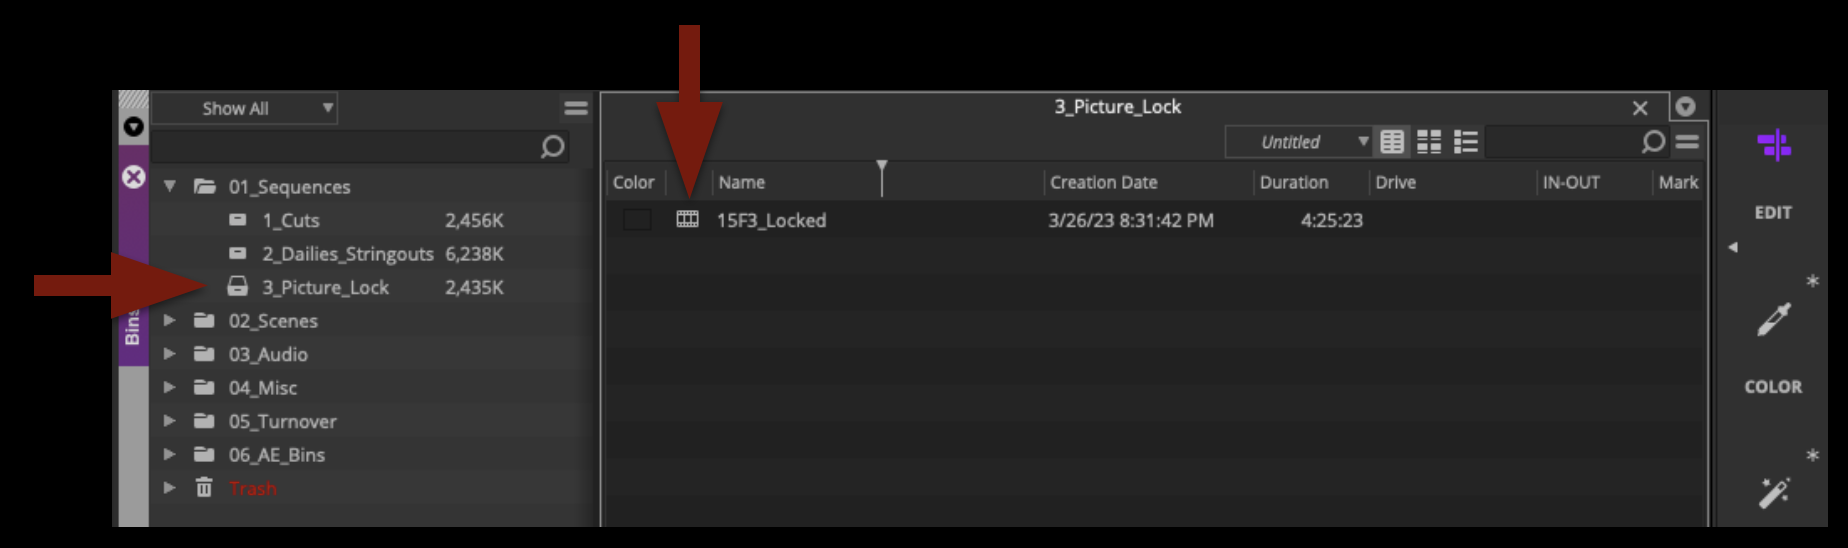
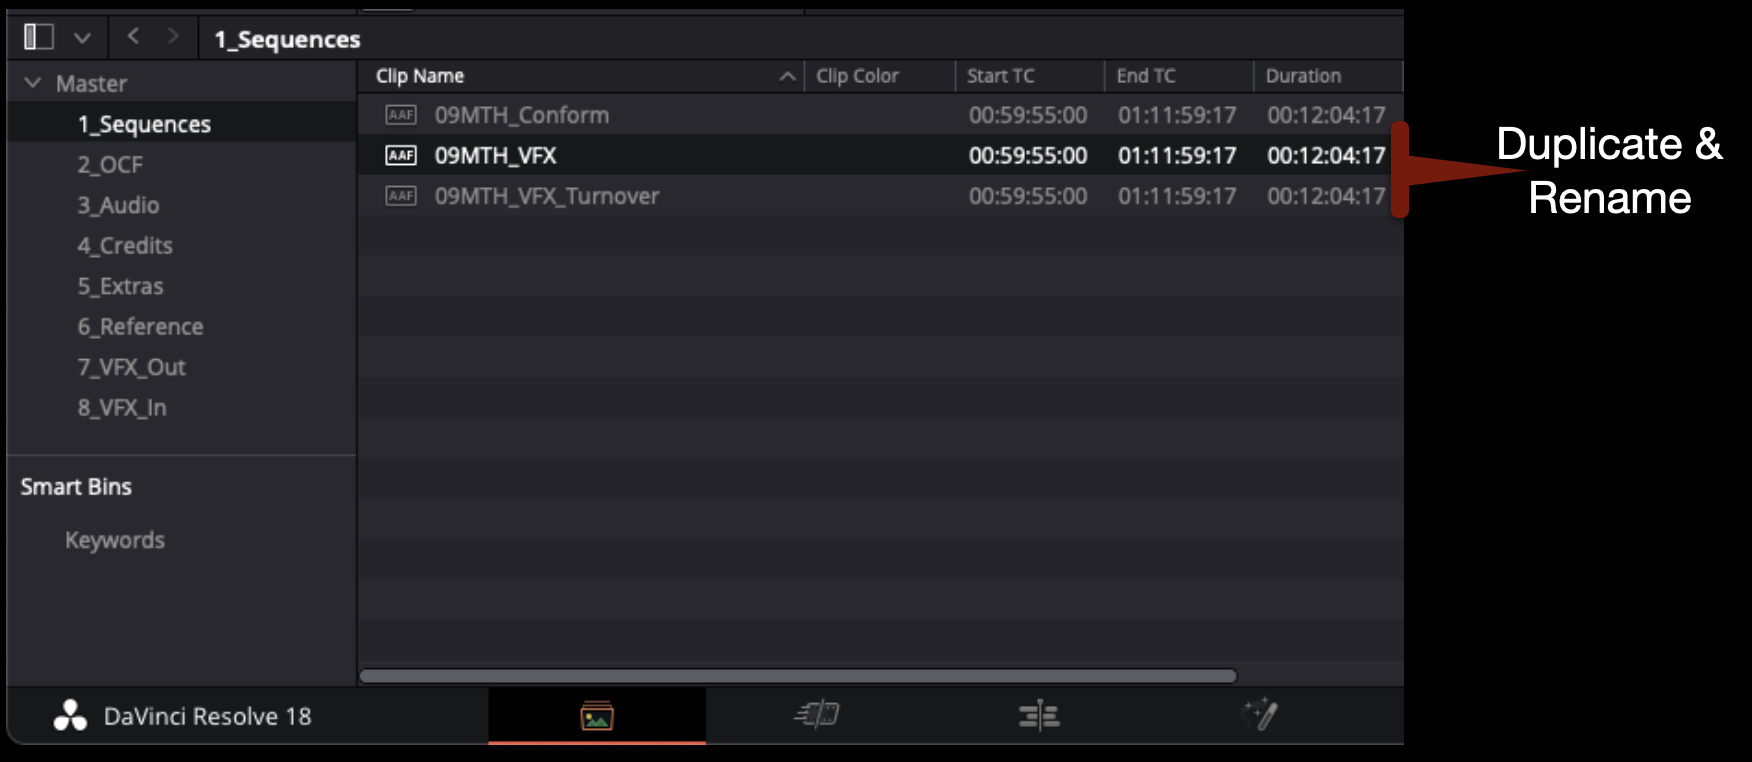
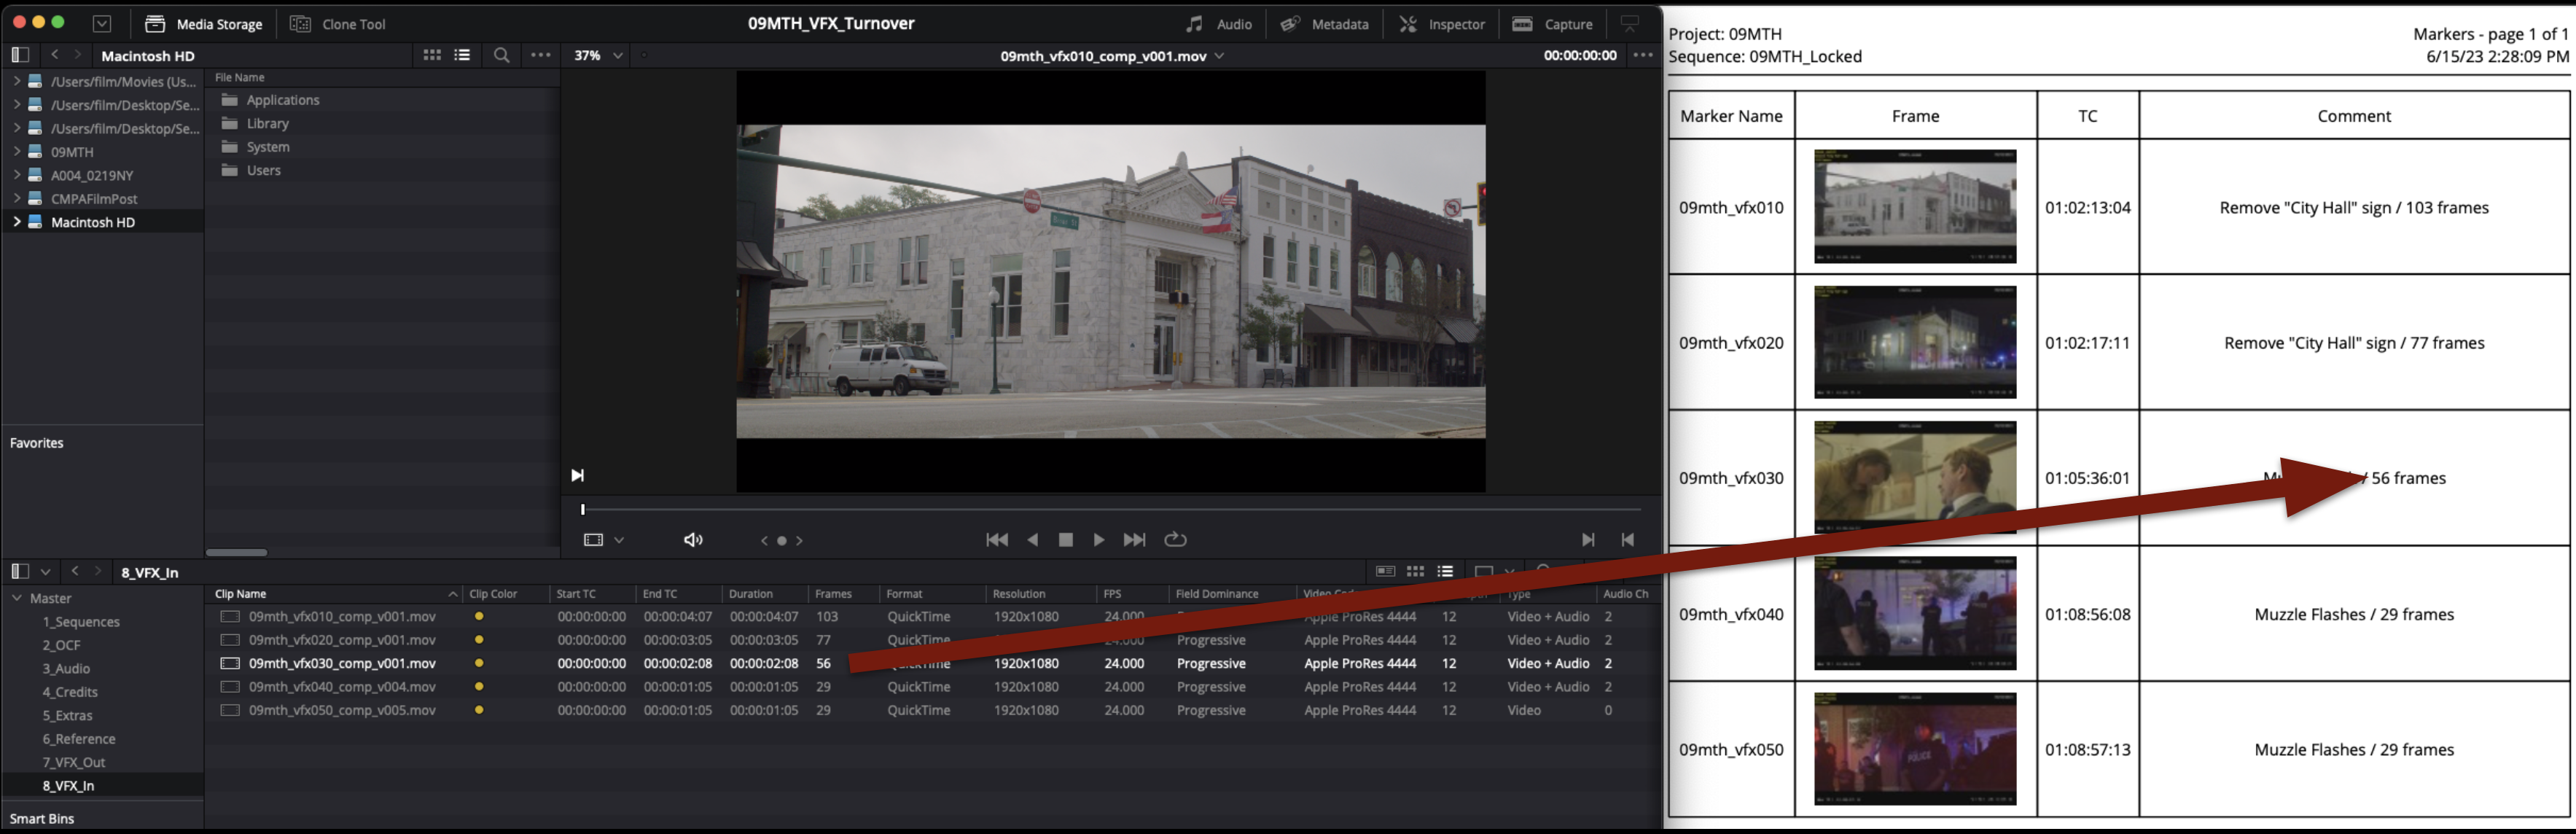
Open the show’s Resolve project. In the Media page, inside the Sequences bin, duplicate the sequence named “show#_VFX_Turnover” and rename the new sequence show#_VFX as shown in the example below.
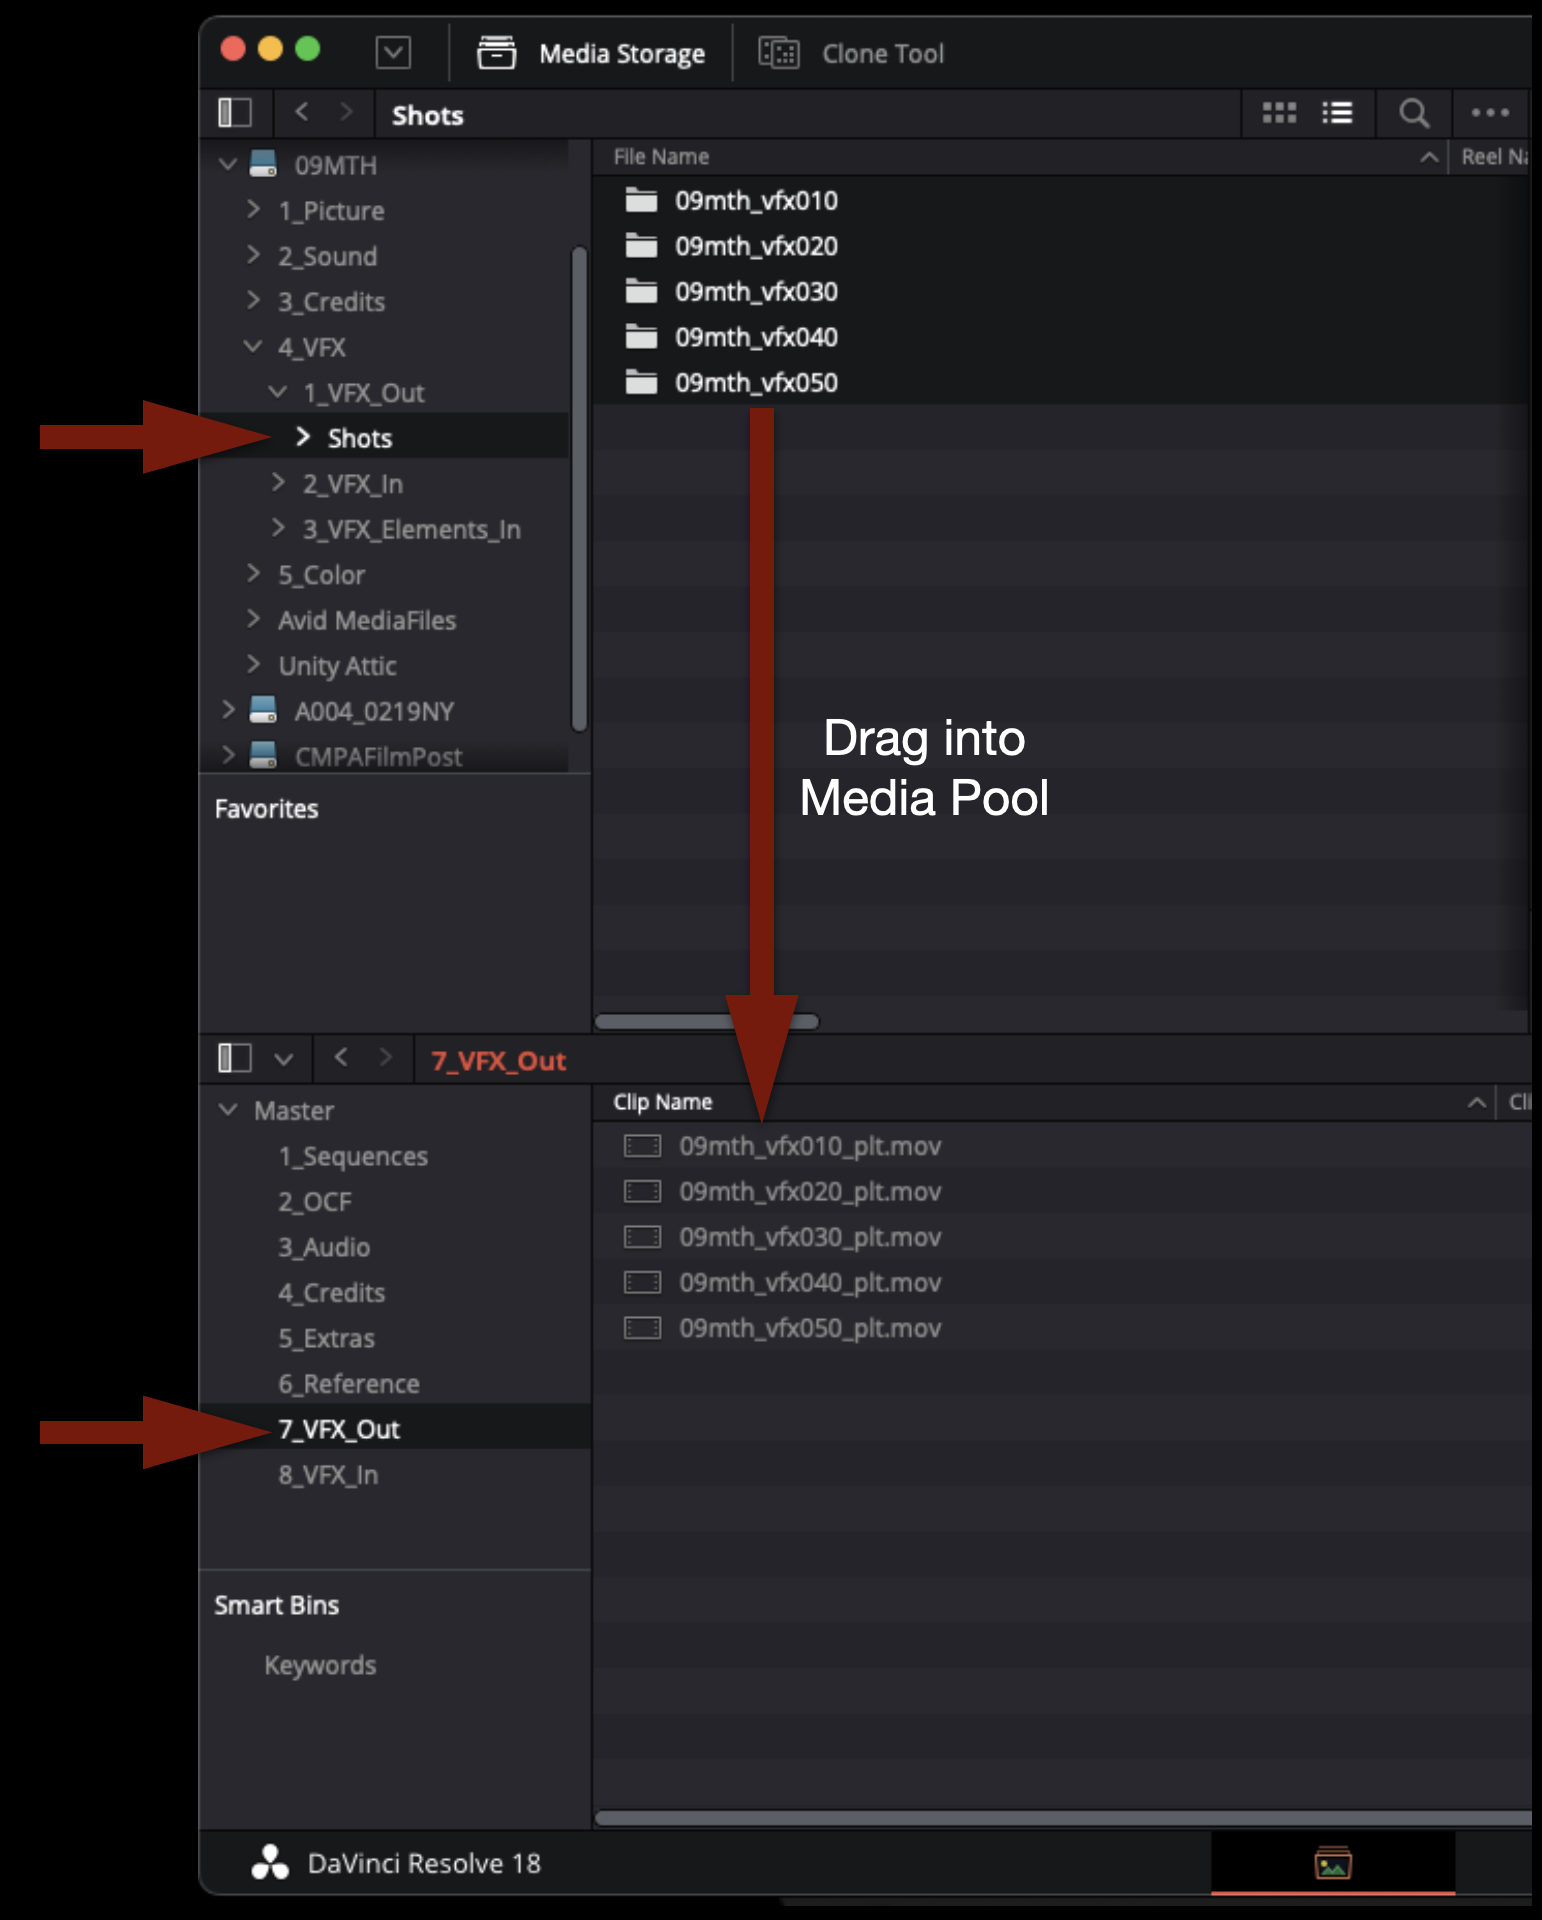
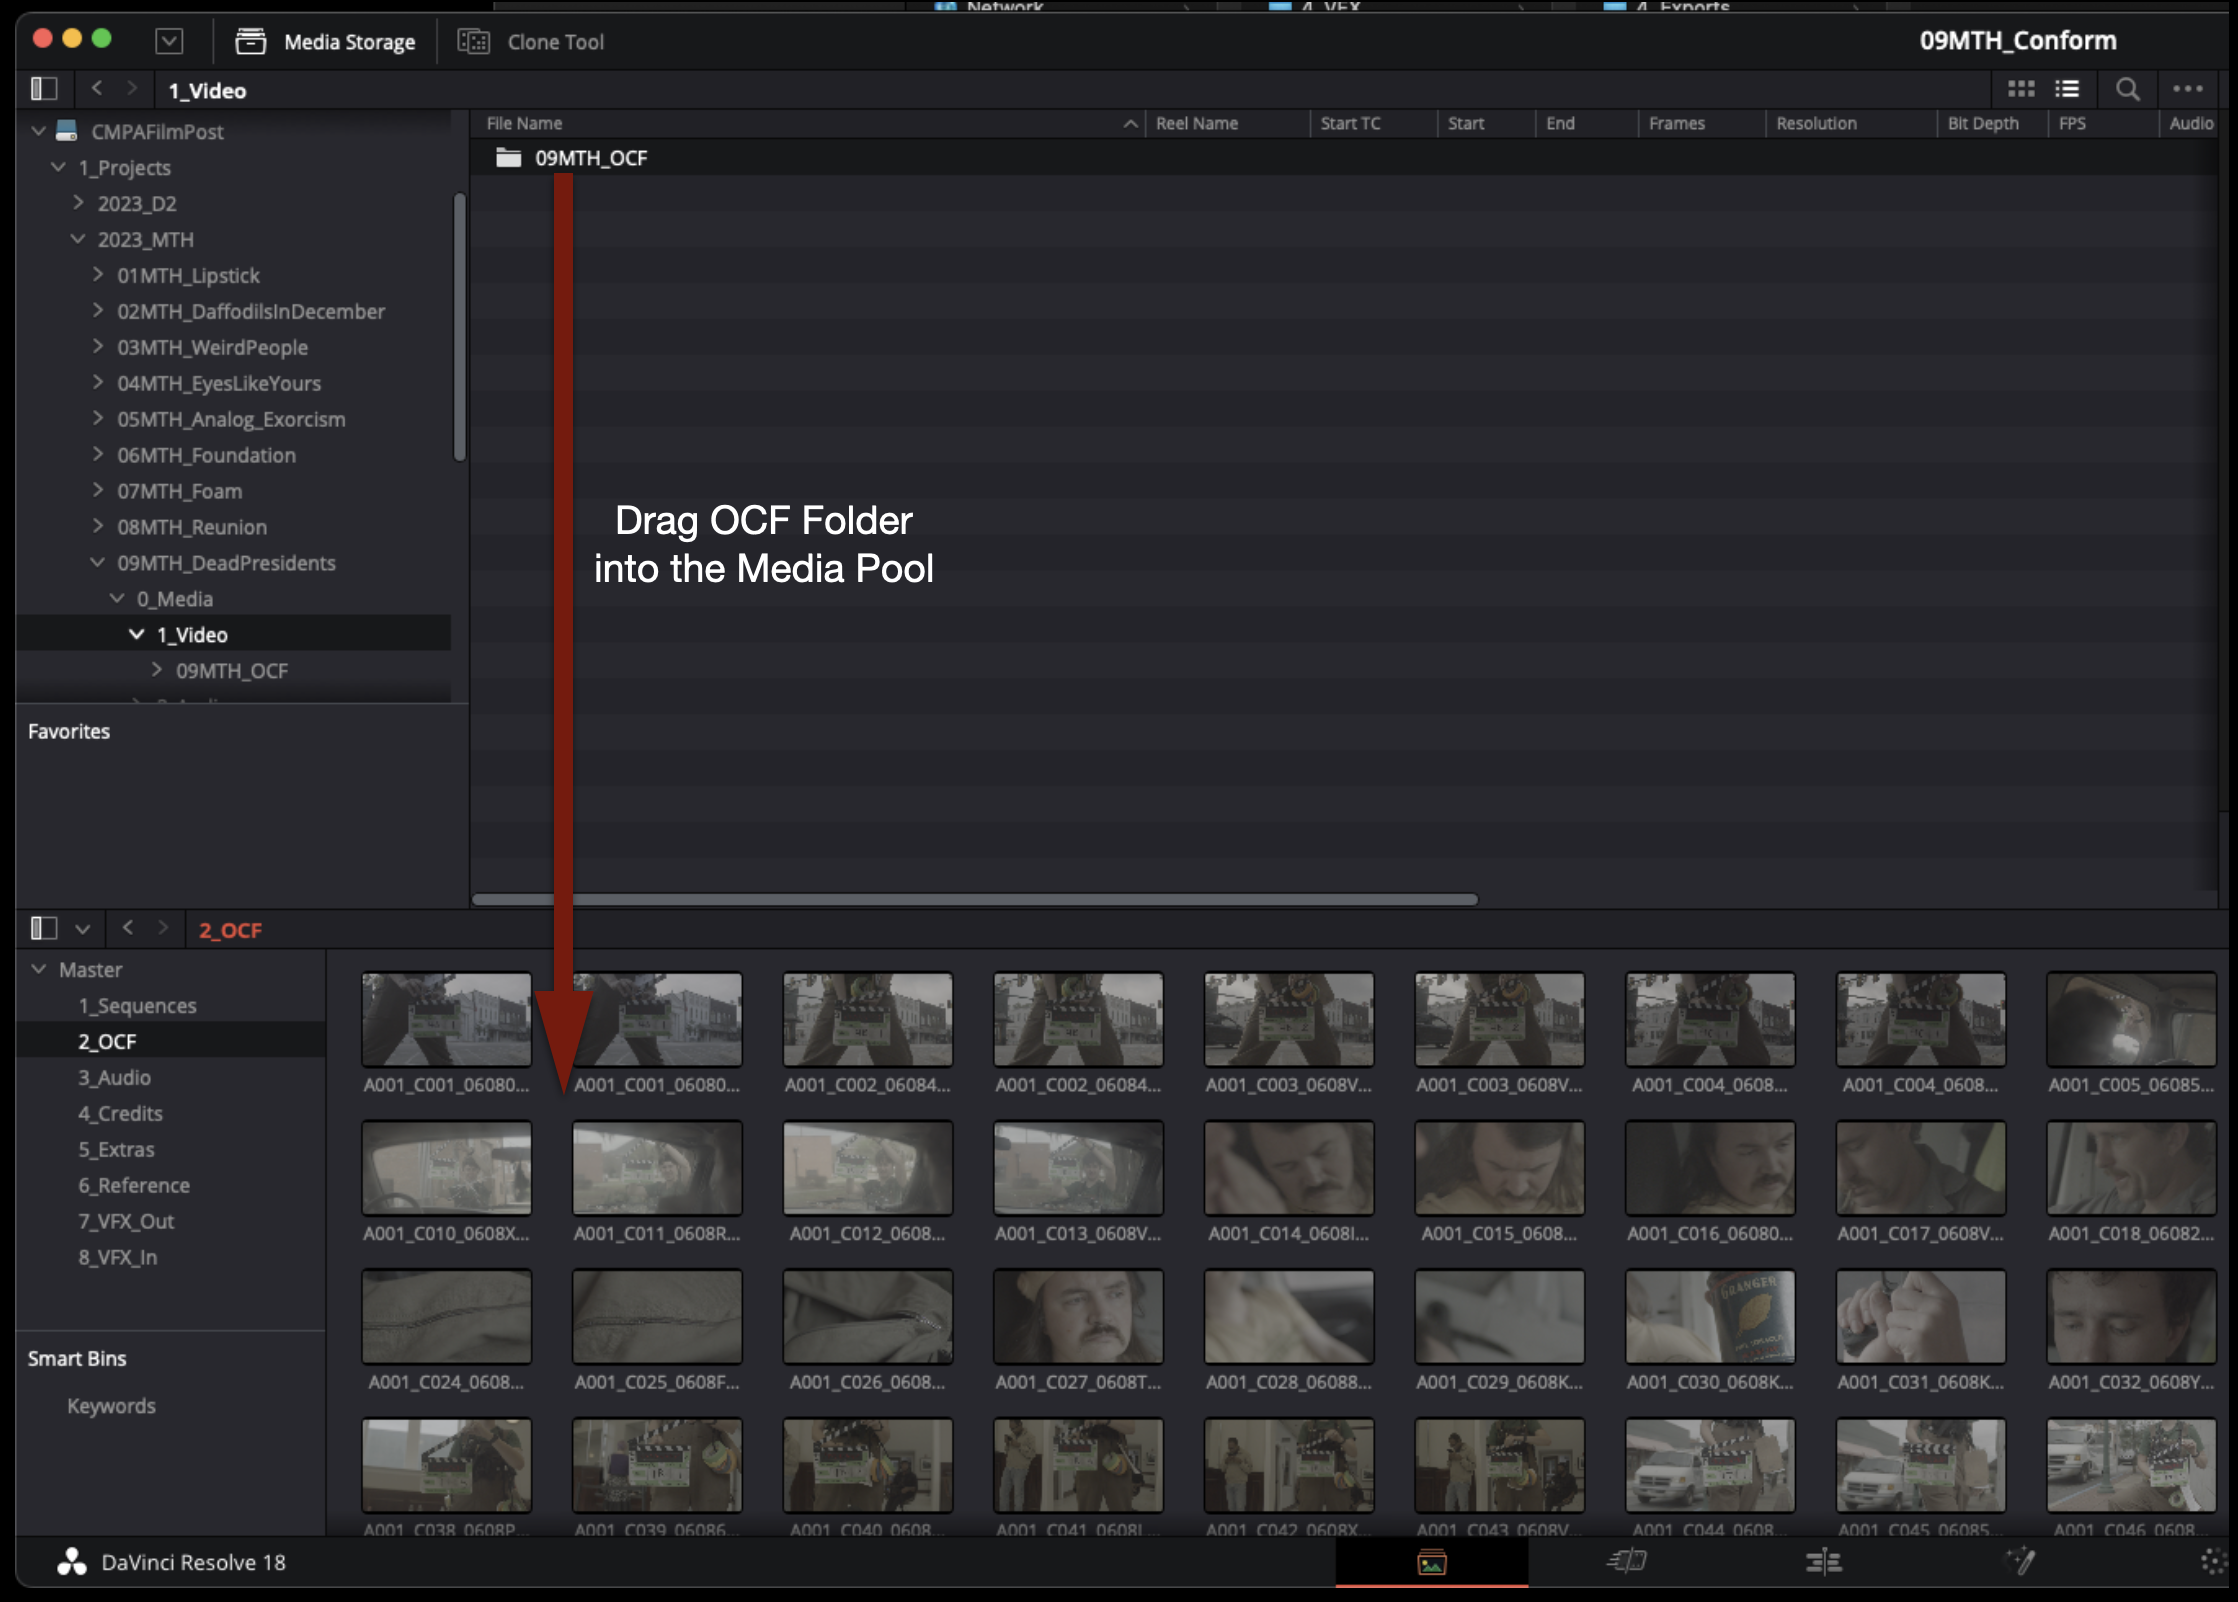
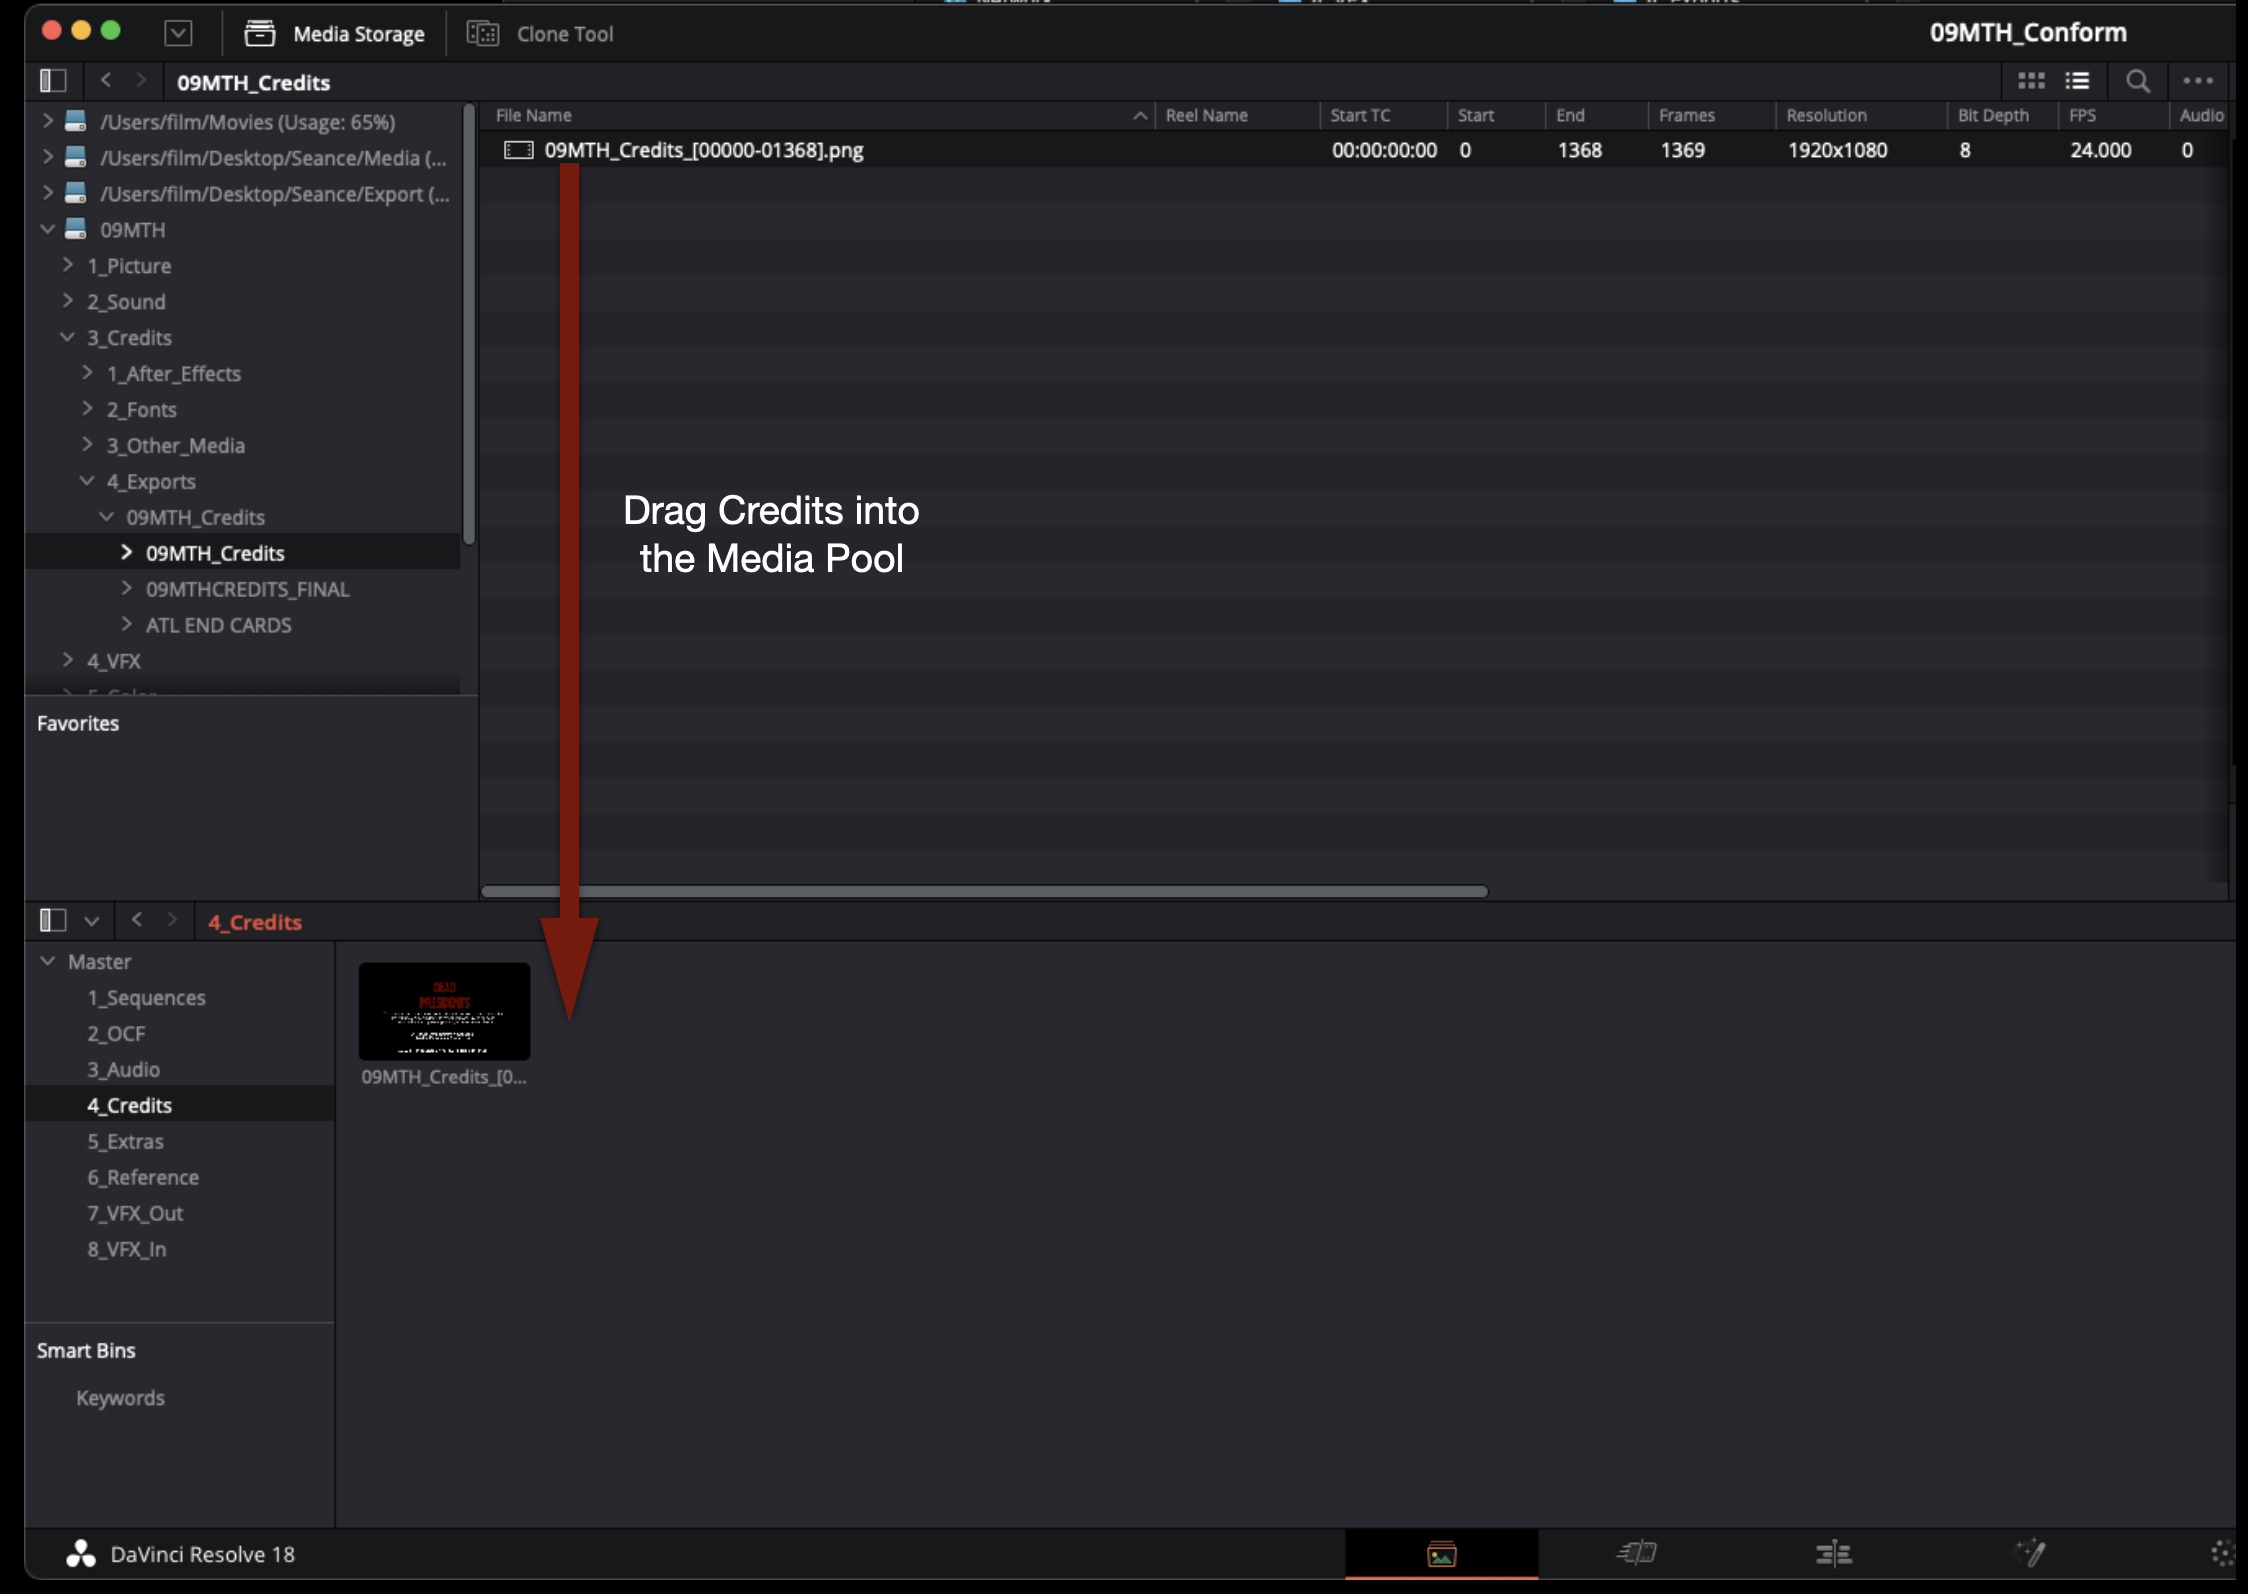
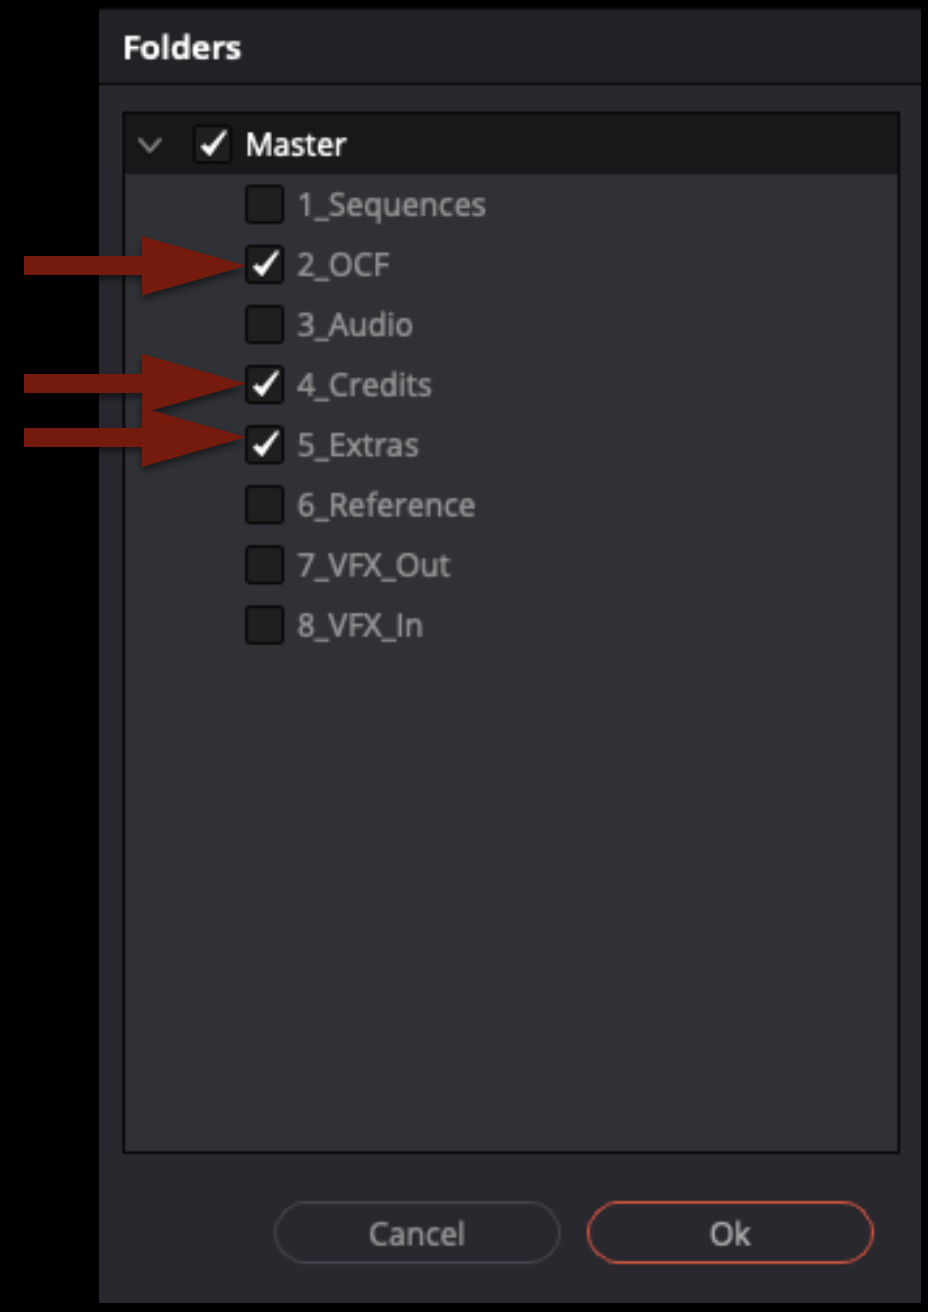
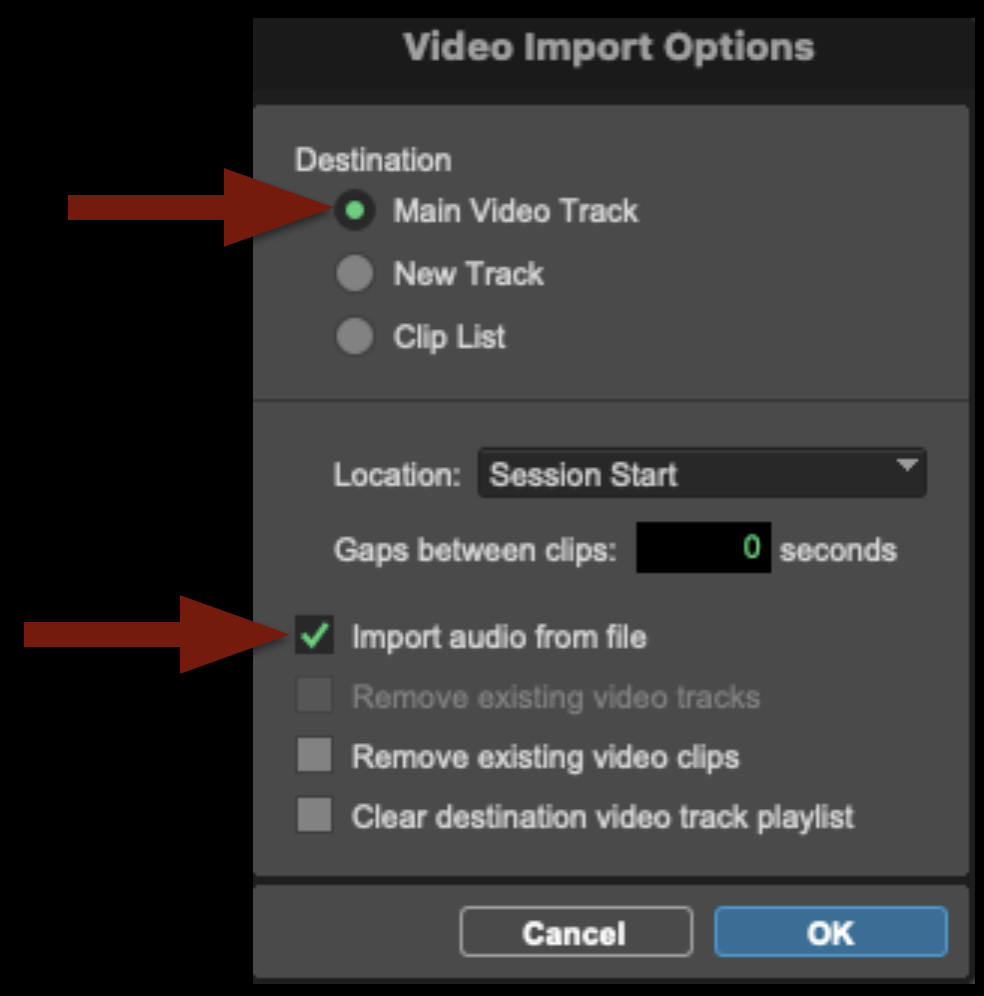
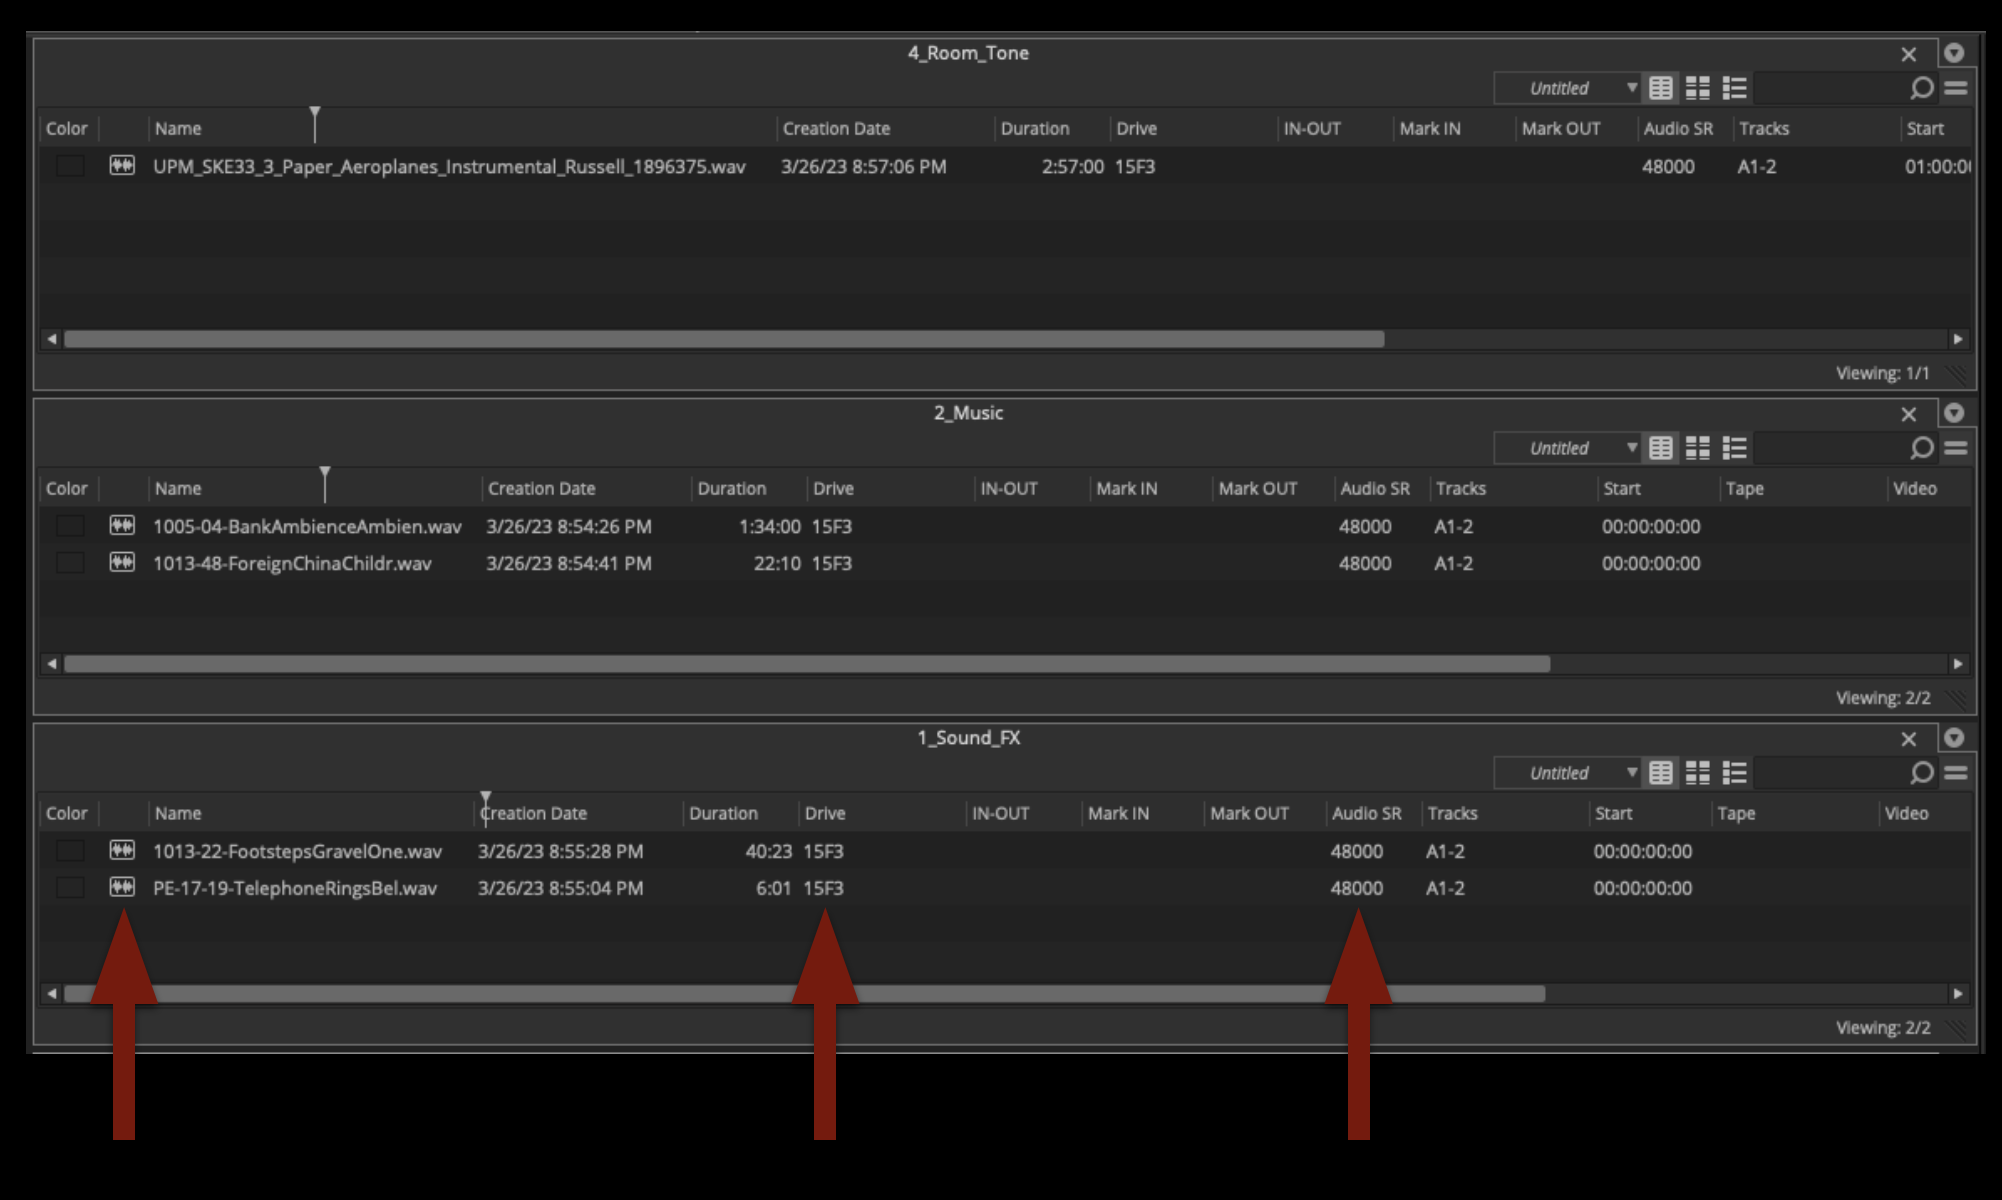
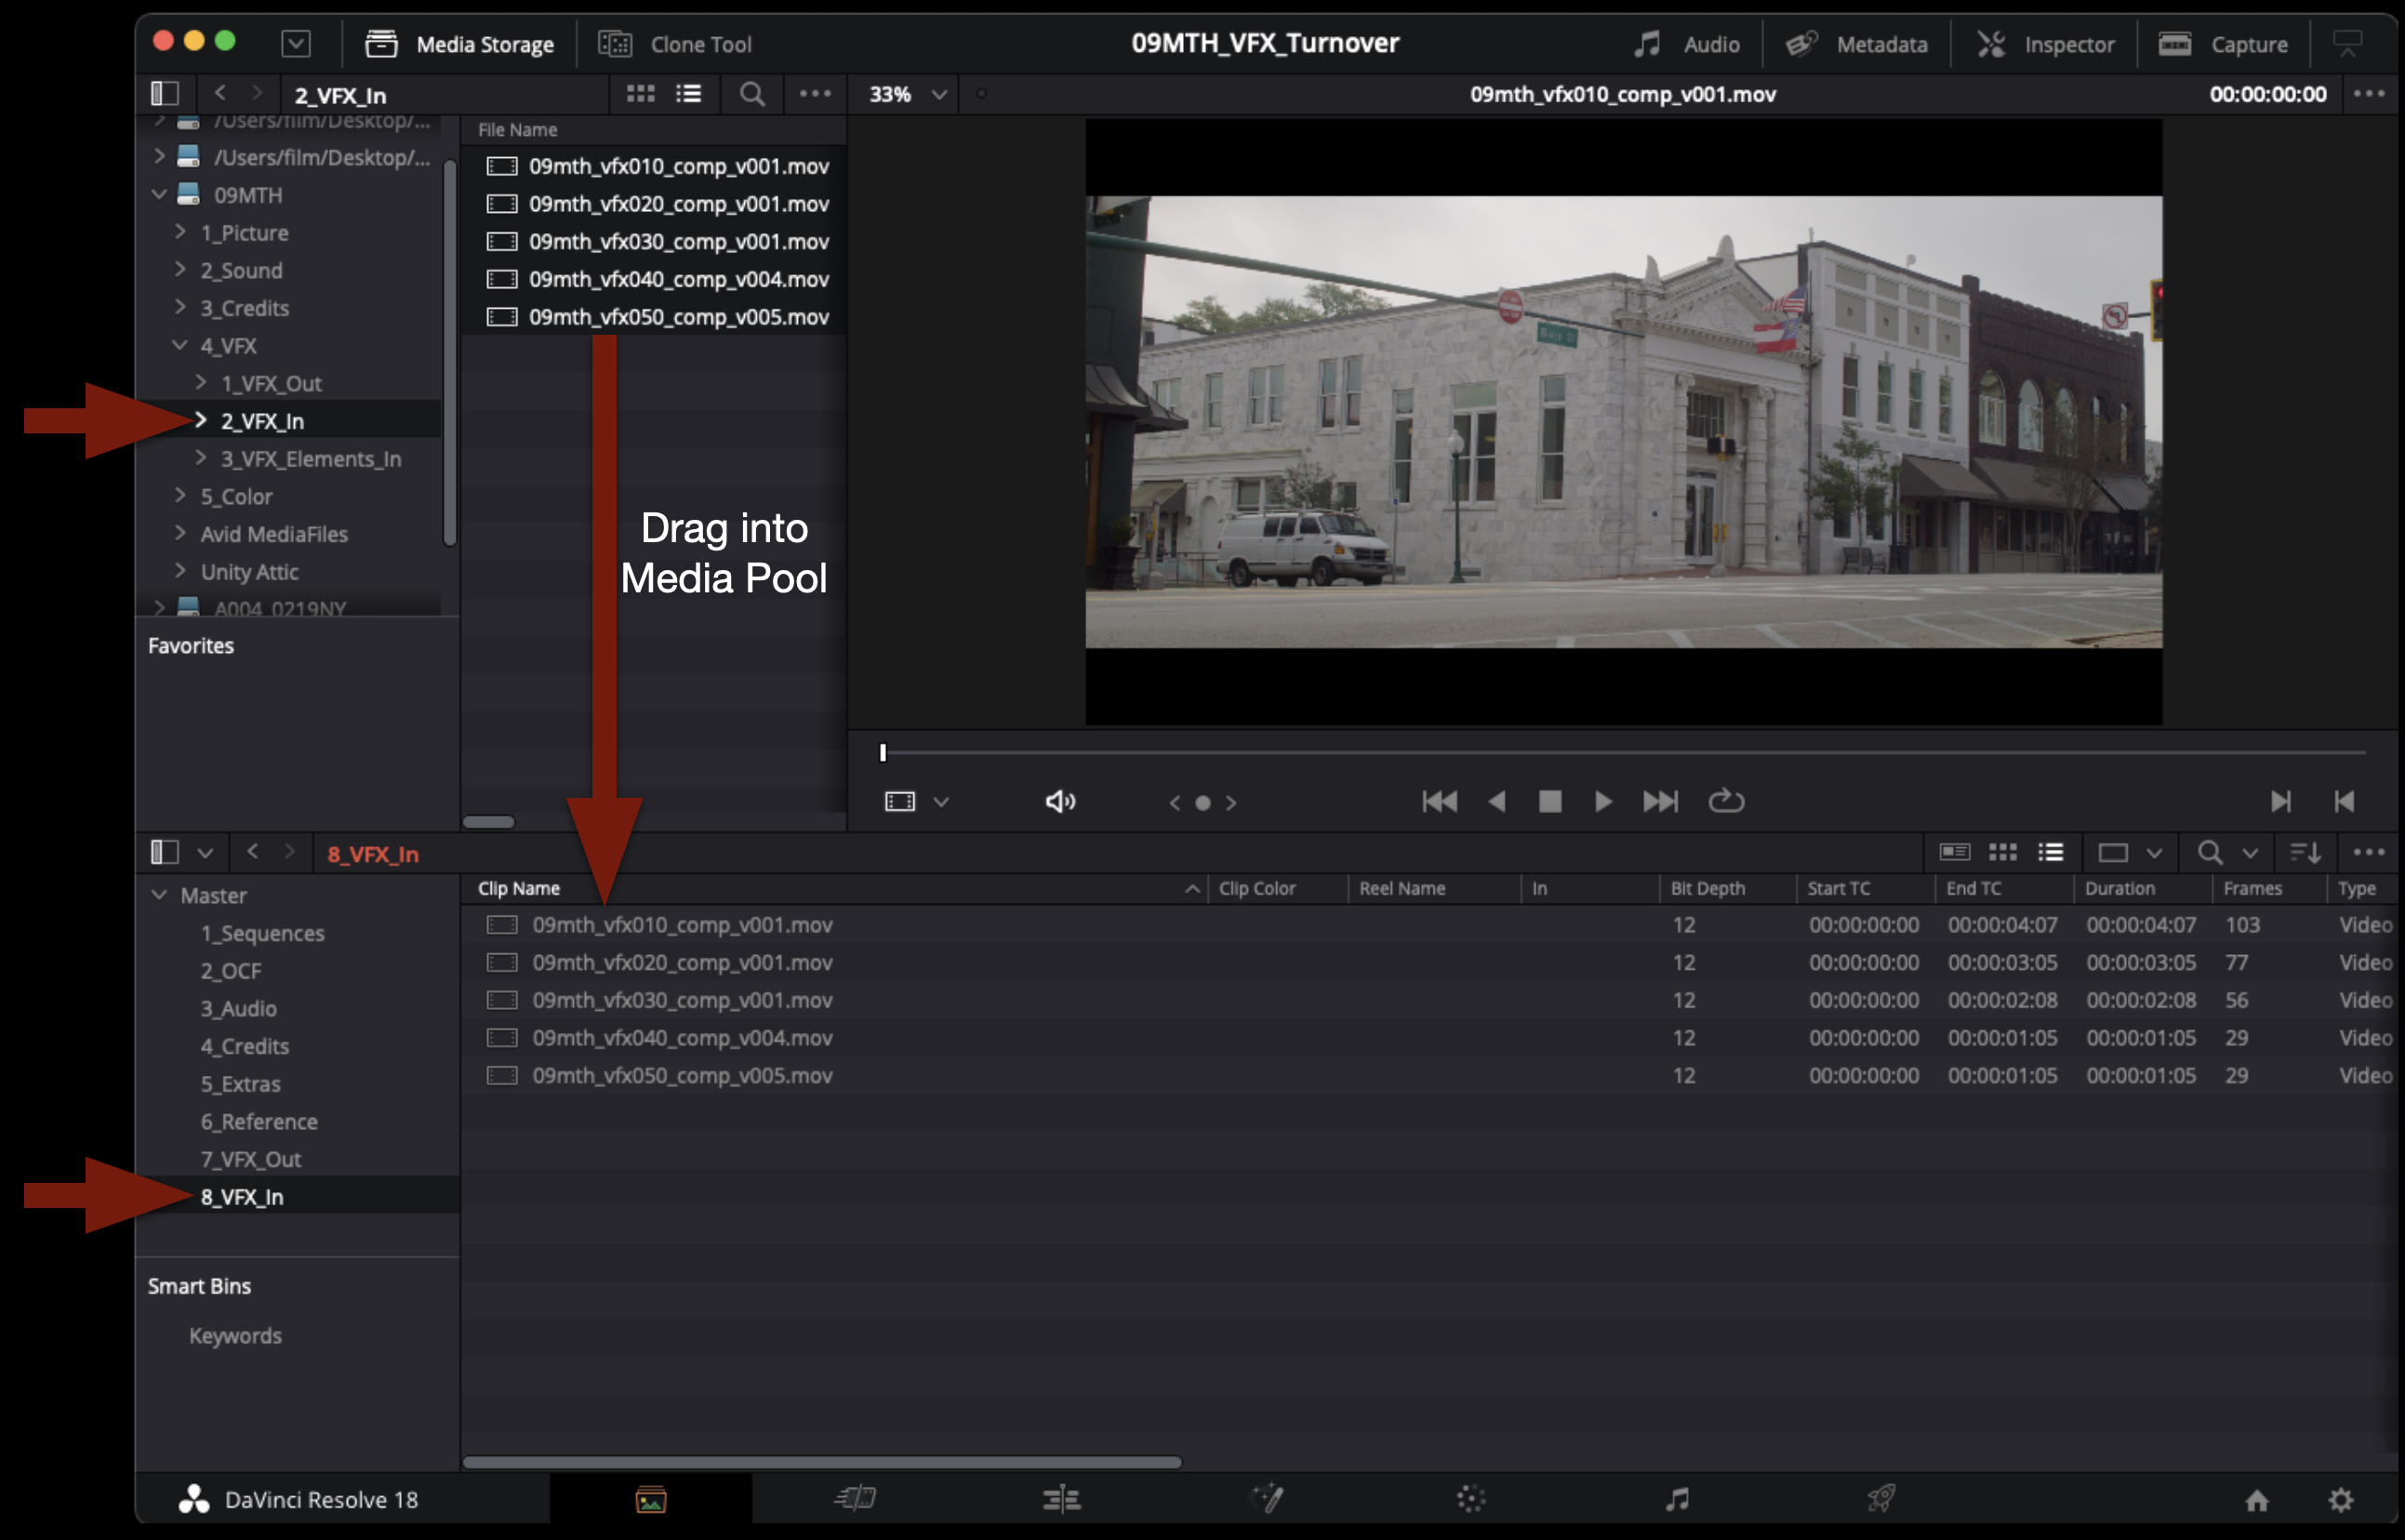
In the Media page, navigate through your media storage to your VFX shots and drag them into the Media Pool to import them.
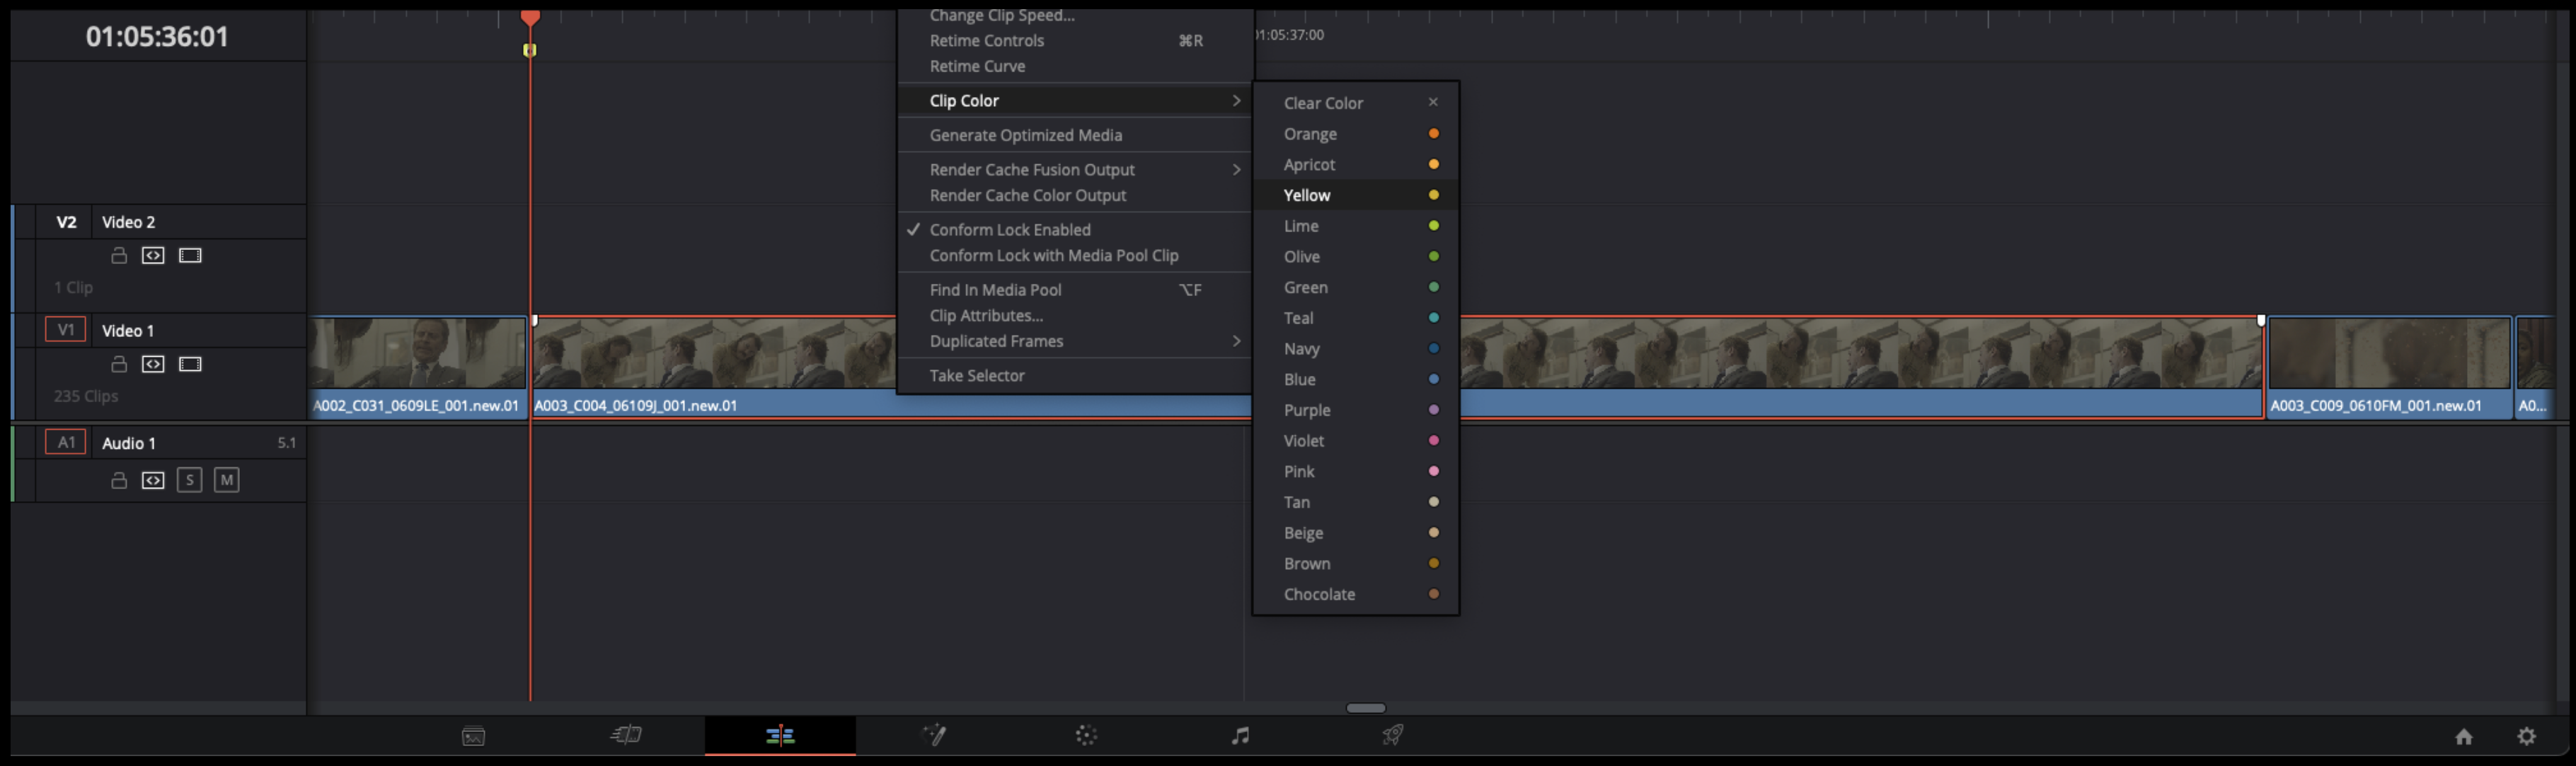
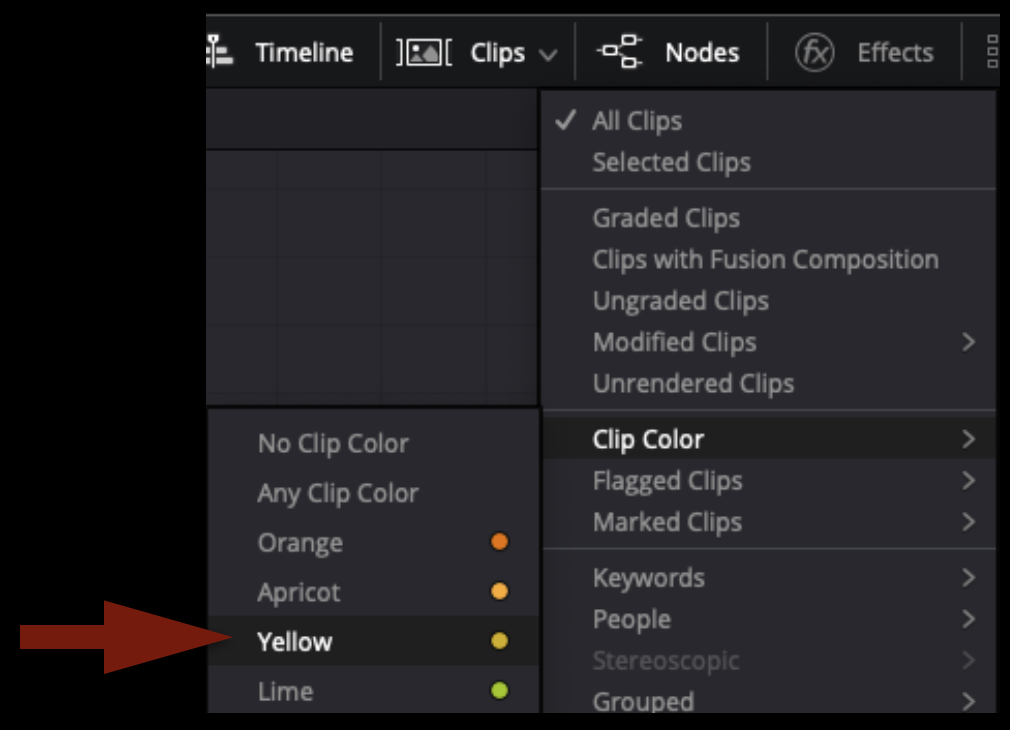
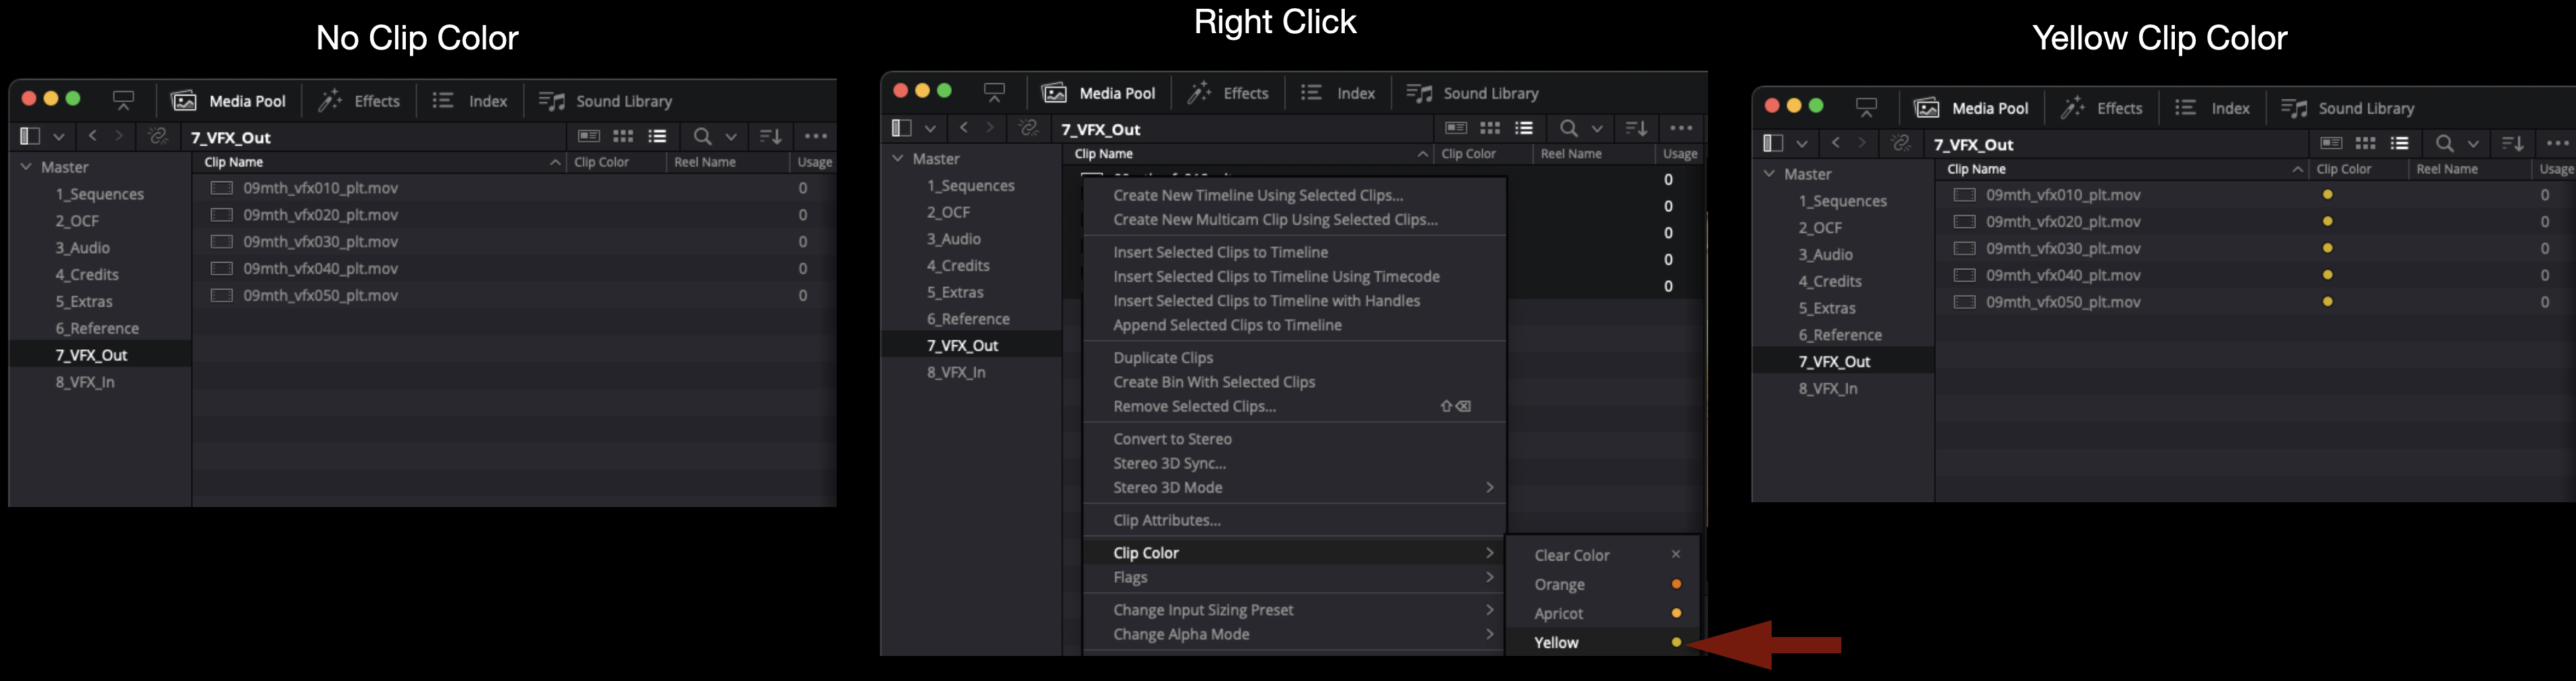
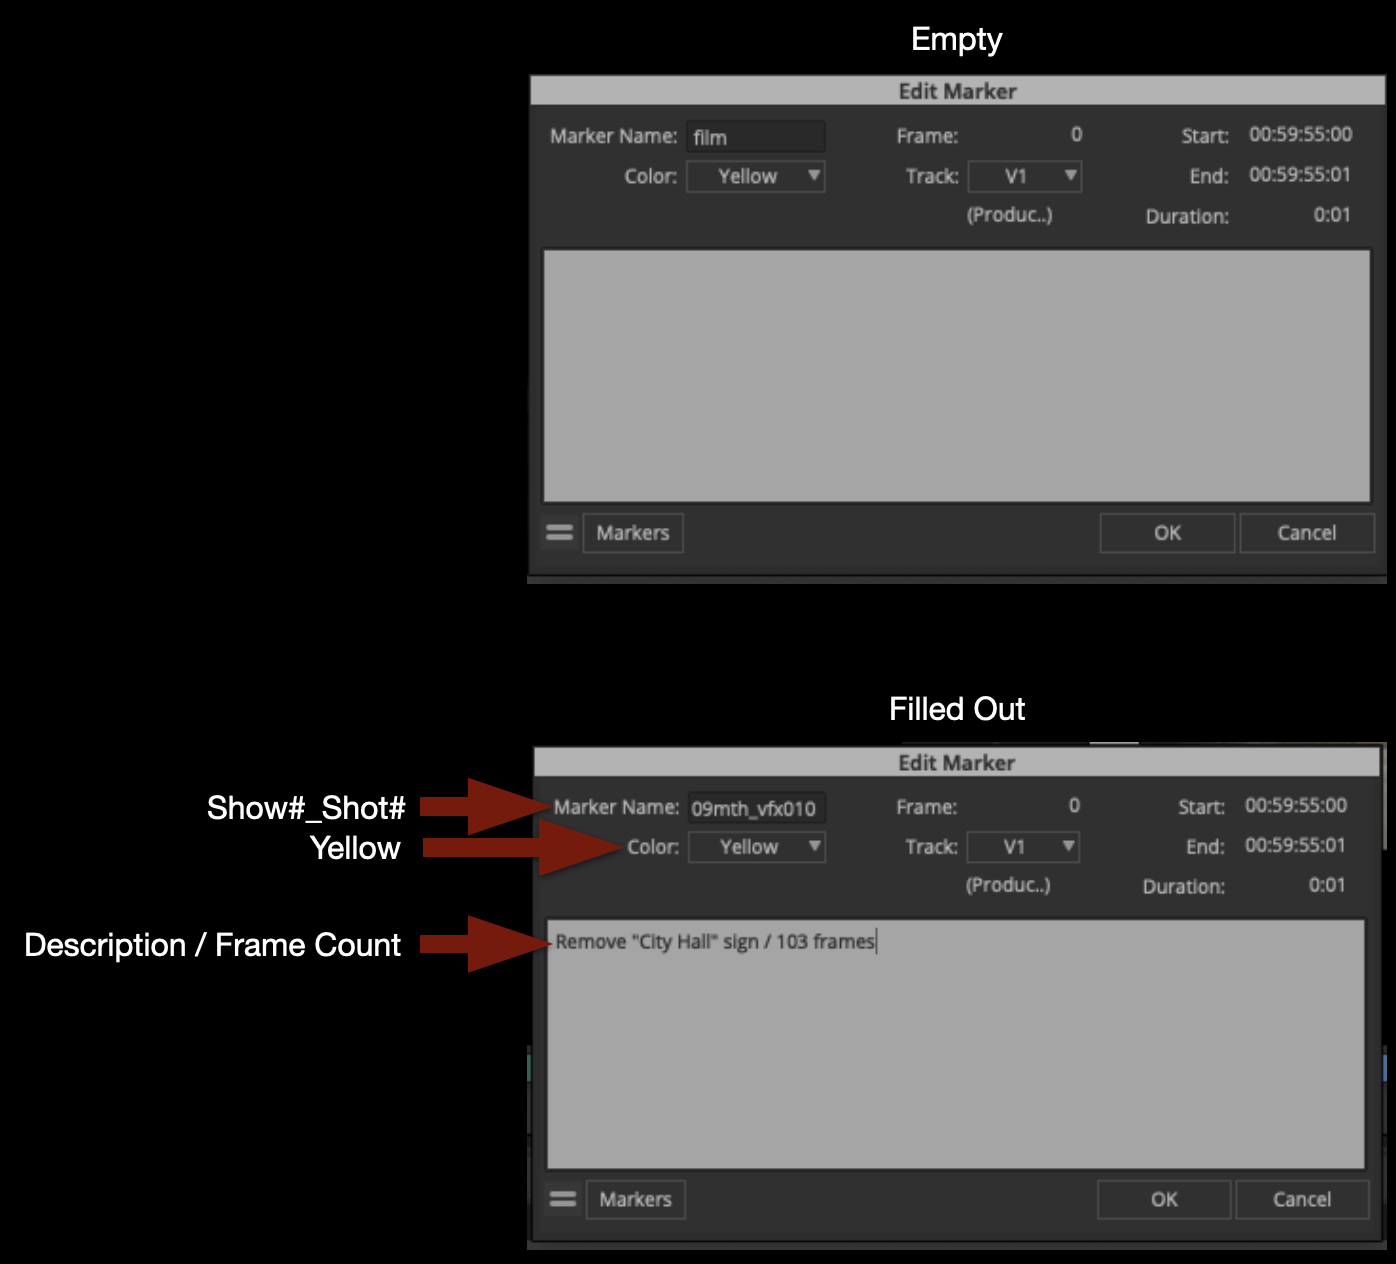
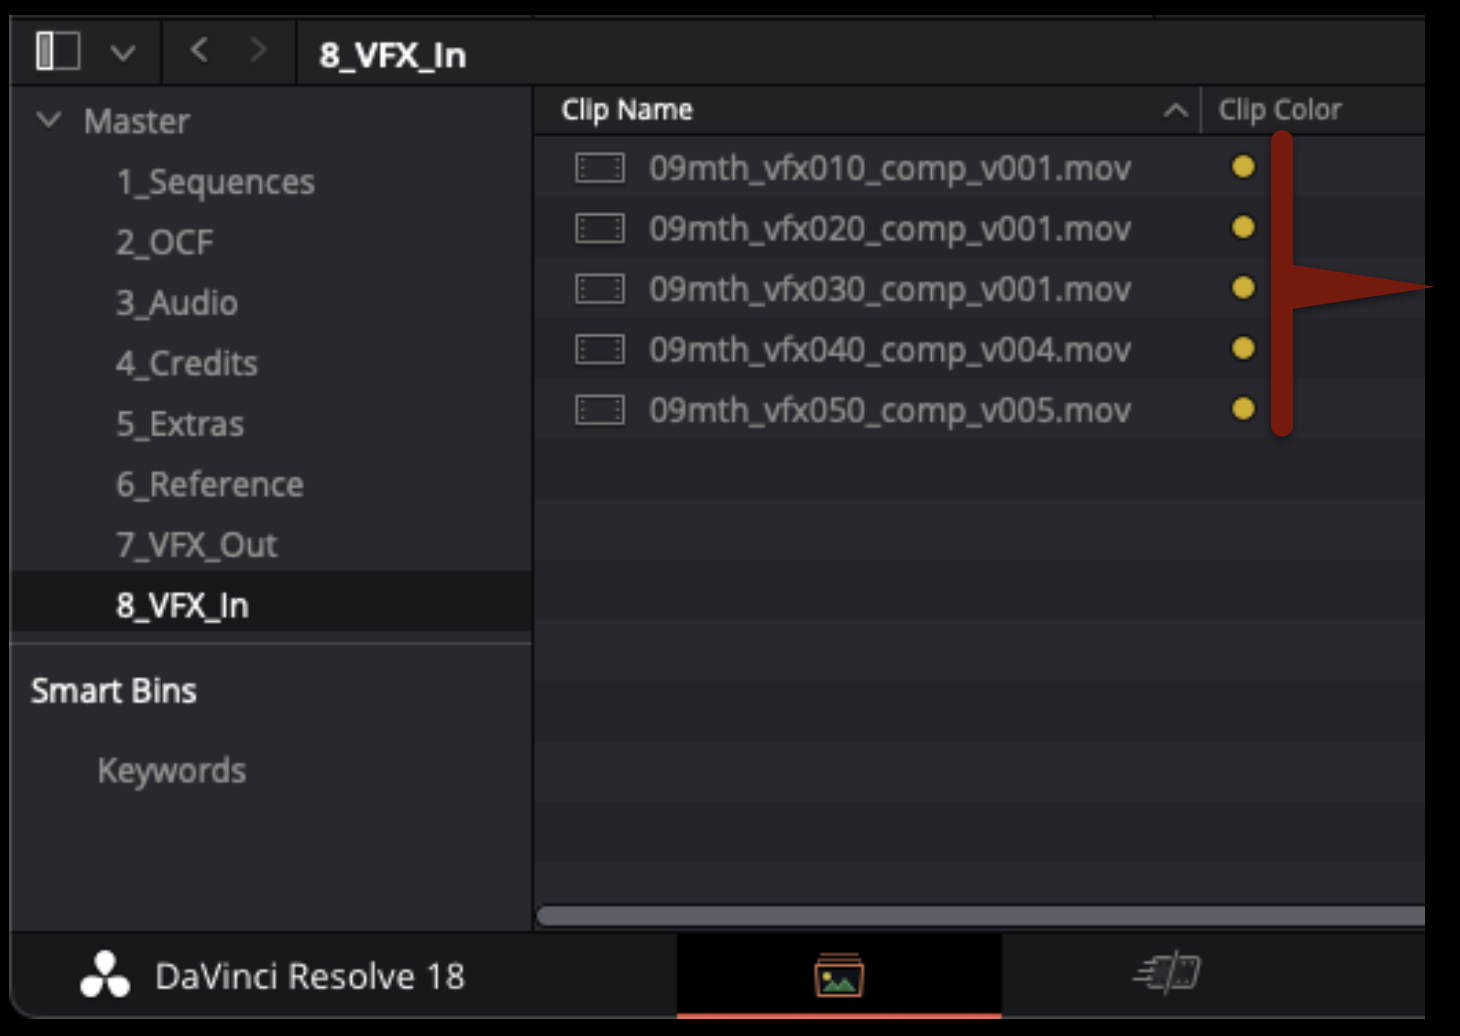
To denote that they are VFX shots, these clips should be changed inside of Resolve so that the clip color is yellow. In the Media Pool, you can highlight them all, right-click, and select clip color.
Check that the VFX shots have been delivered to the correct specifications. They should be 1920×1080 AppleProRes4444 QuickTimes at 24fps with no sound channels.
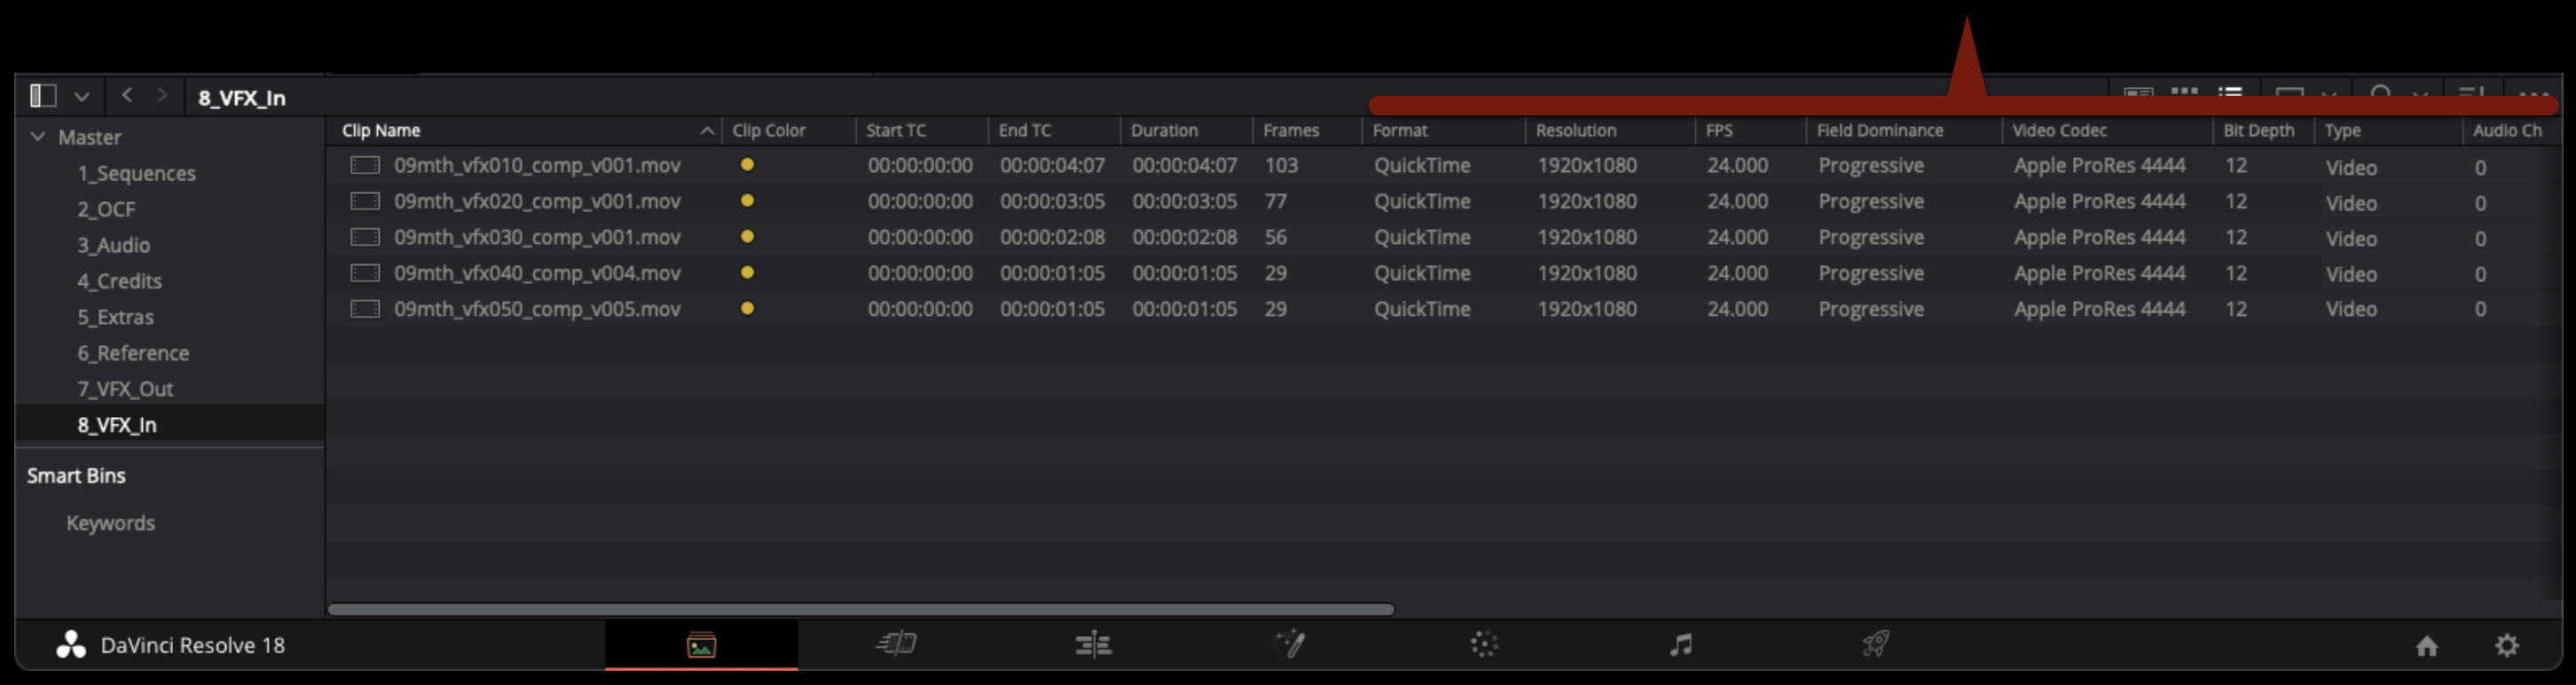
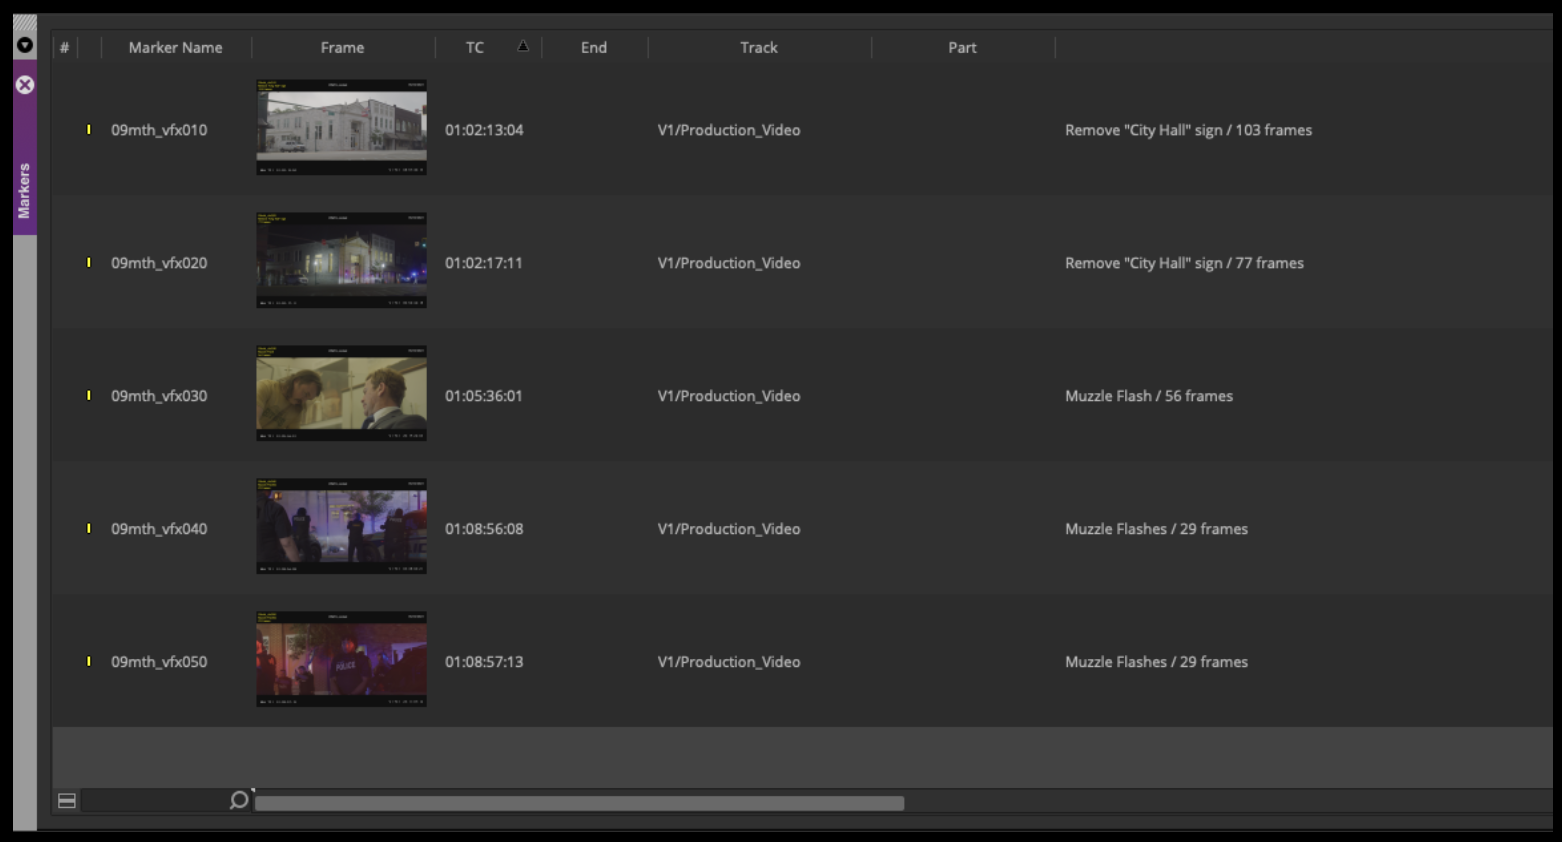
Also check the frame counts of each shot against the the VFX Turnover Sheet to make sure they match.
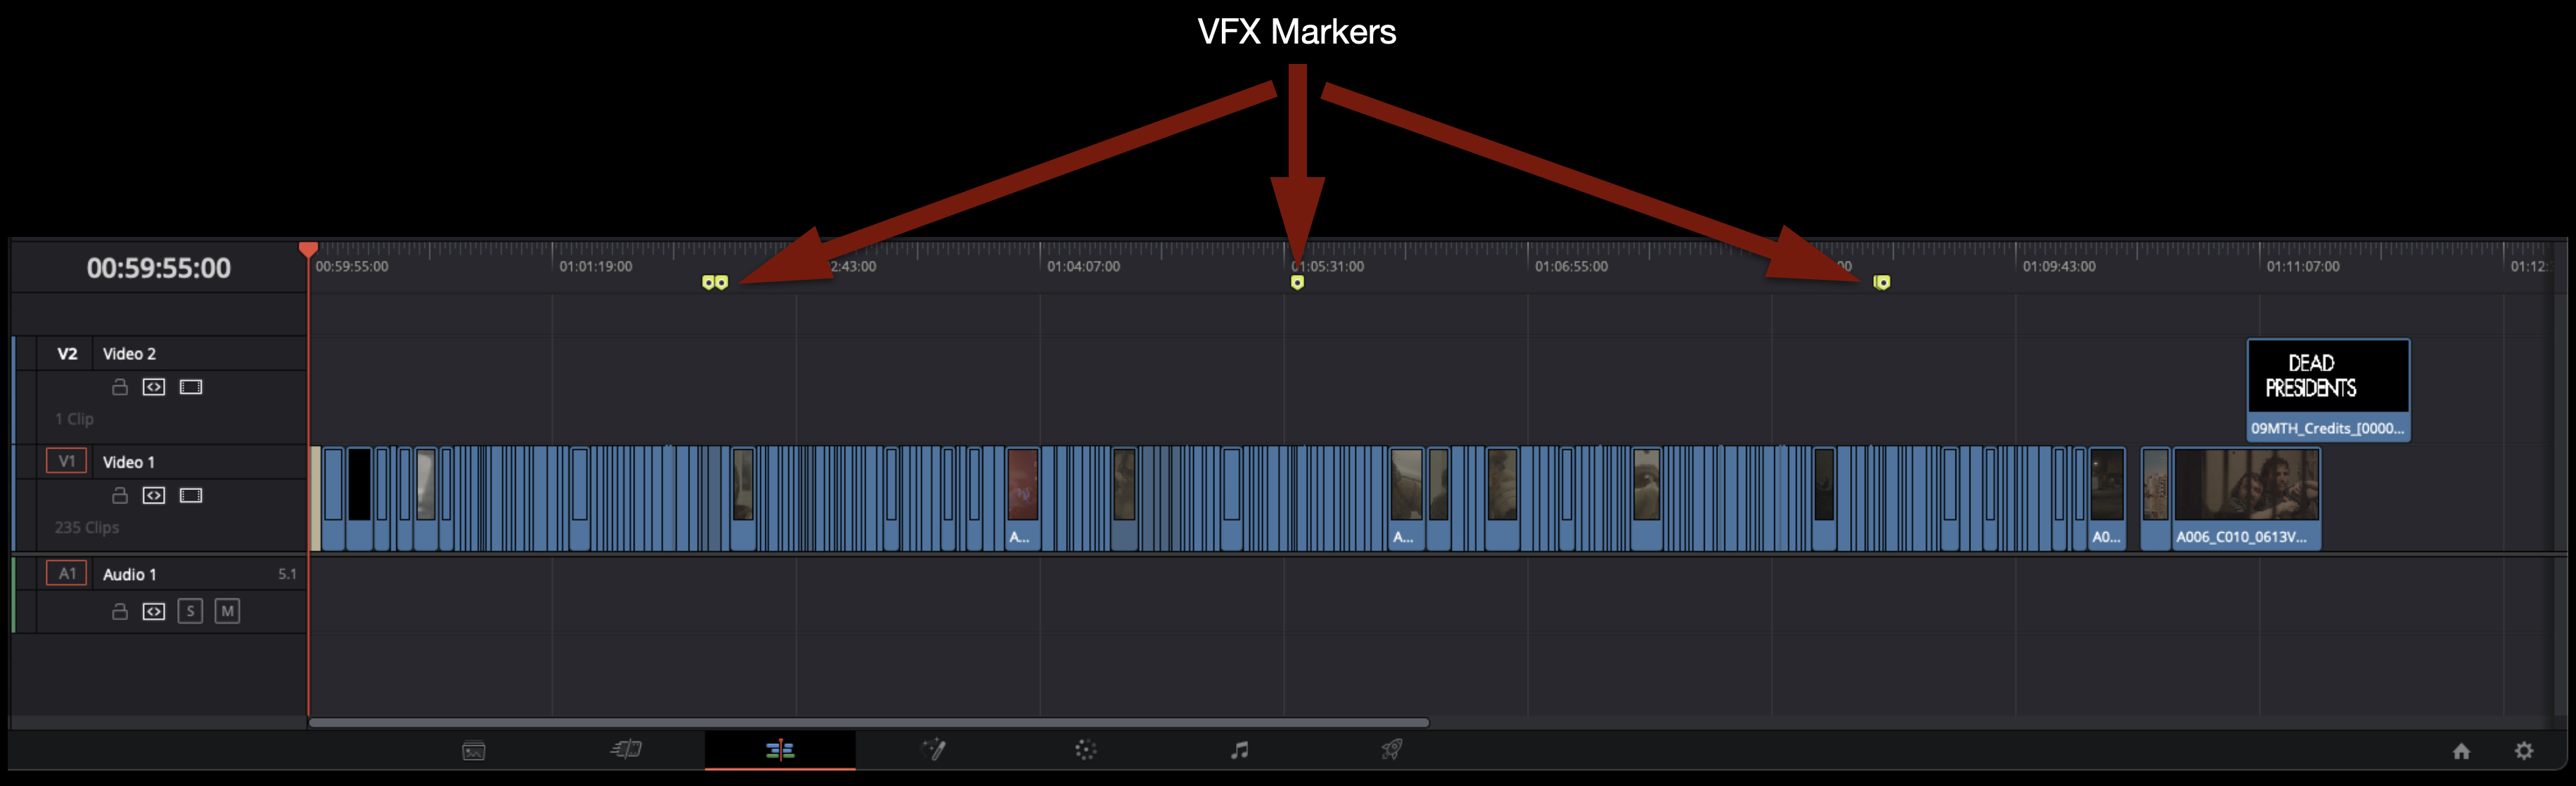
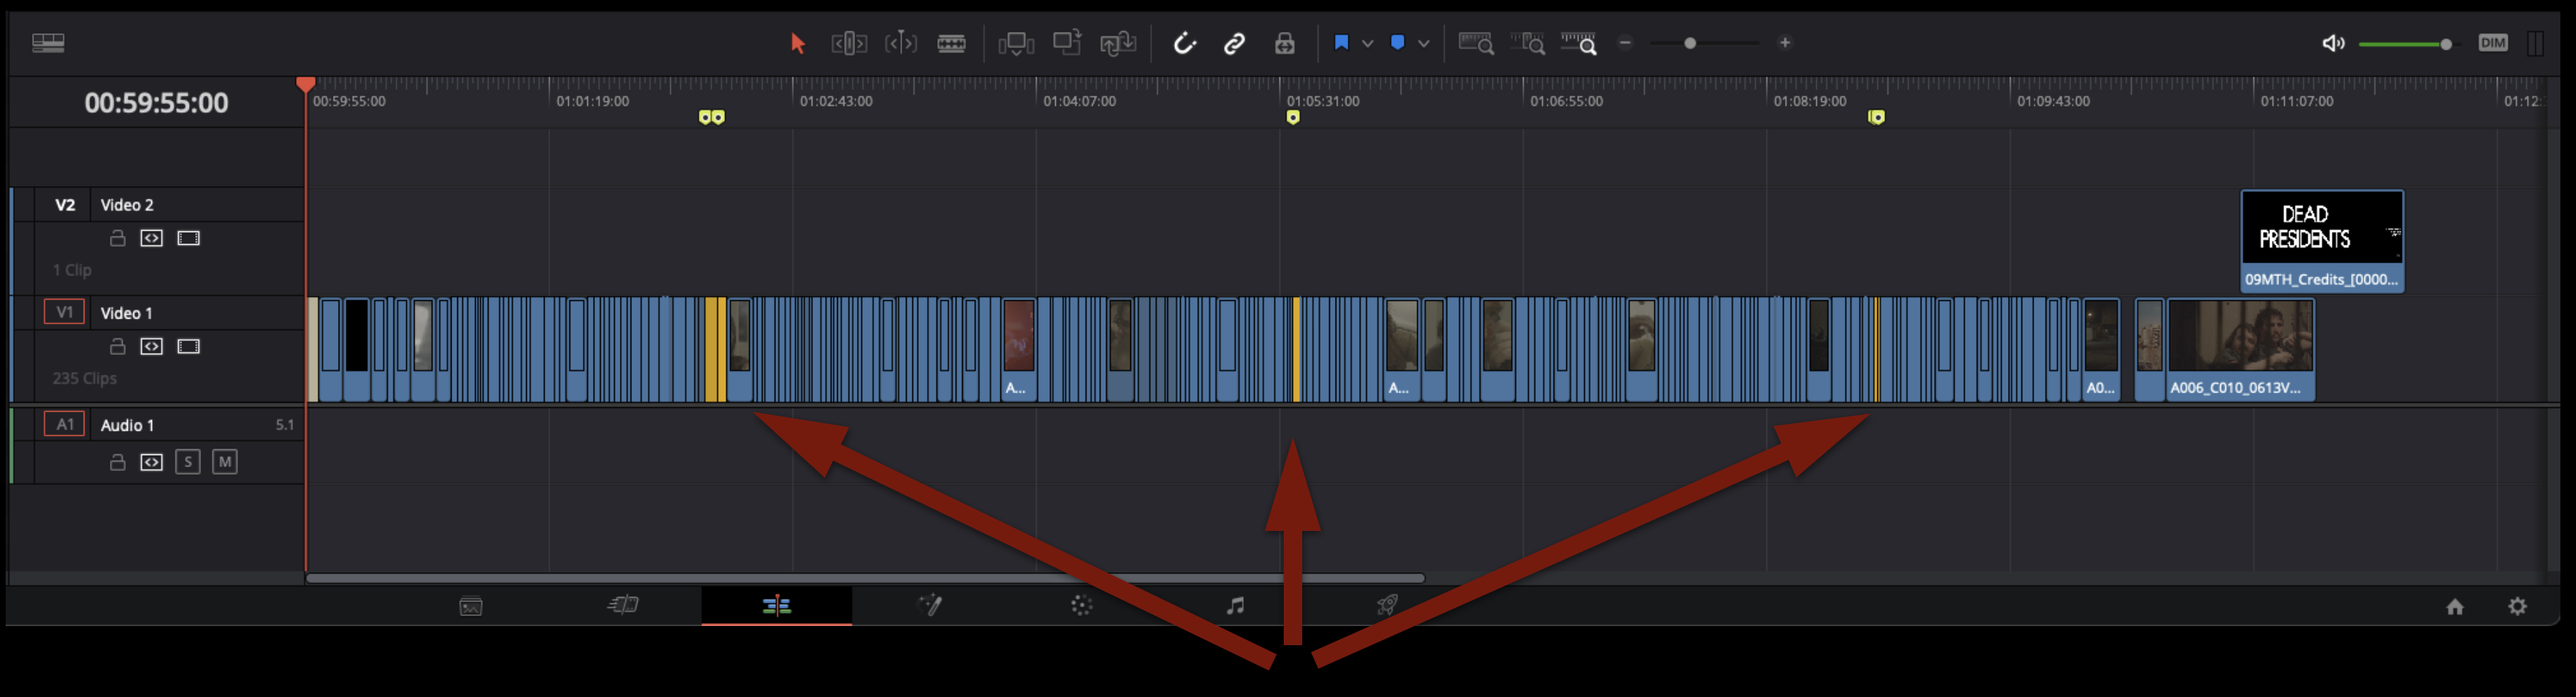
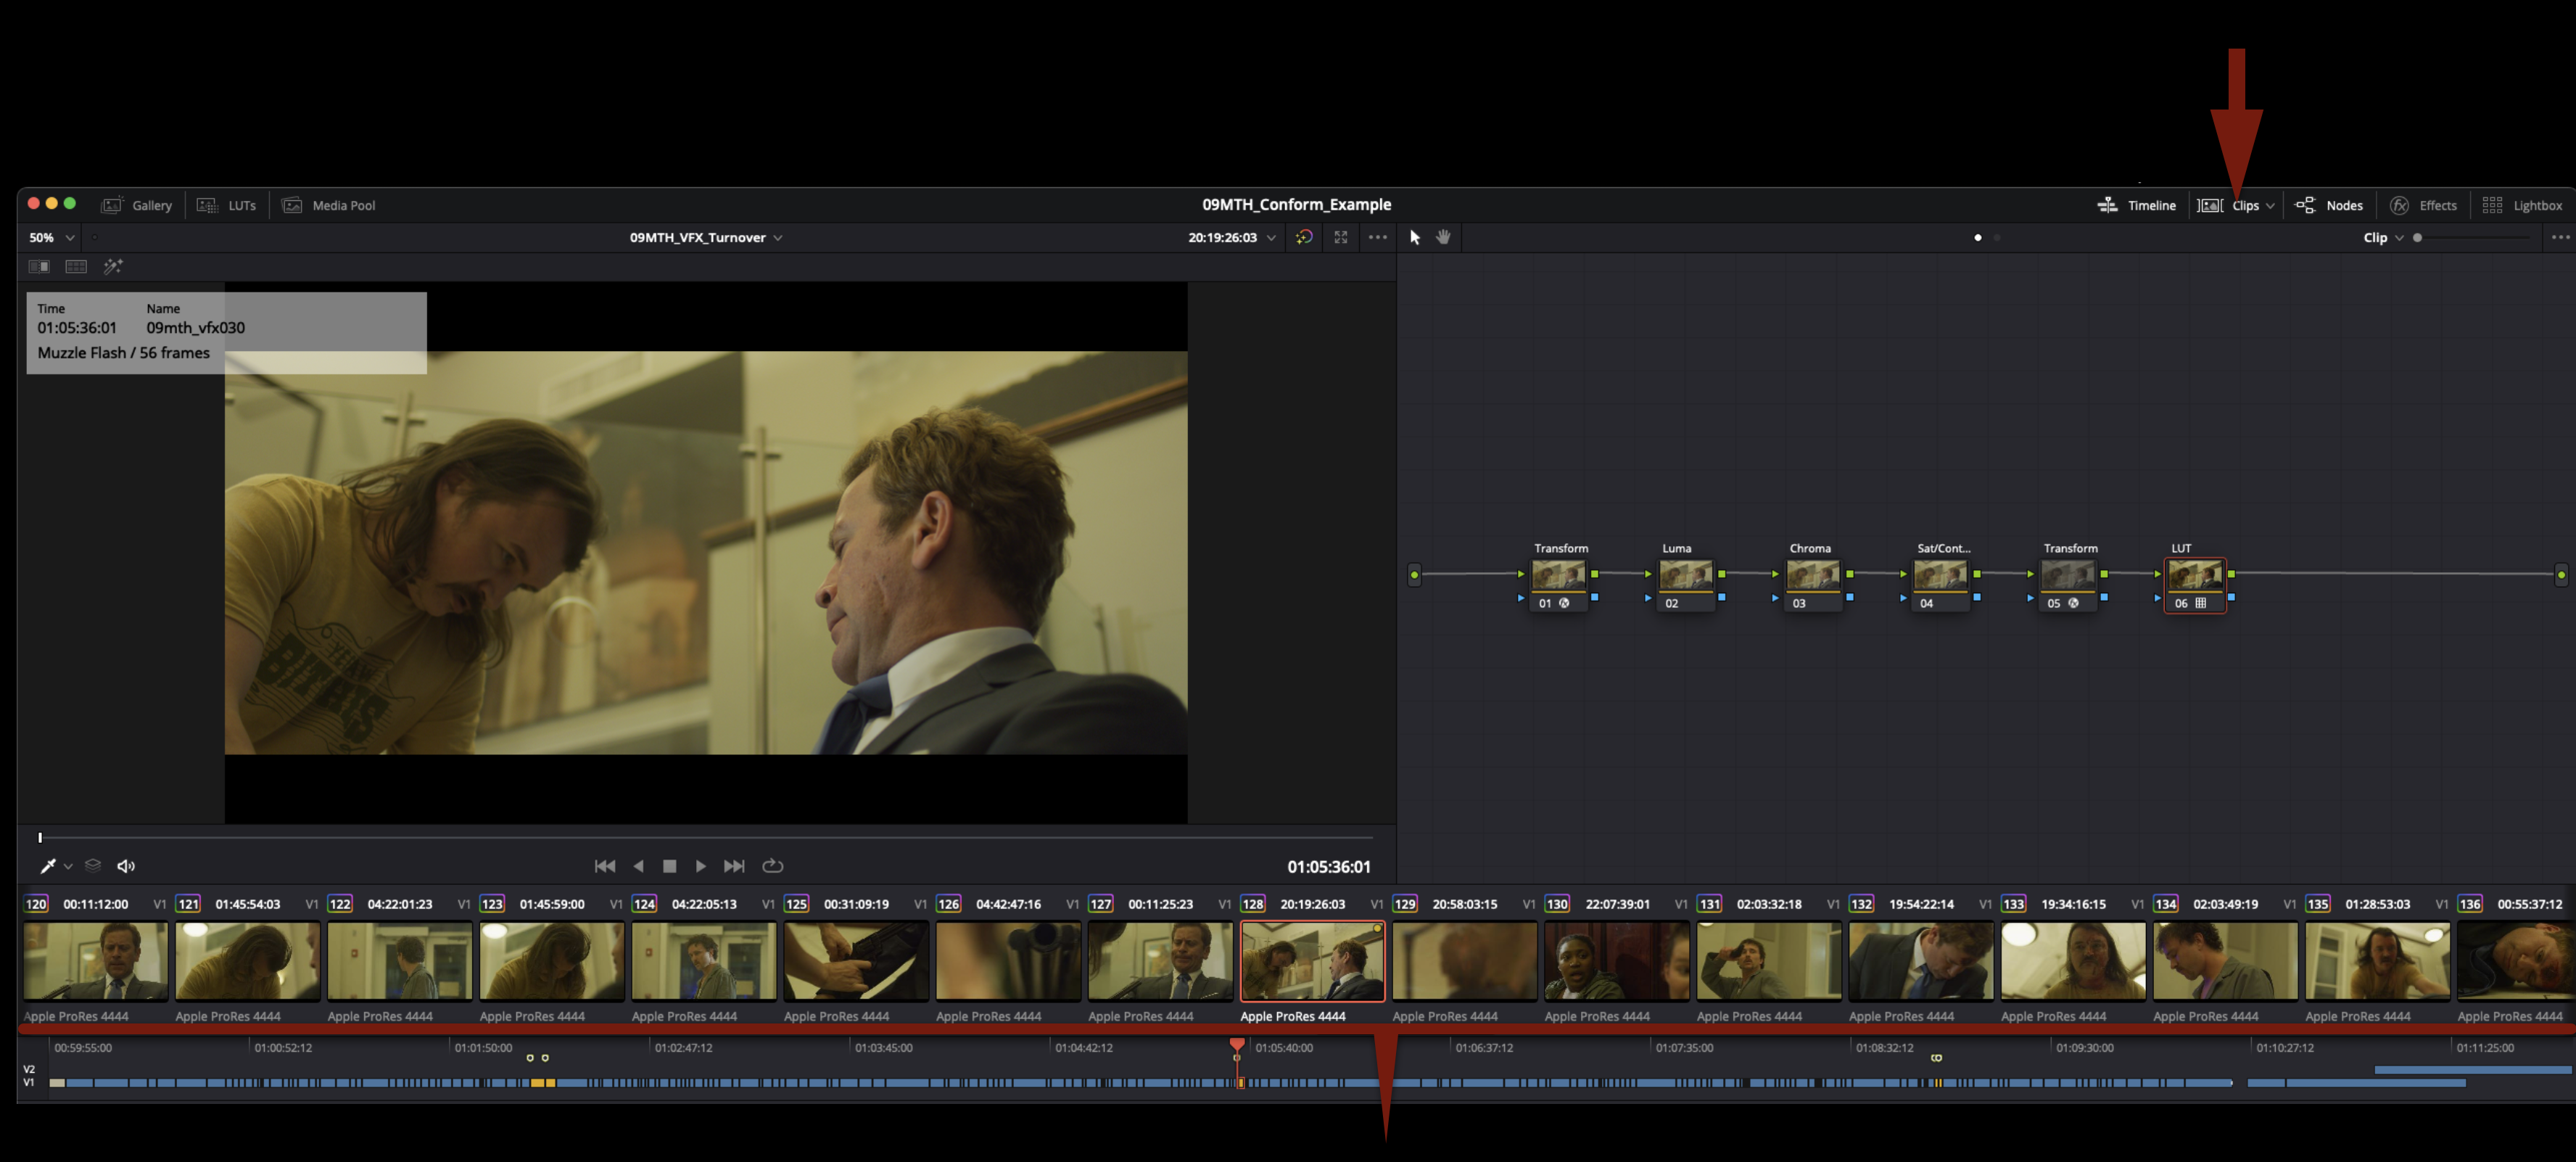
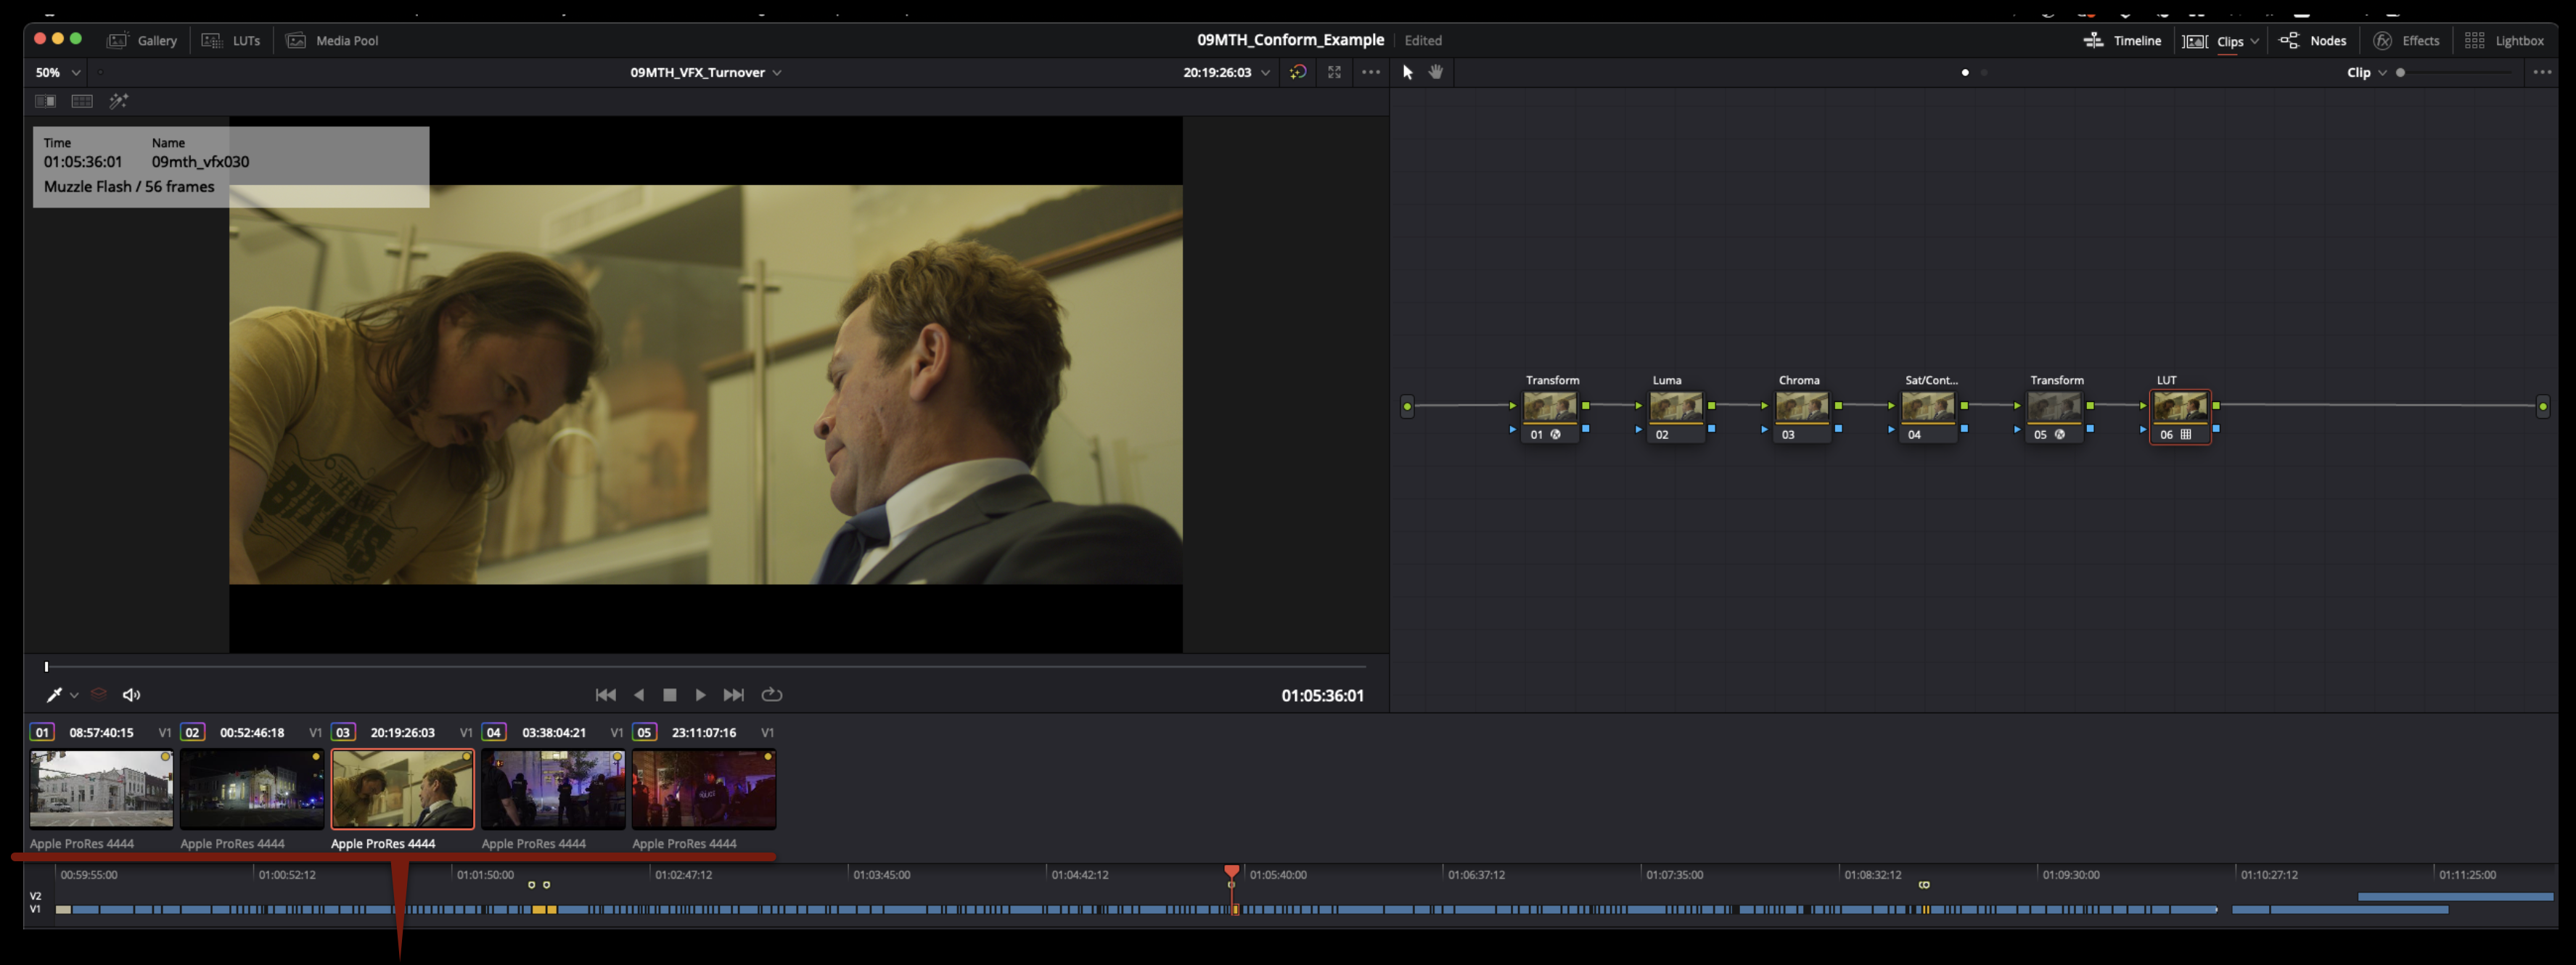
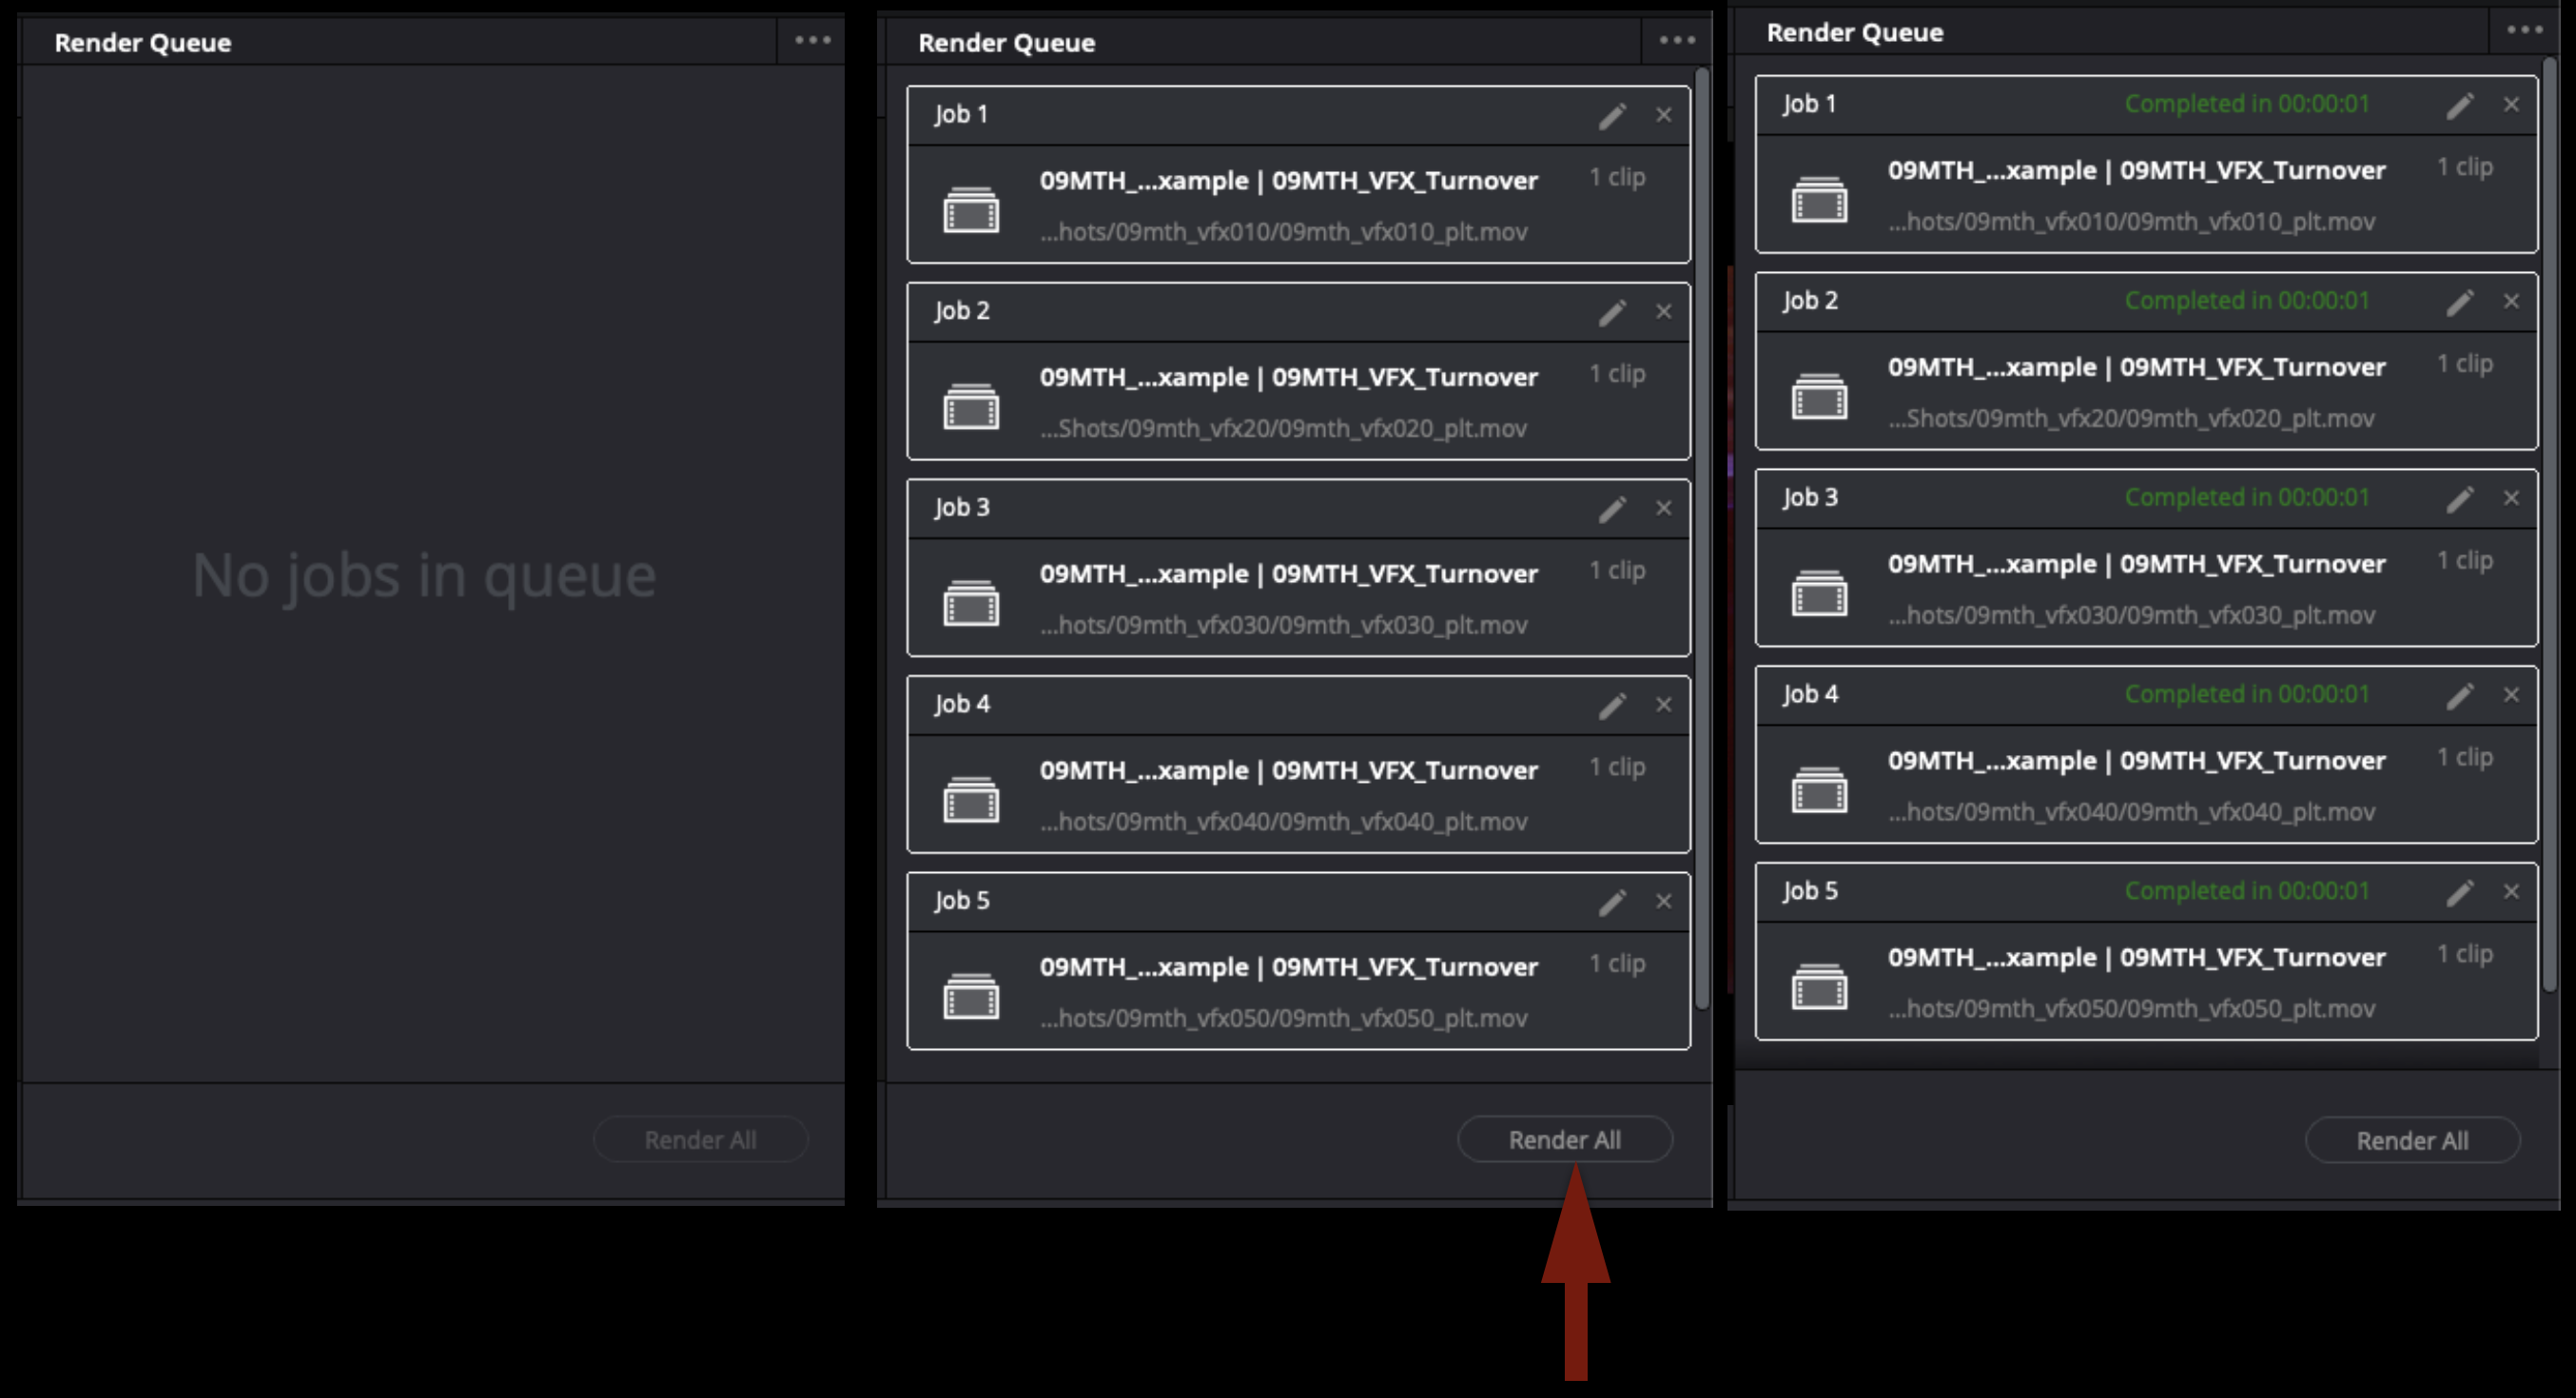
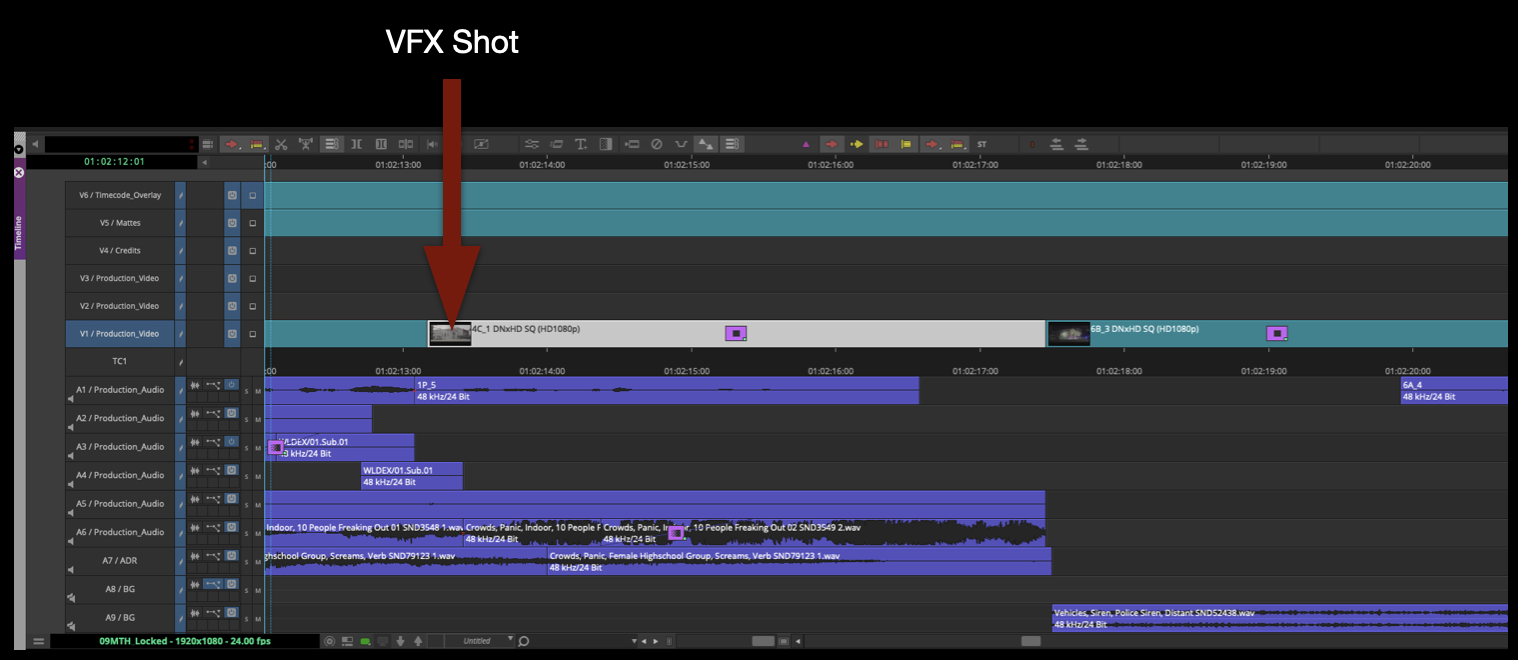
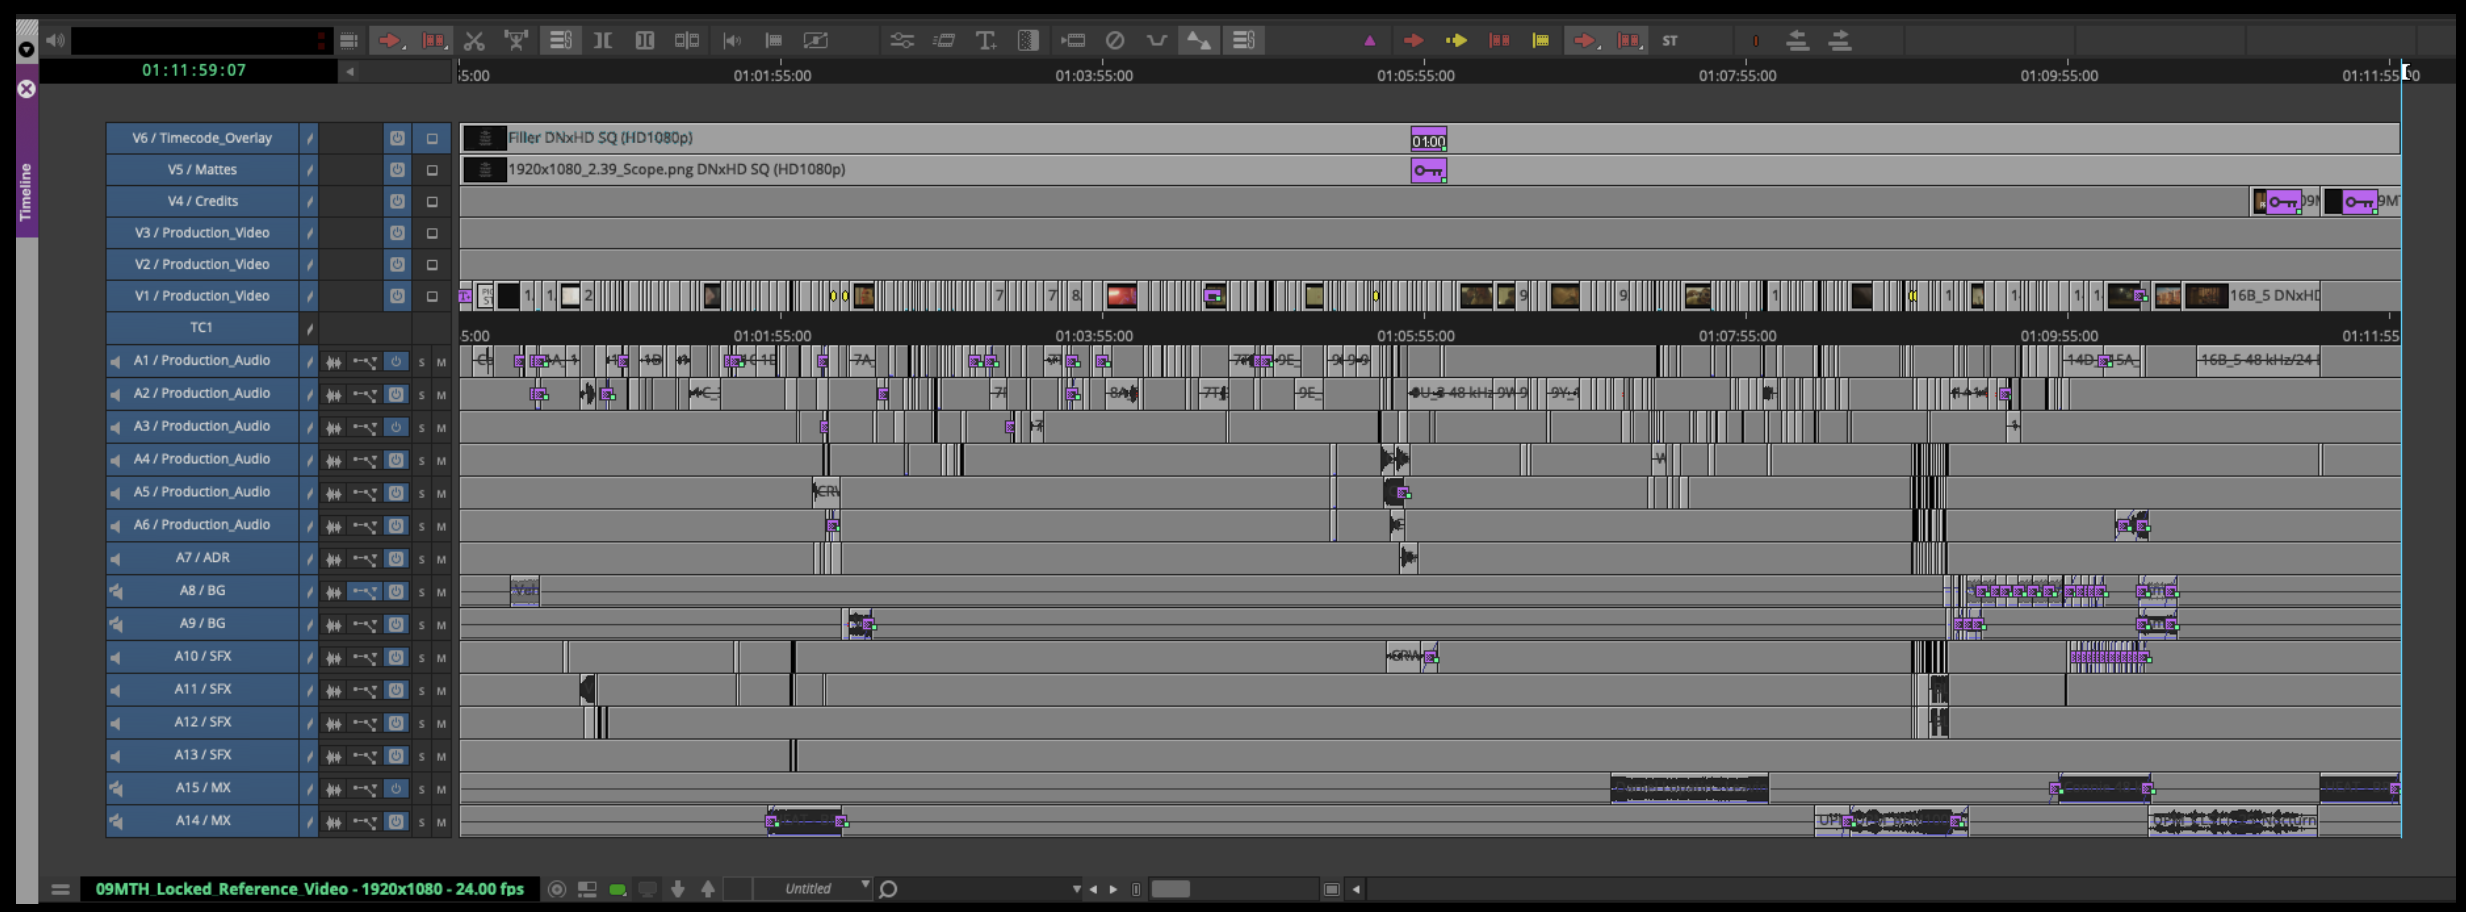
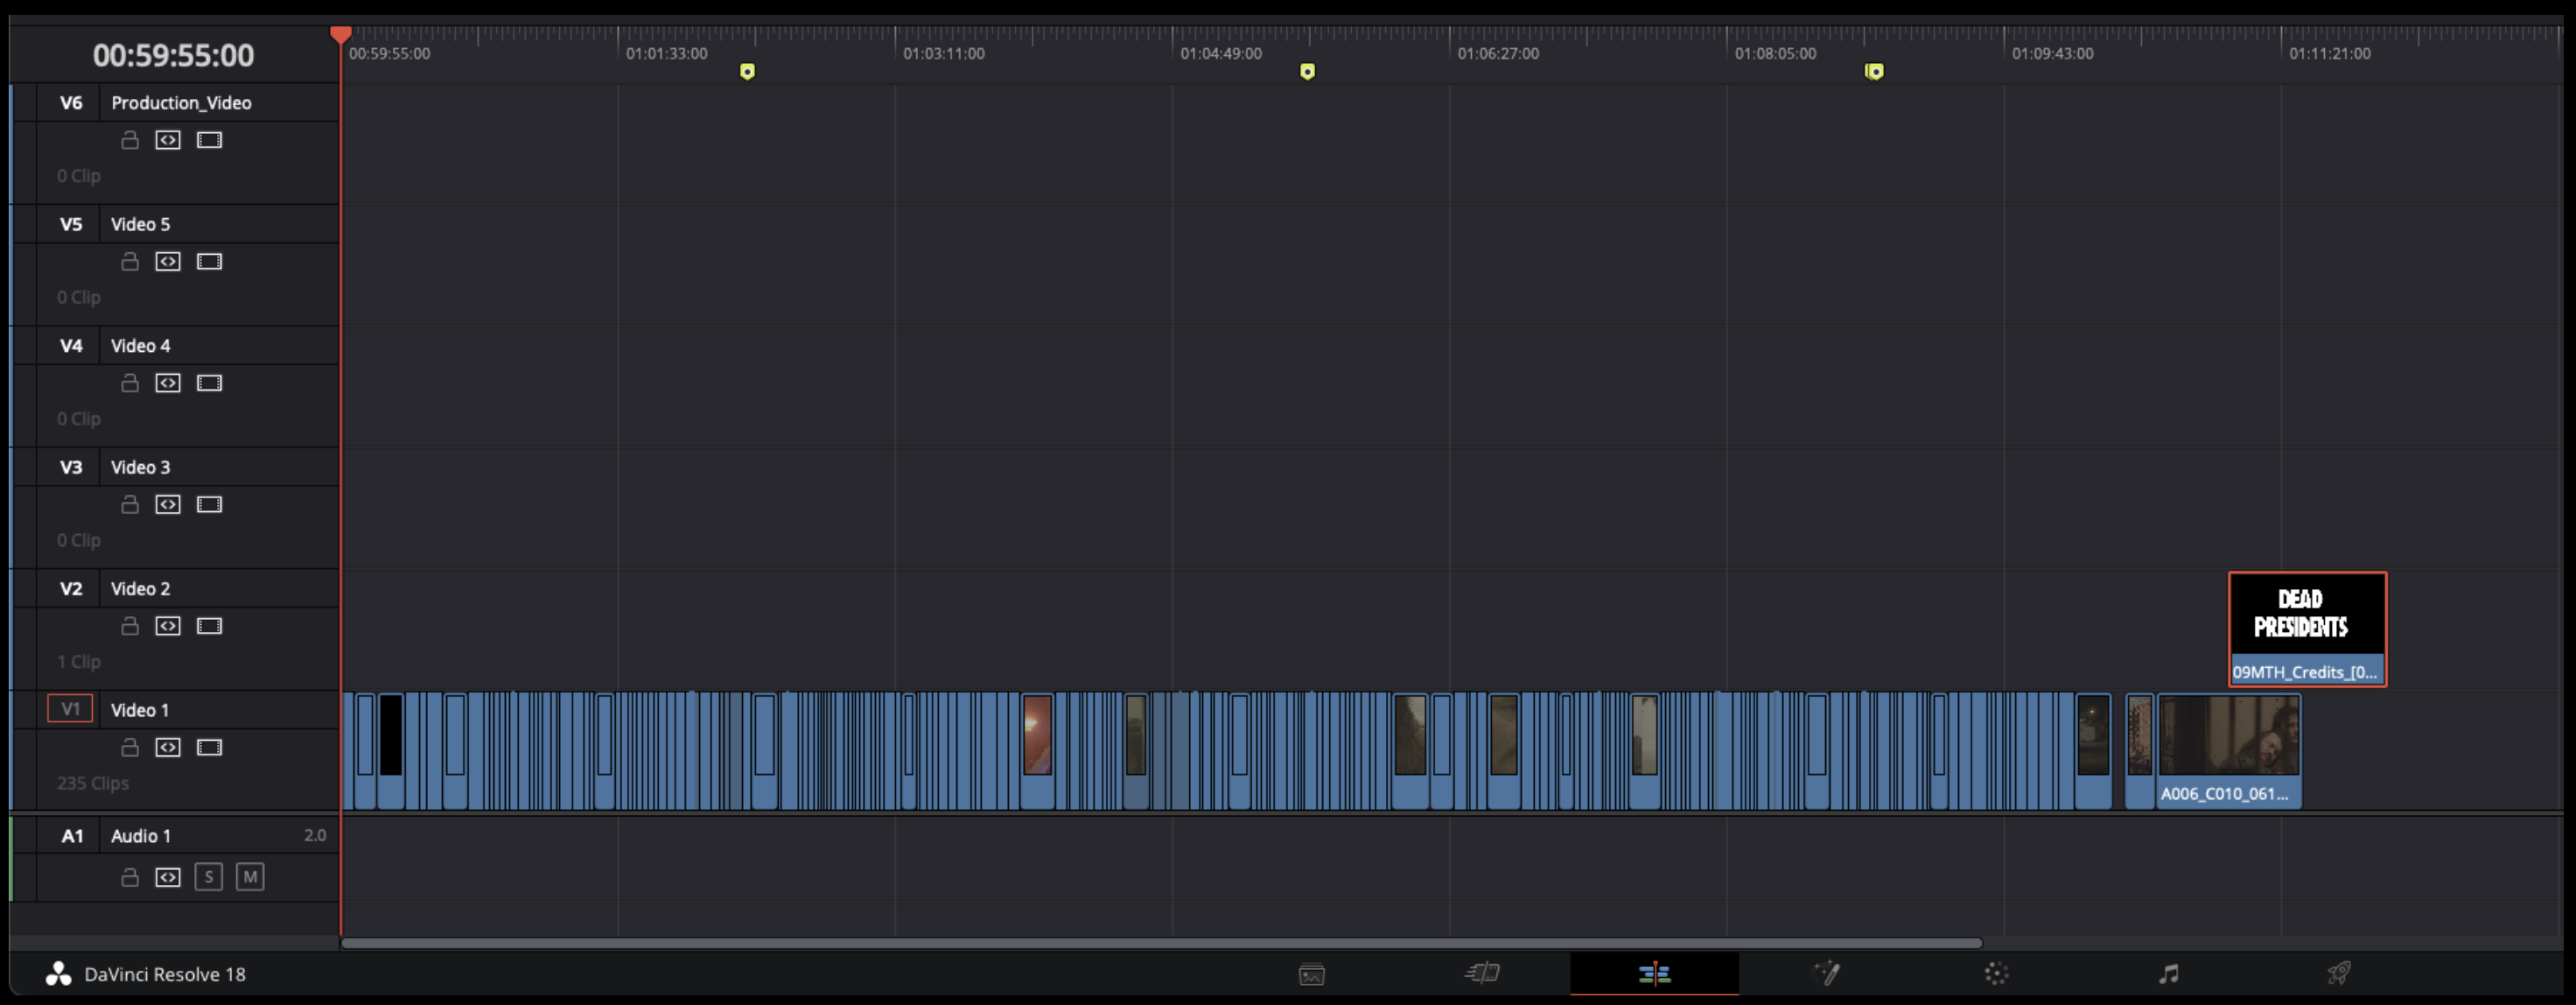
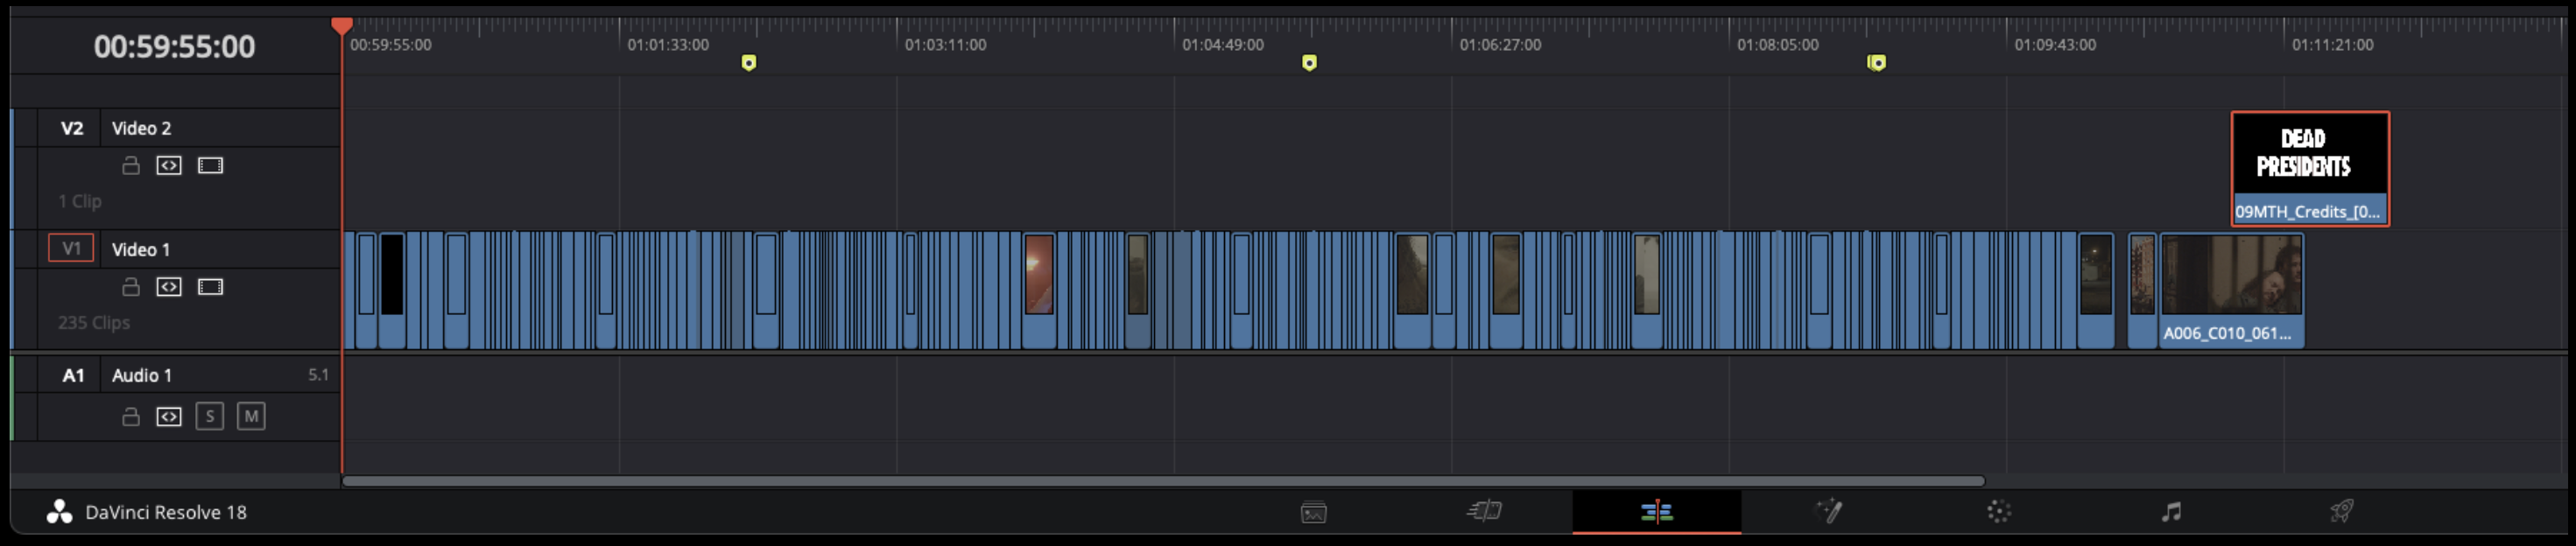
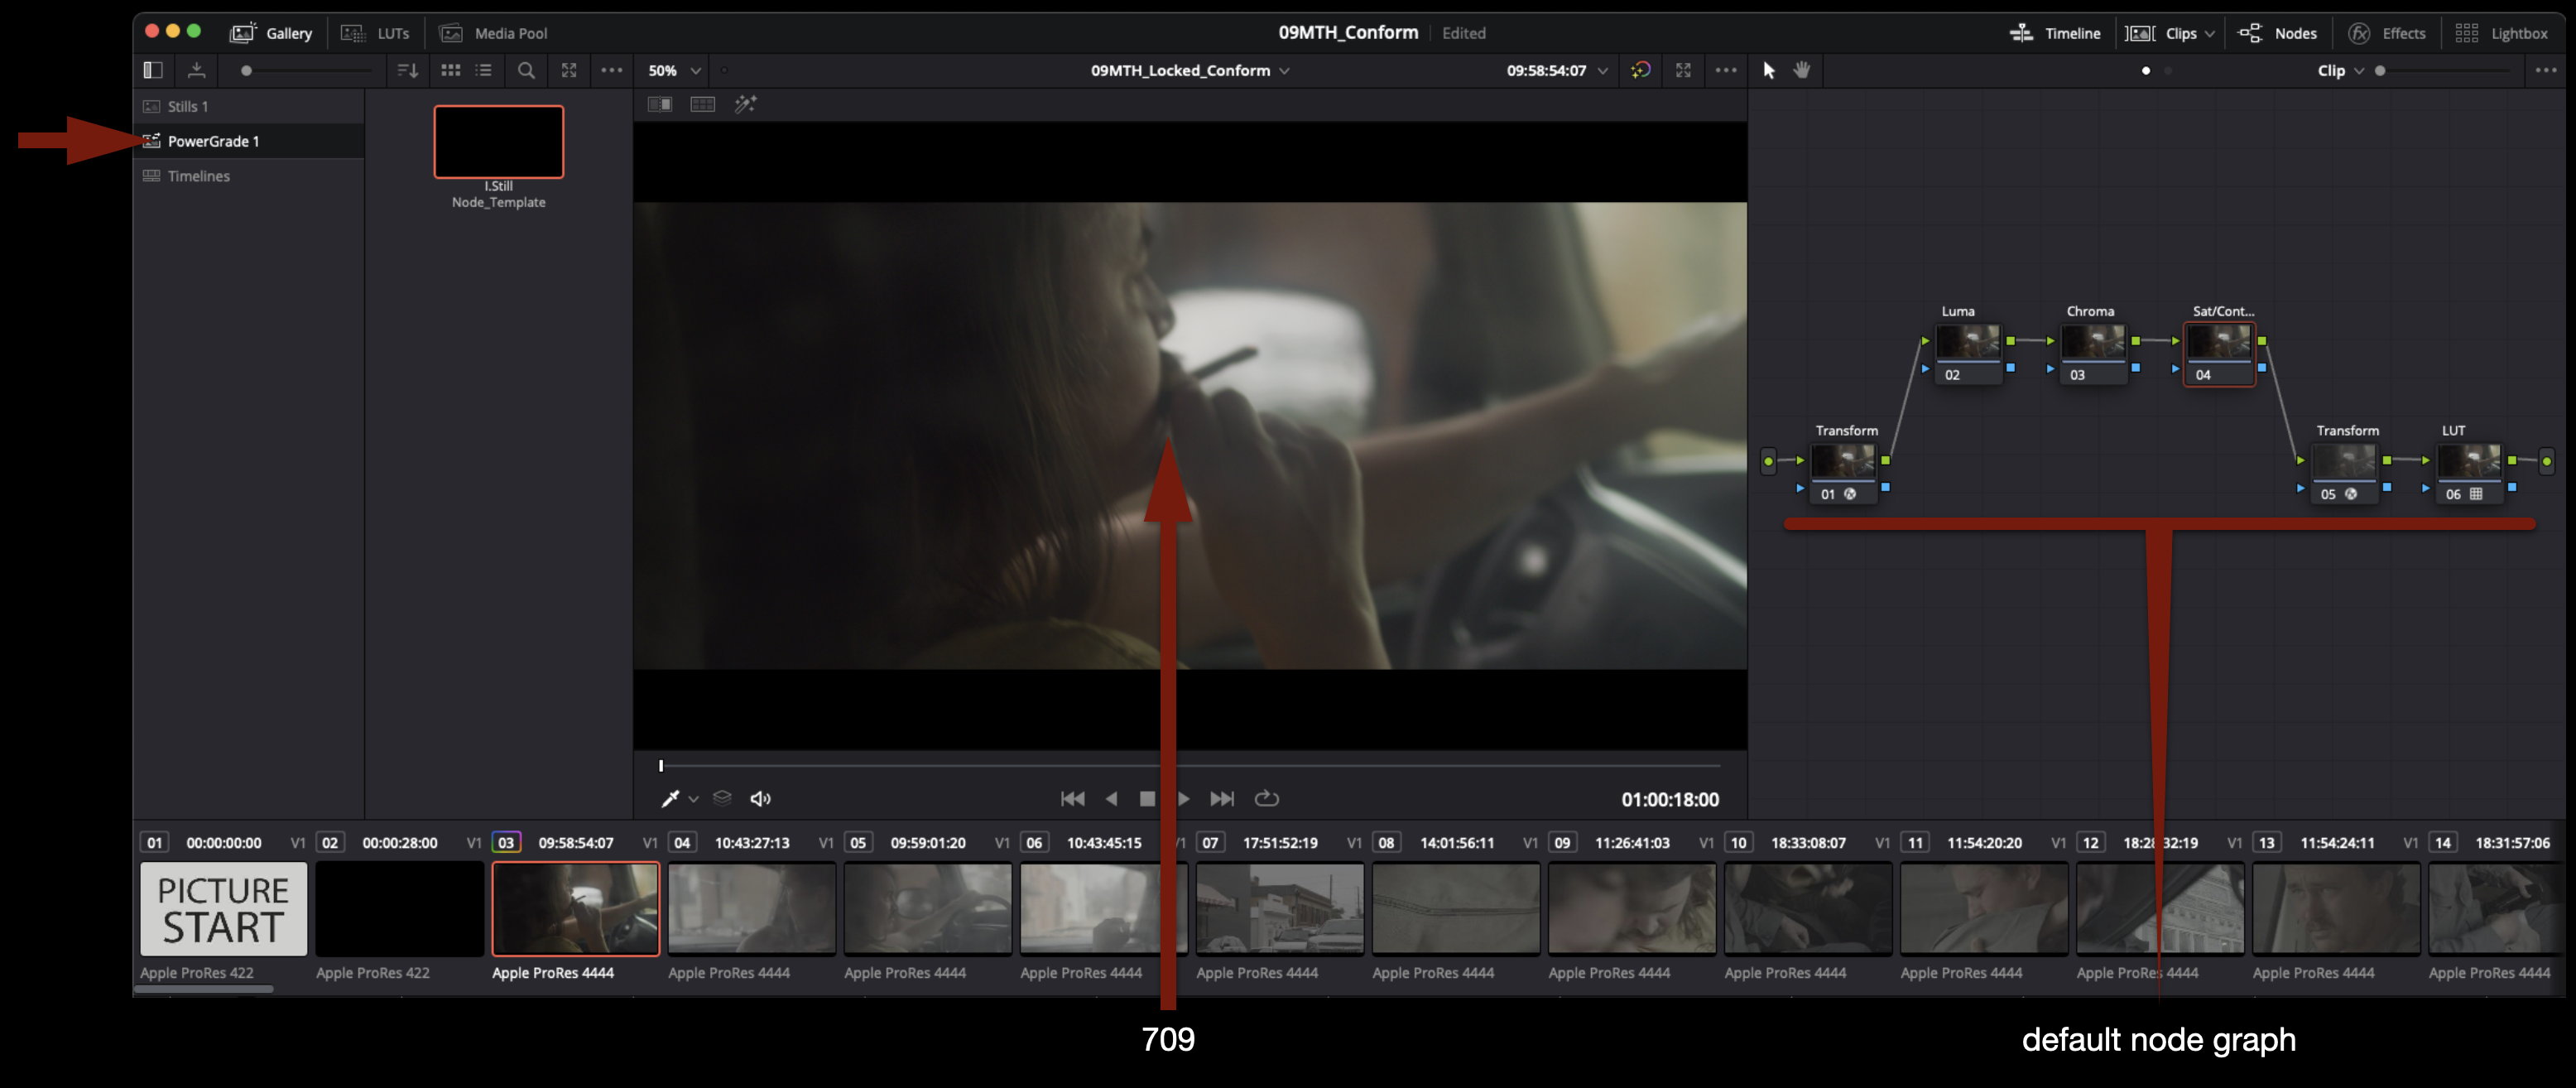
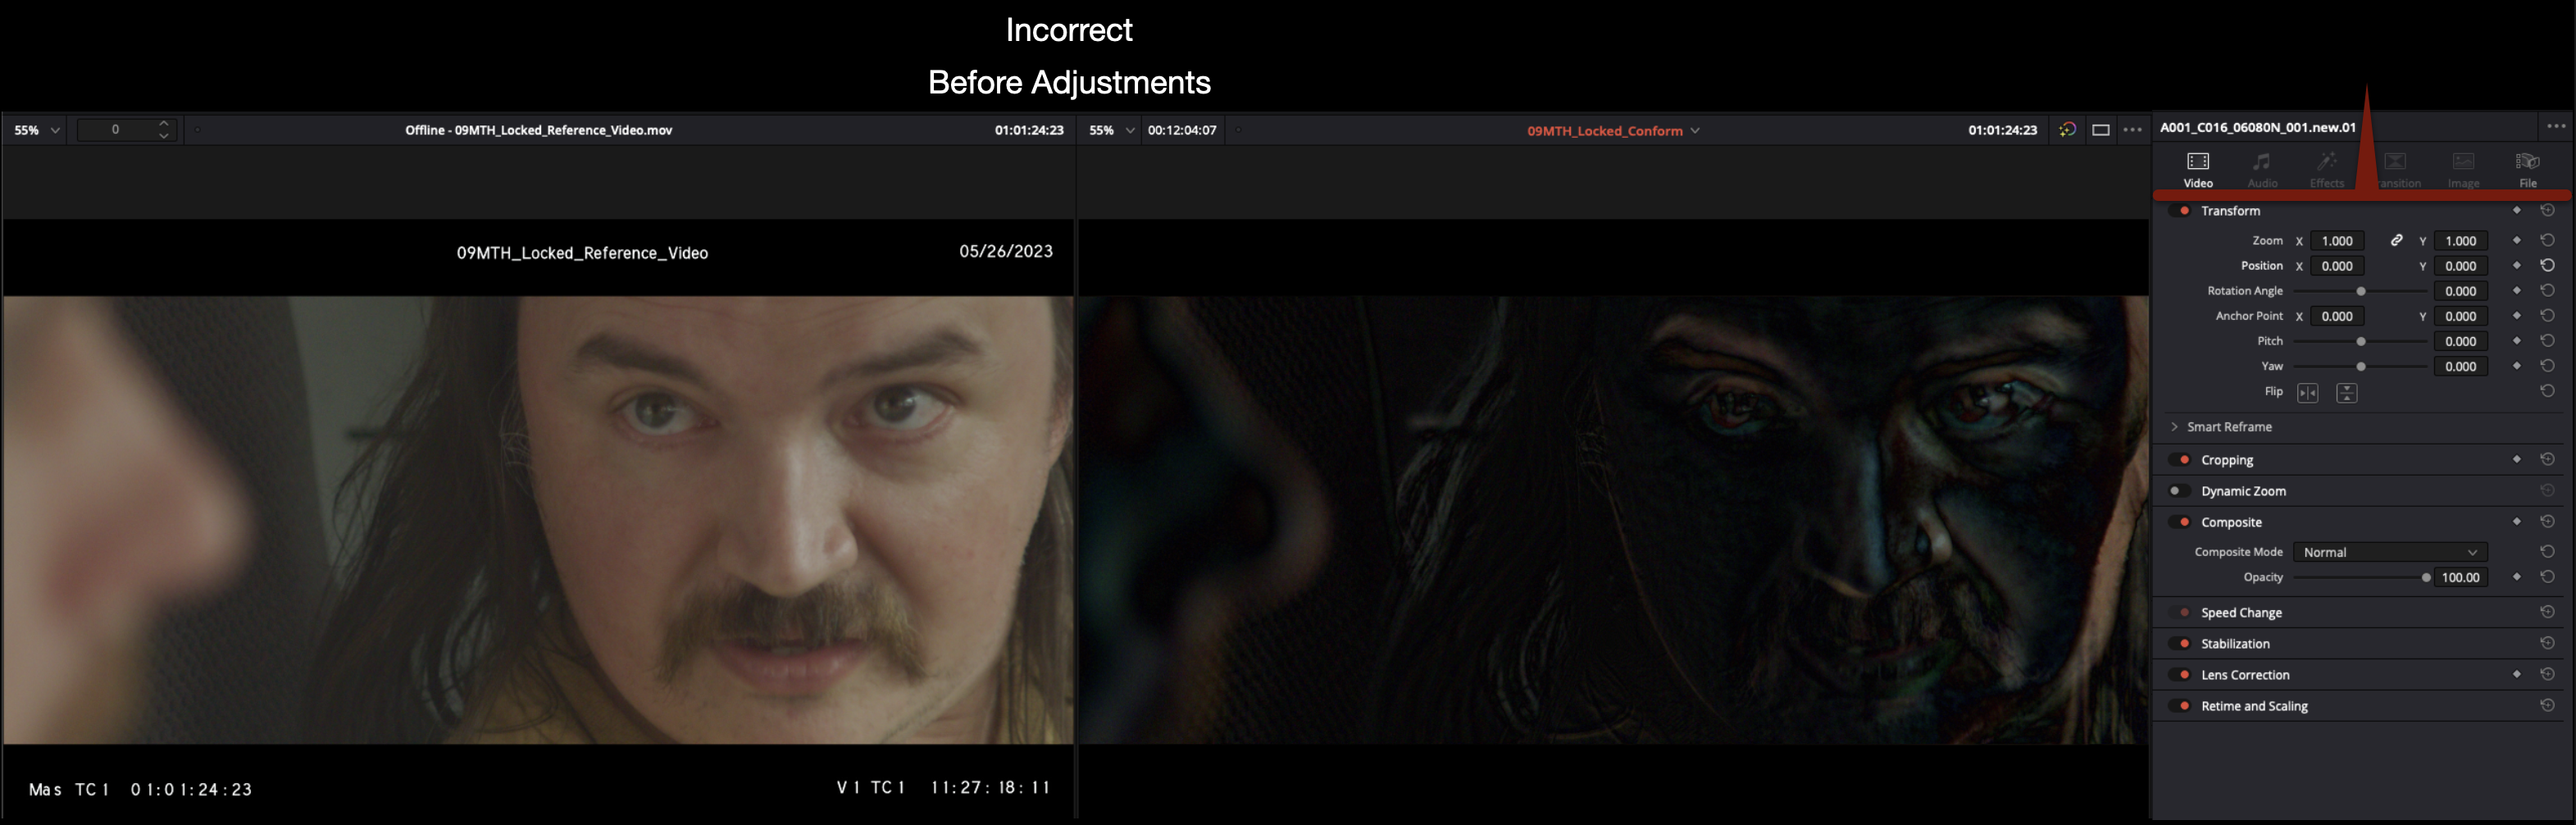
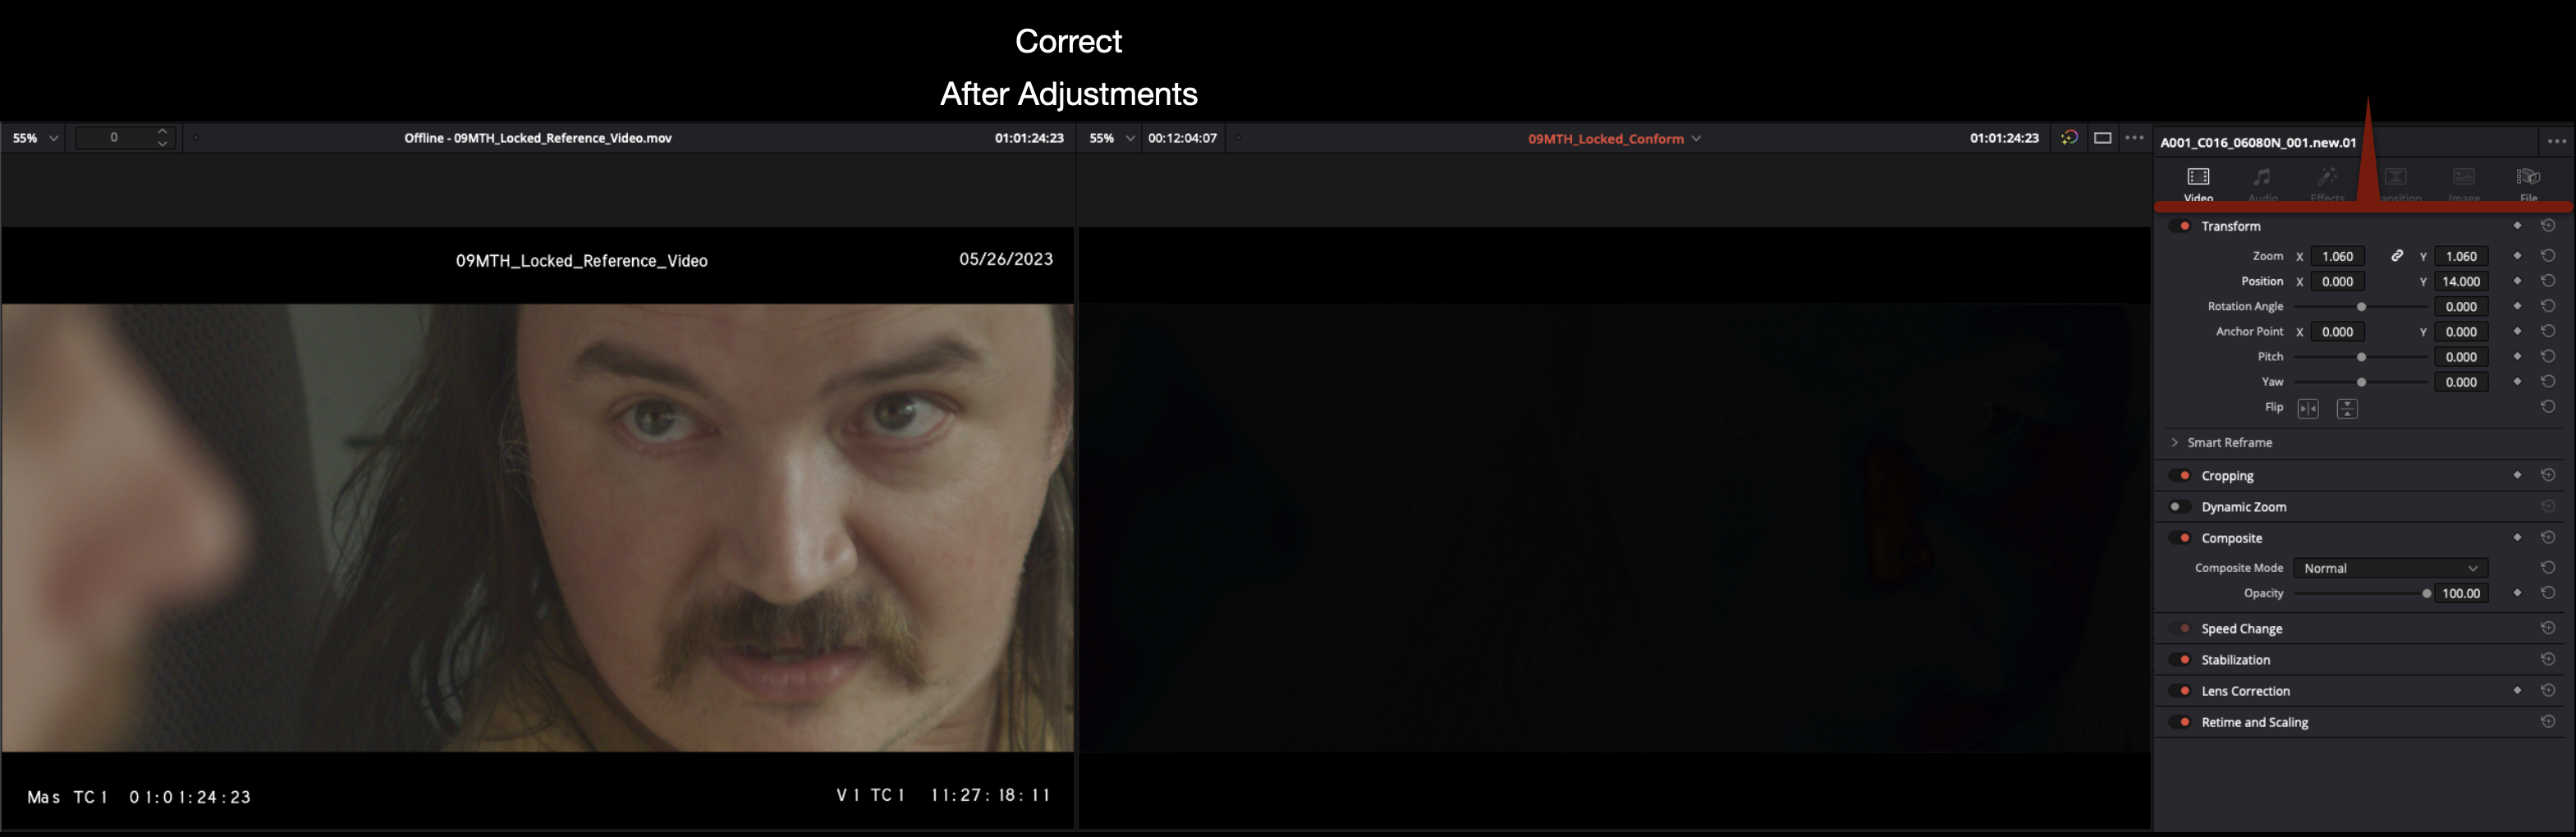
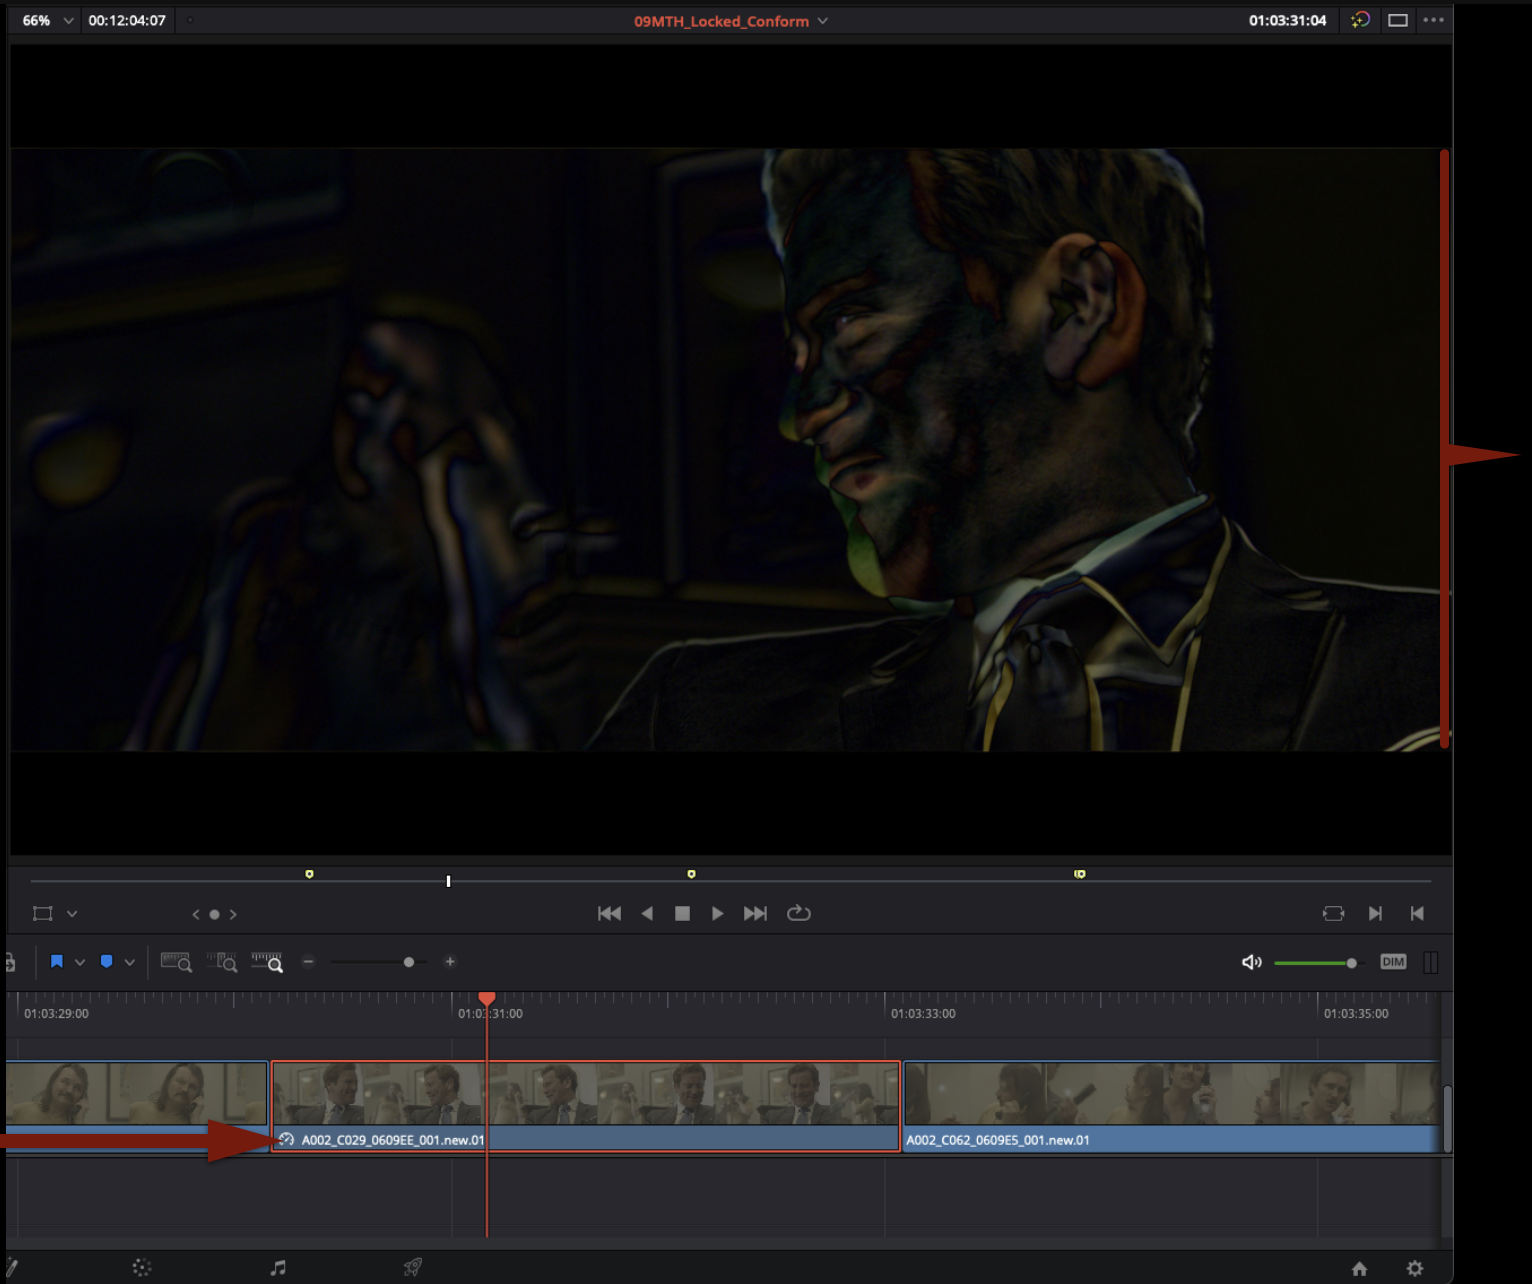
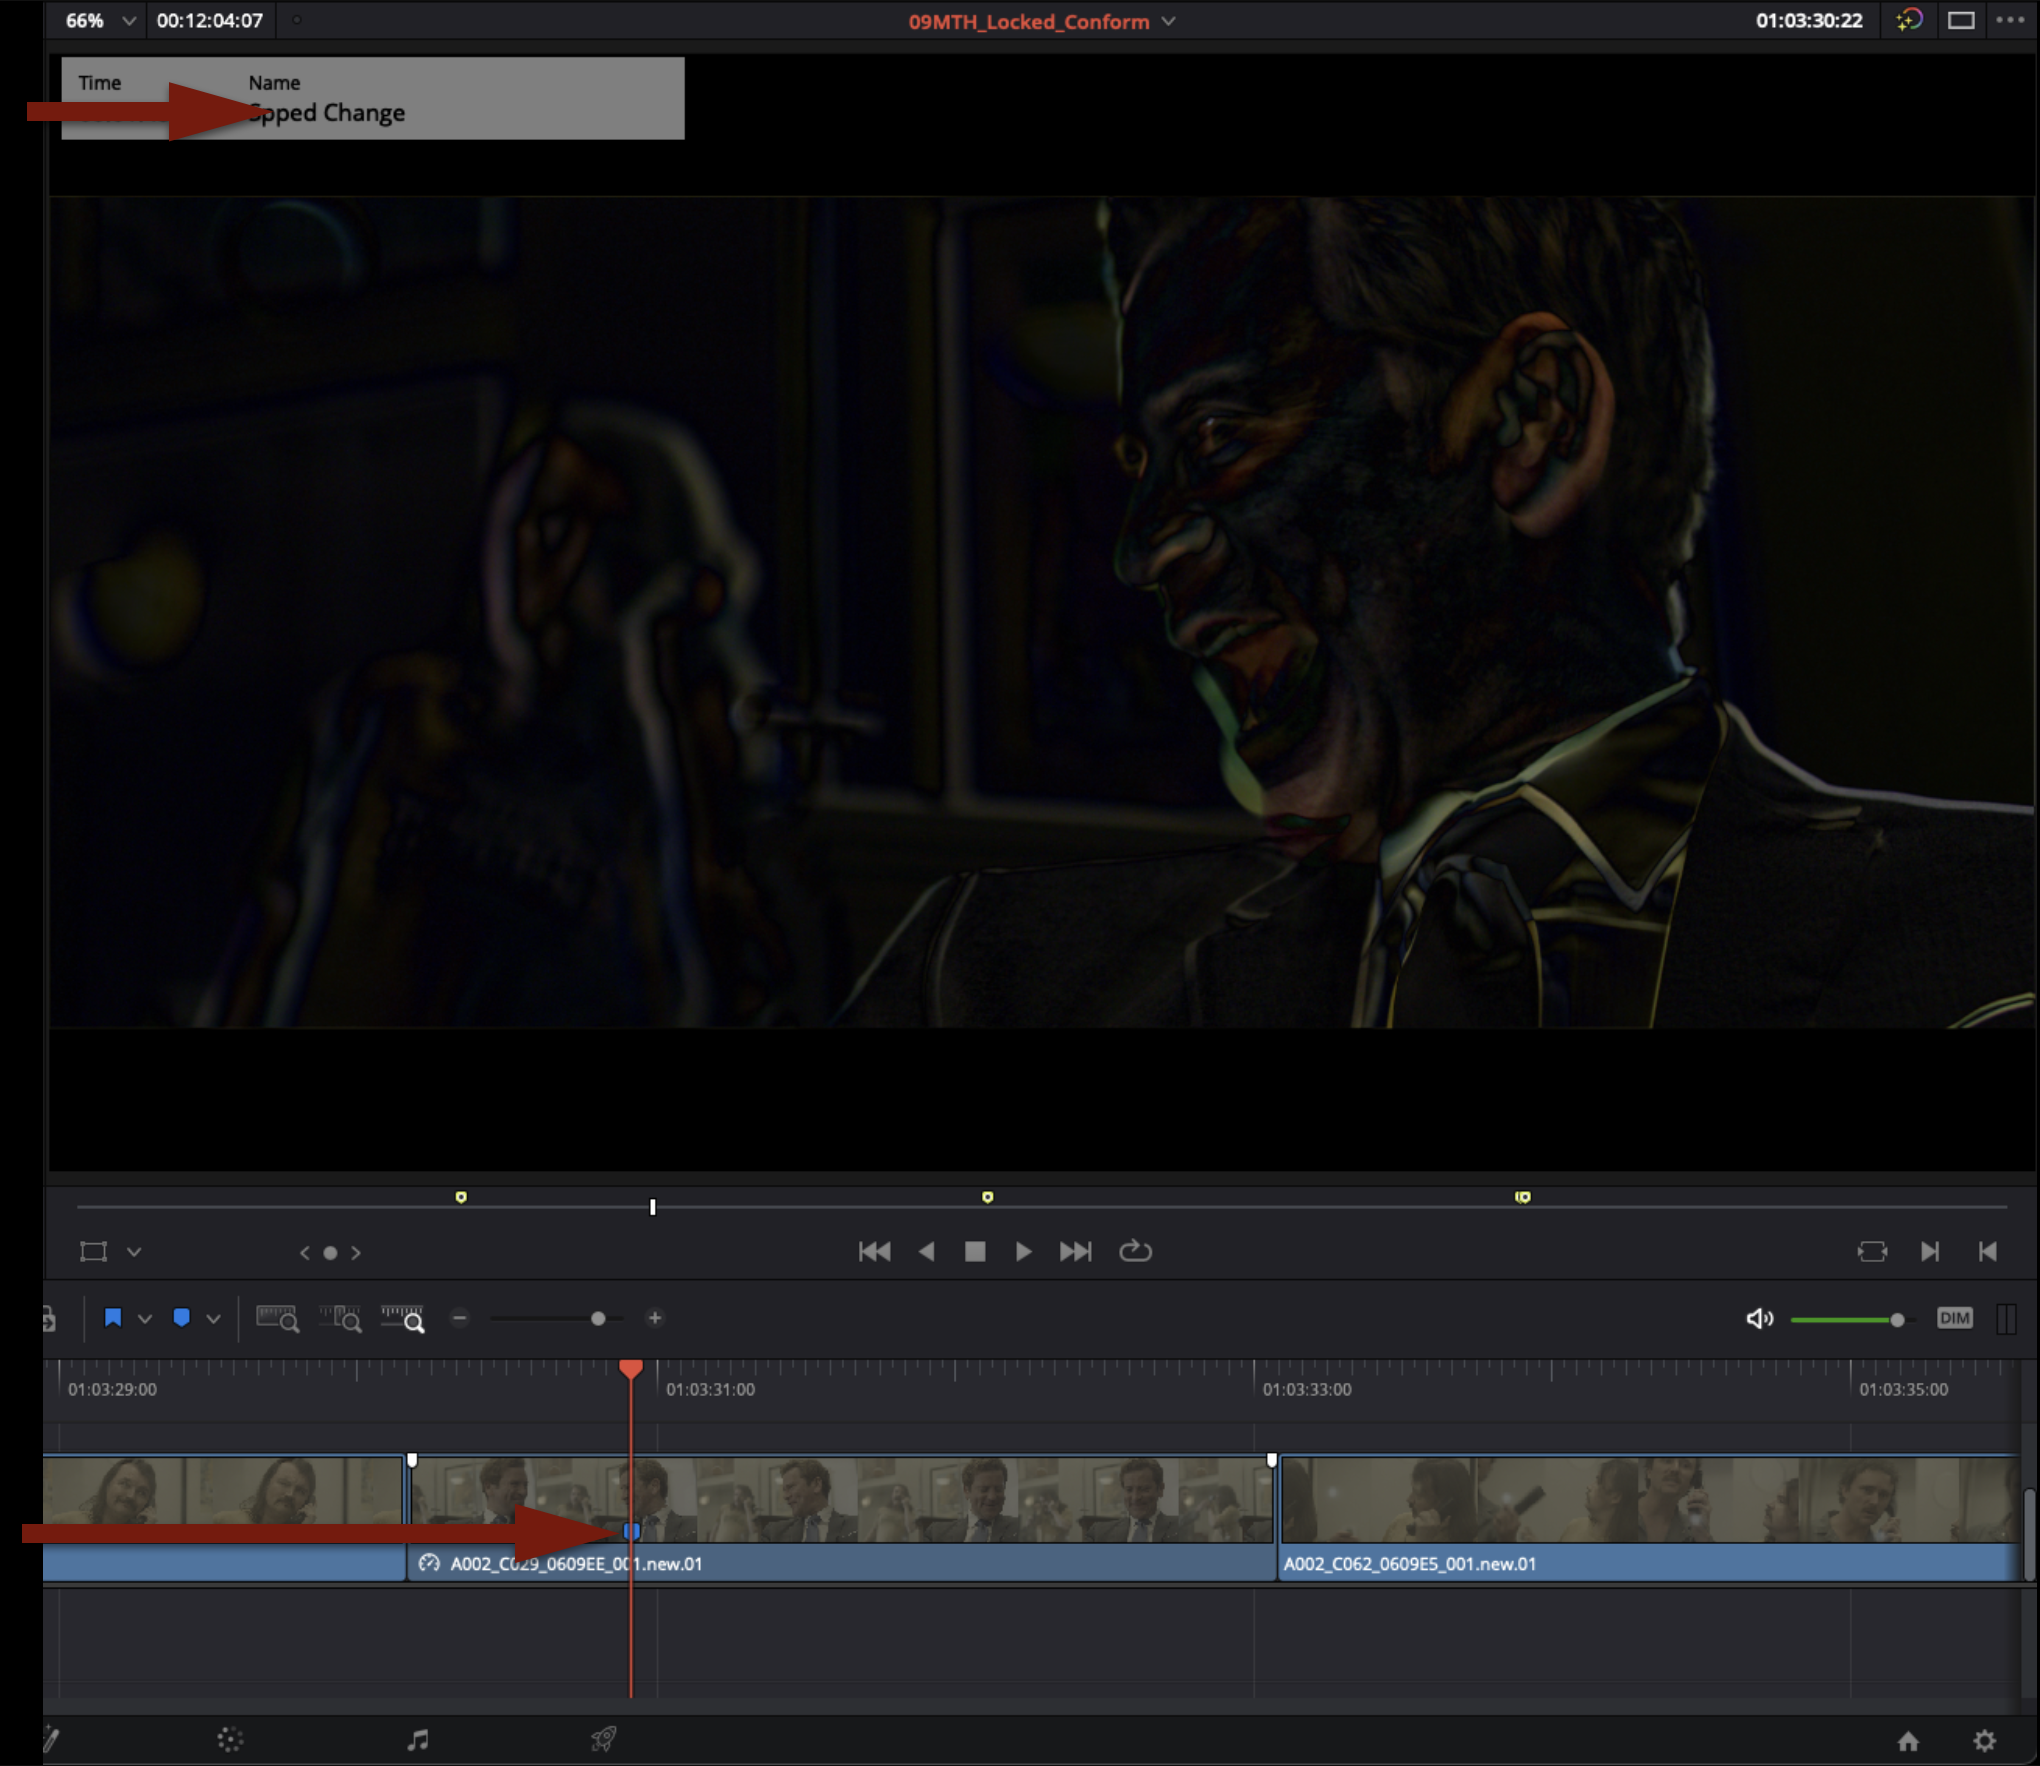
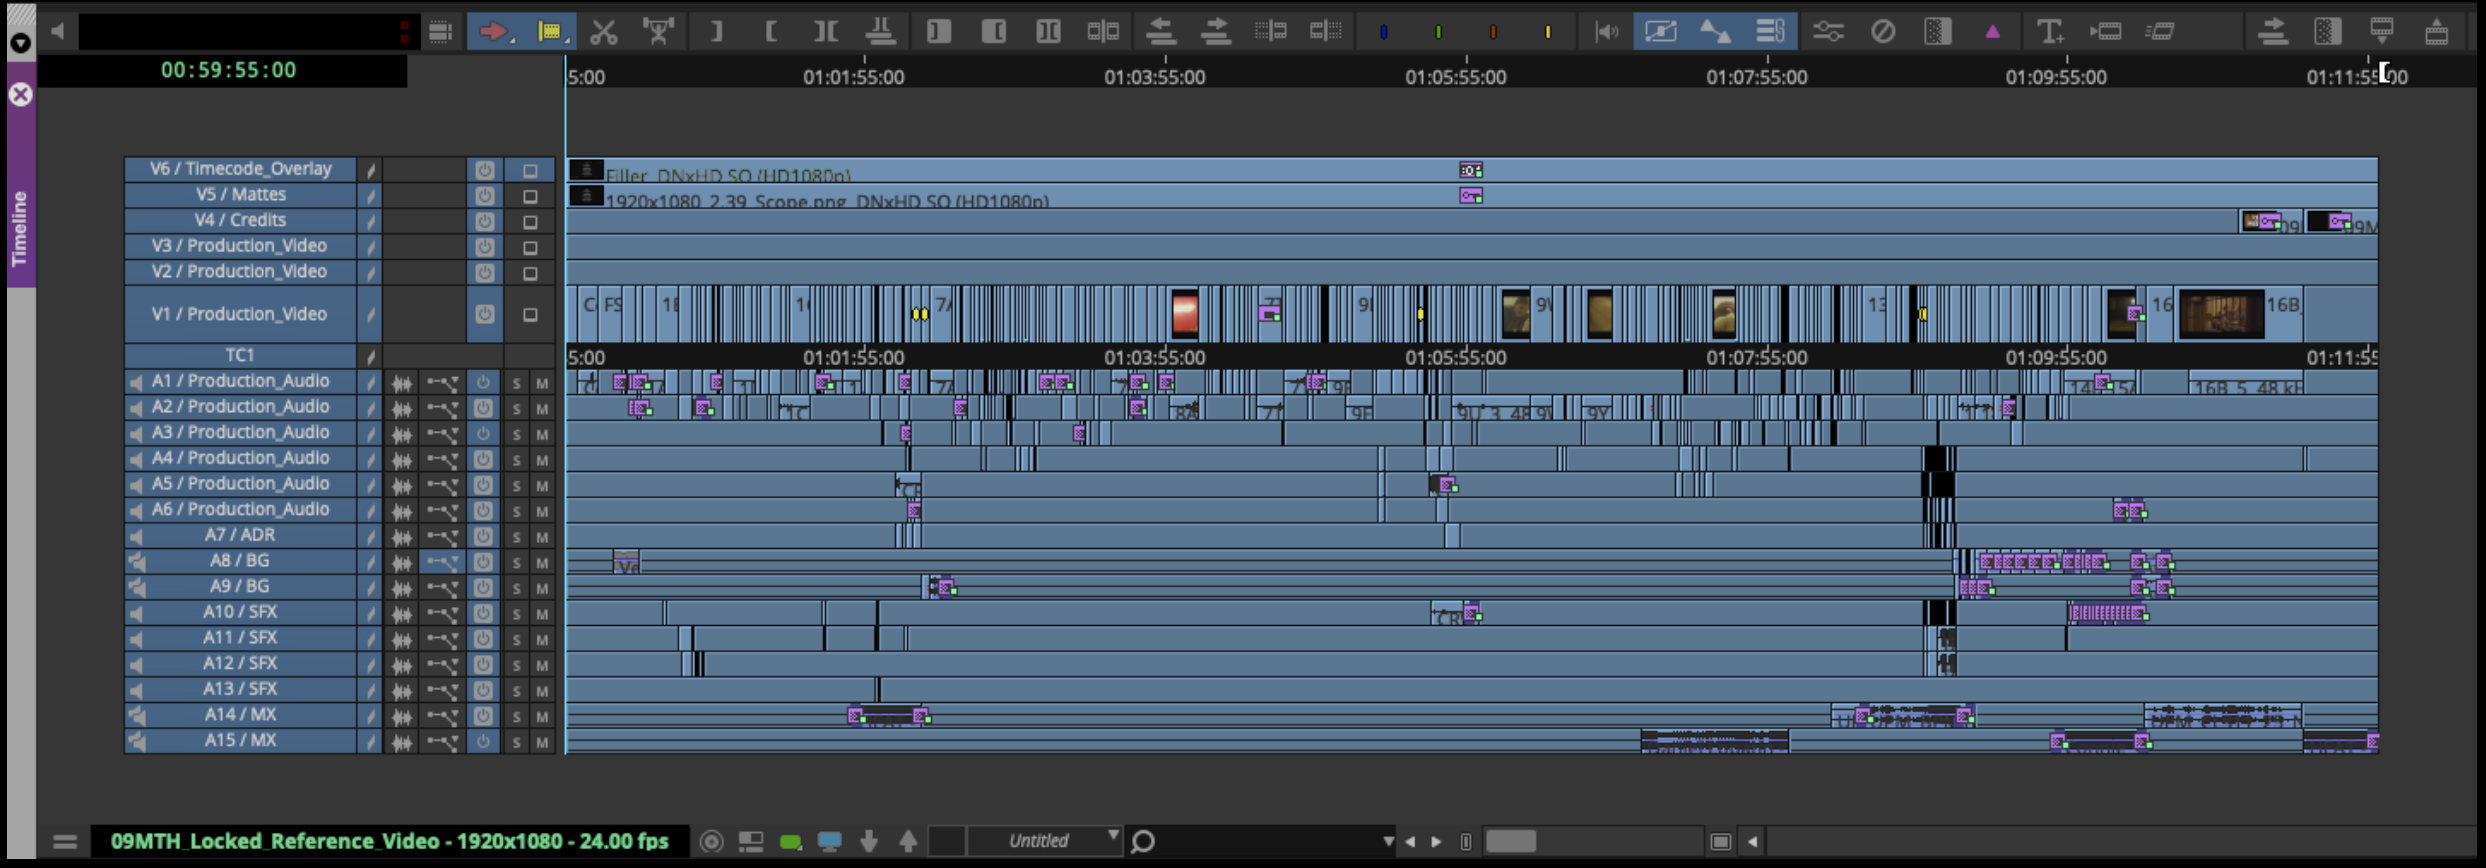
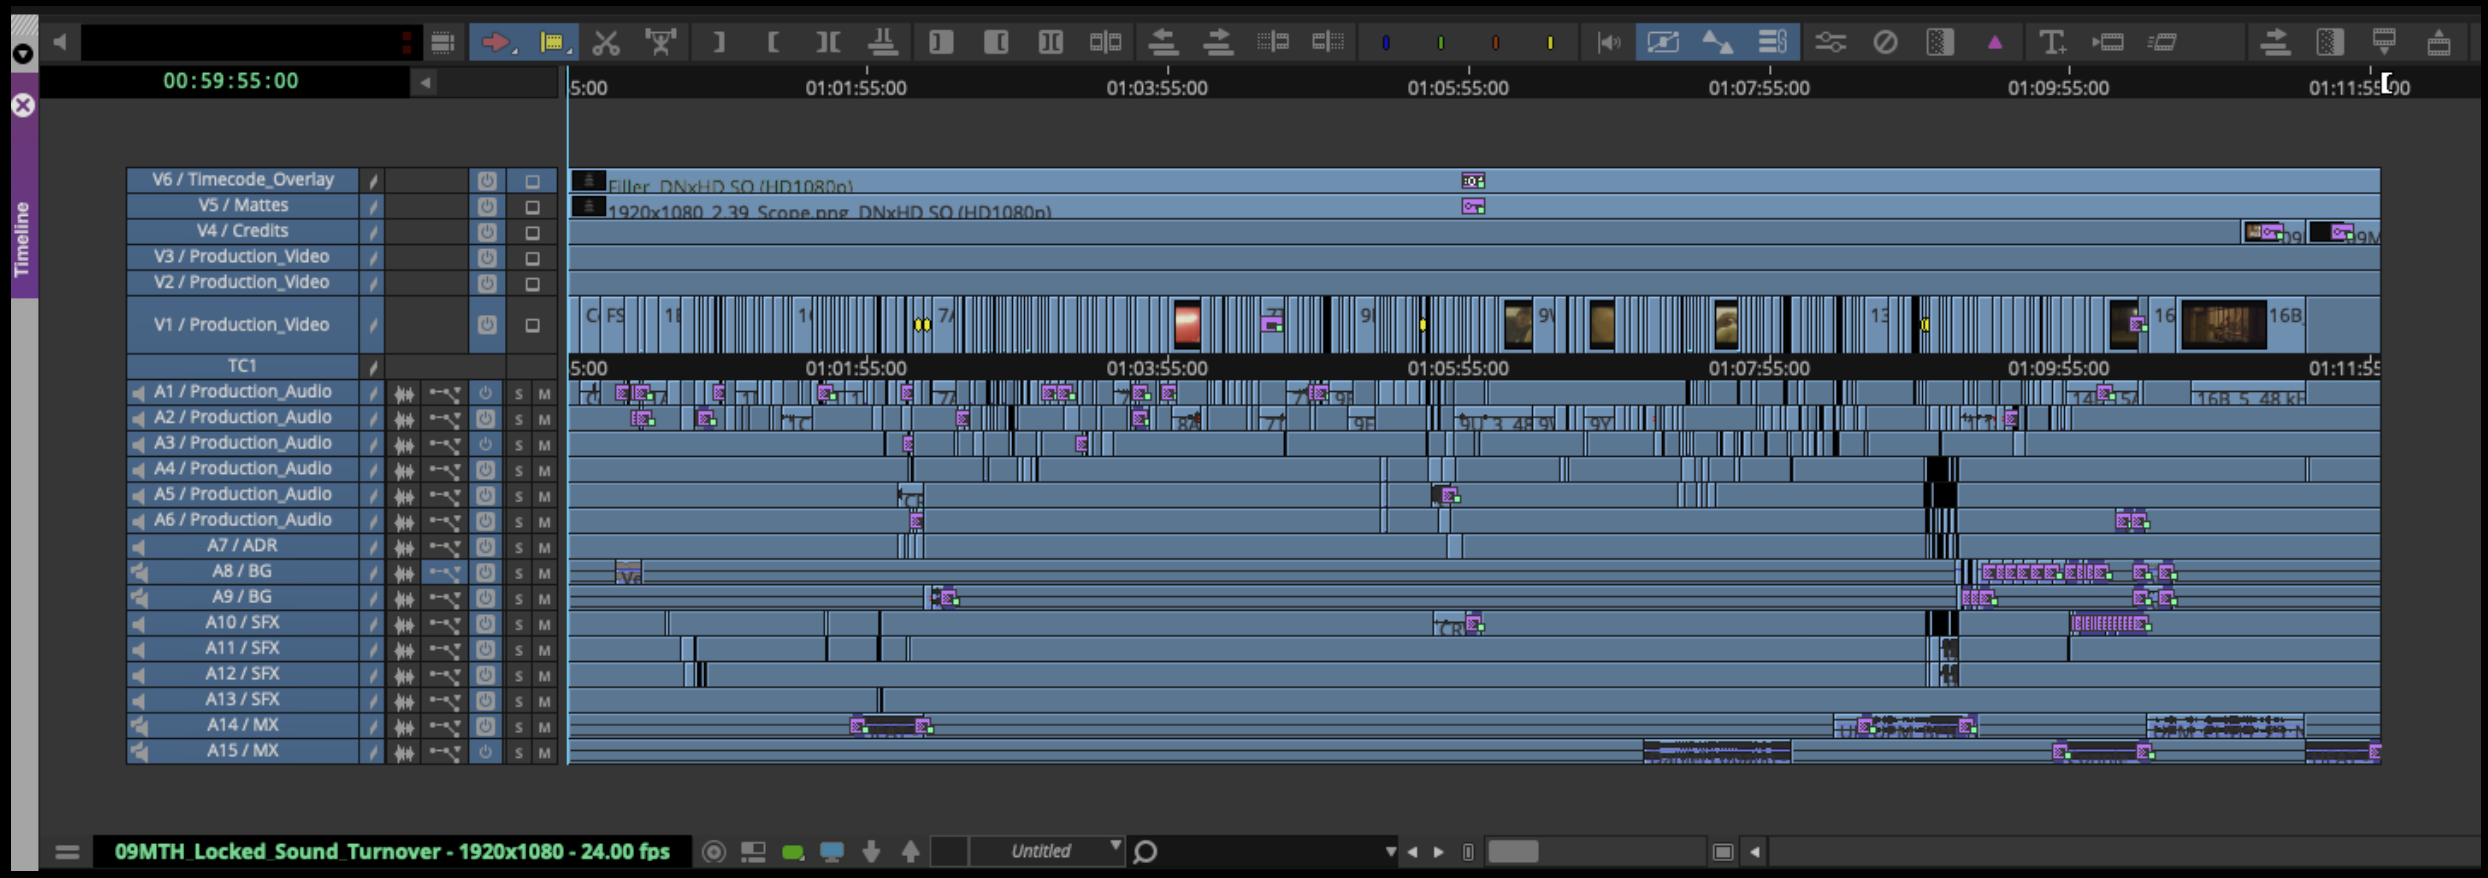
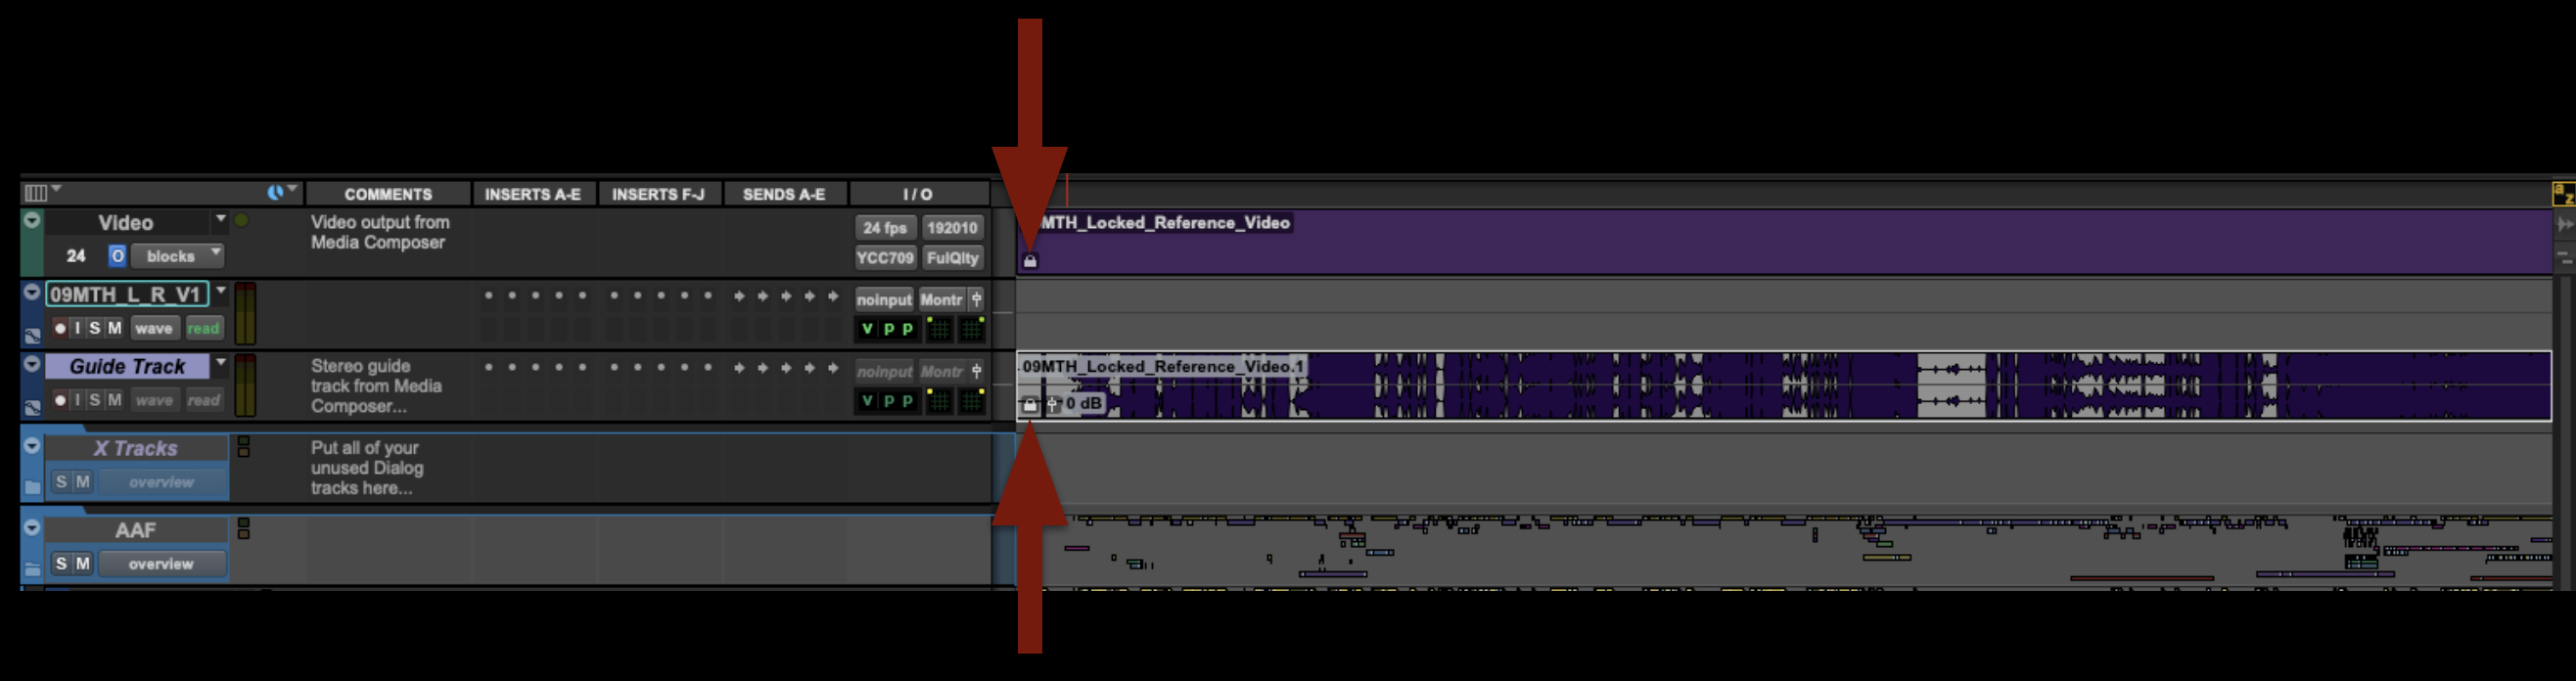
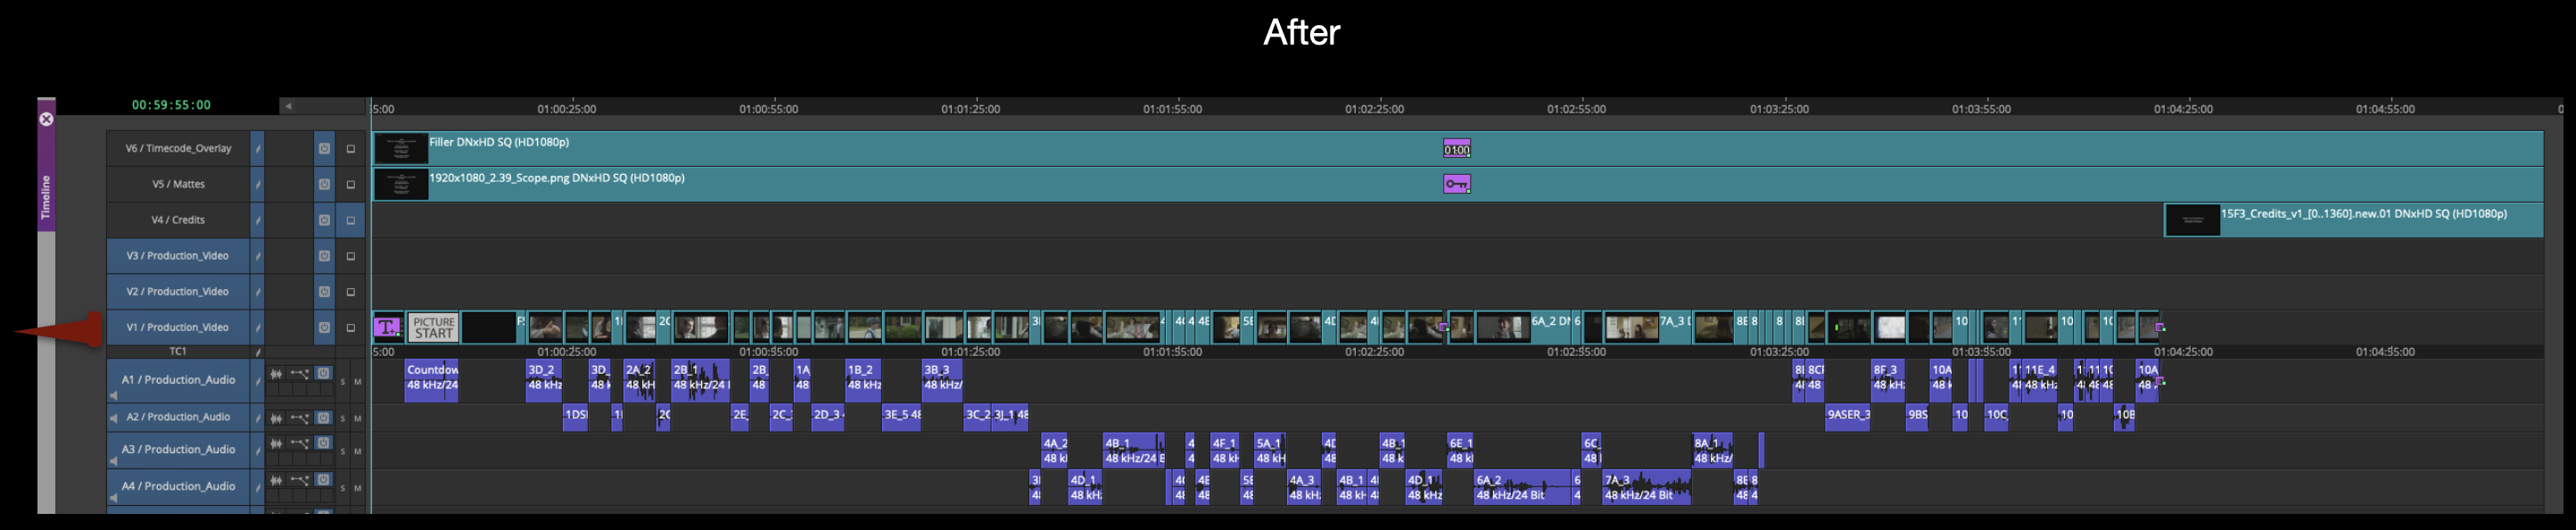
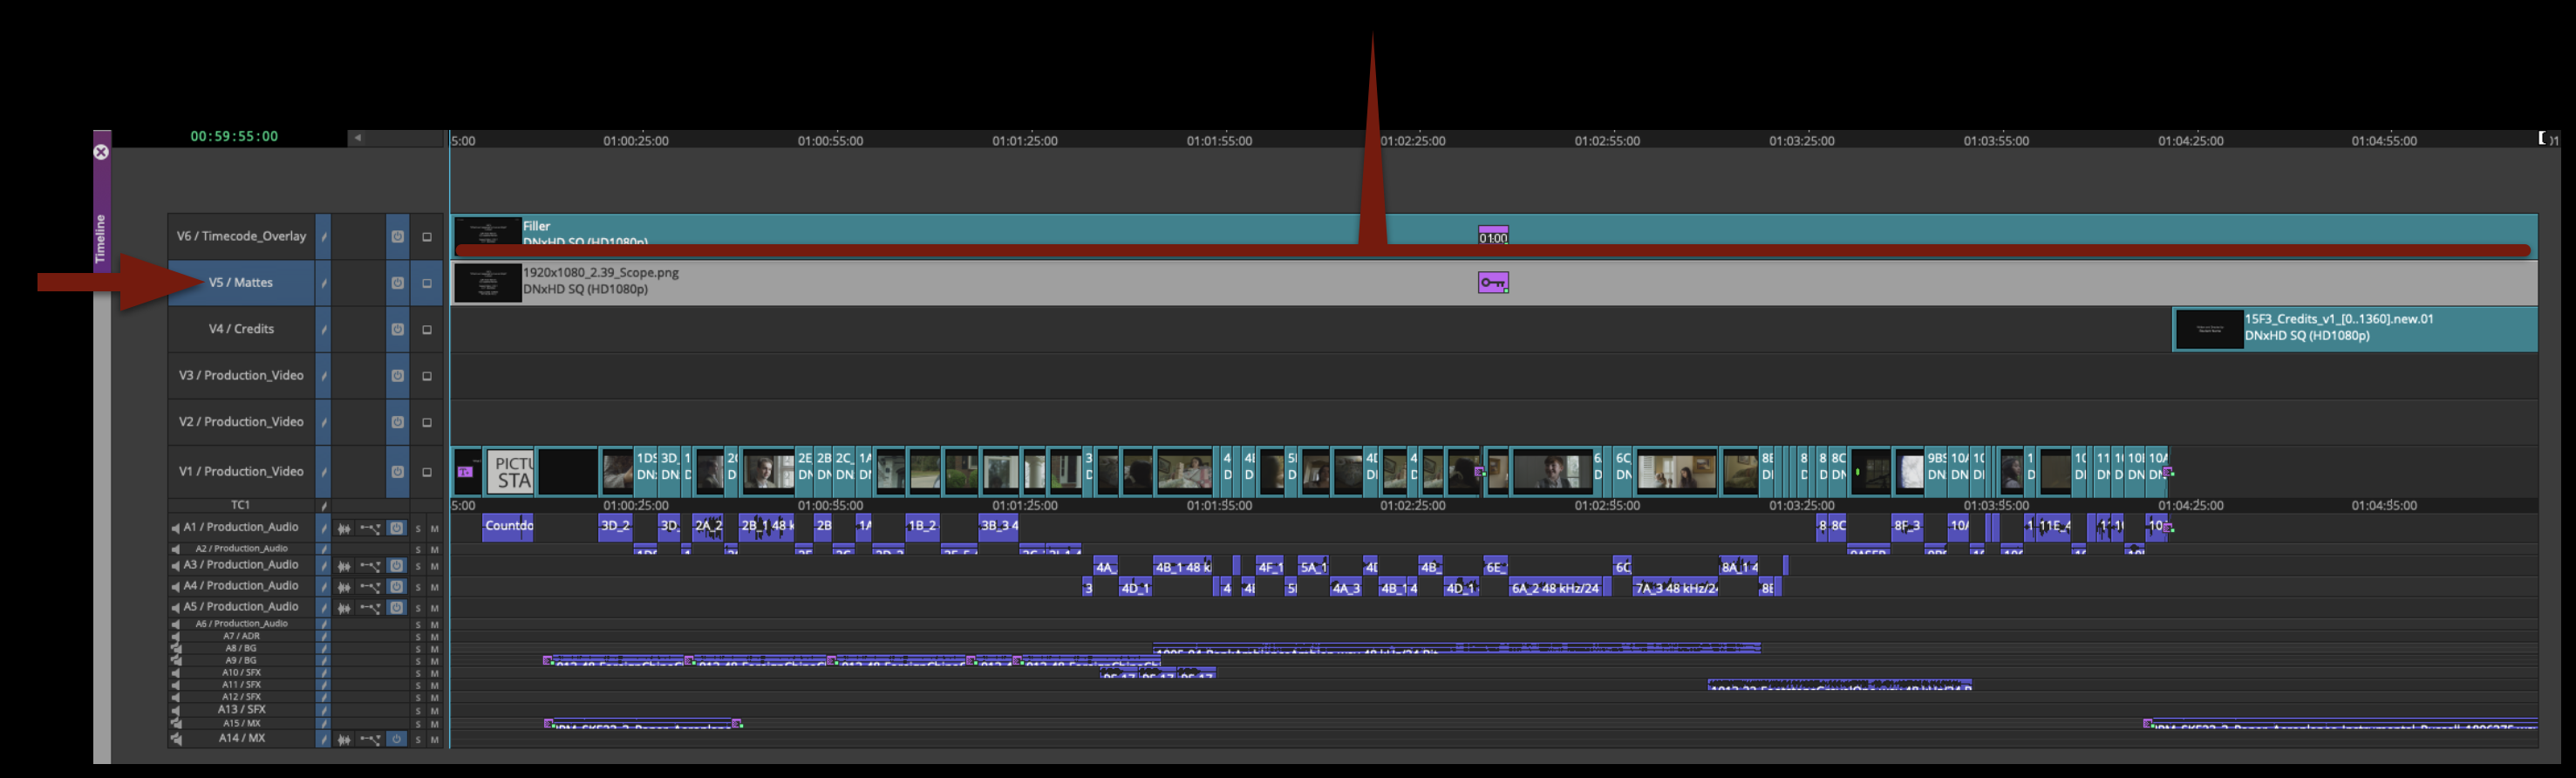
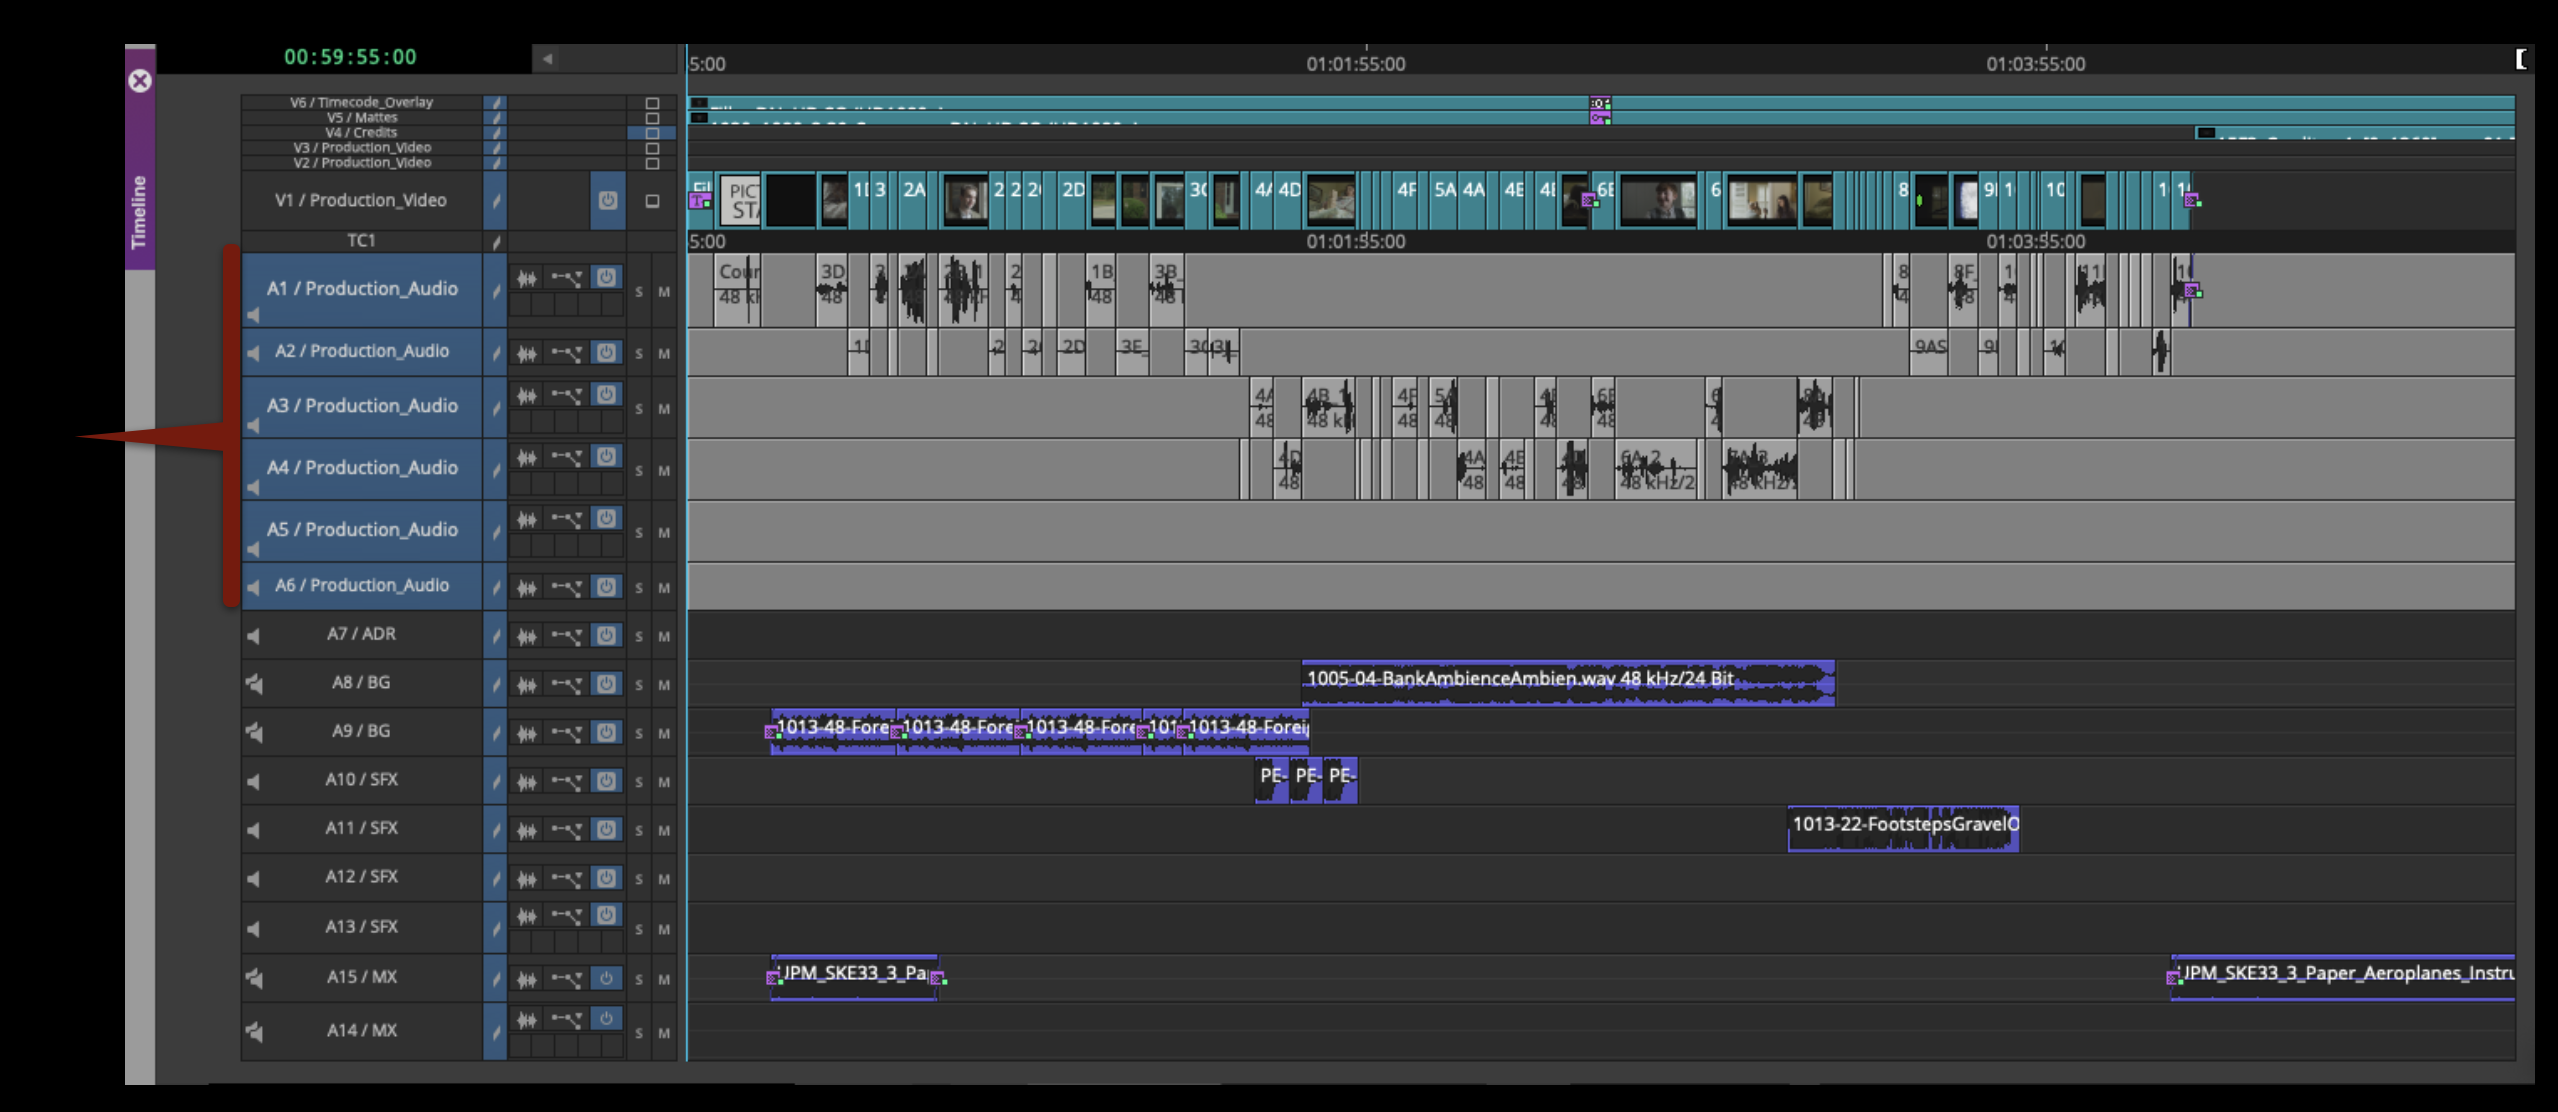
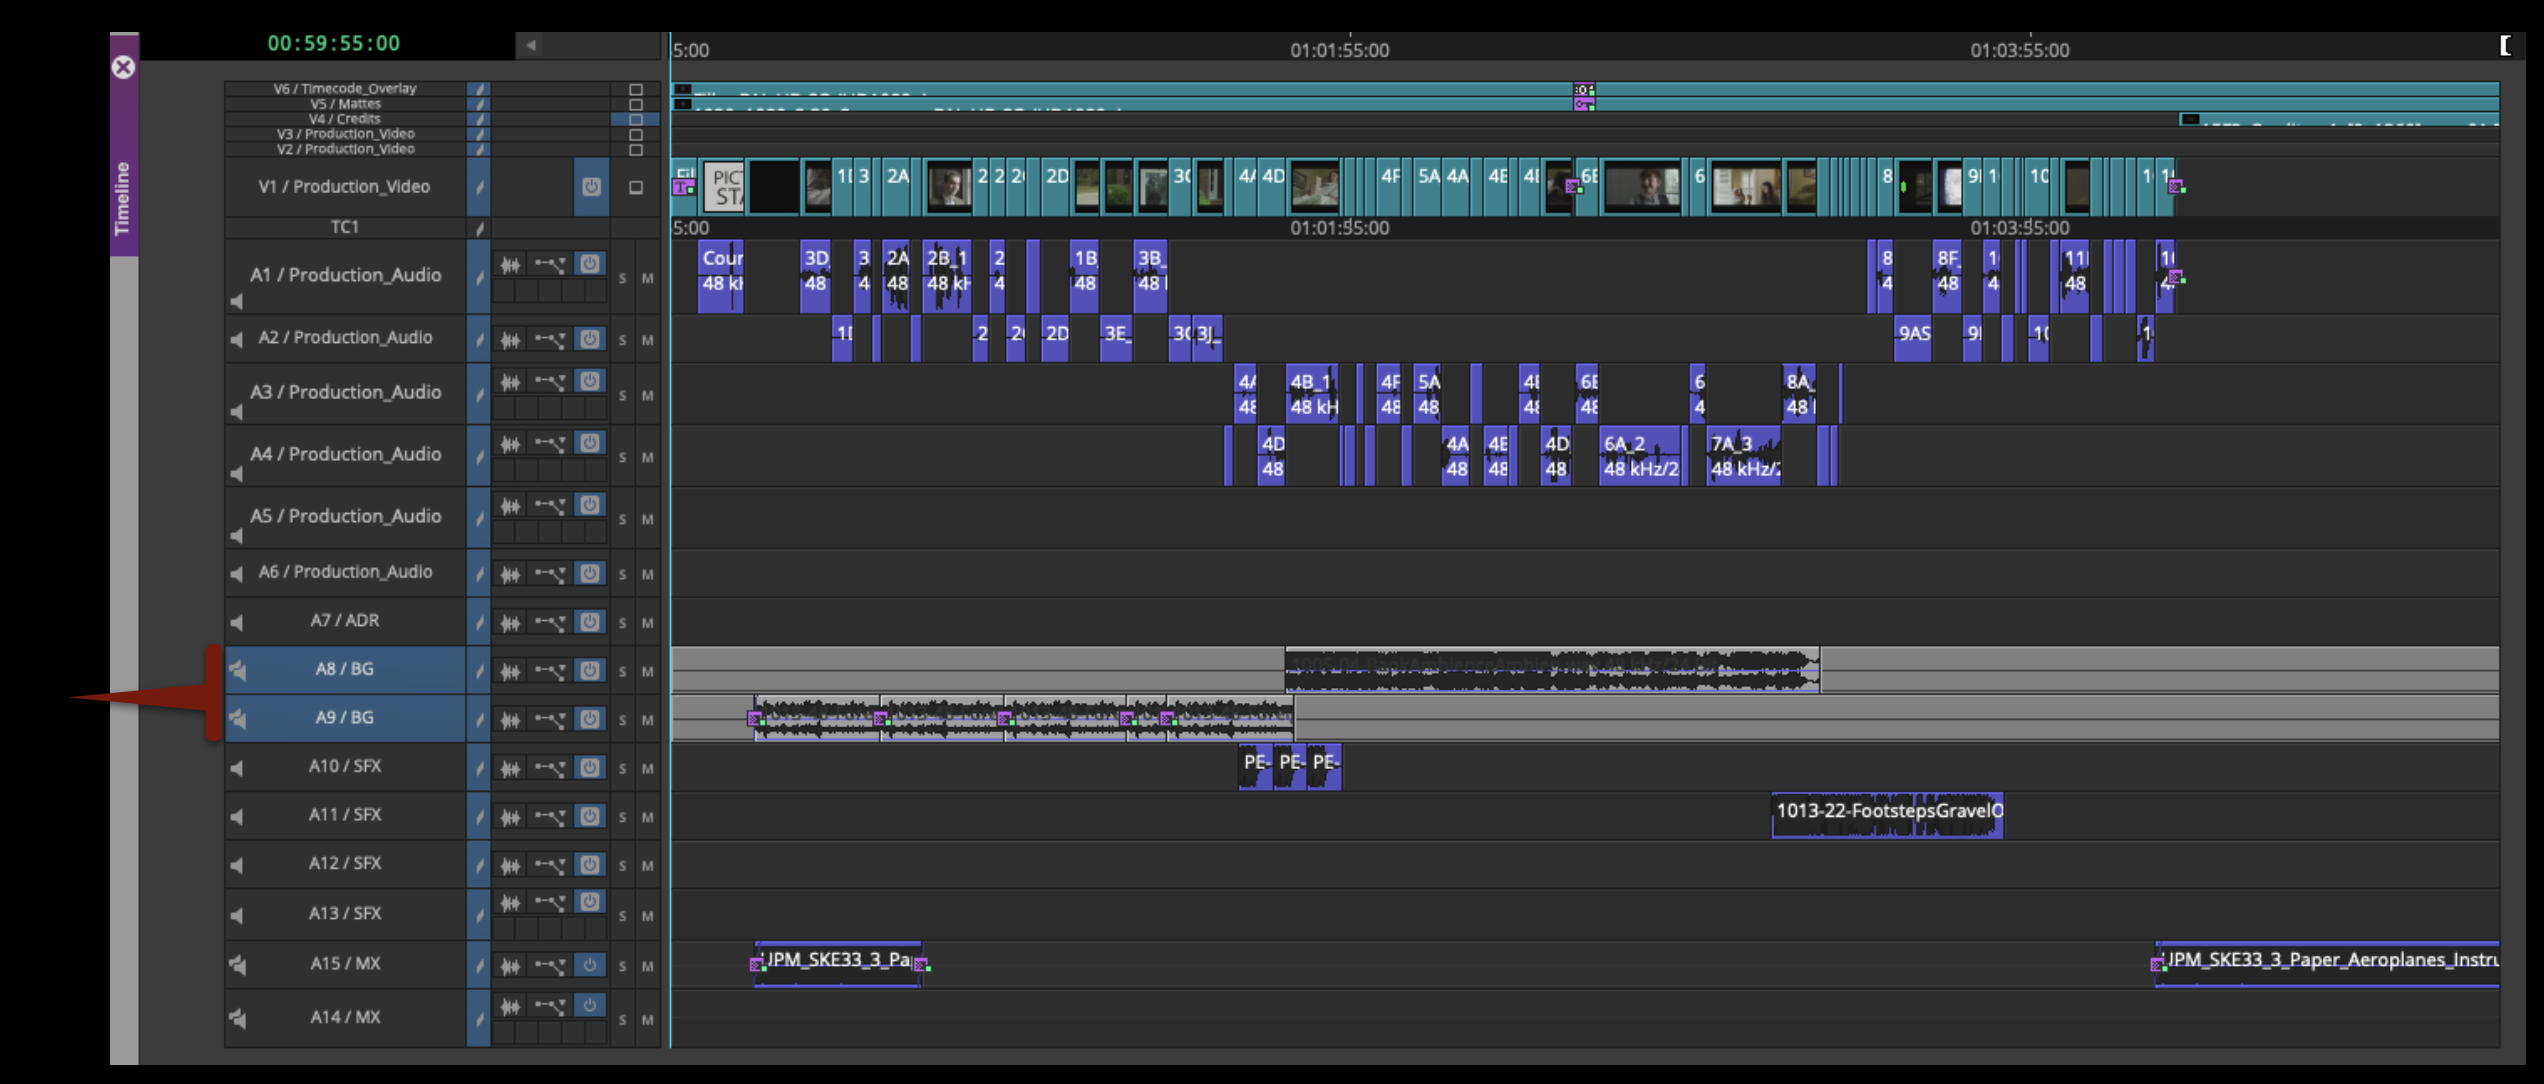
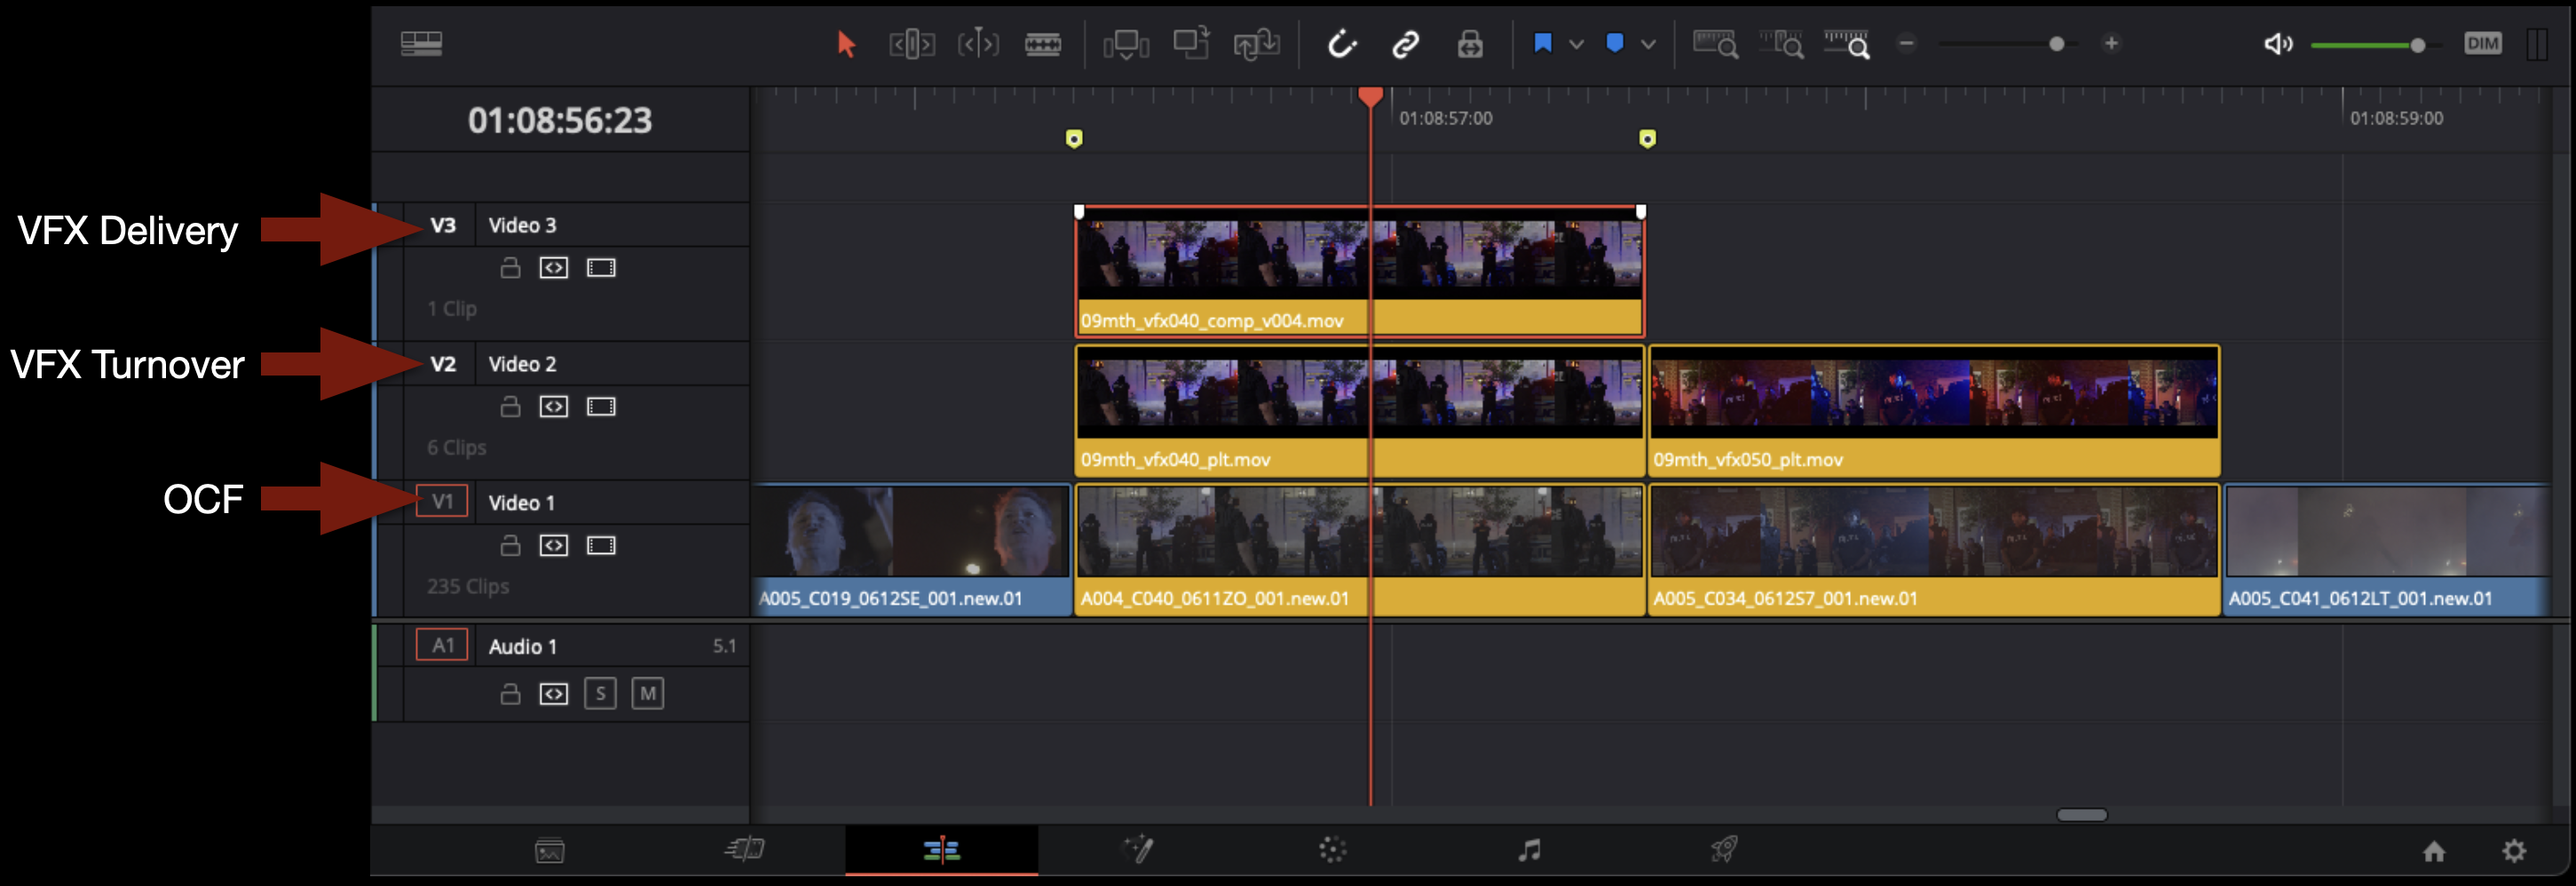
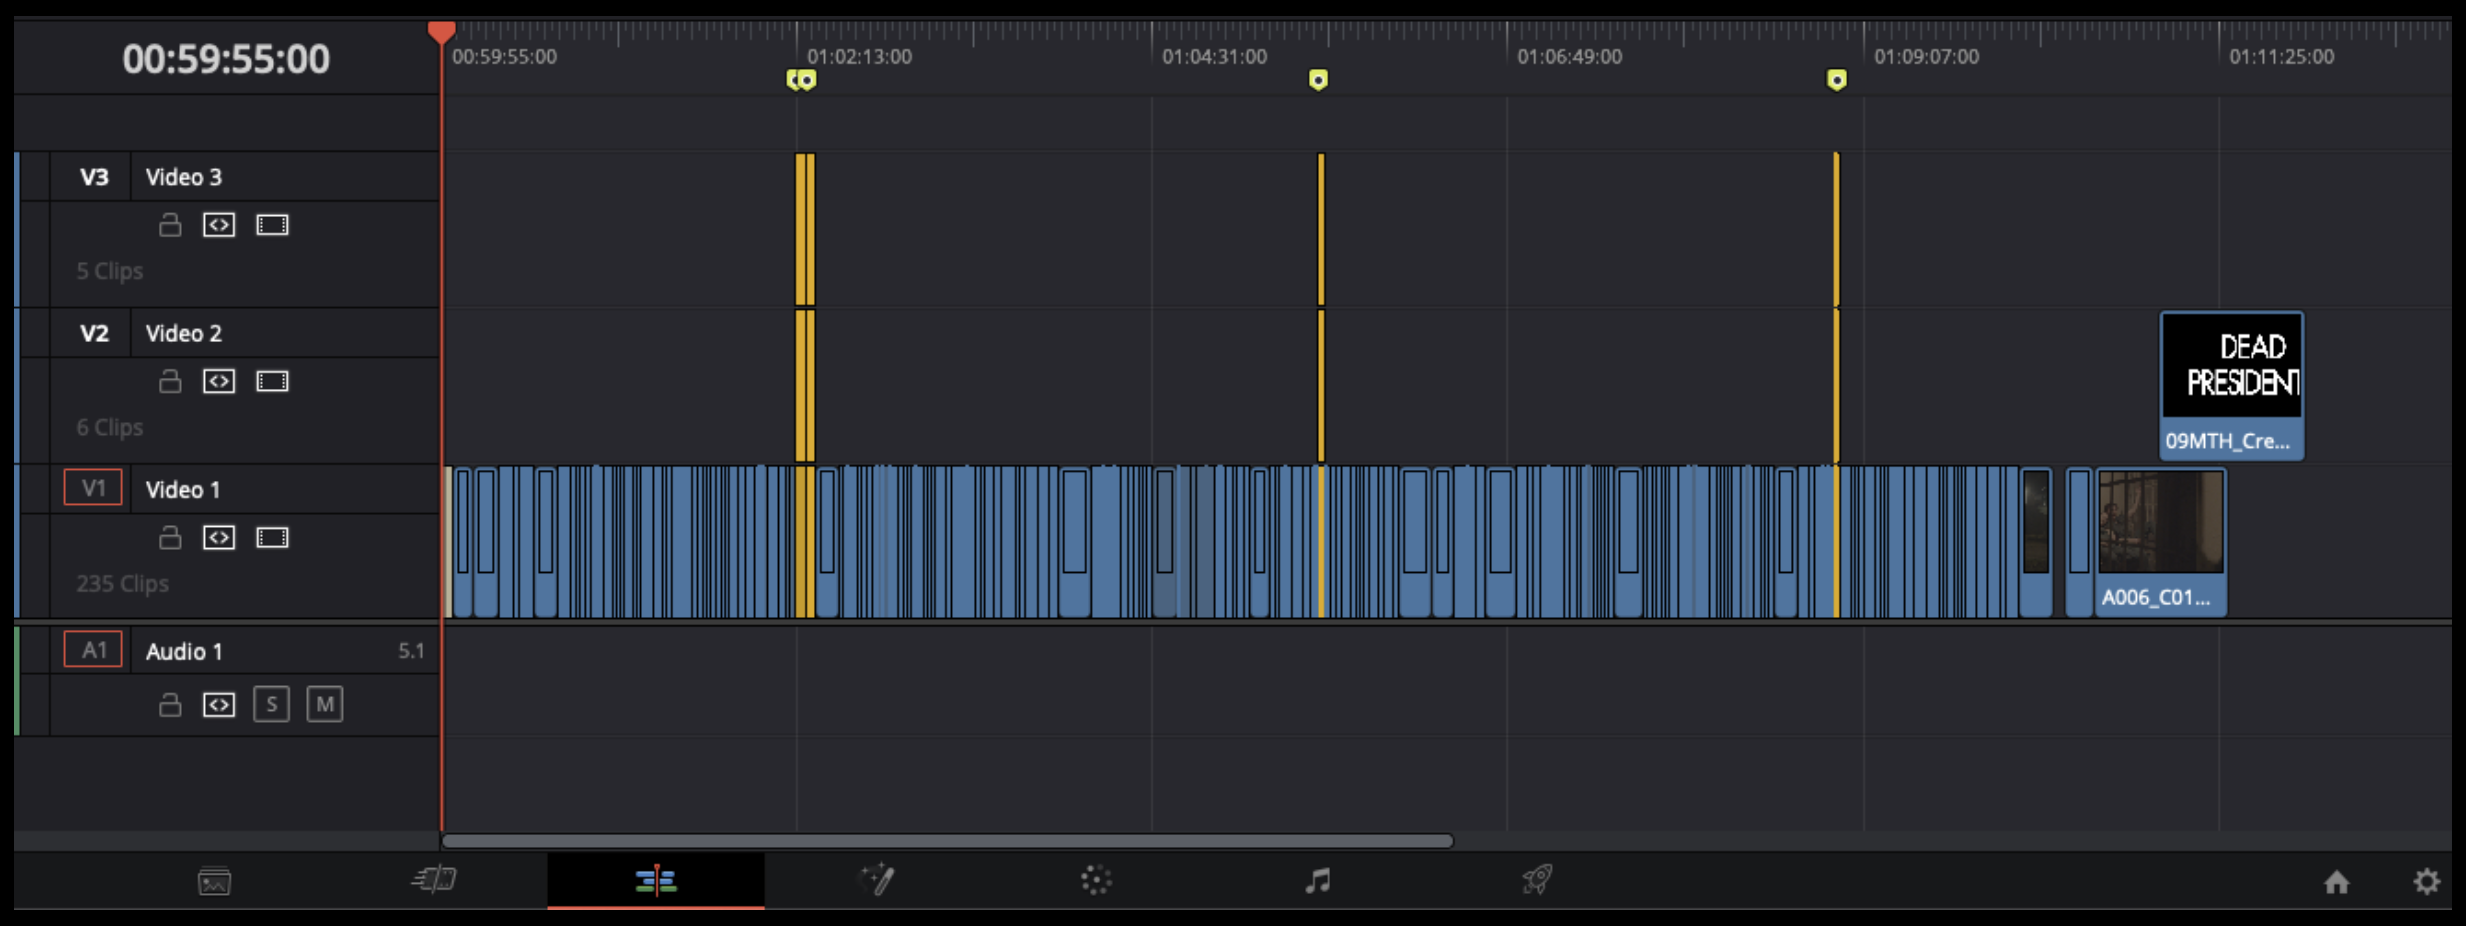
In the Edit page, cut in each VFX shot to Video Track 3.
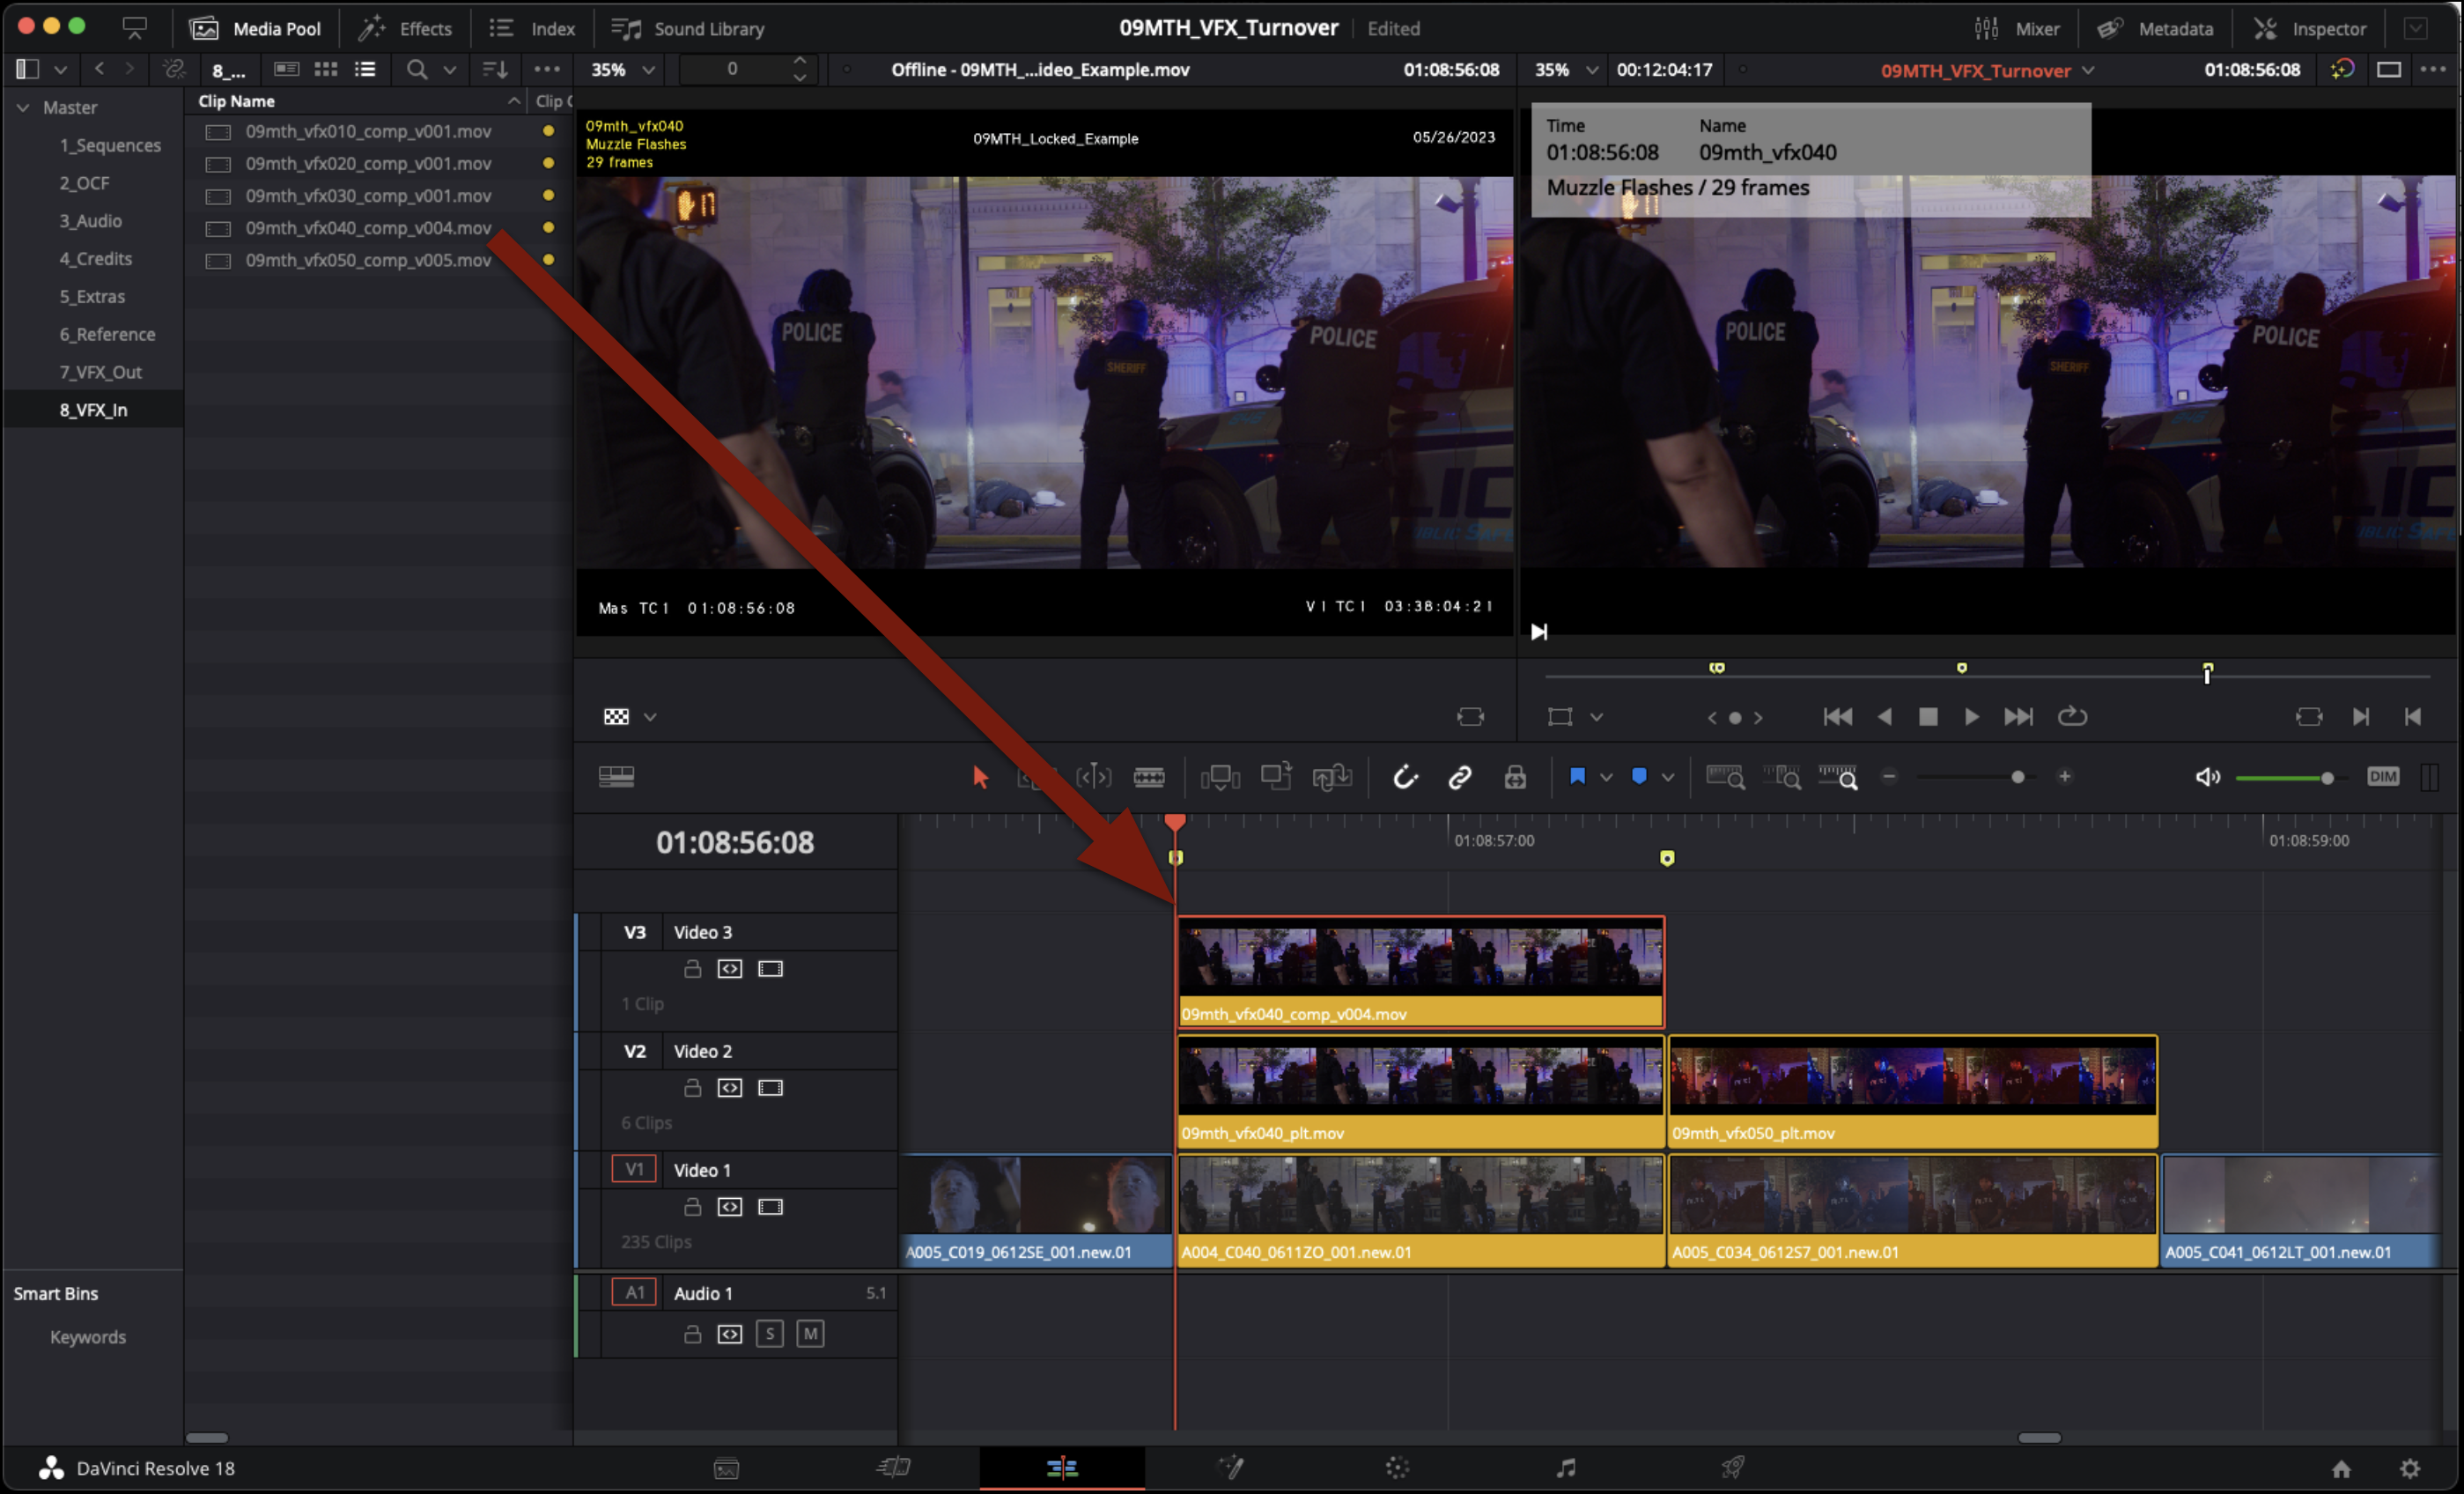
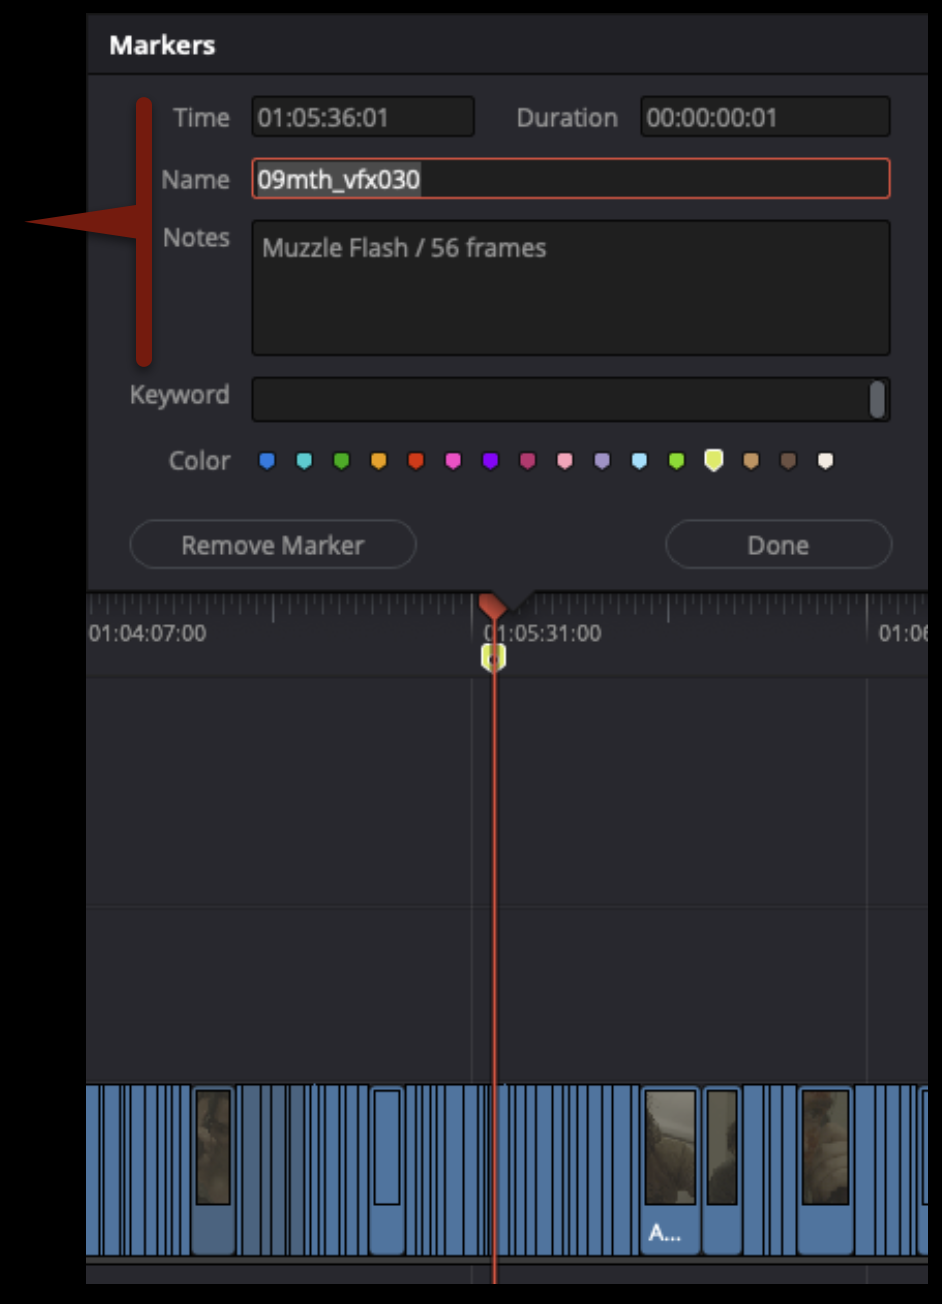
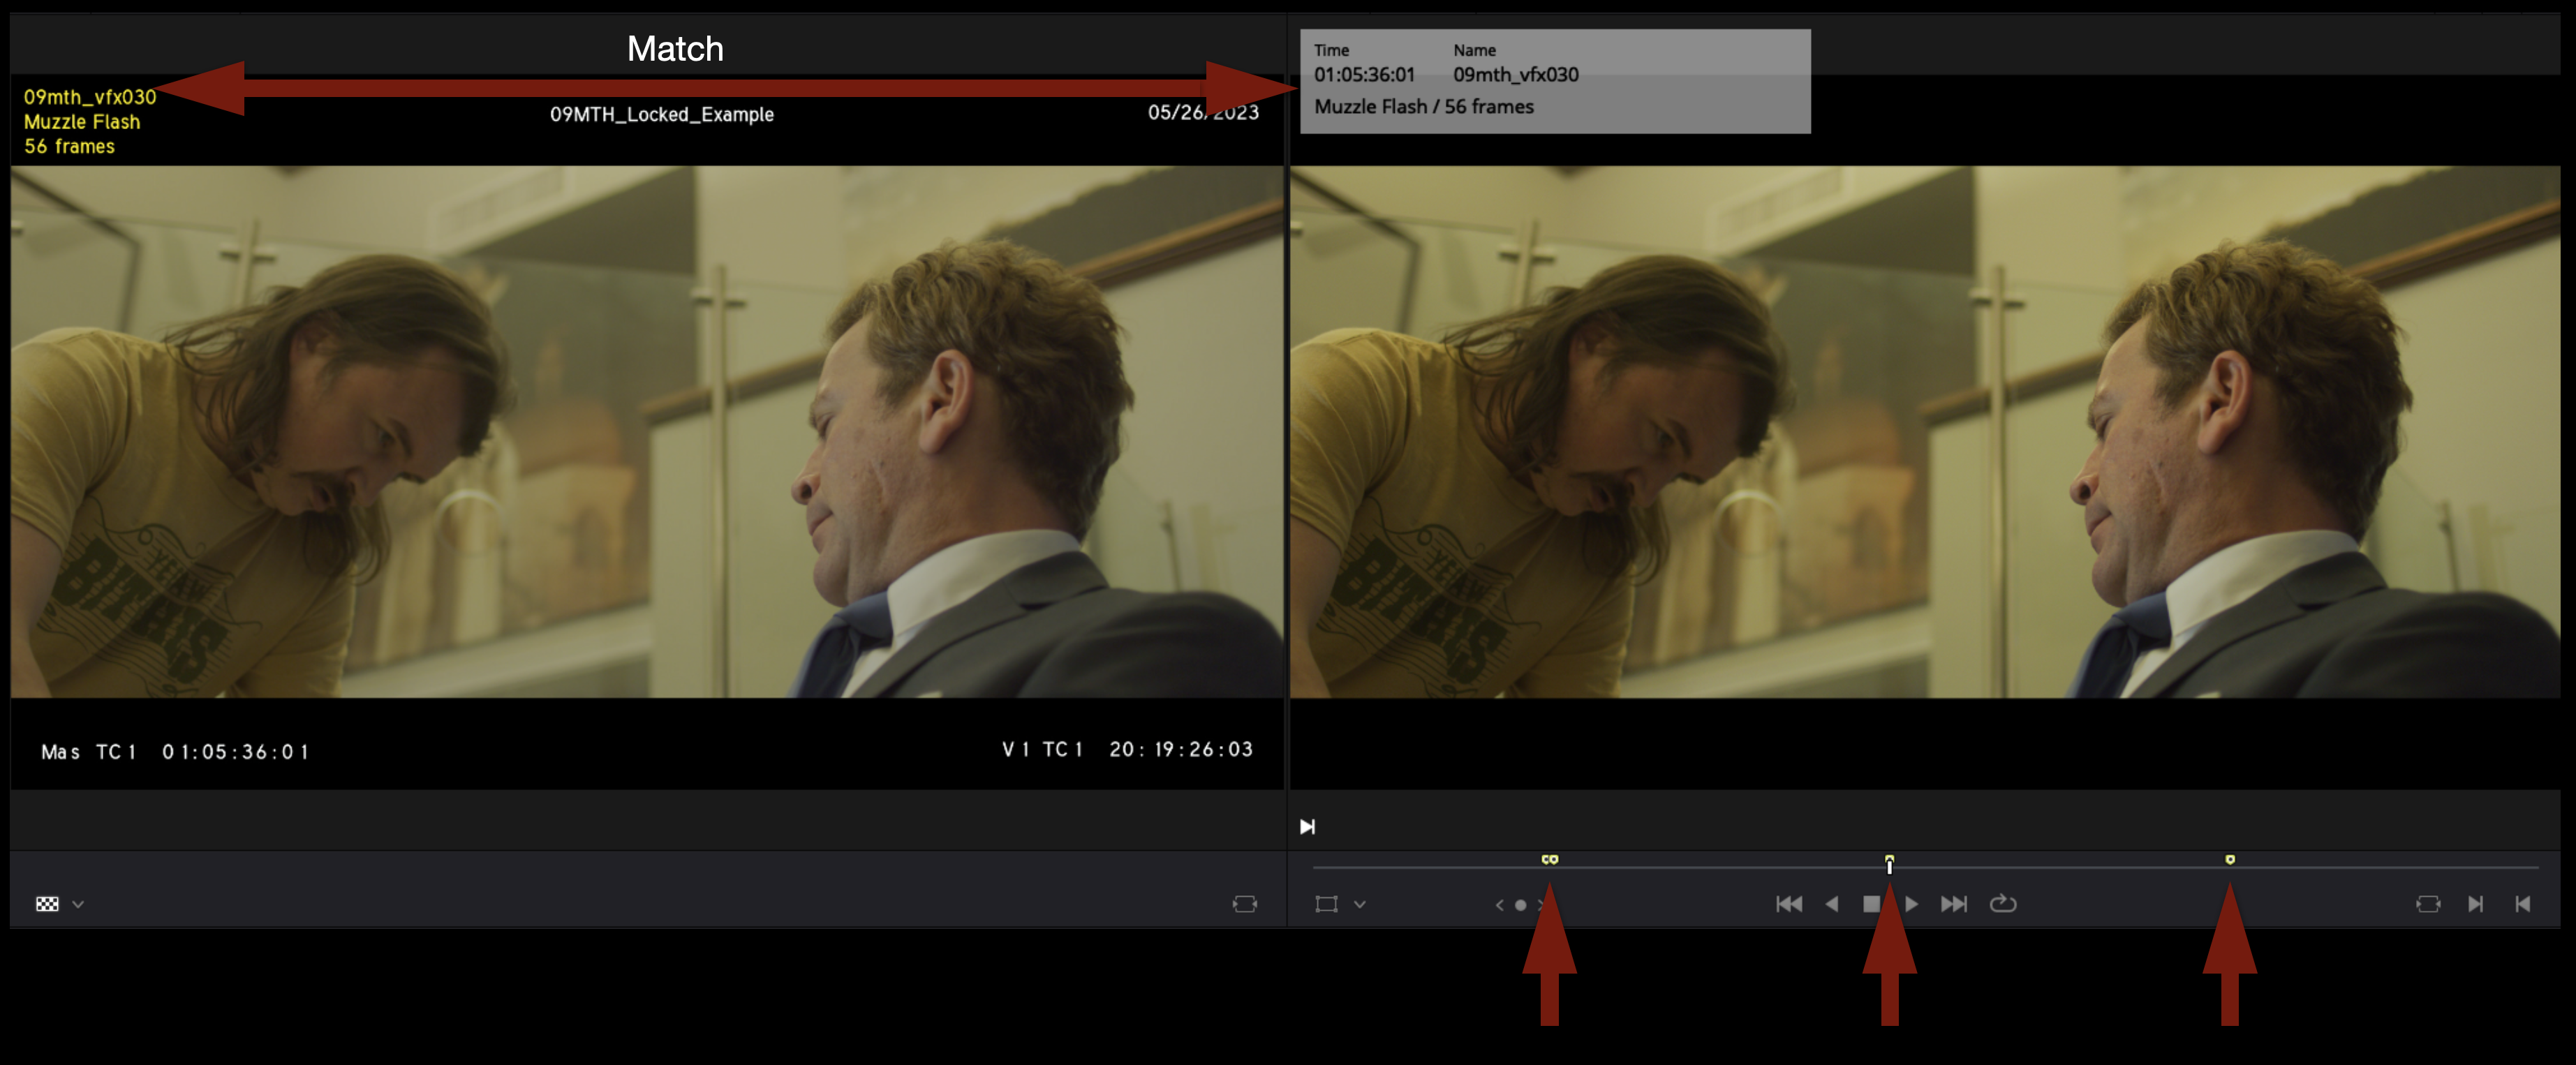
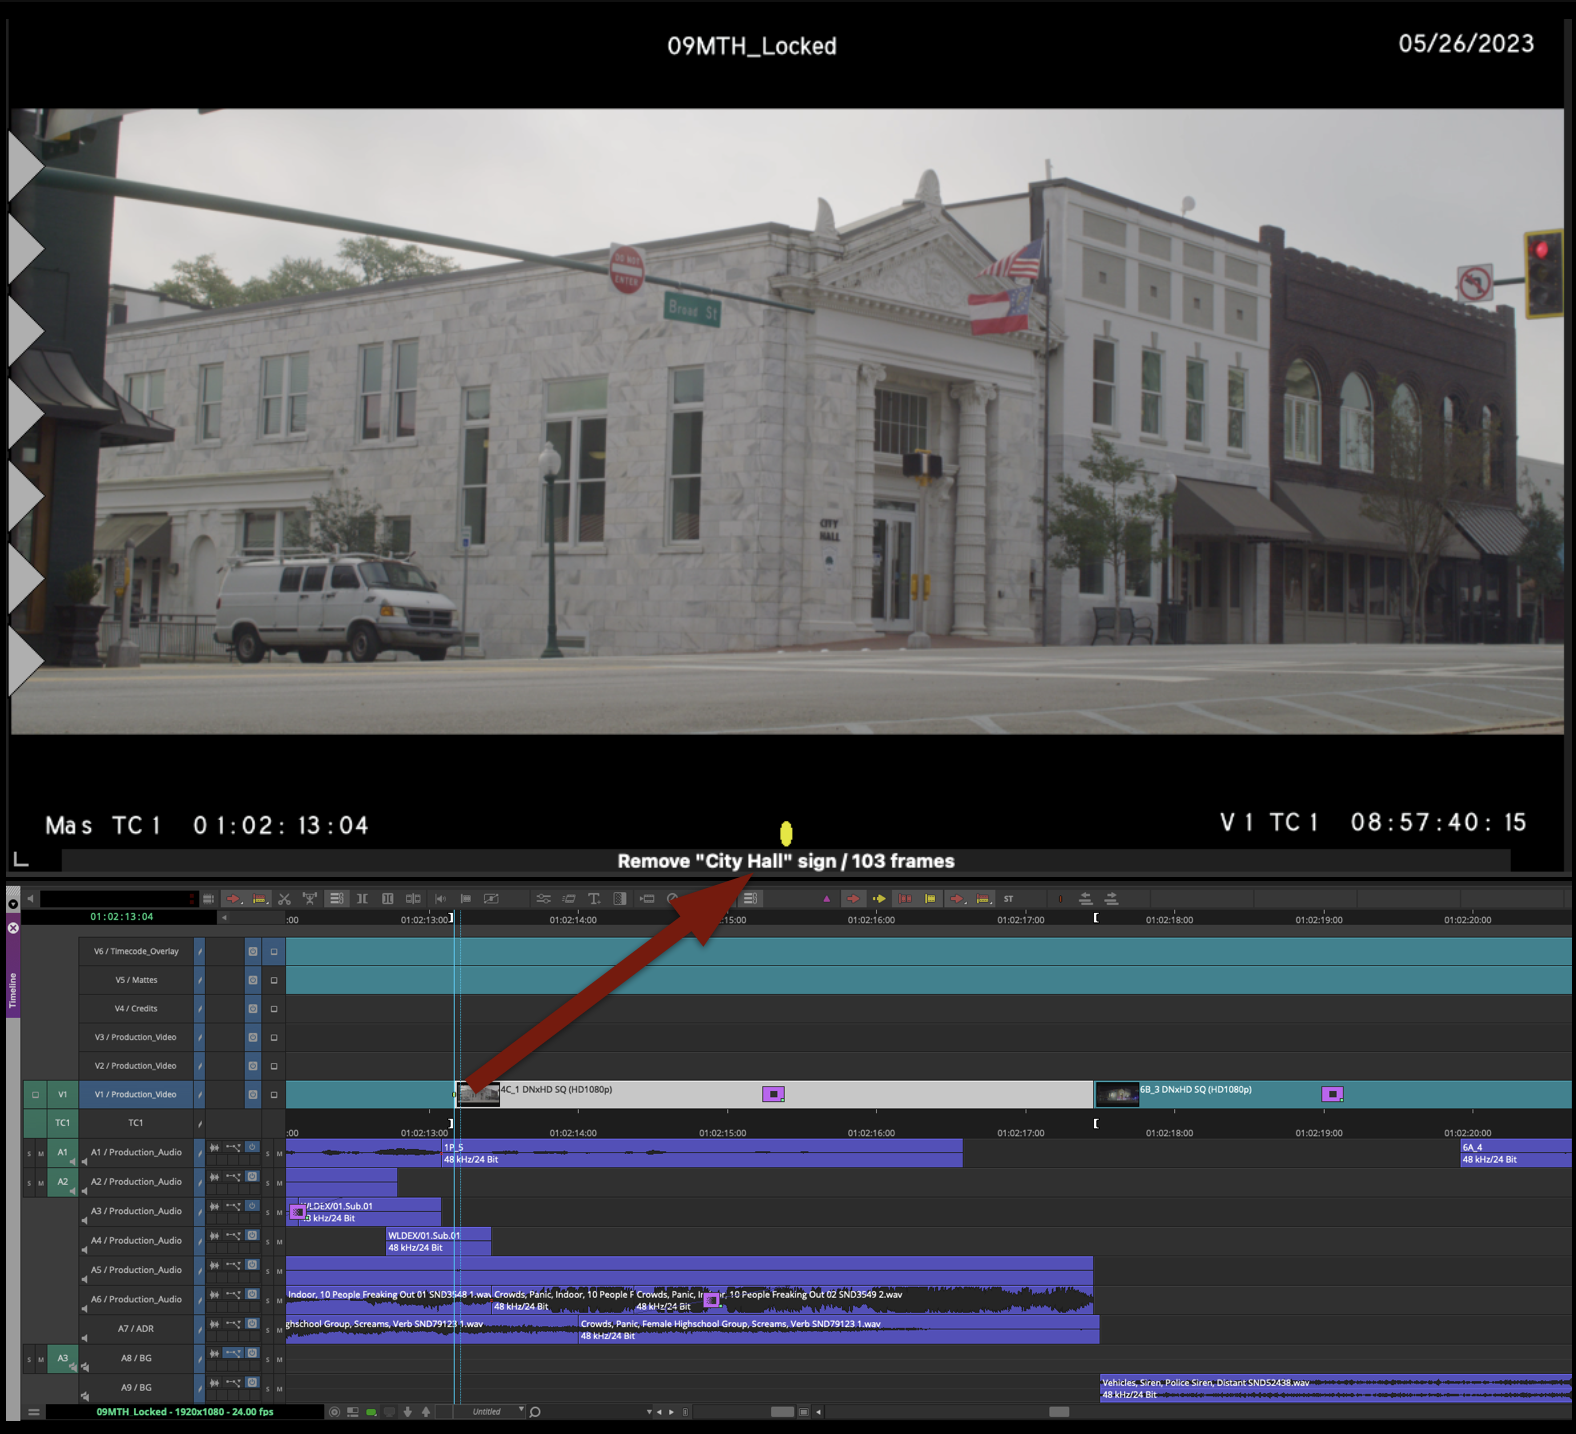
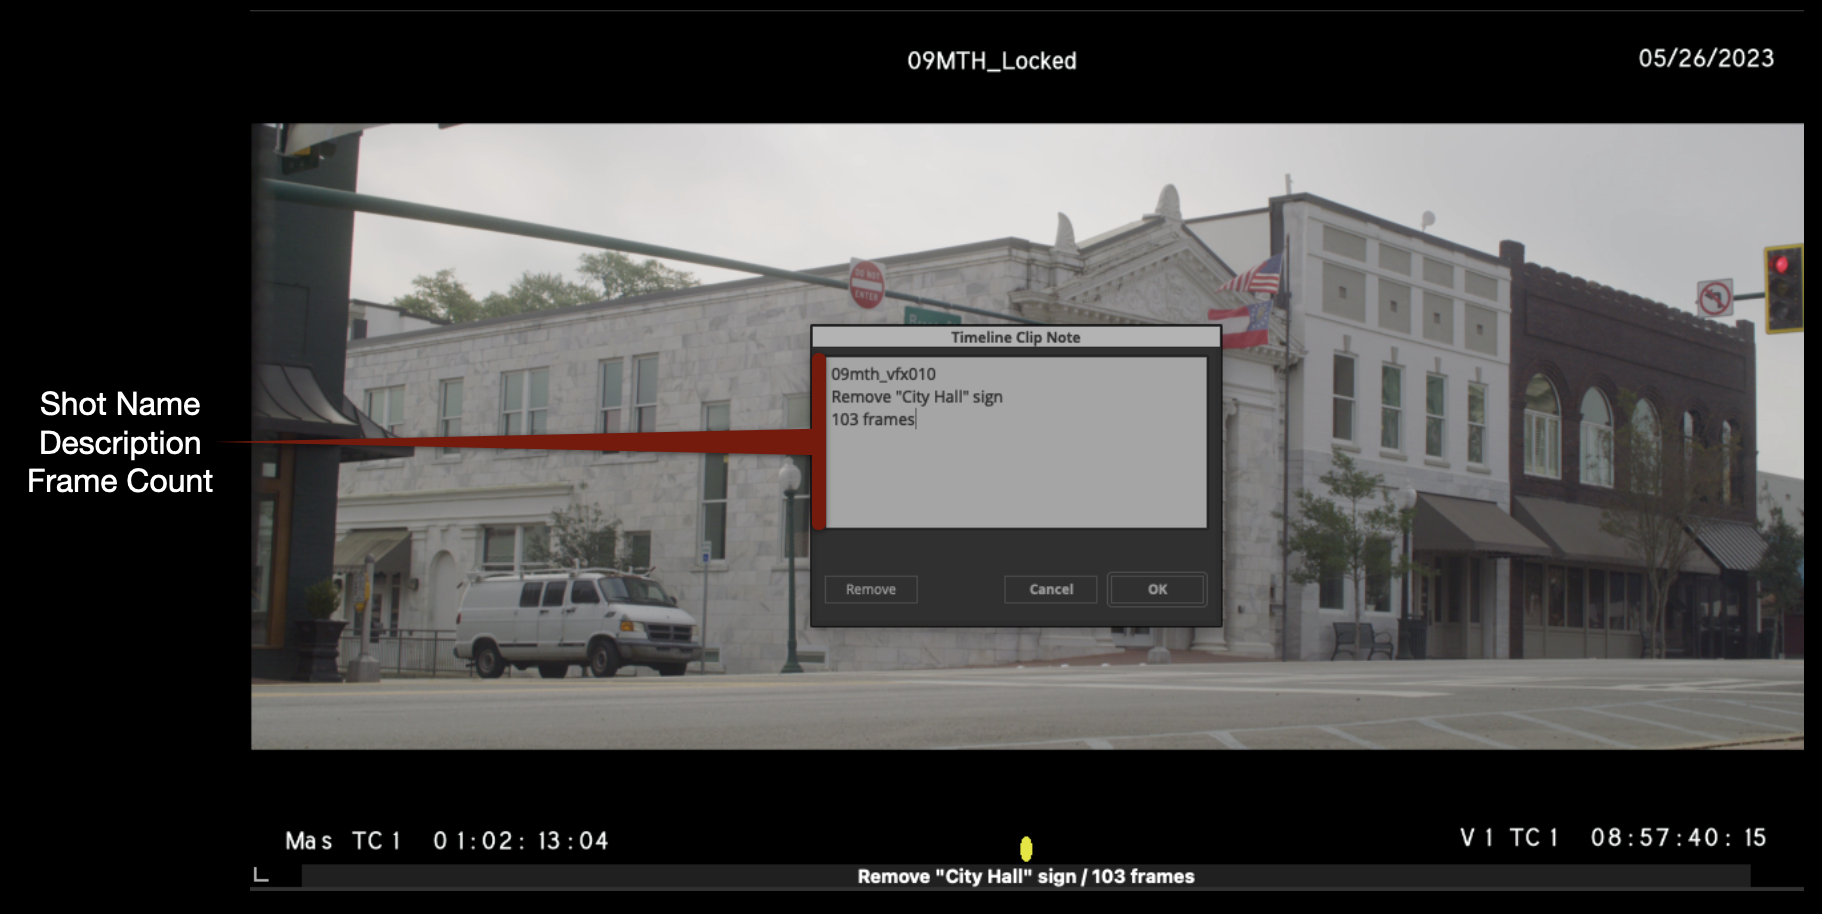
You should see the progression of the shot as shown in the example below.
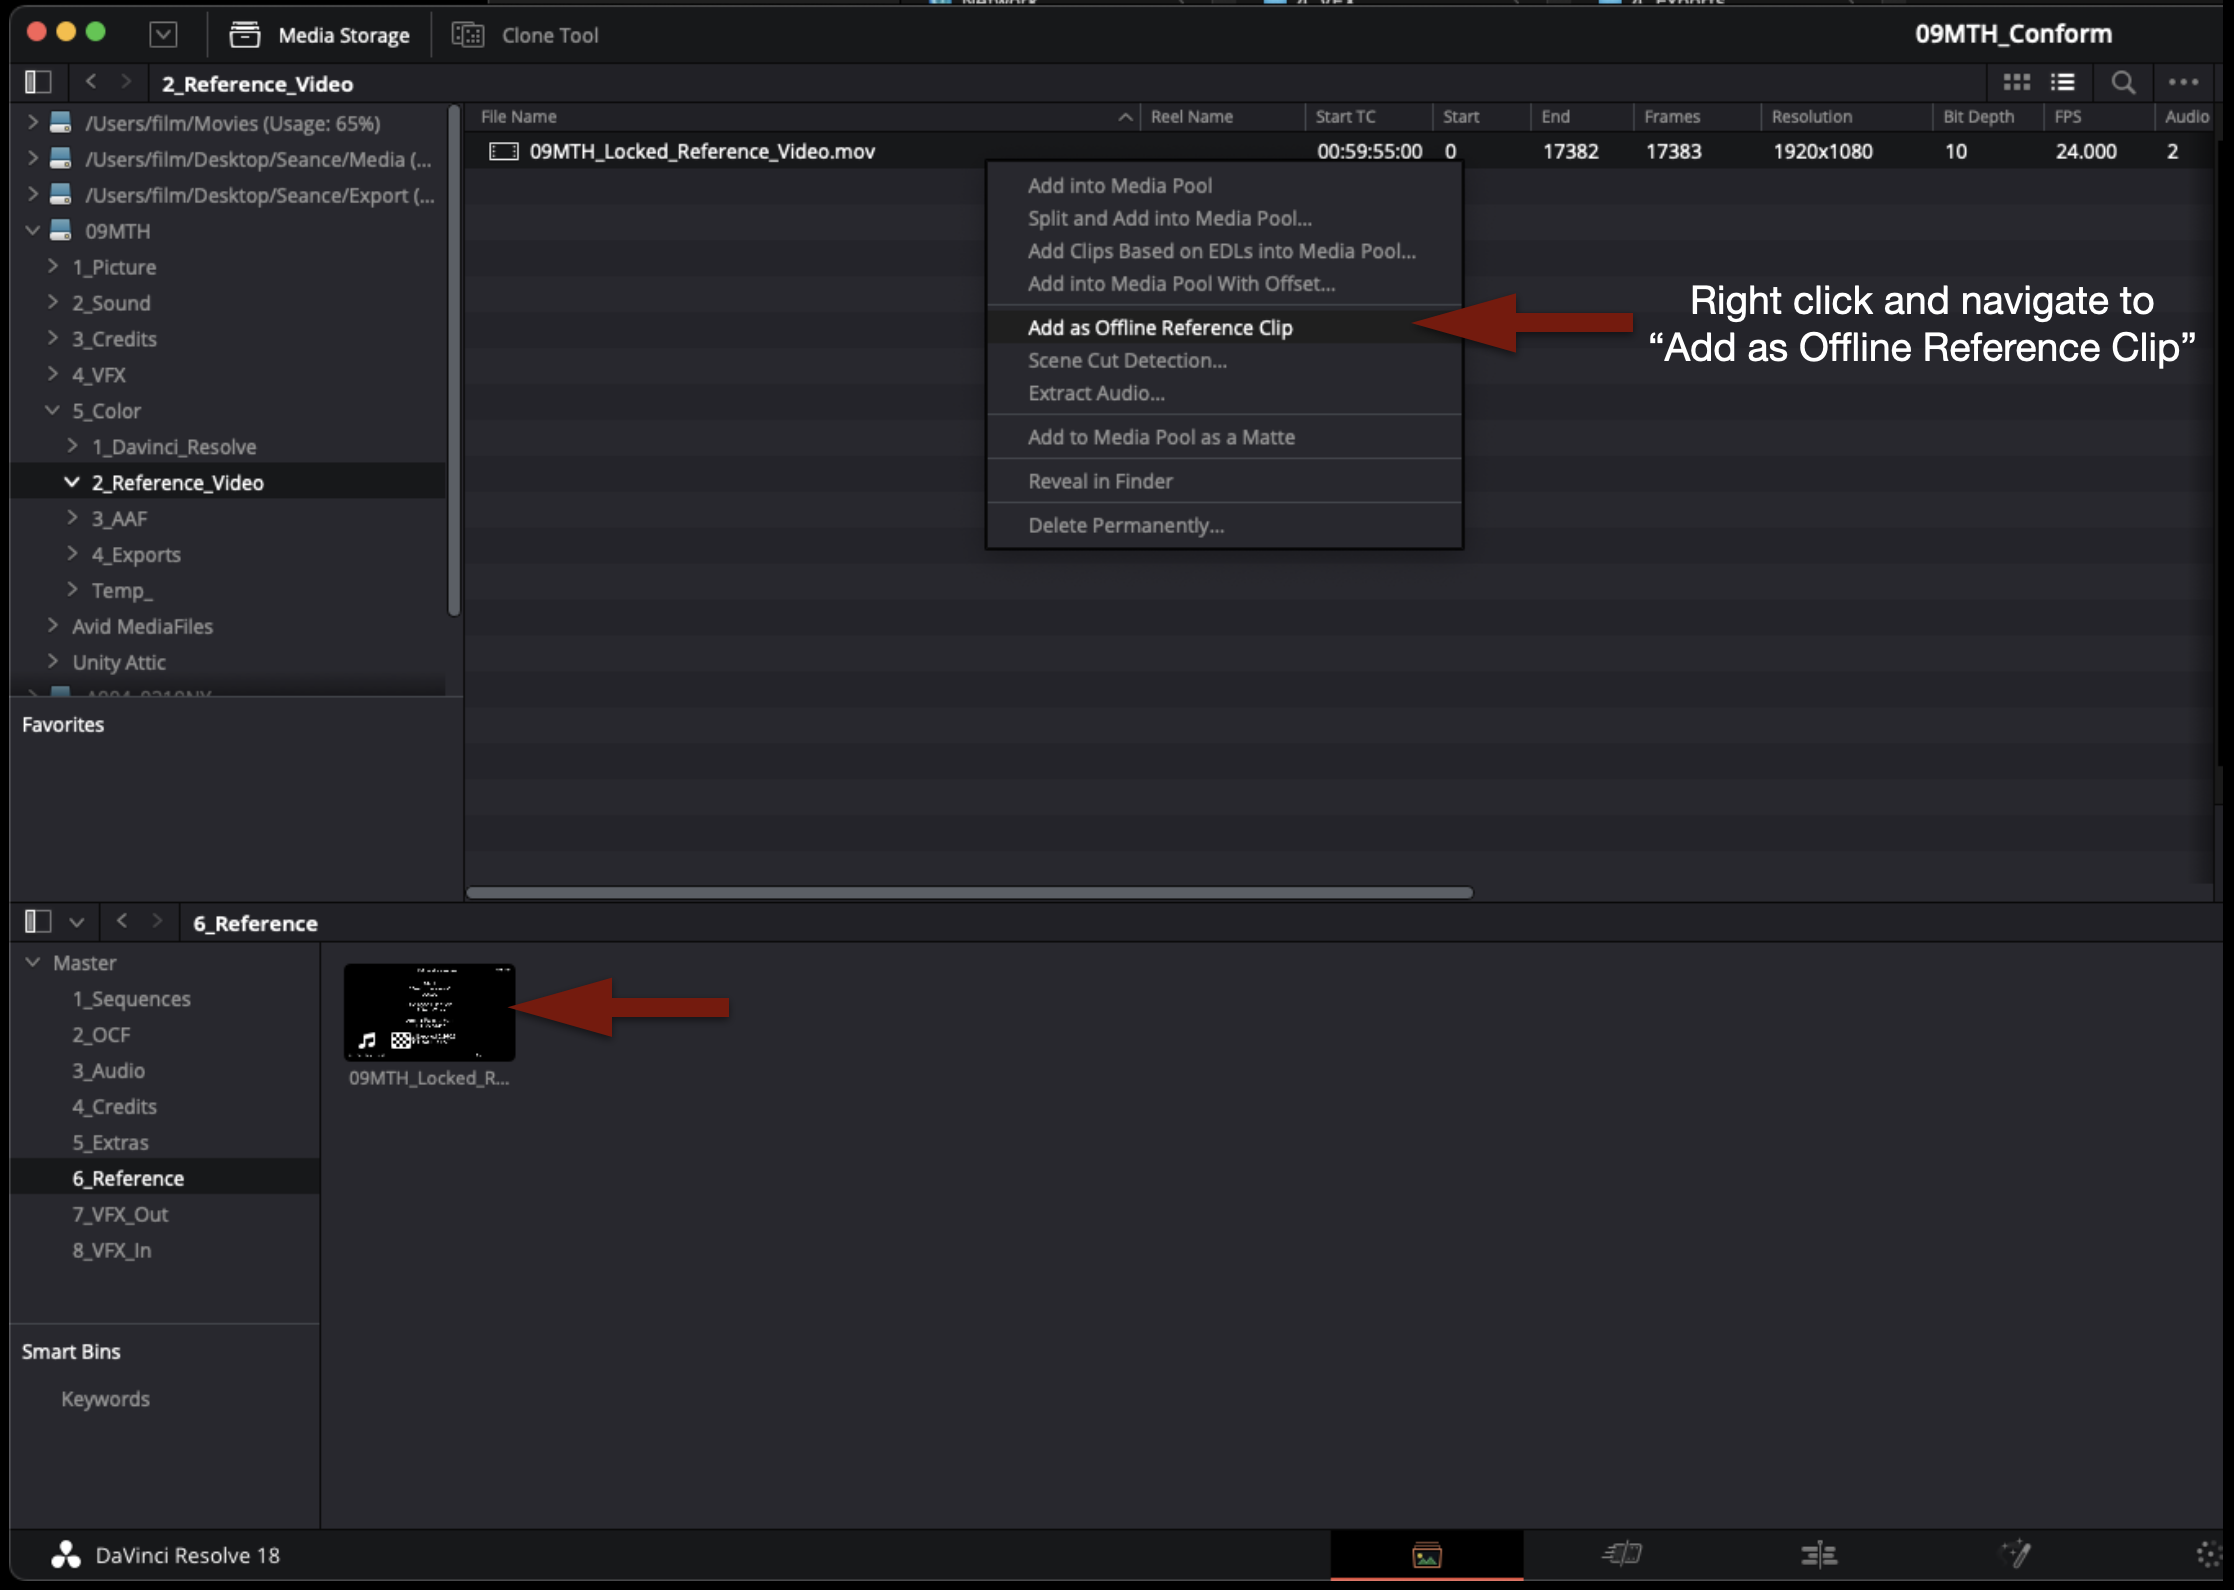
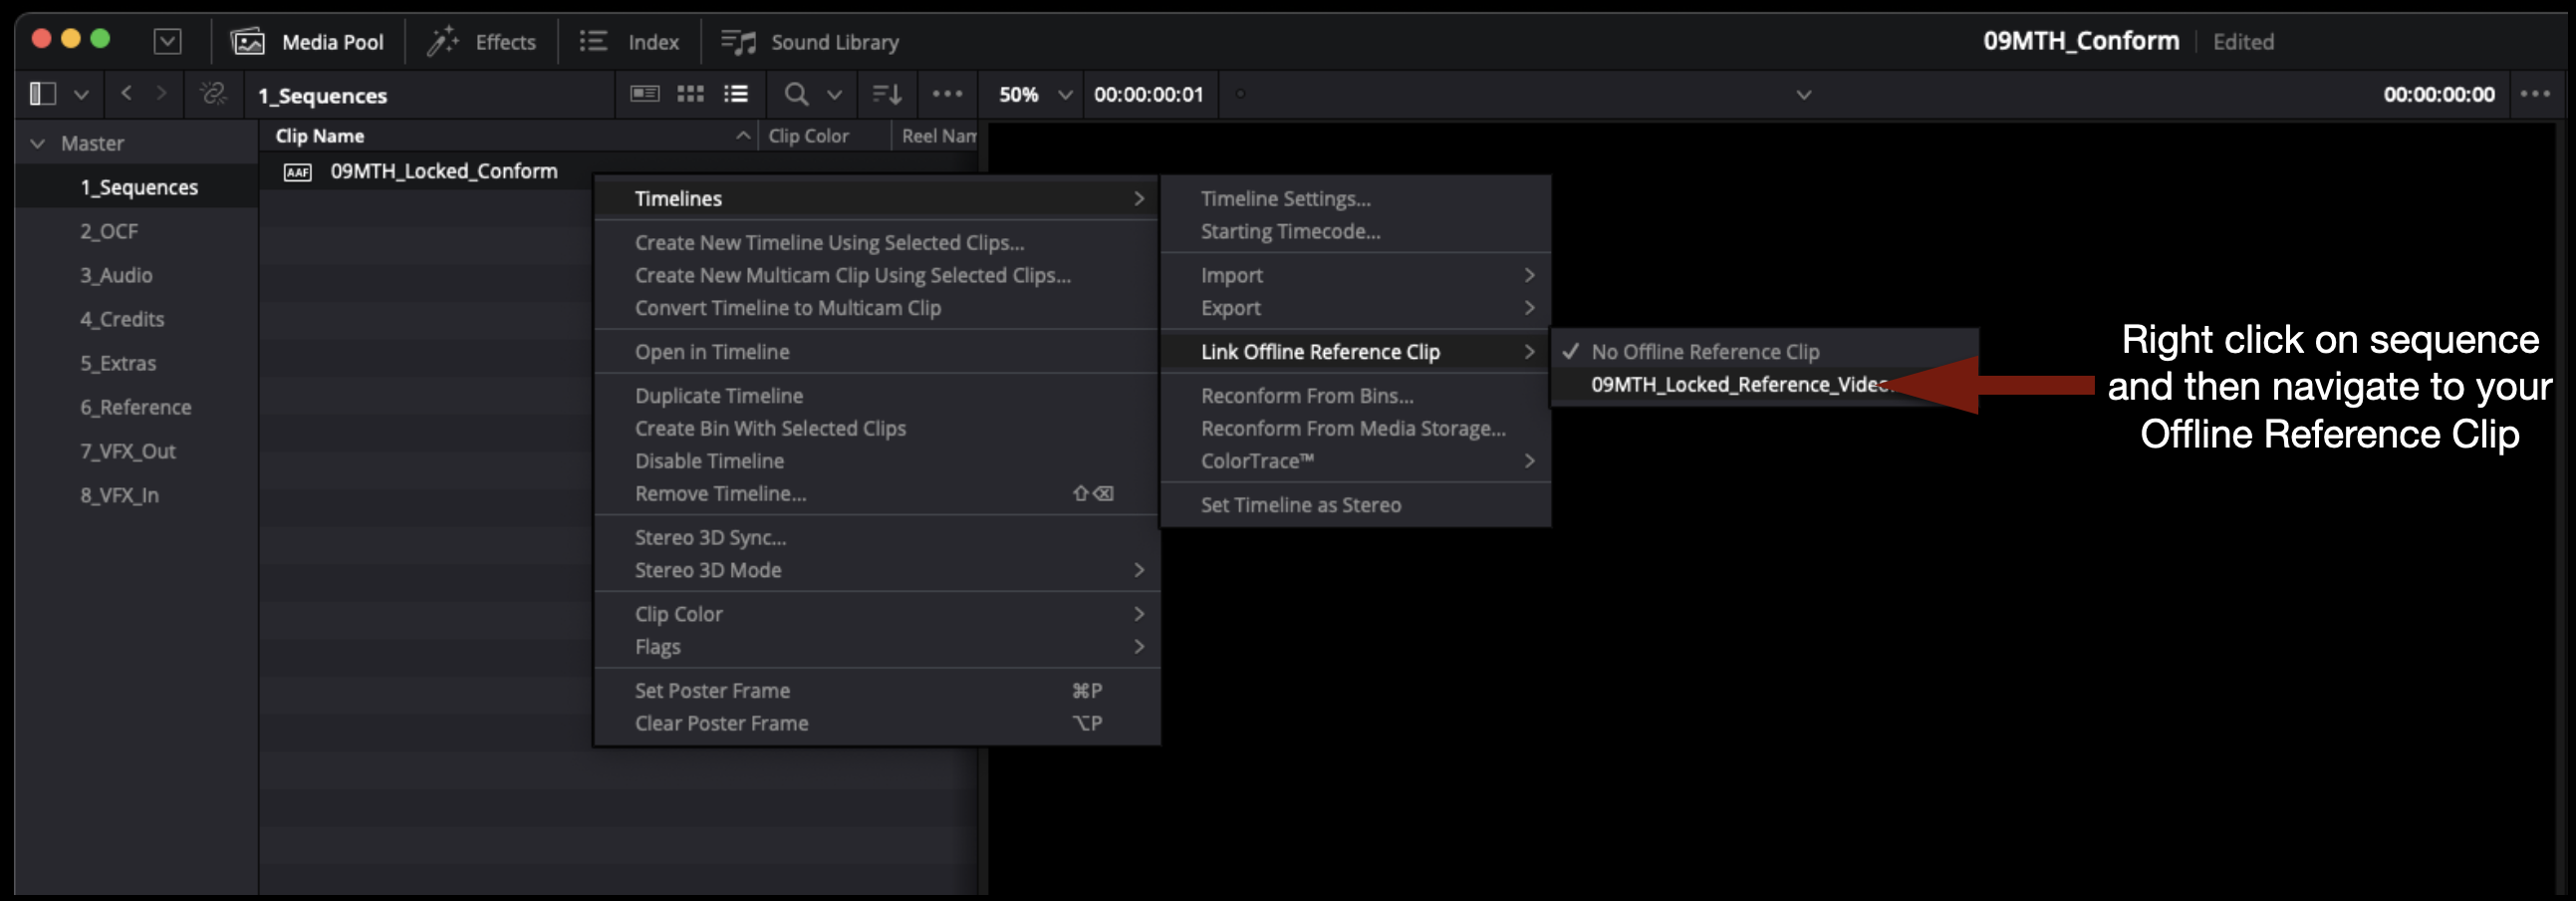
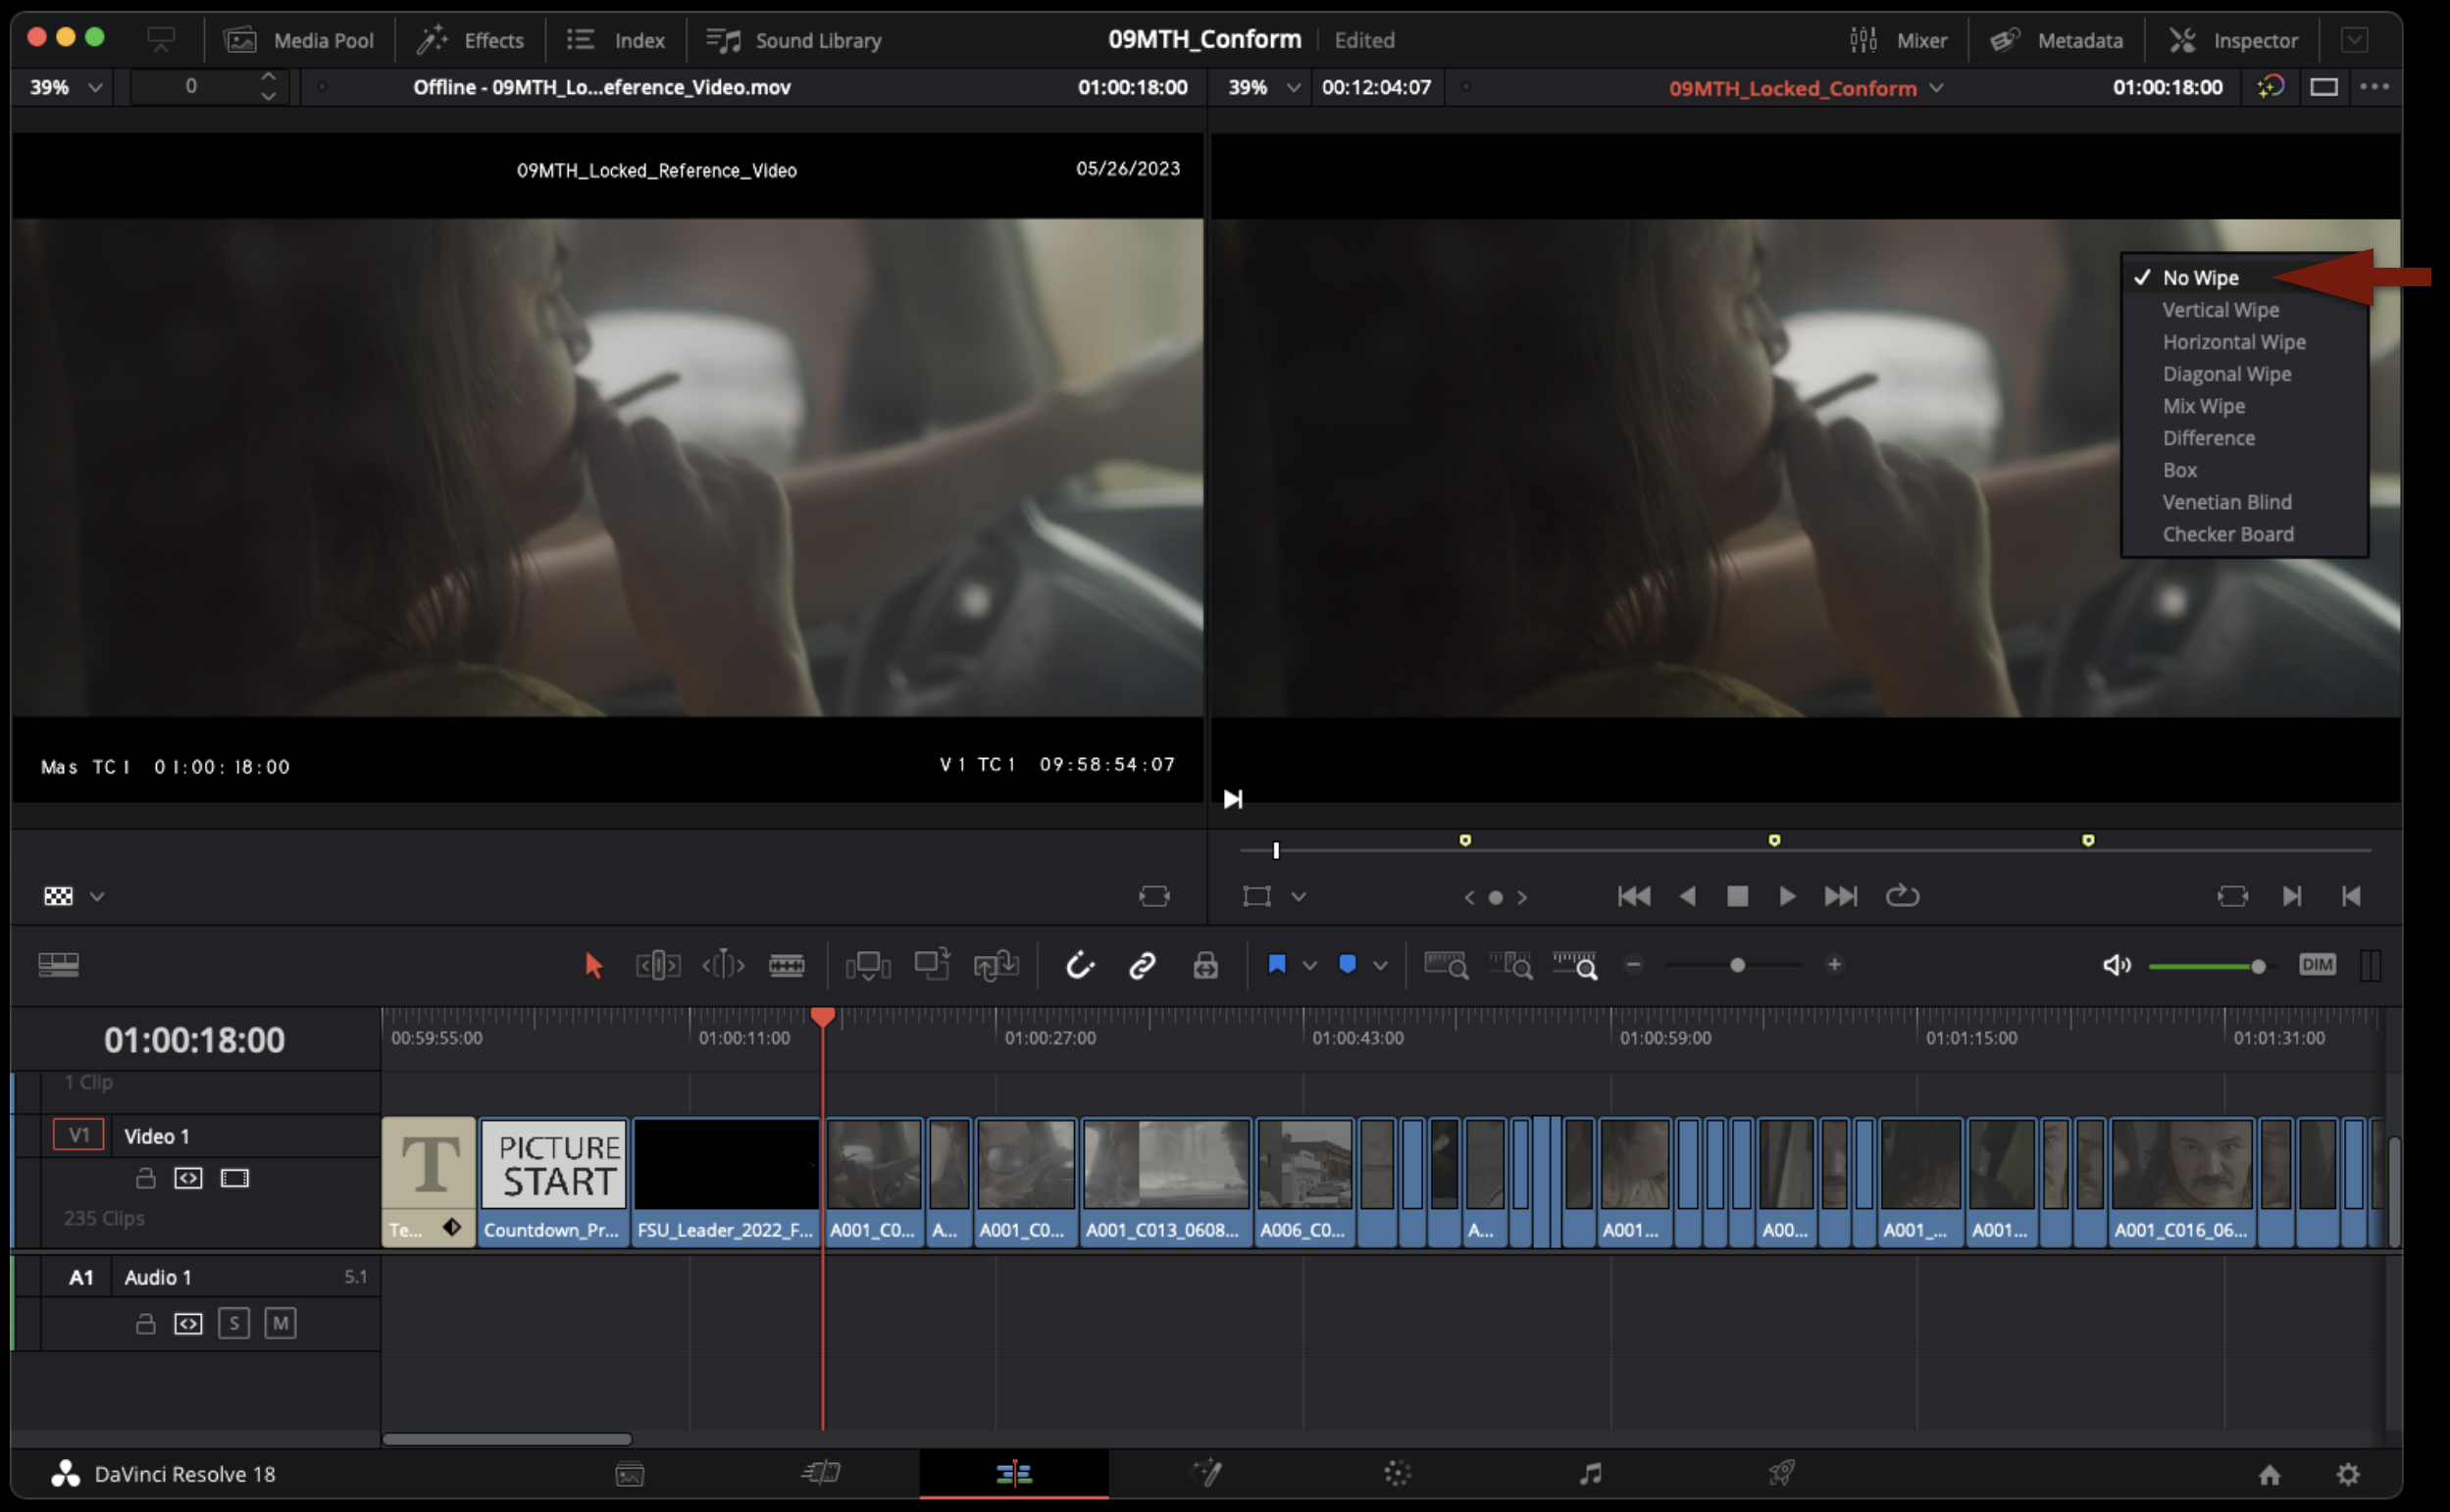
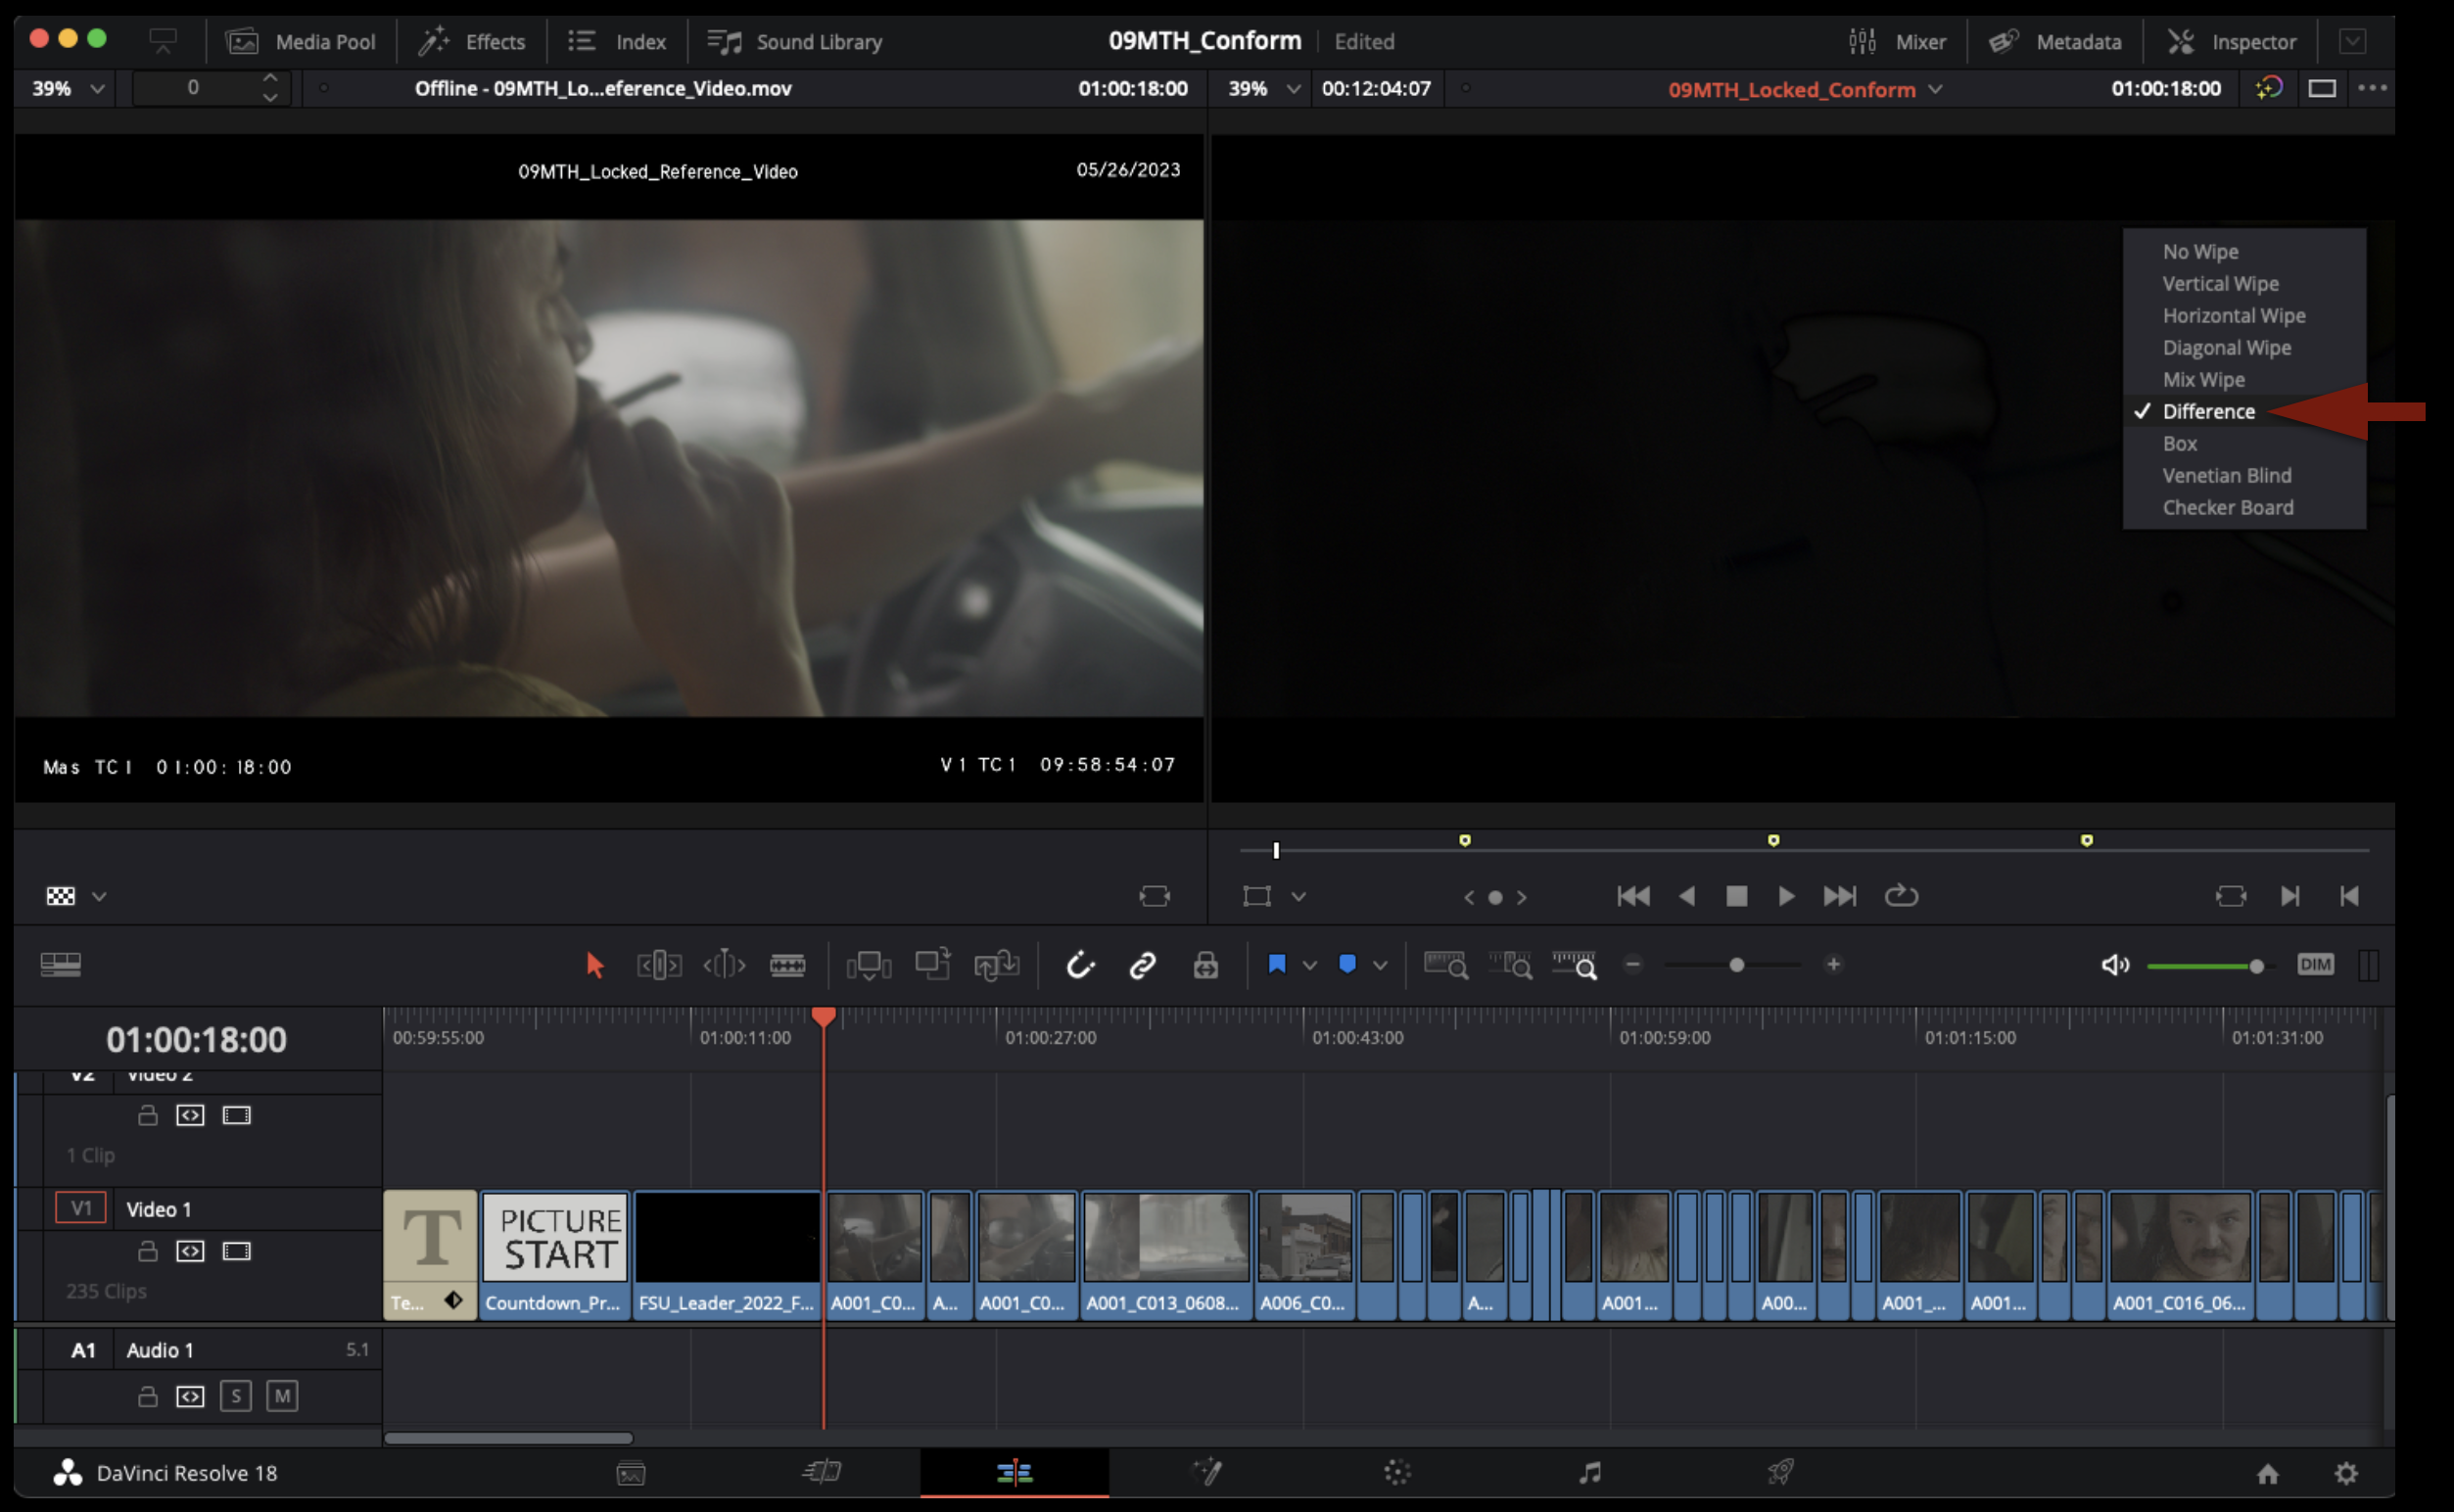
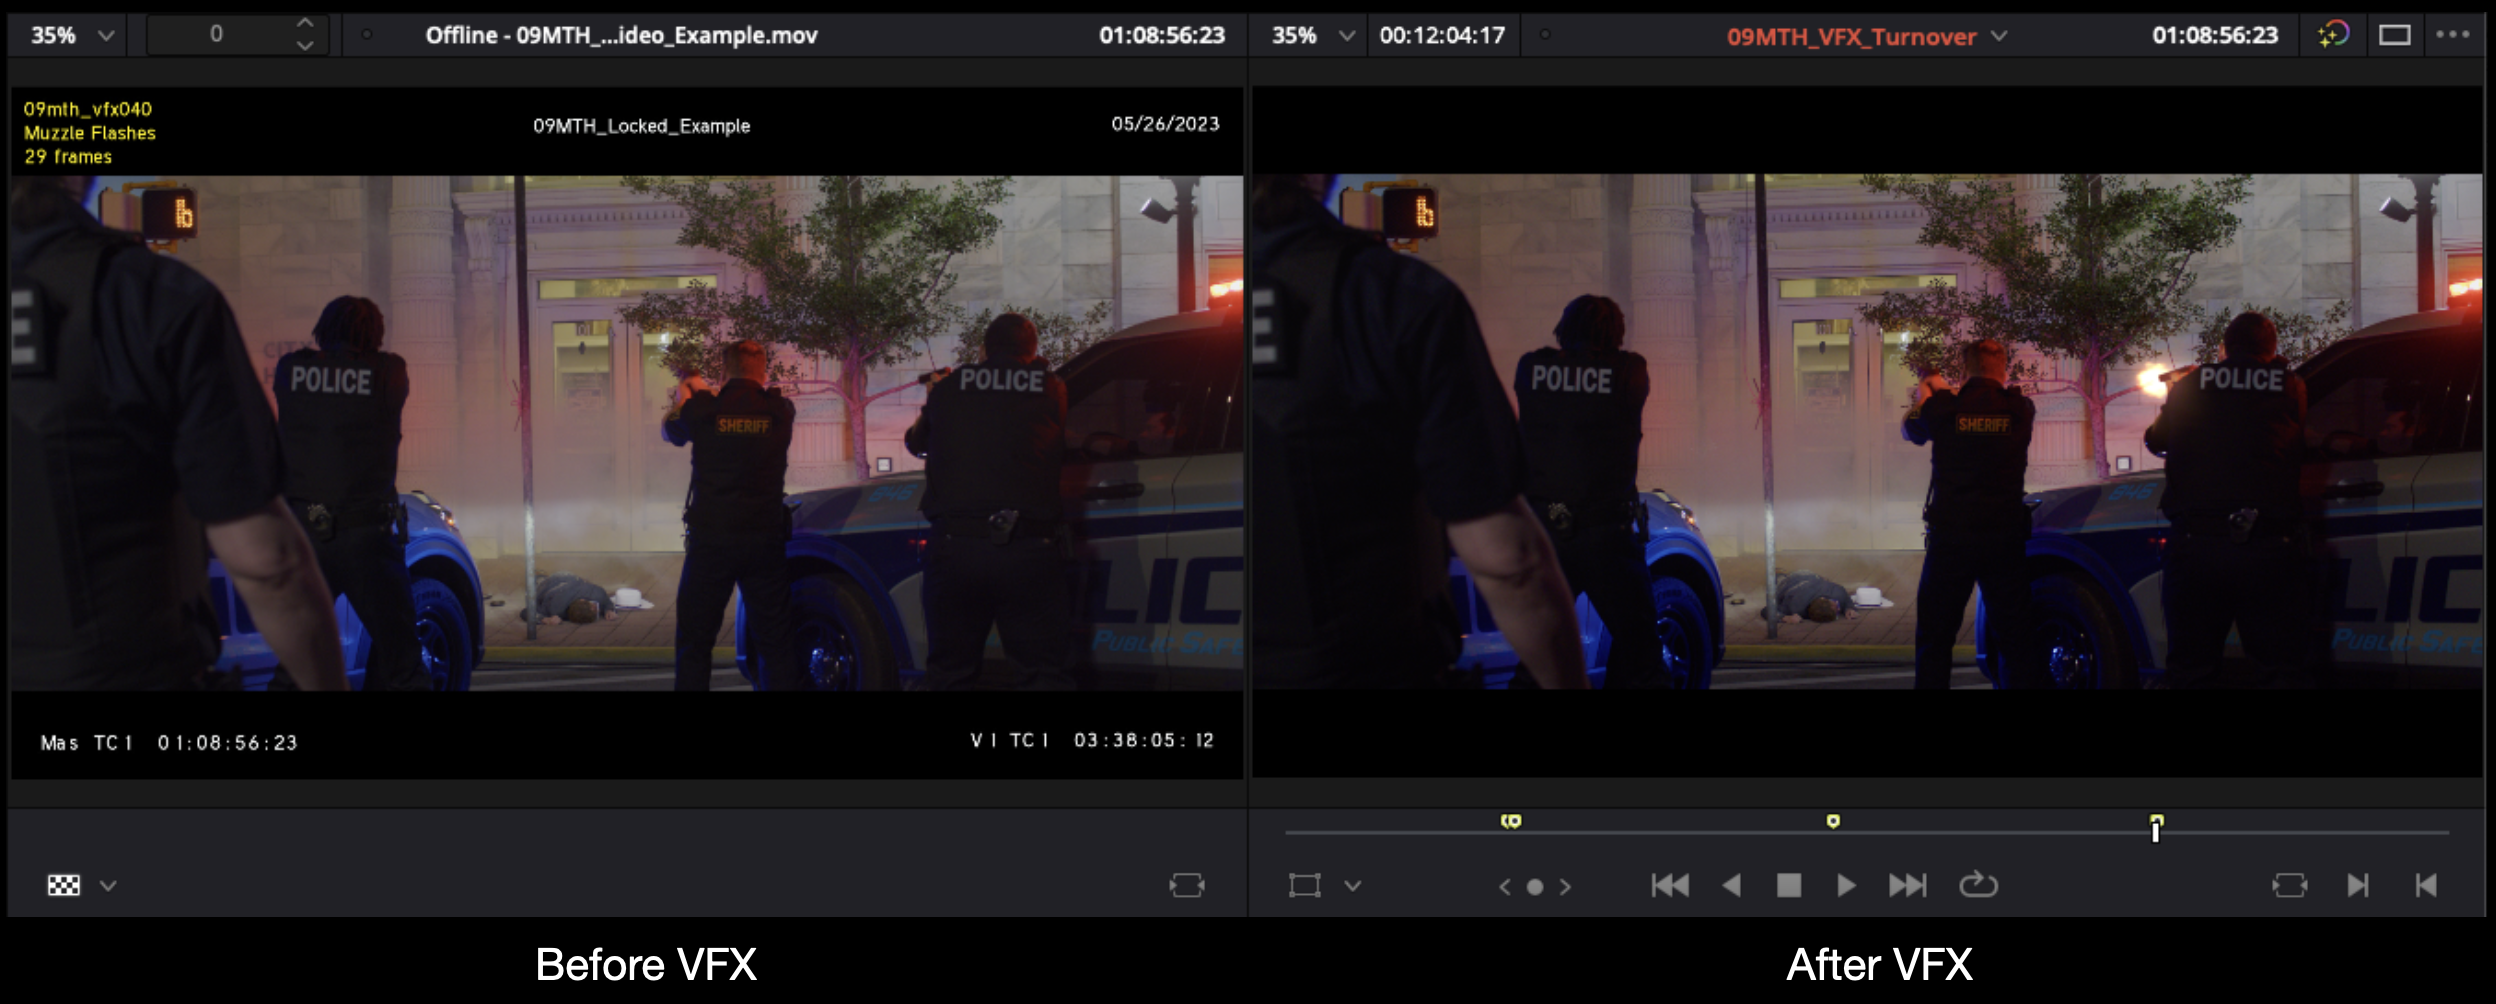
Using the Offline Reference, you should be able to see how the finished VFX shot compares to the locked picture edit.
Repeat for the remaining shots.
Export Reference Video from Resolve
A new reference video will need to be exported for sound design and sound mixing reference.
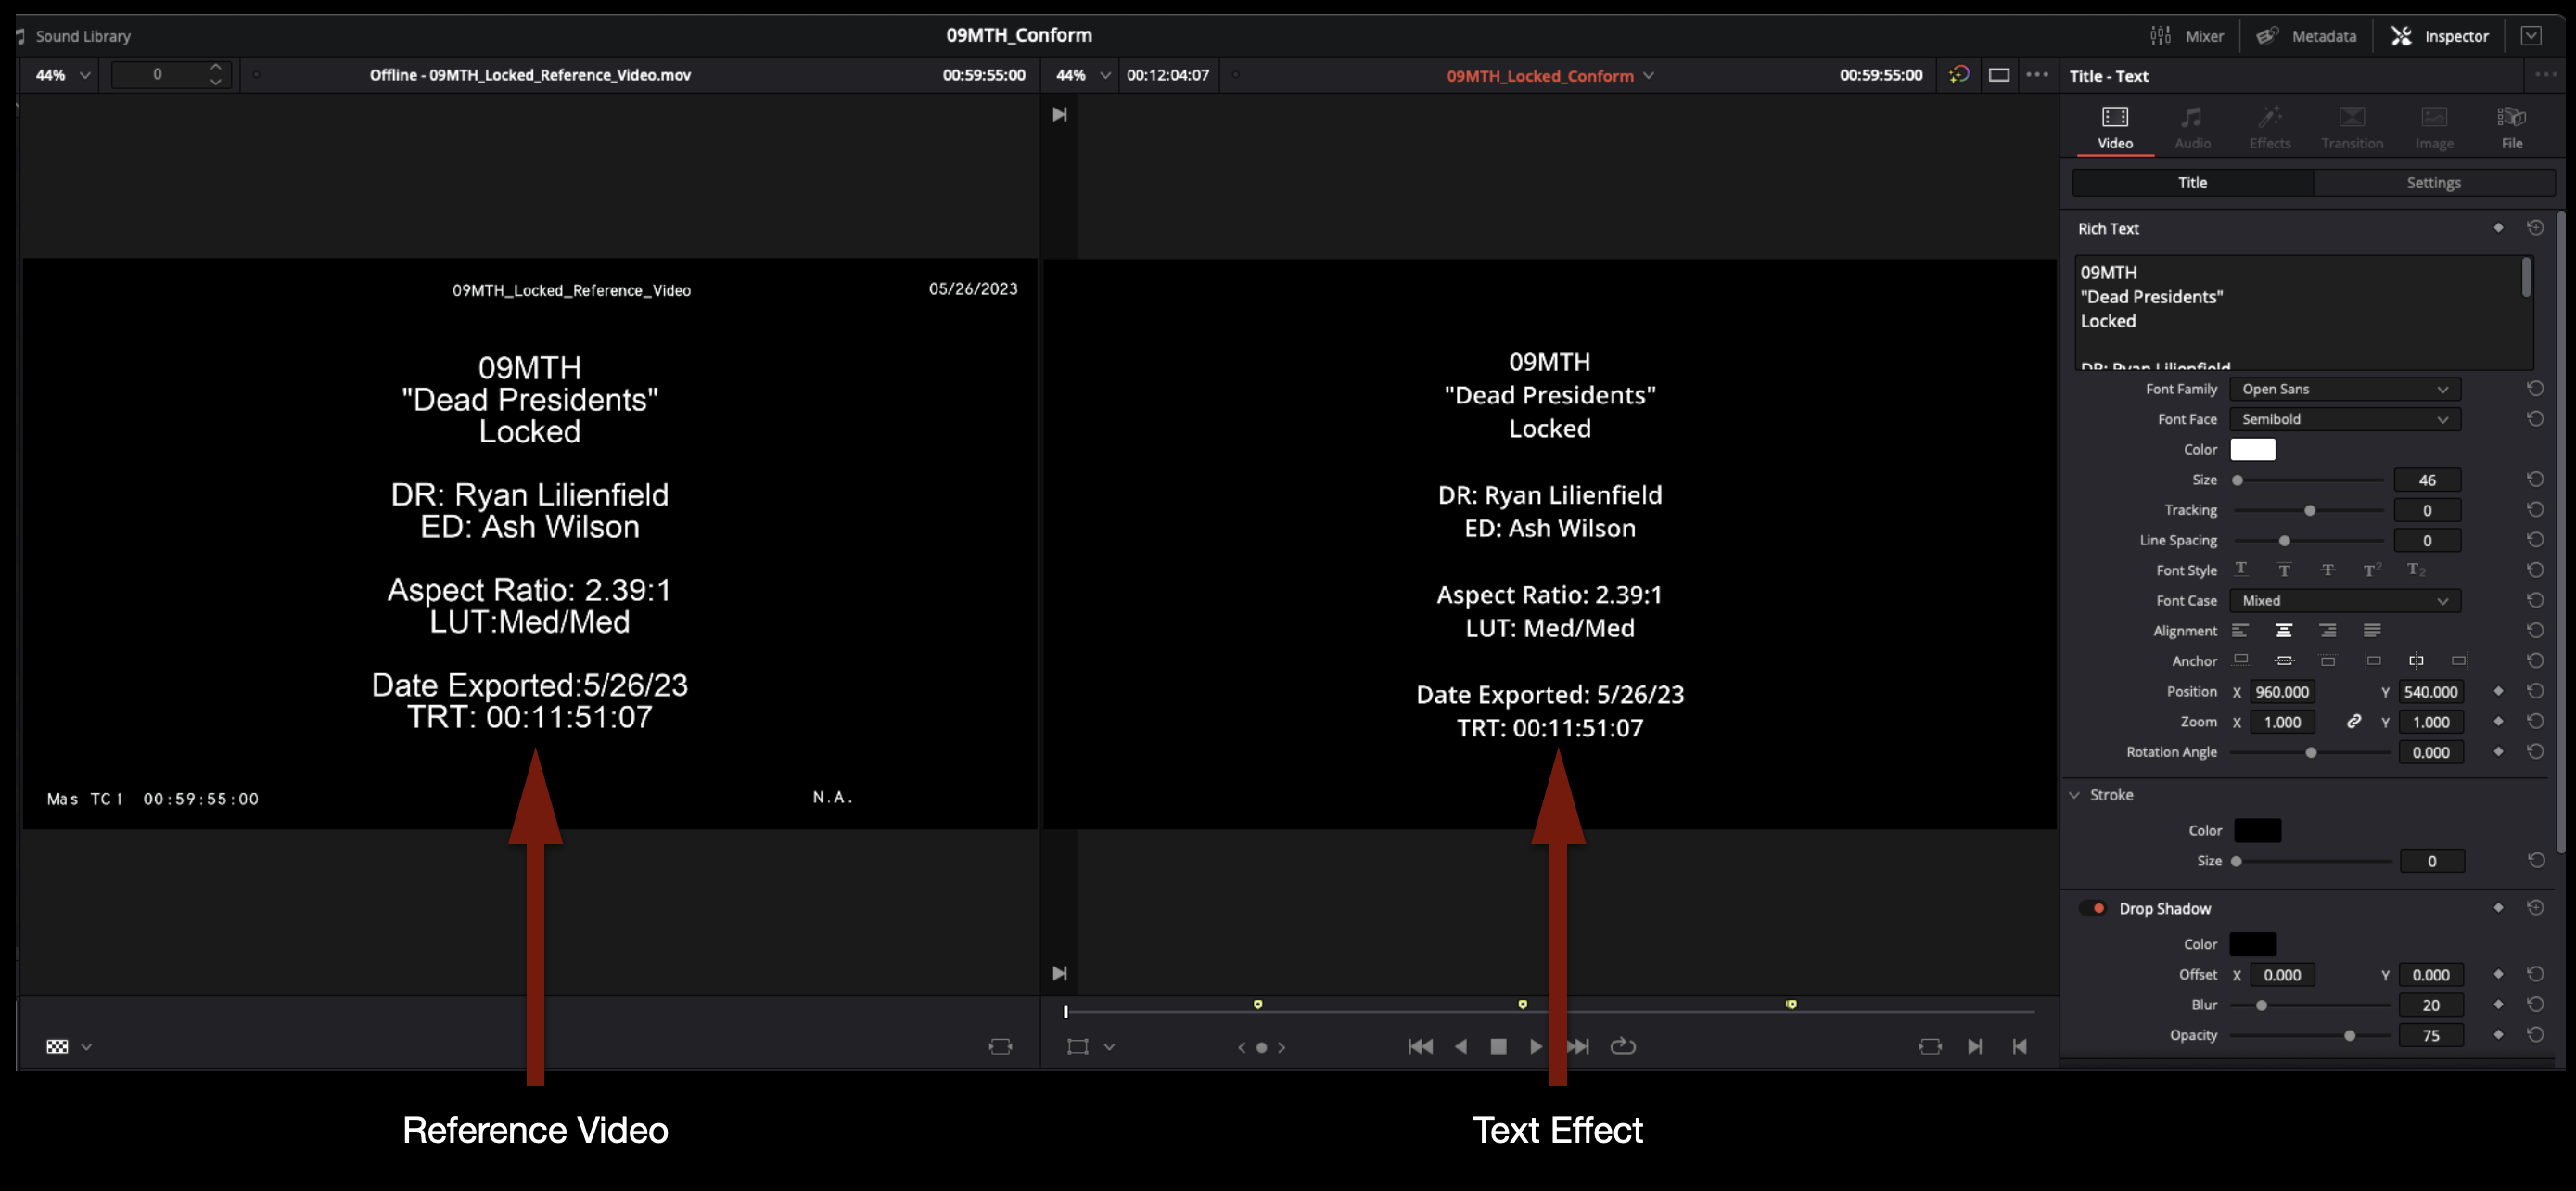
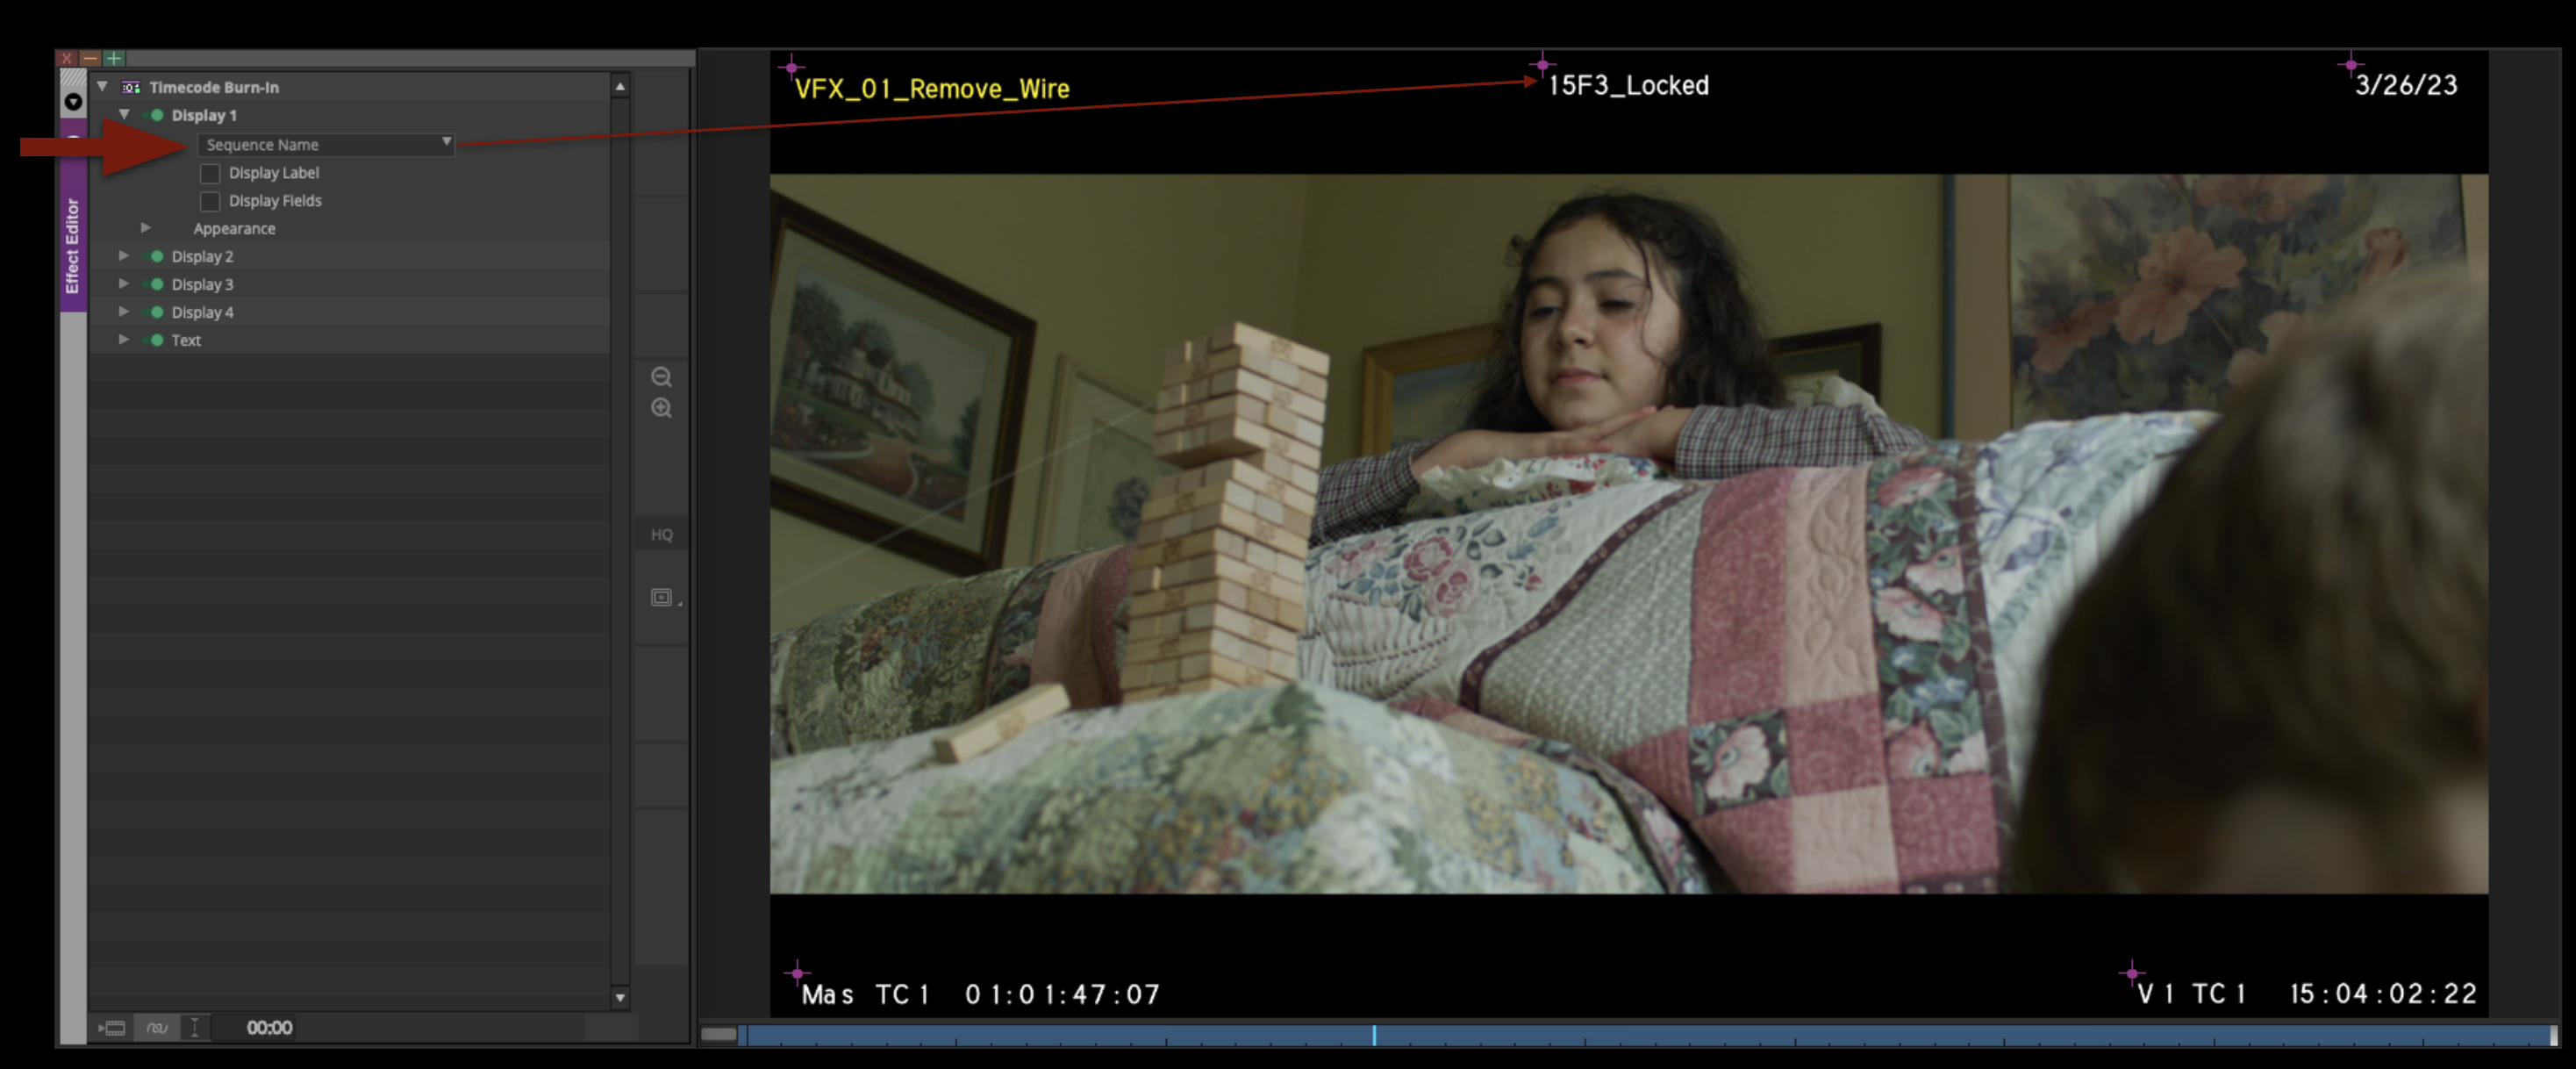
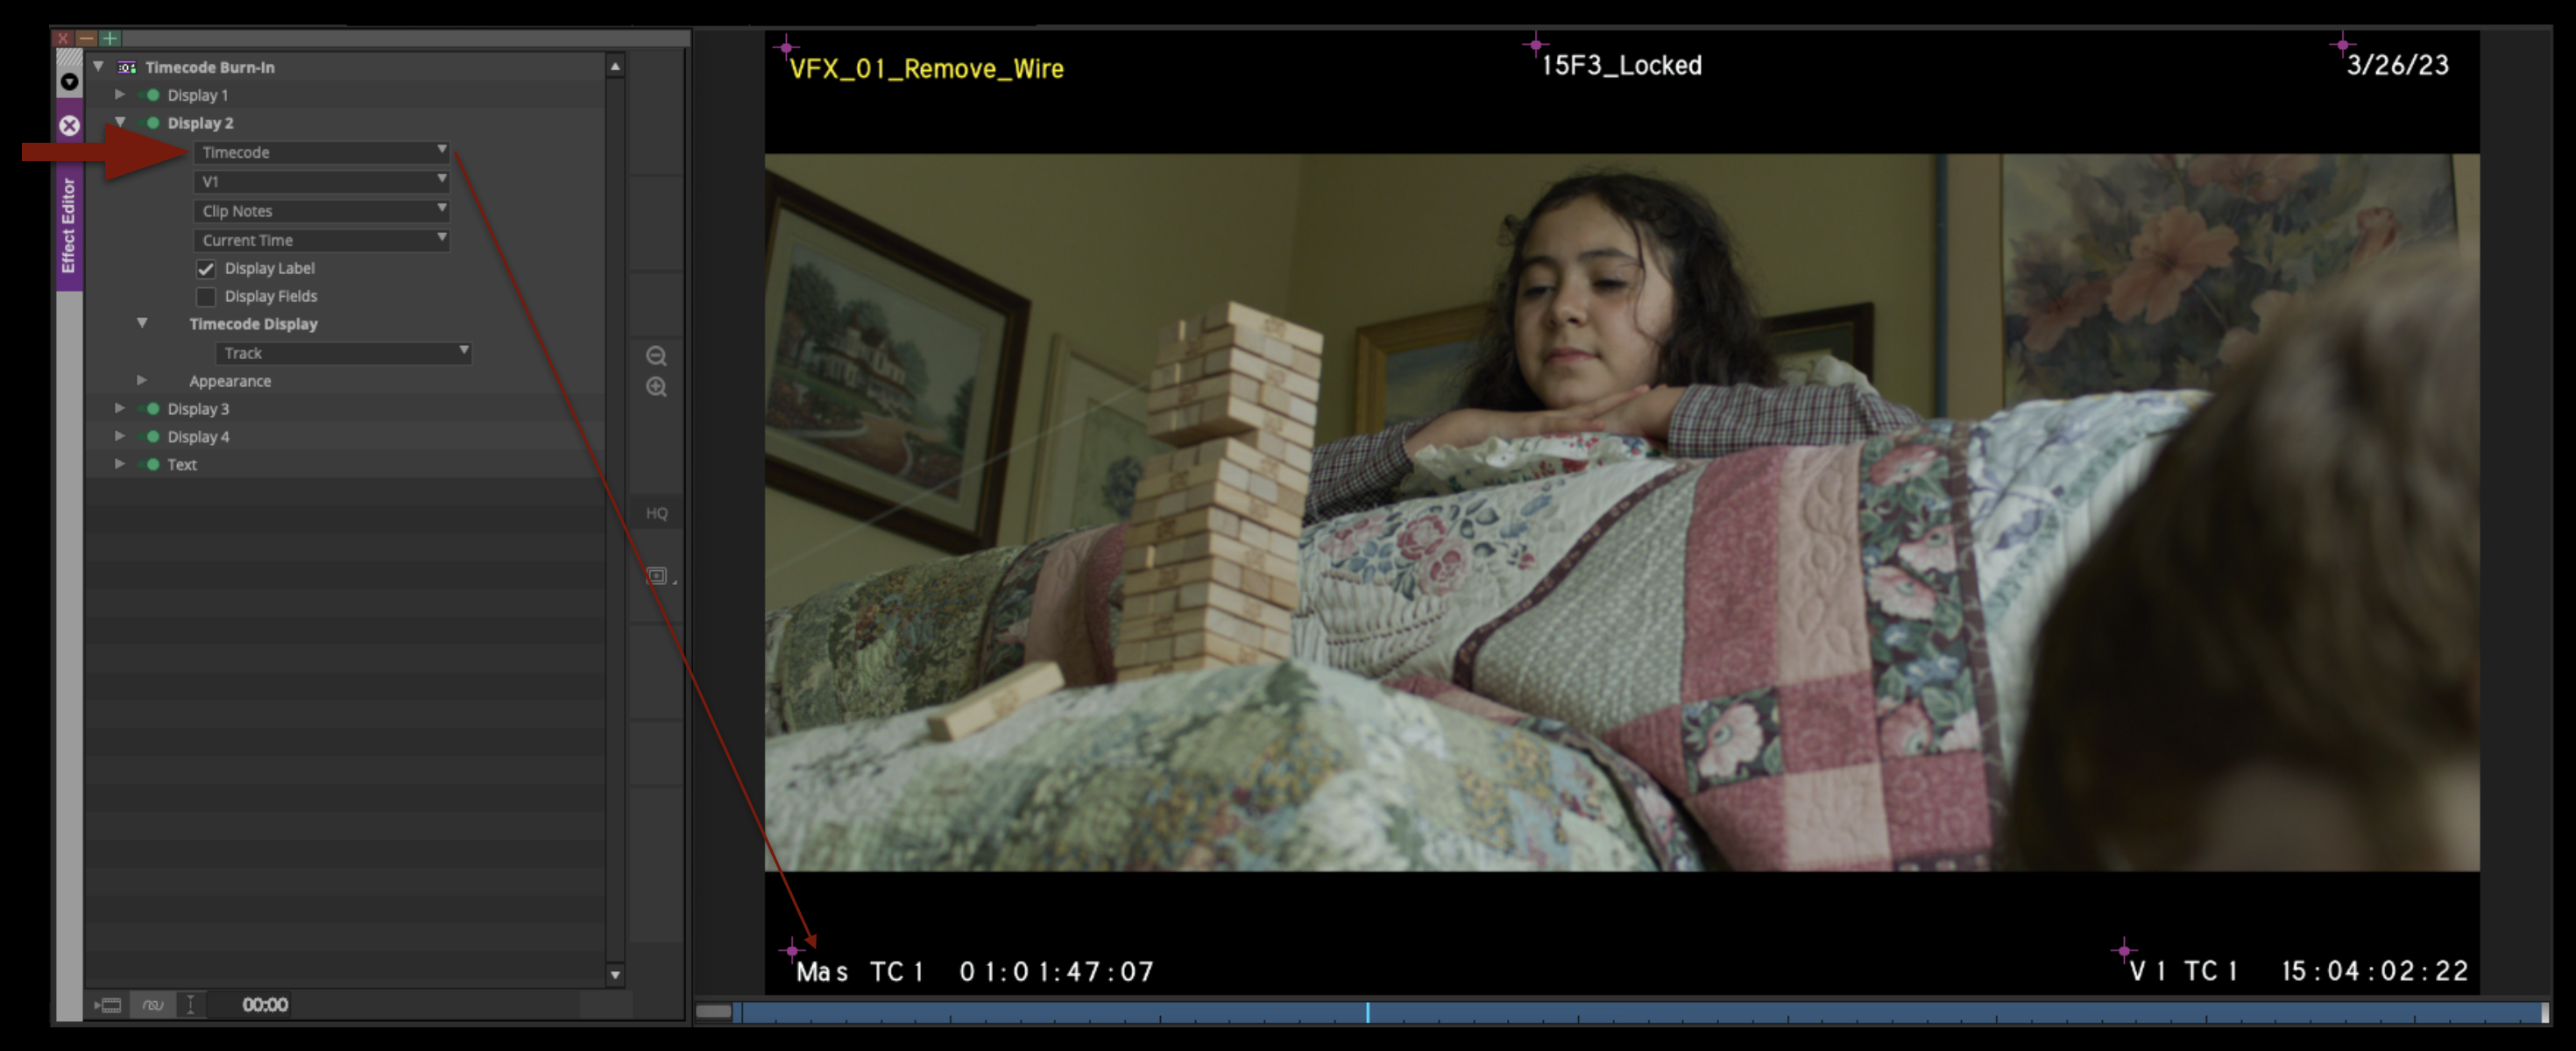
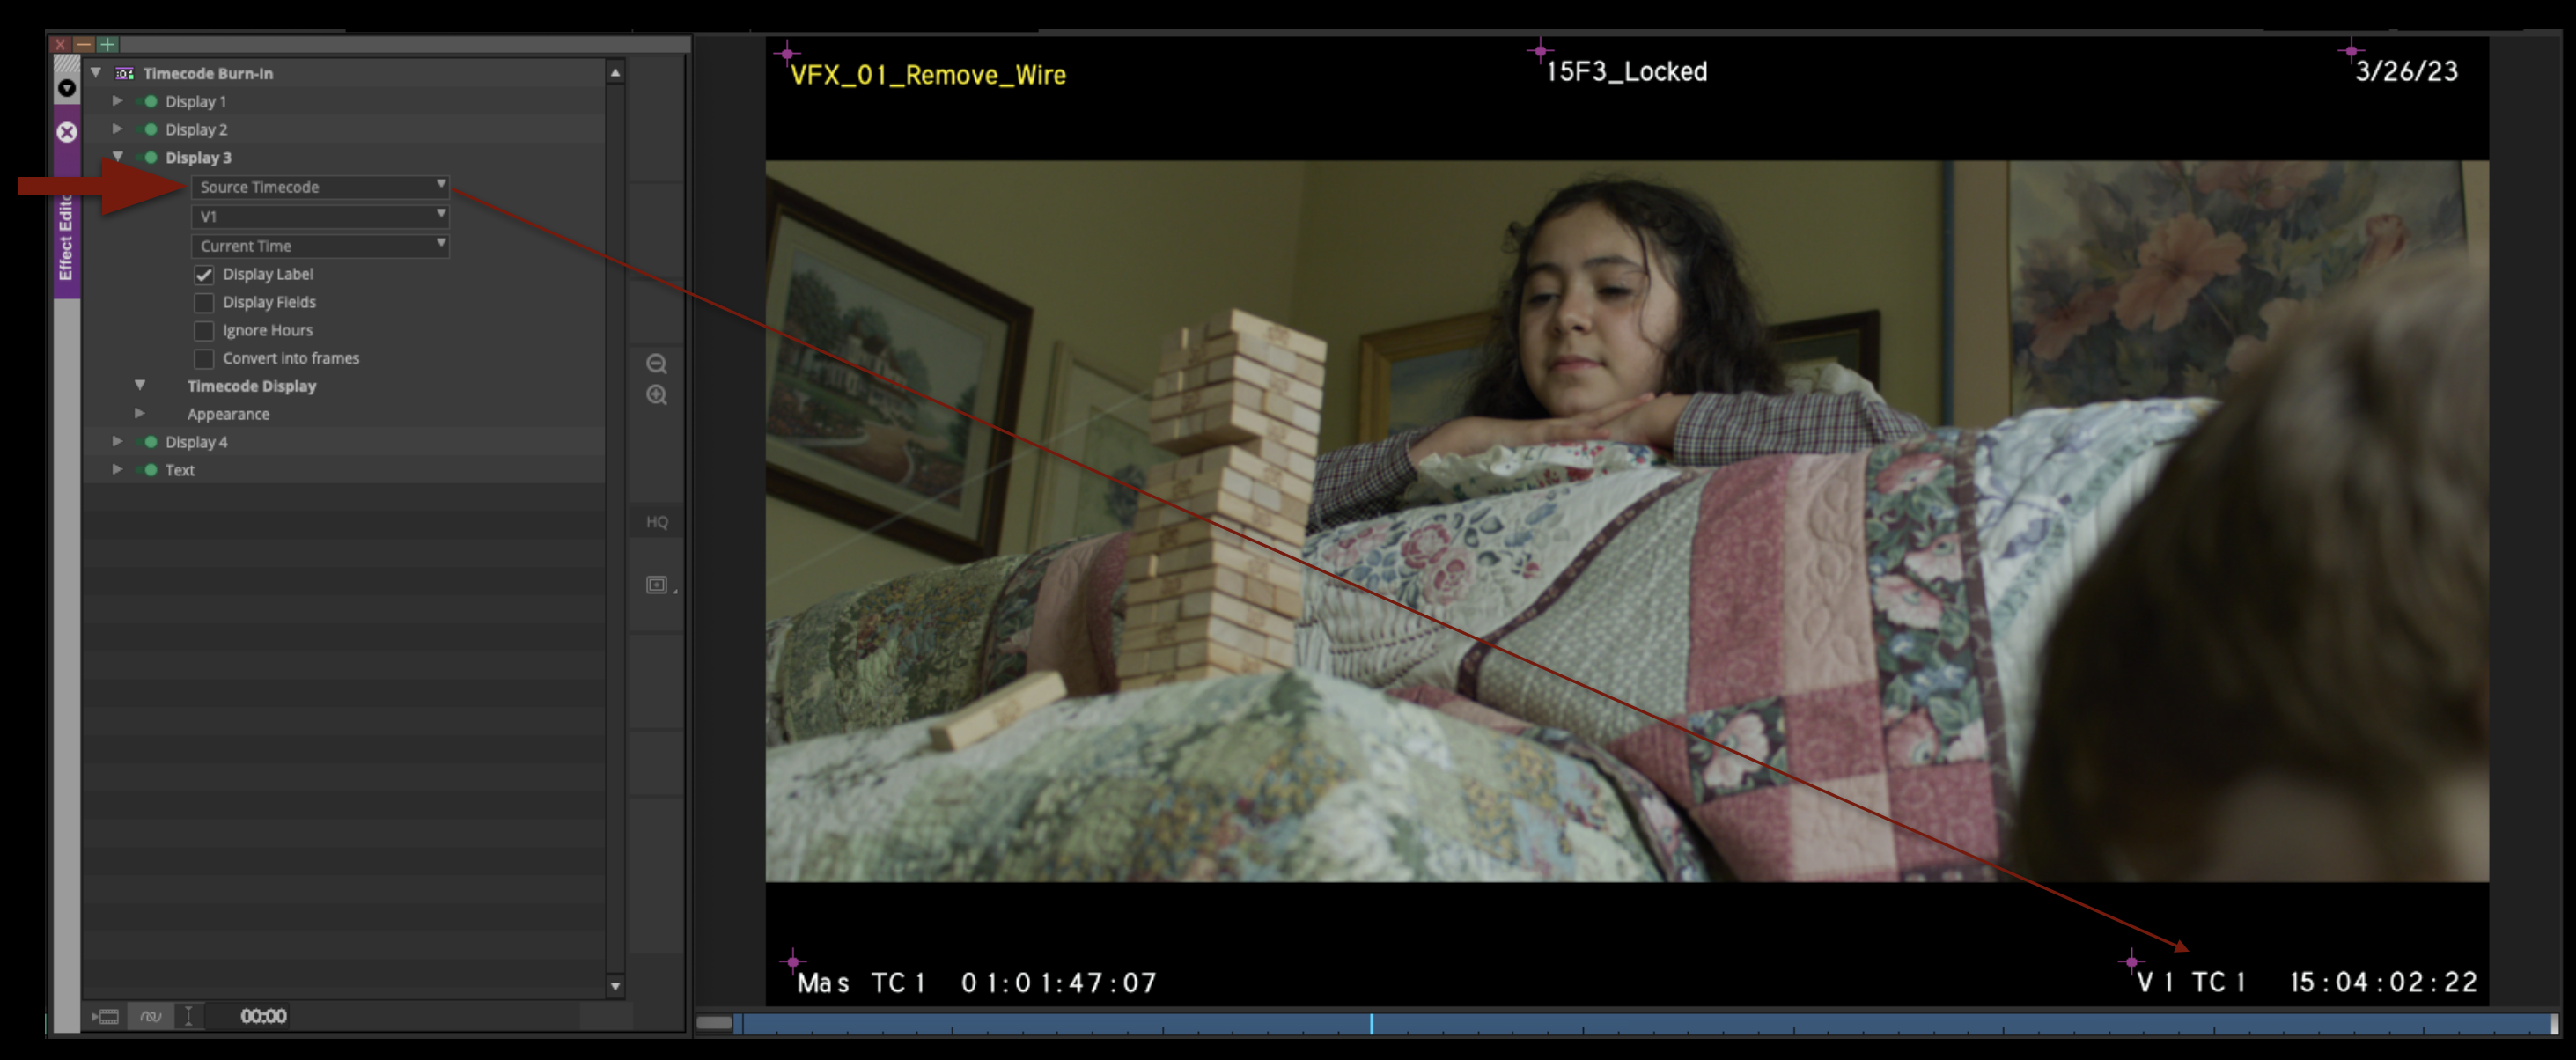
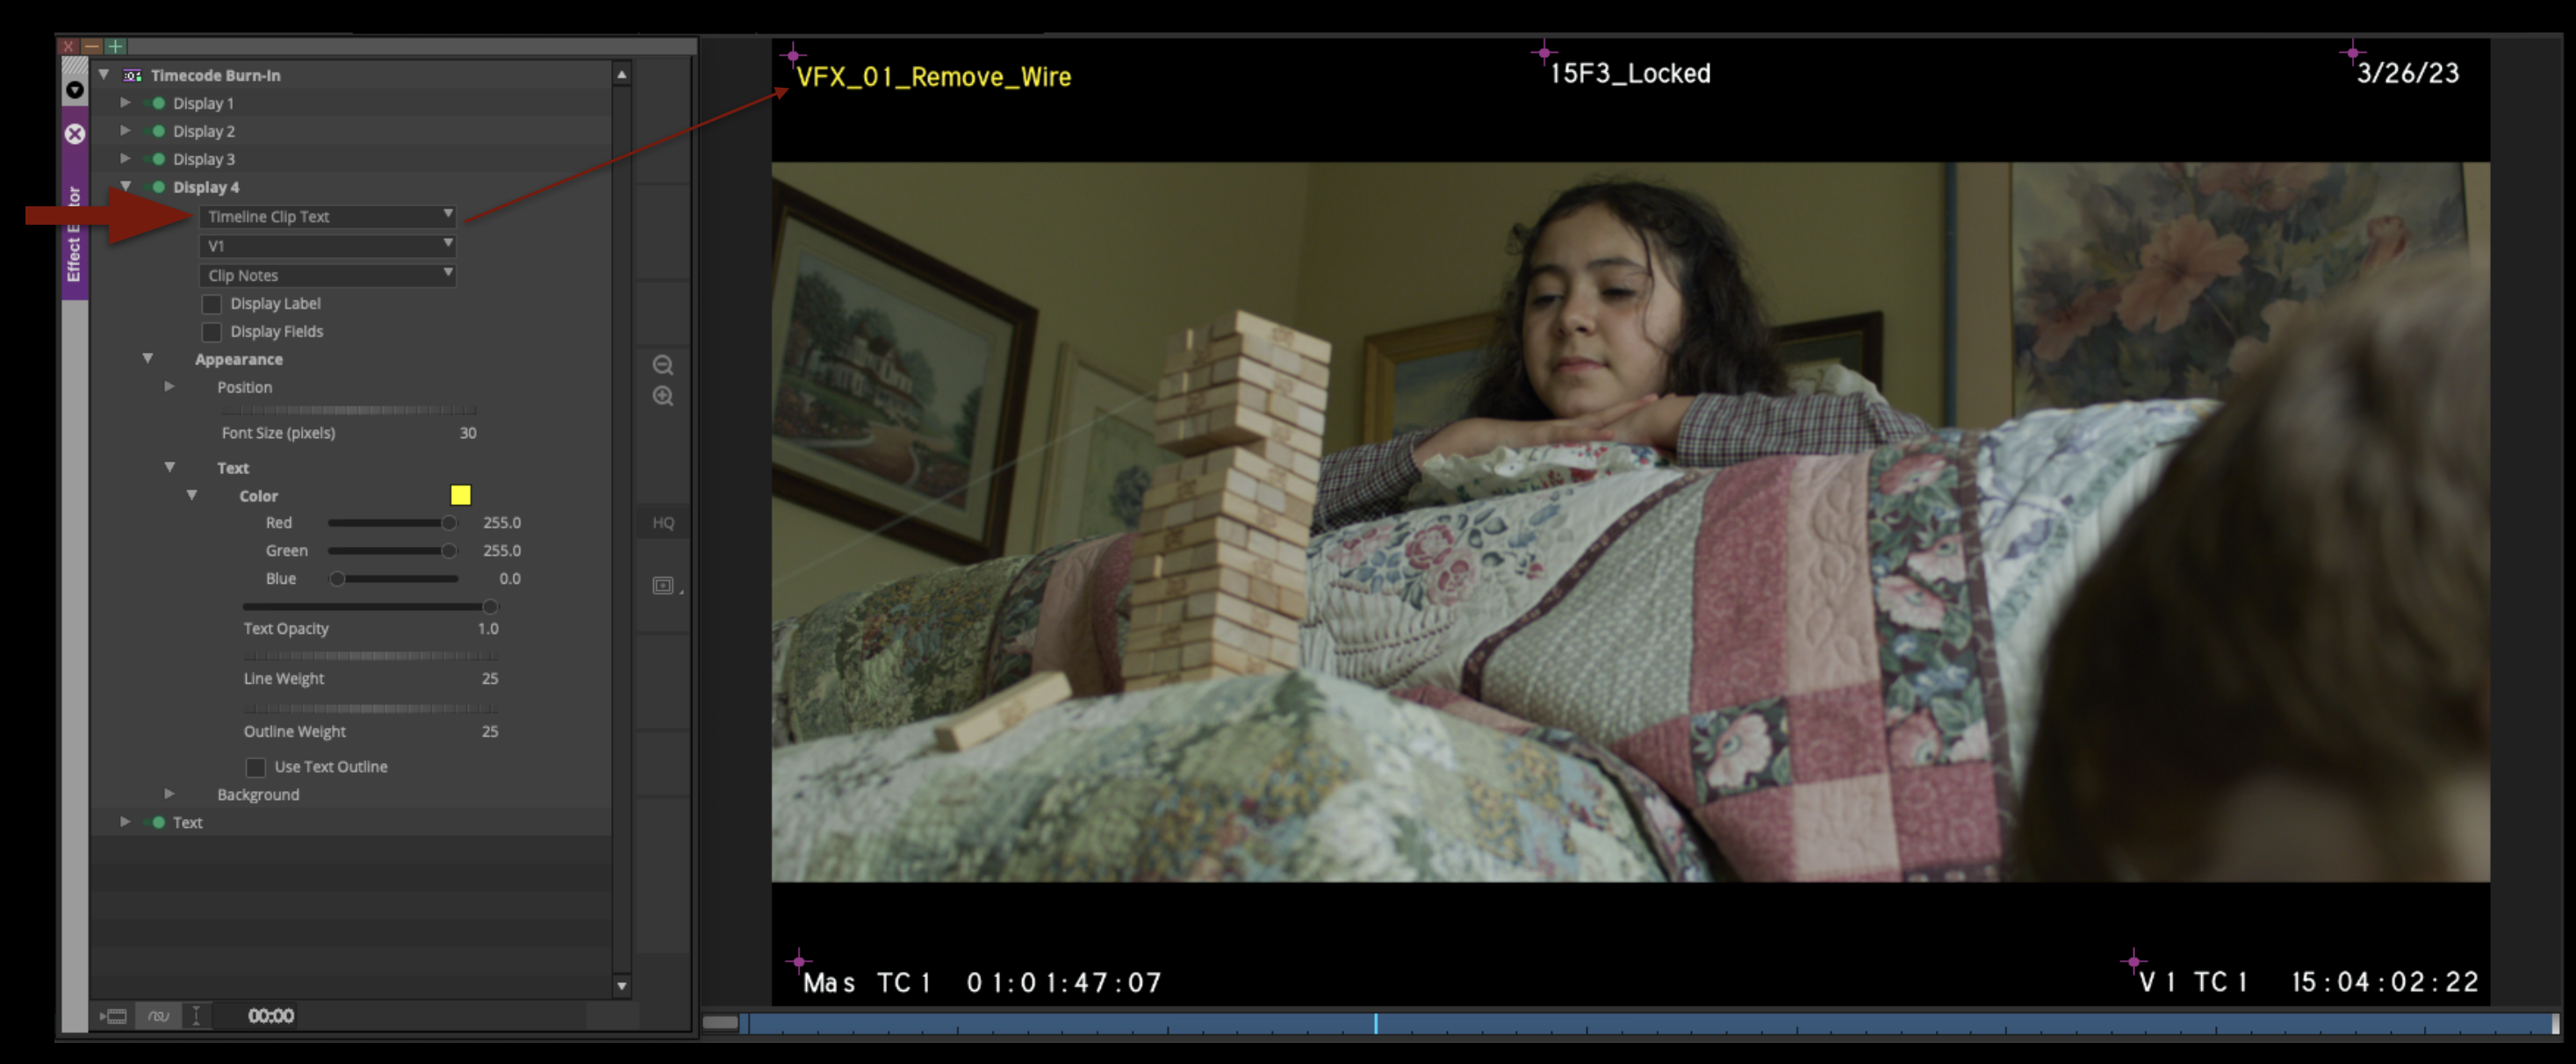
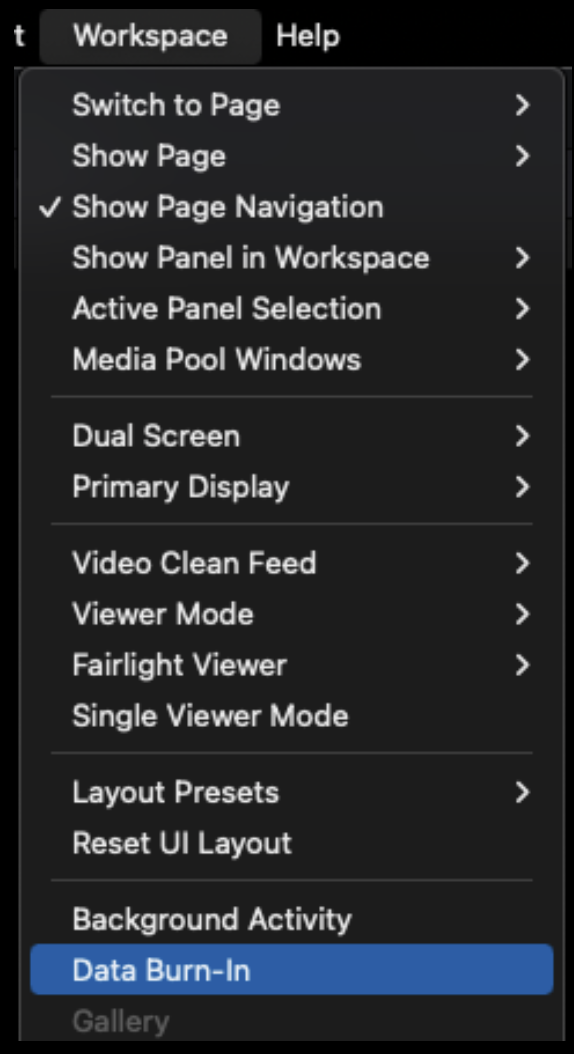
Before exporting, you will want to replicate the Timecode Burn-In Effect from Media Composer to match all the Burn-Ins on the original Reference Video. In Resolve, this is done using the Data Burn-In effect. It can be found under Workspace > Data Burn-in.
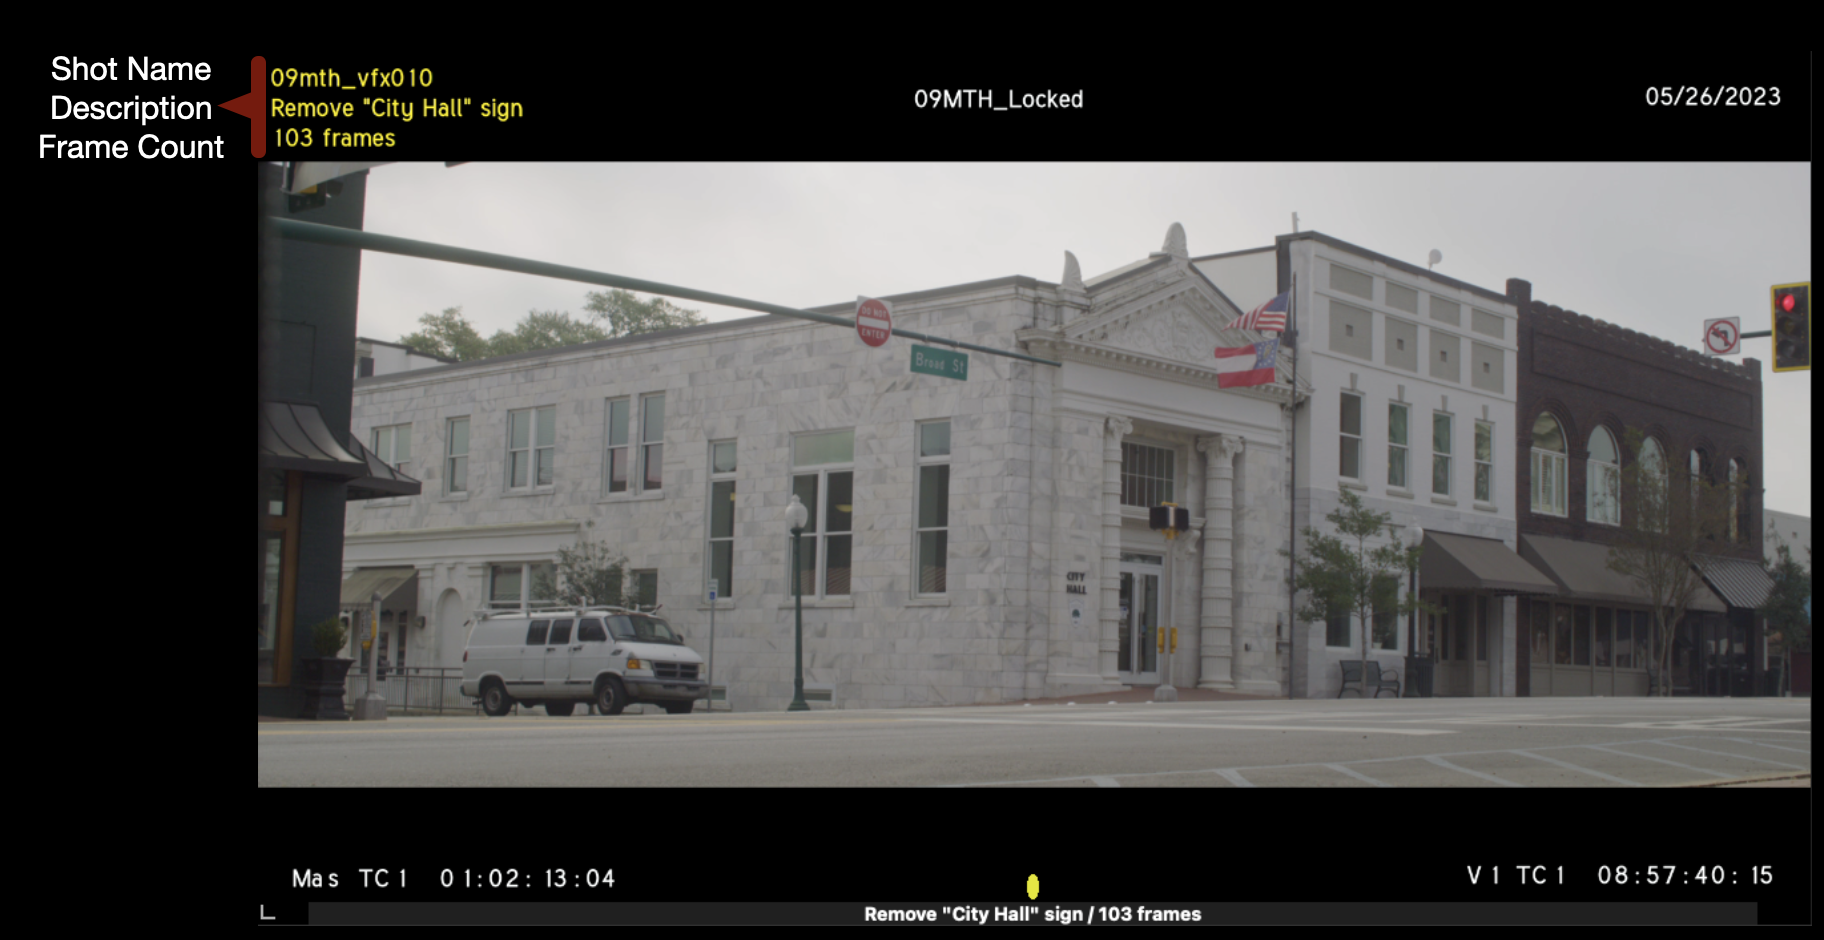
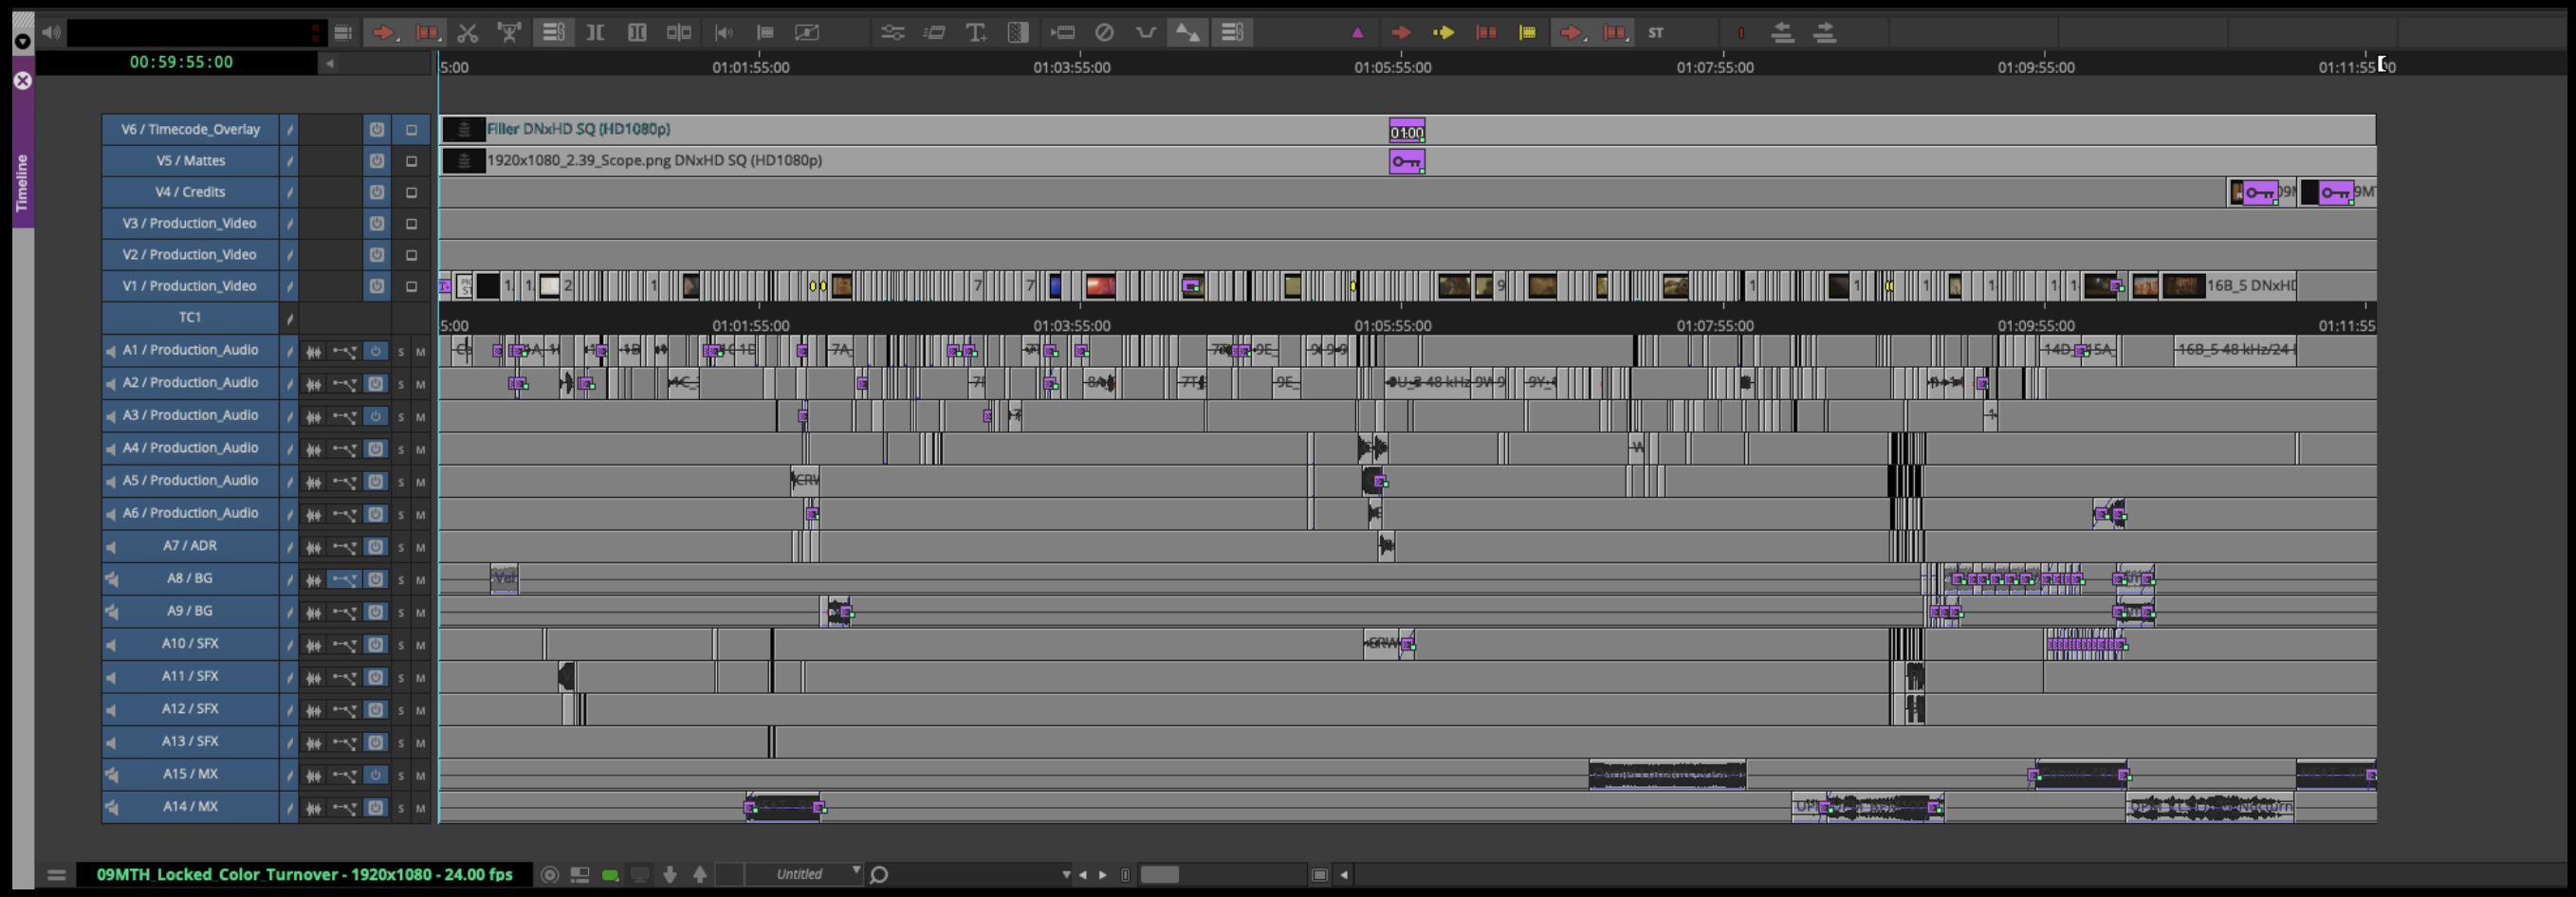
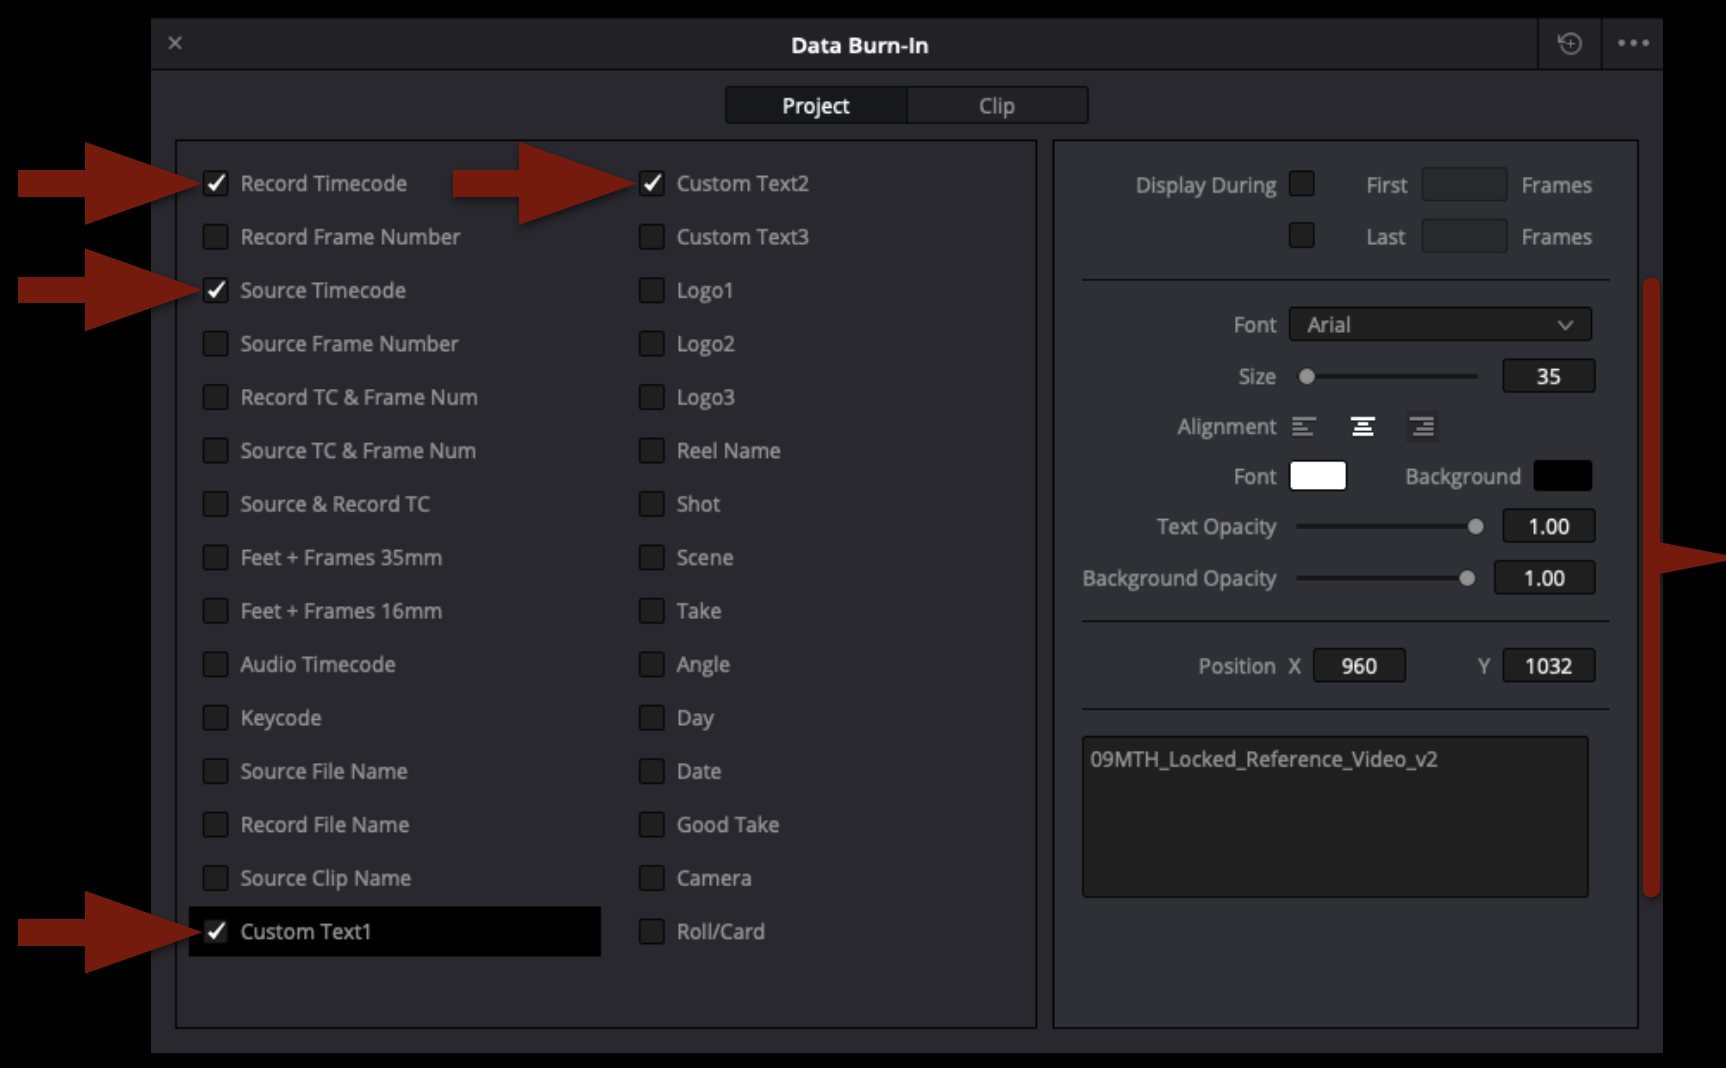
When the effect opens, you will see it is laid out in roughly two sections. On the left, you can choose what metadata you want to select to be burned in. On the right, you can select how and where you want that to be displayed. Select the four boxes shown in the example below and choose the same font and font size. You will need to address the position of each burn-in manually.
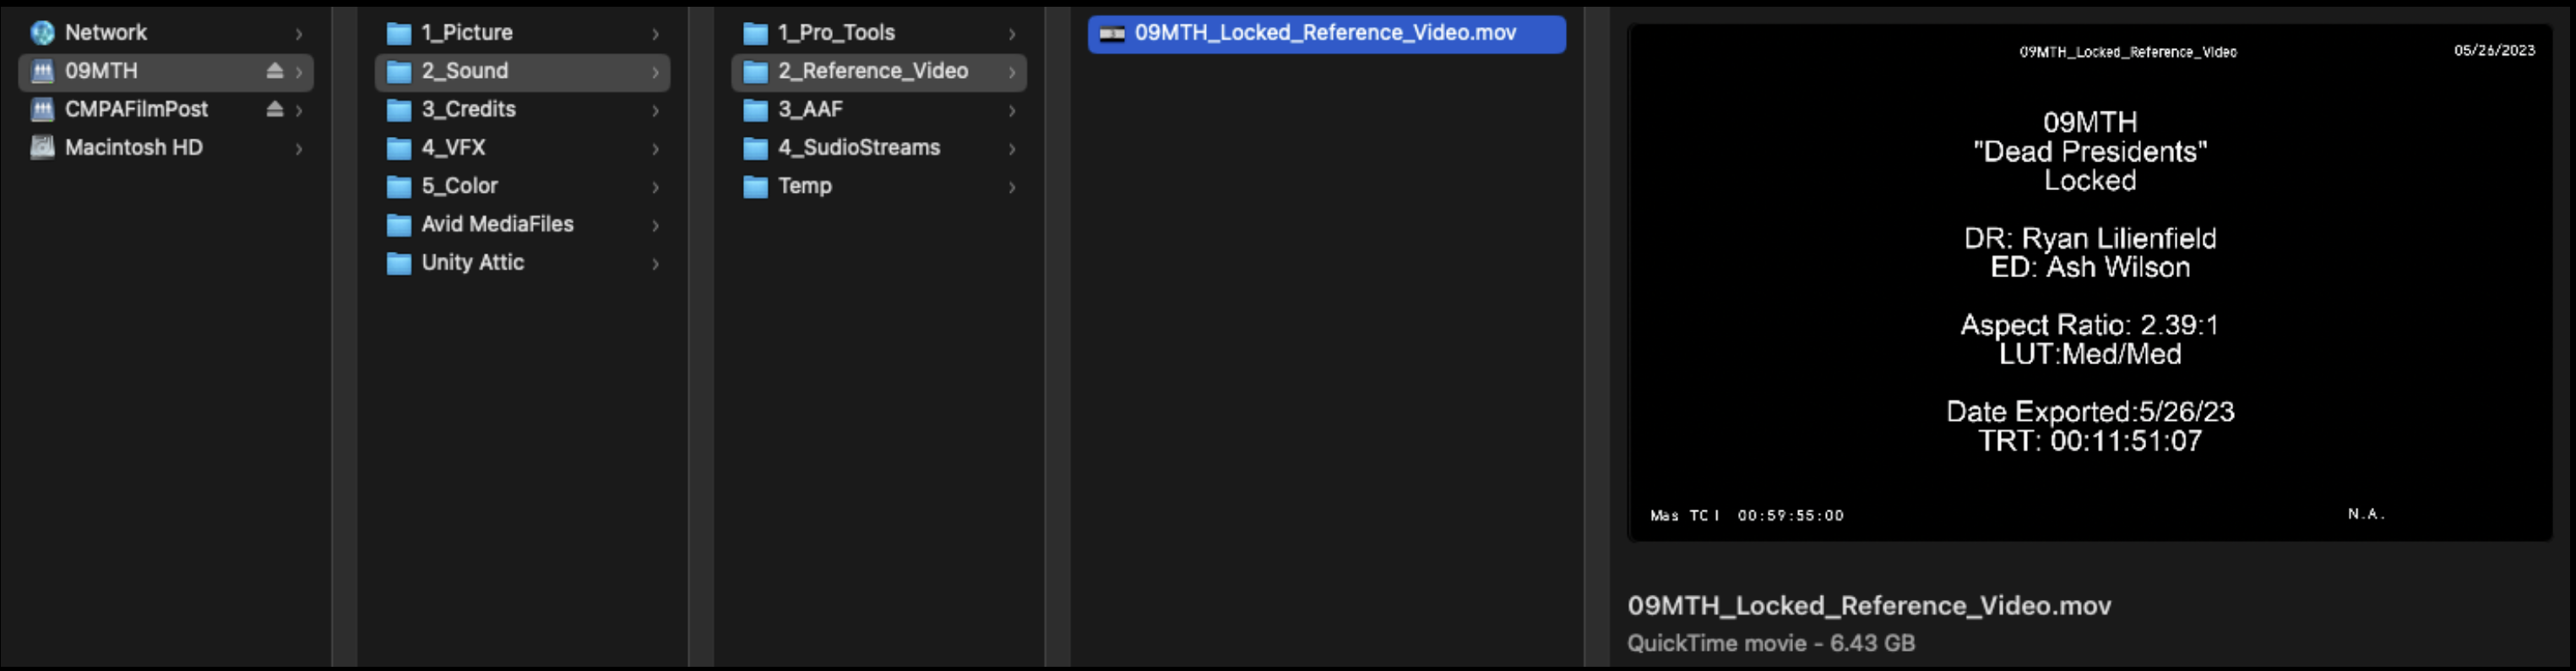
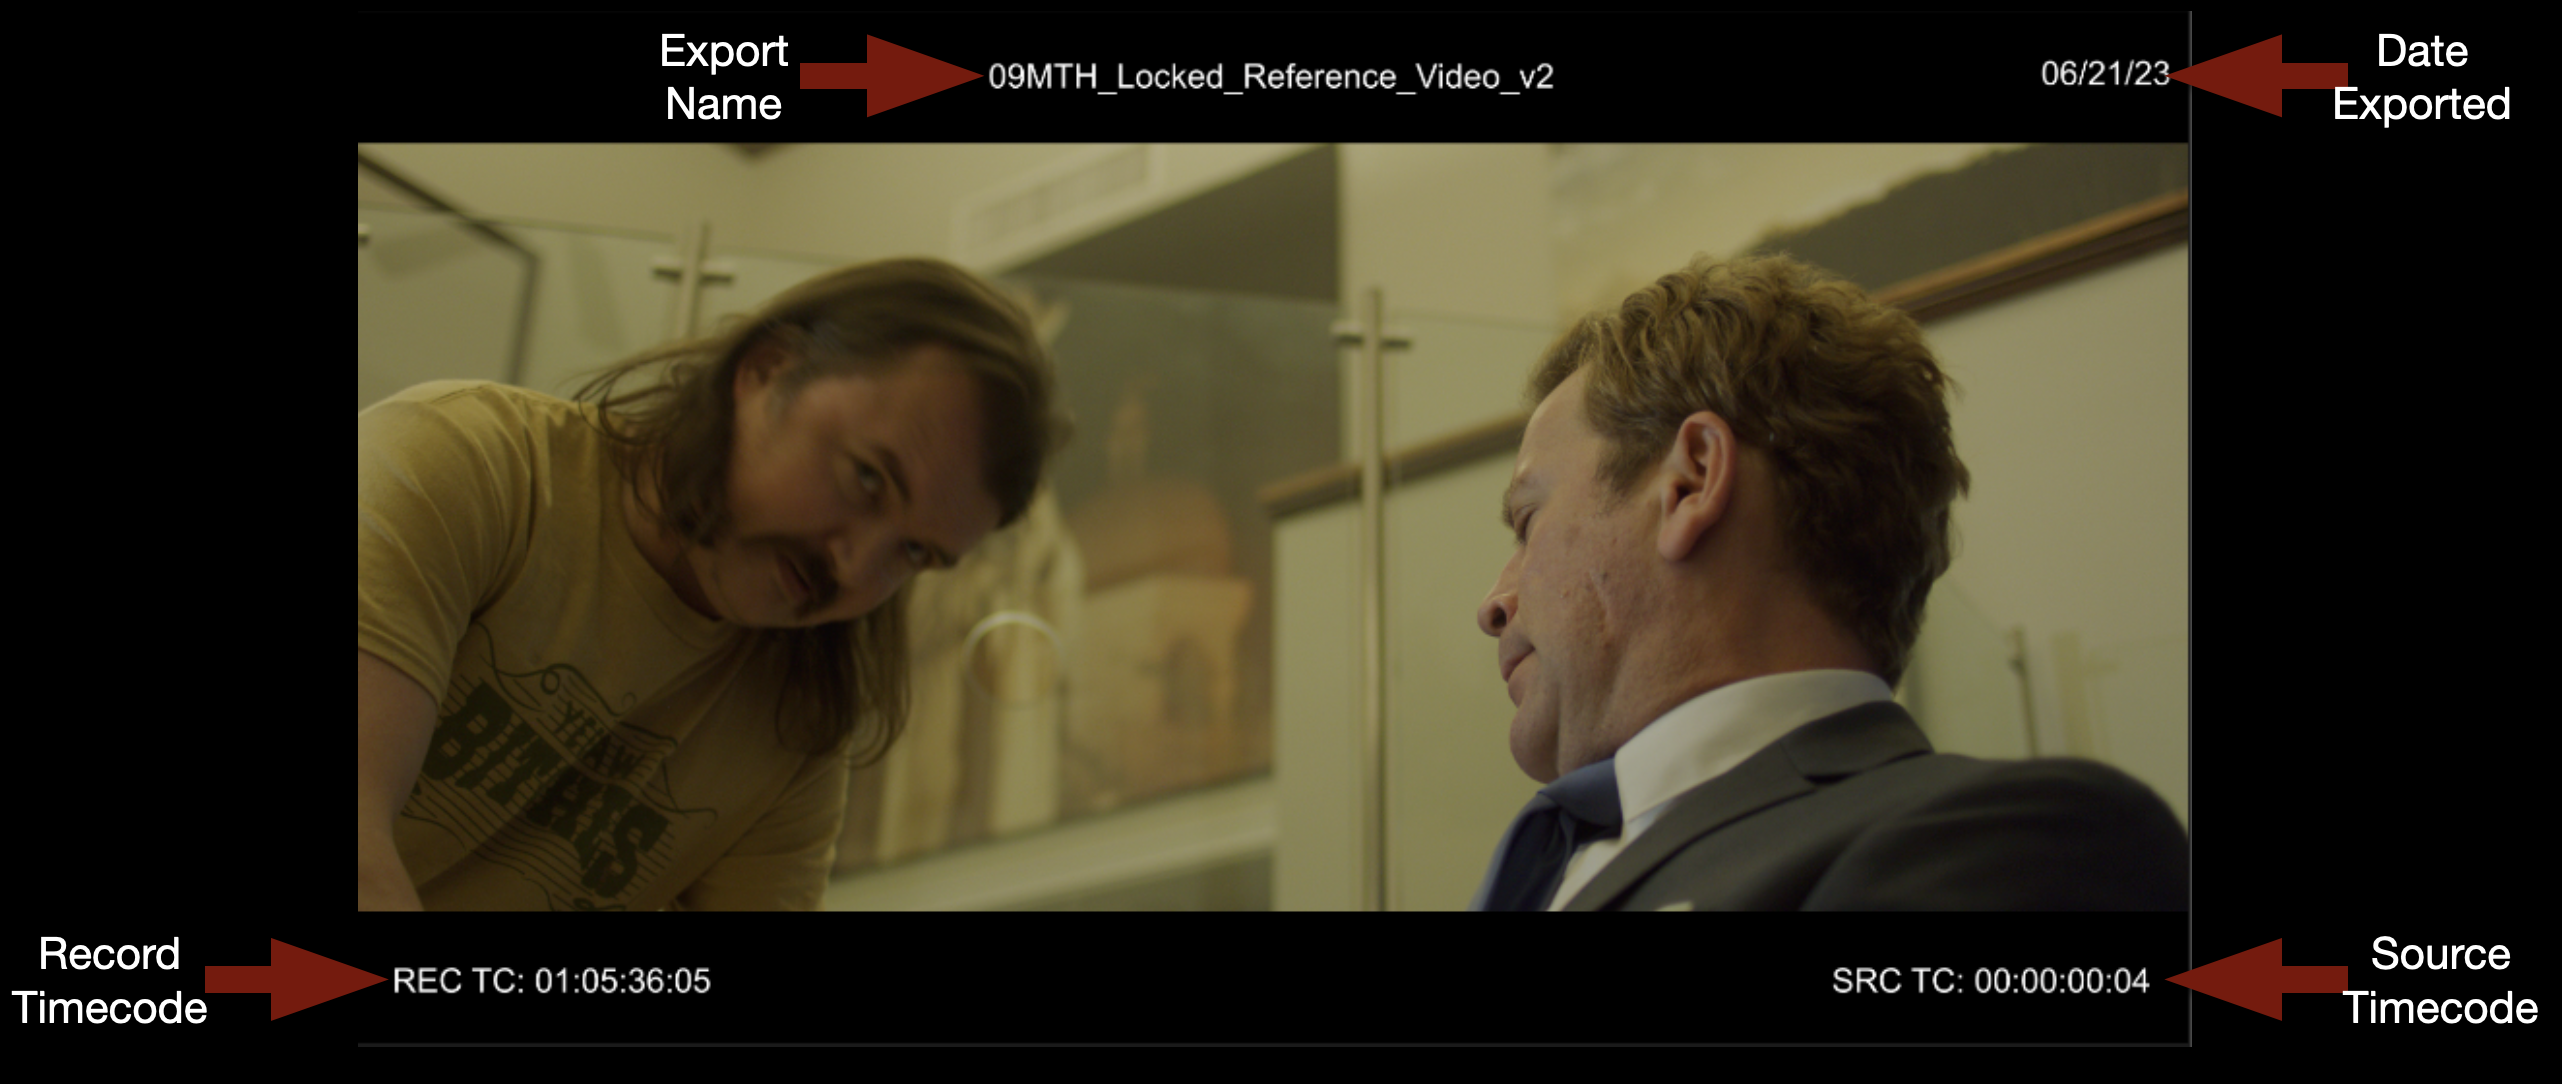
In the example below, you can see what the result of the Data Burn-in effect should look like.
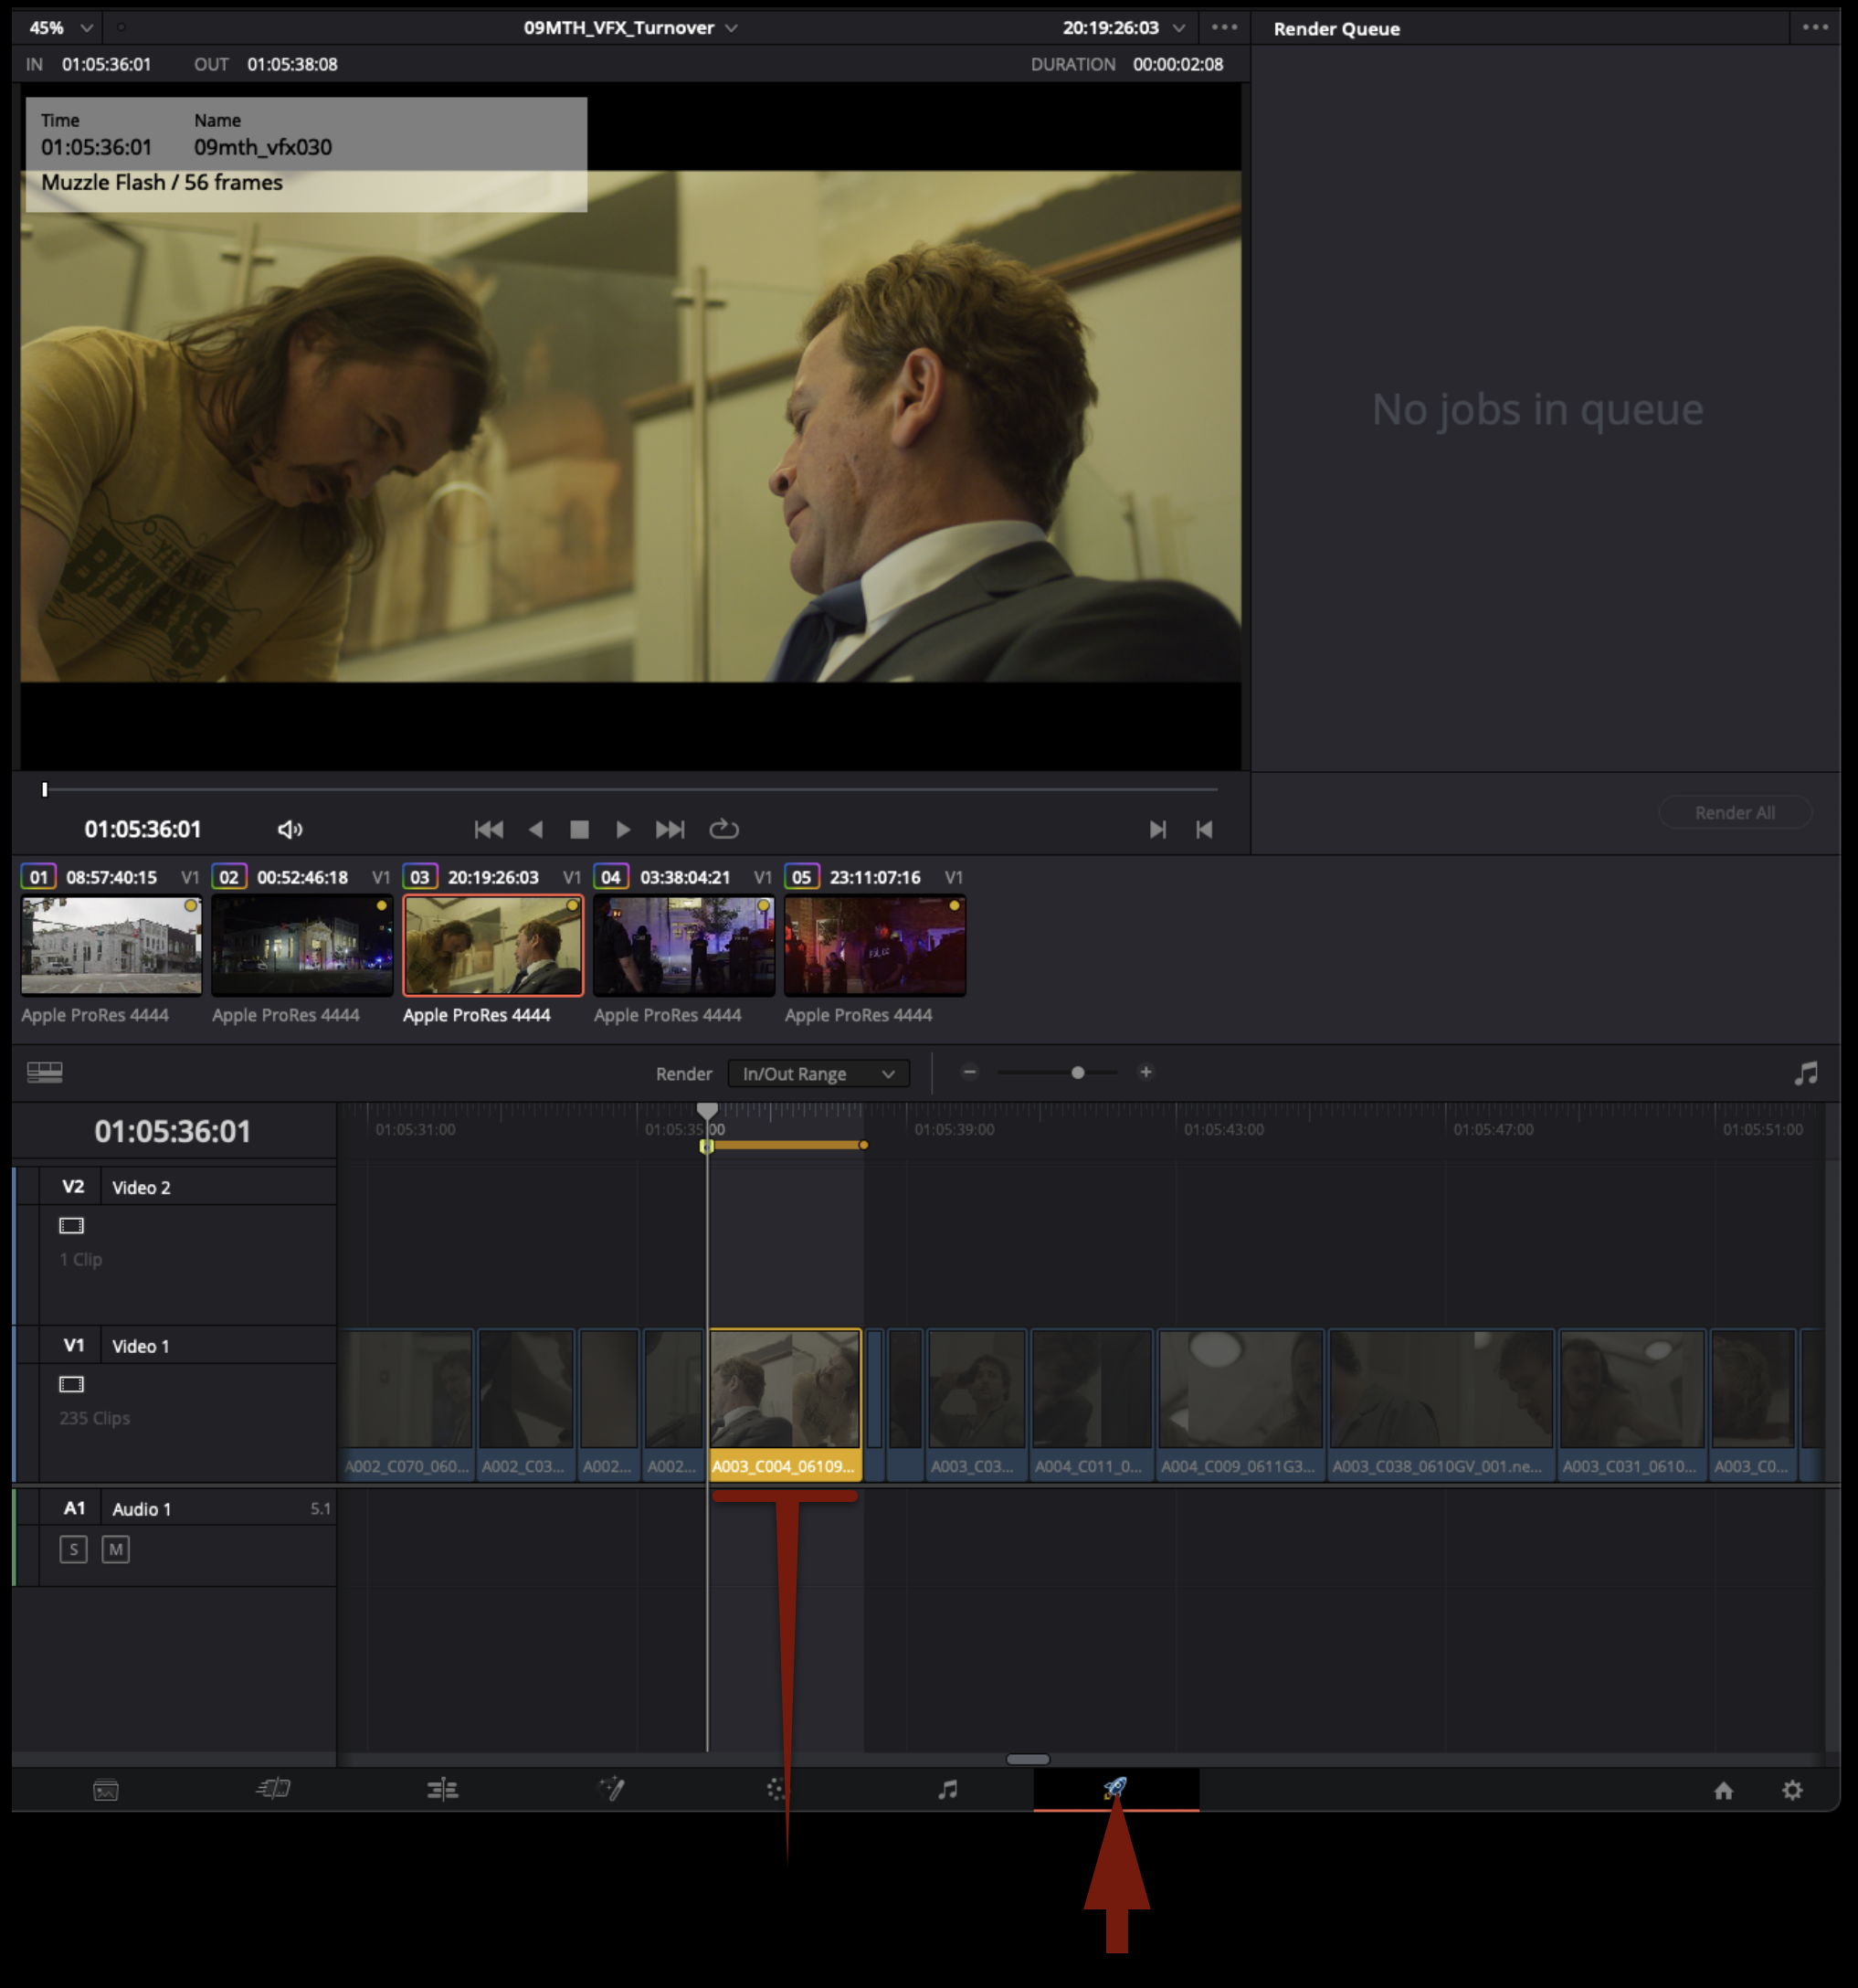
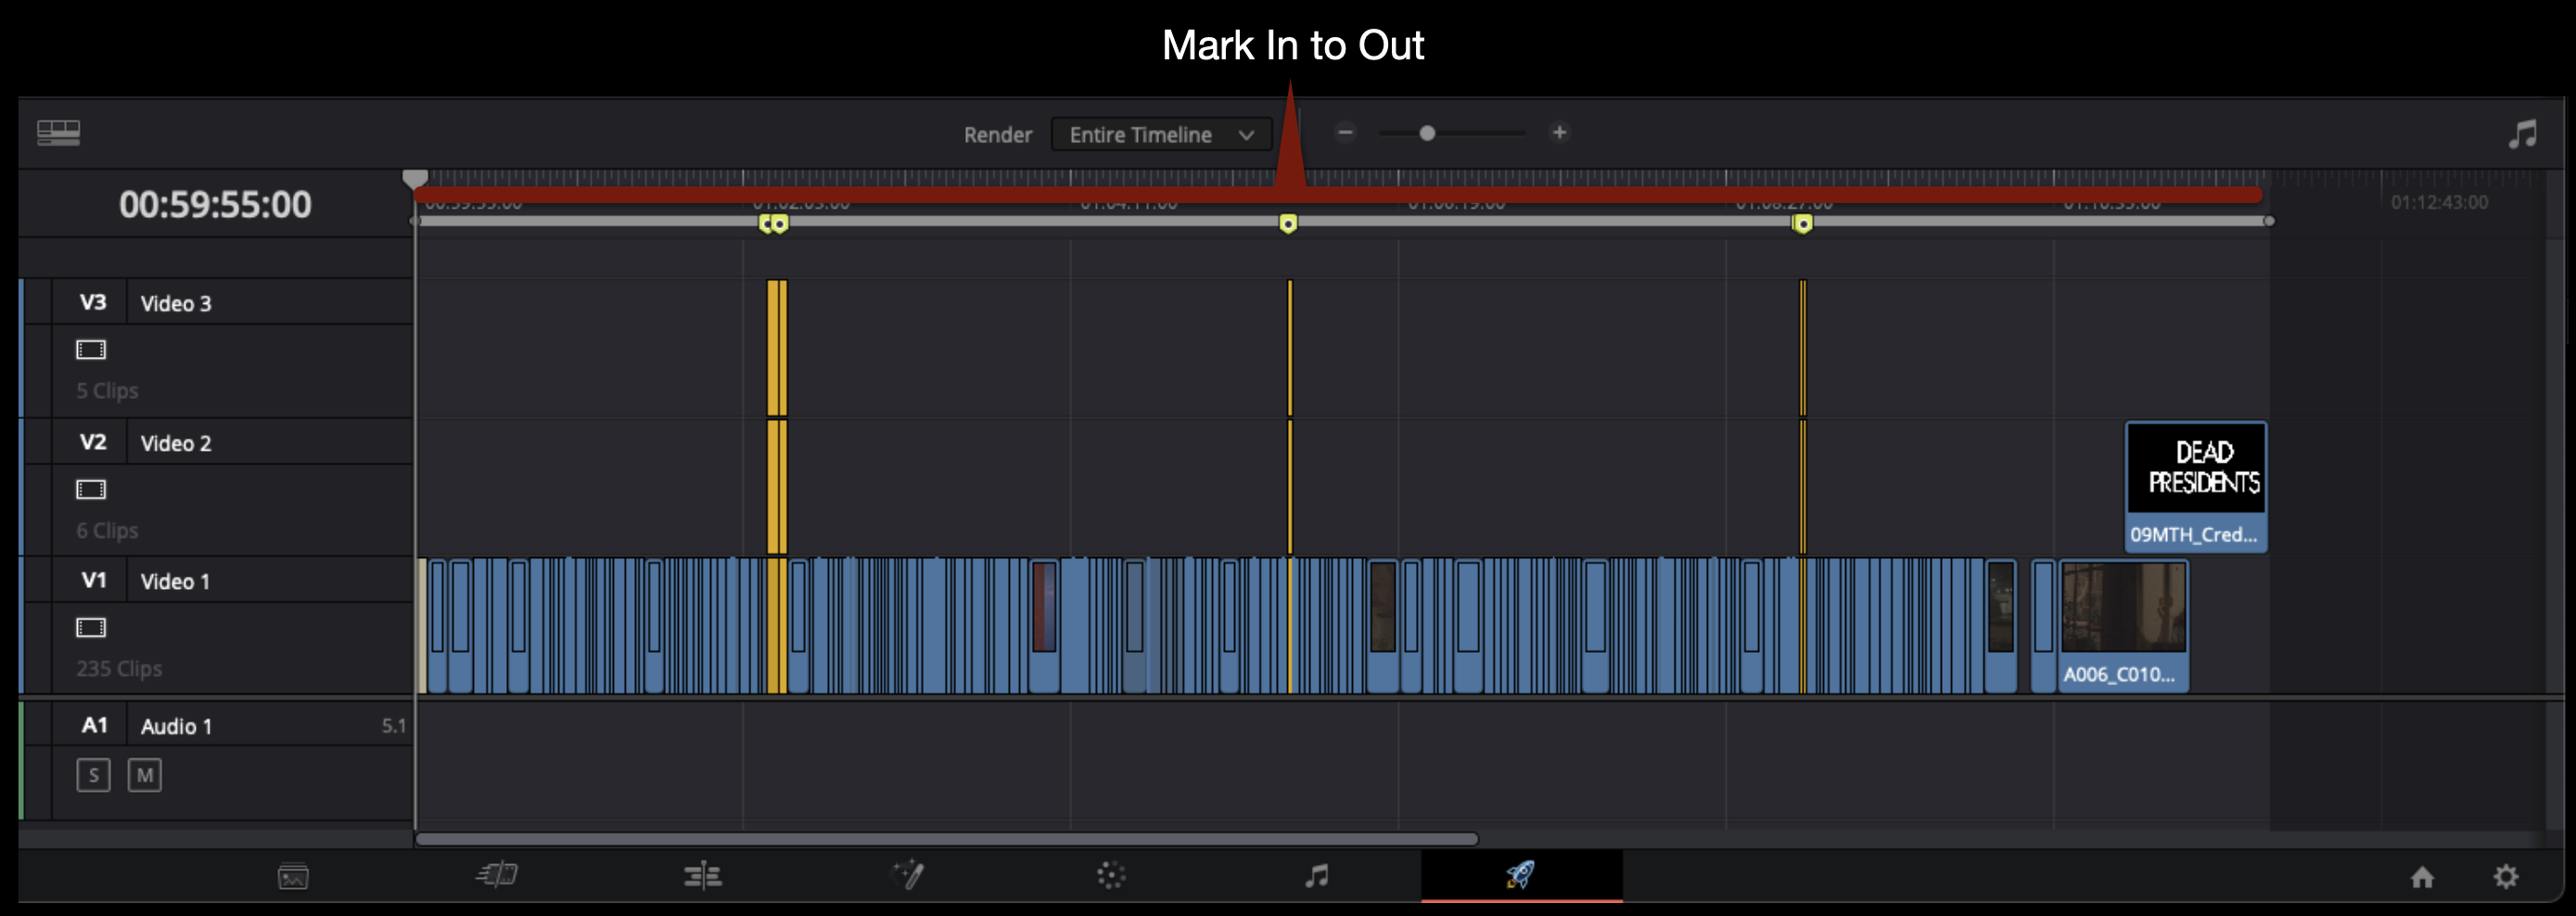
In the Deliver page, make sure you are marked In to Out around the entire sequence.
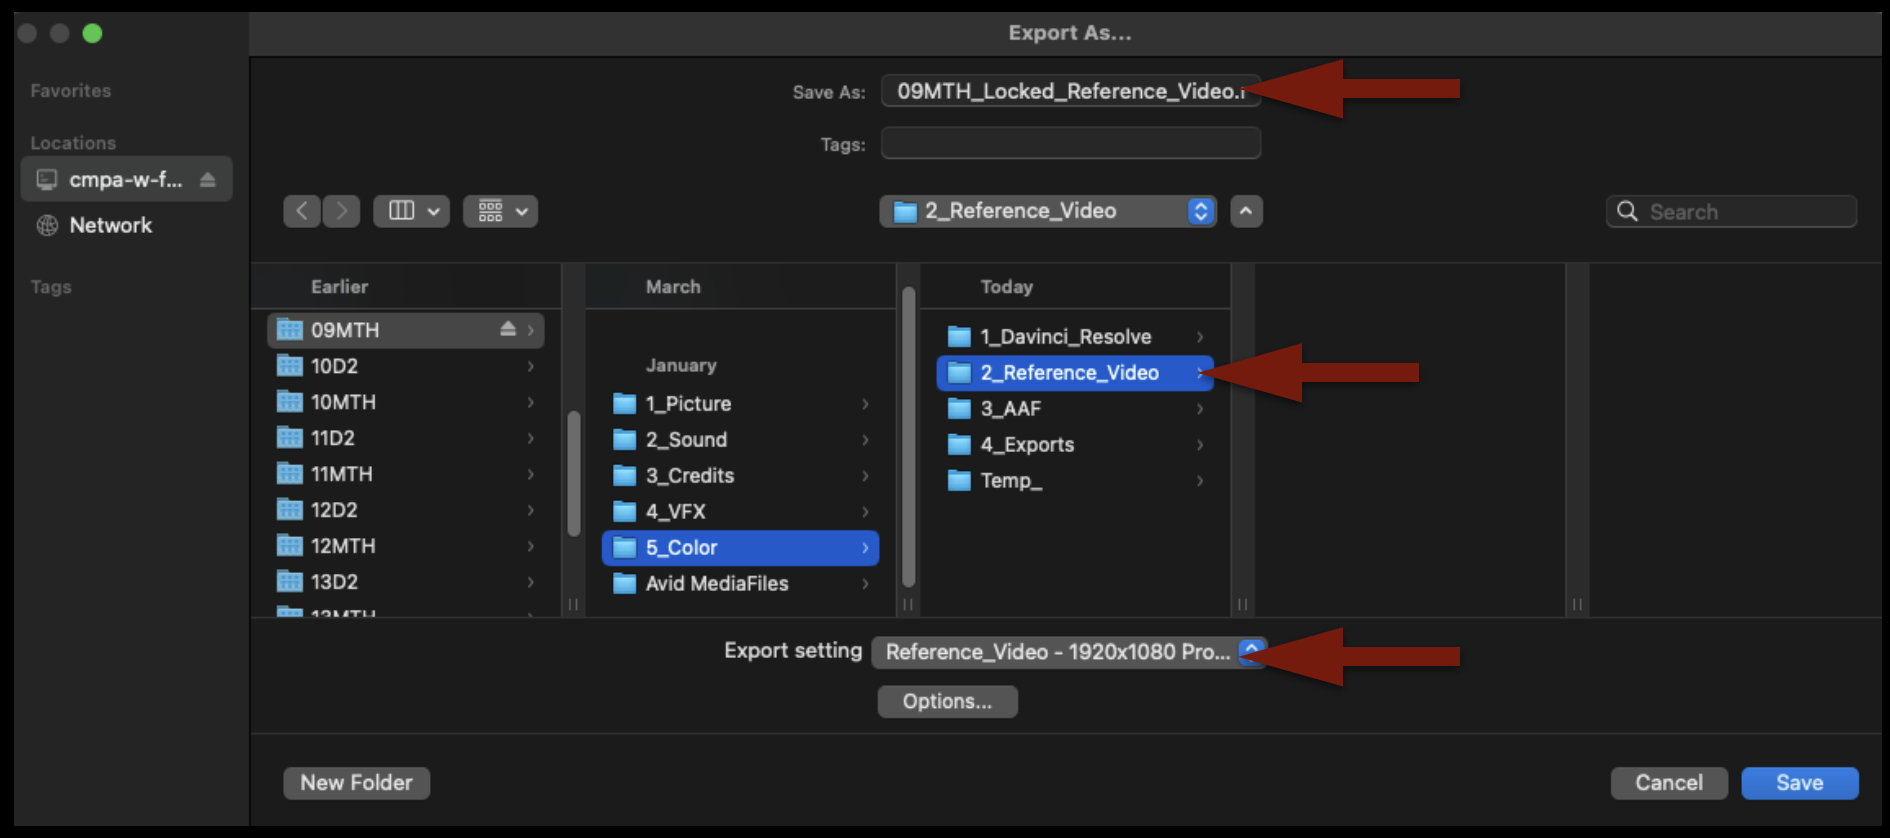
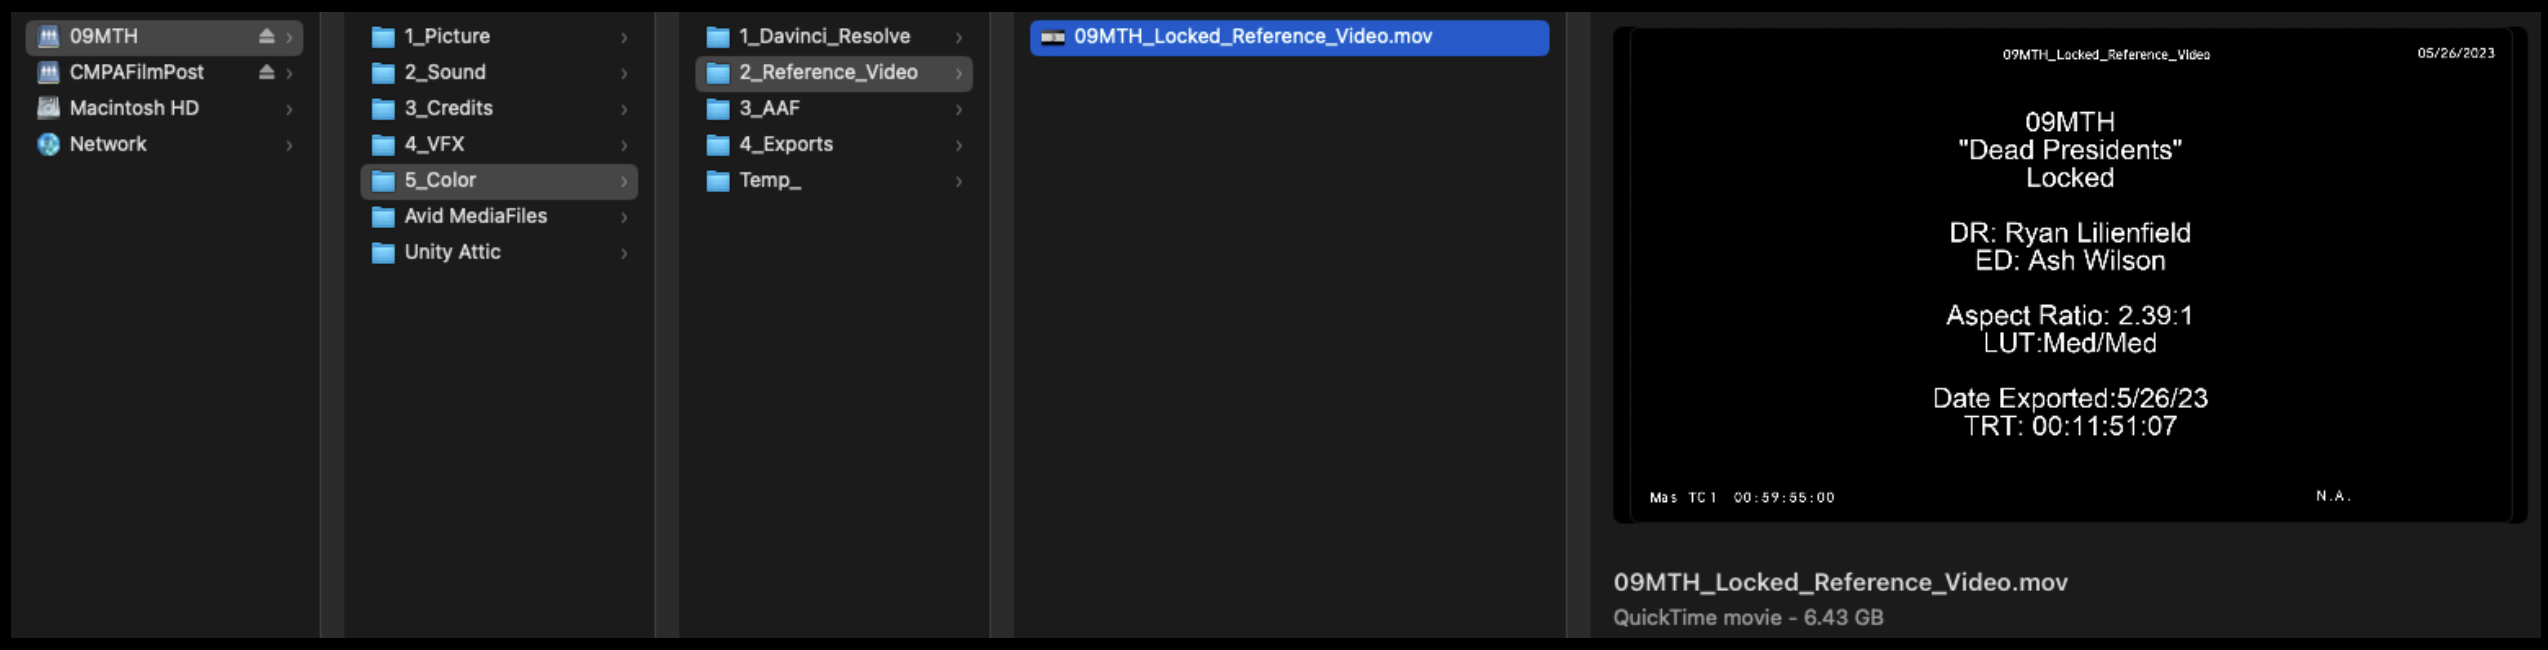
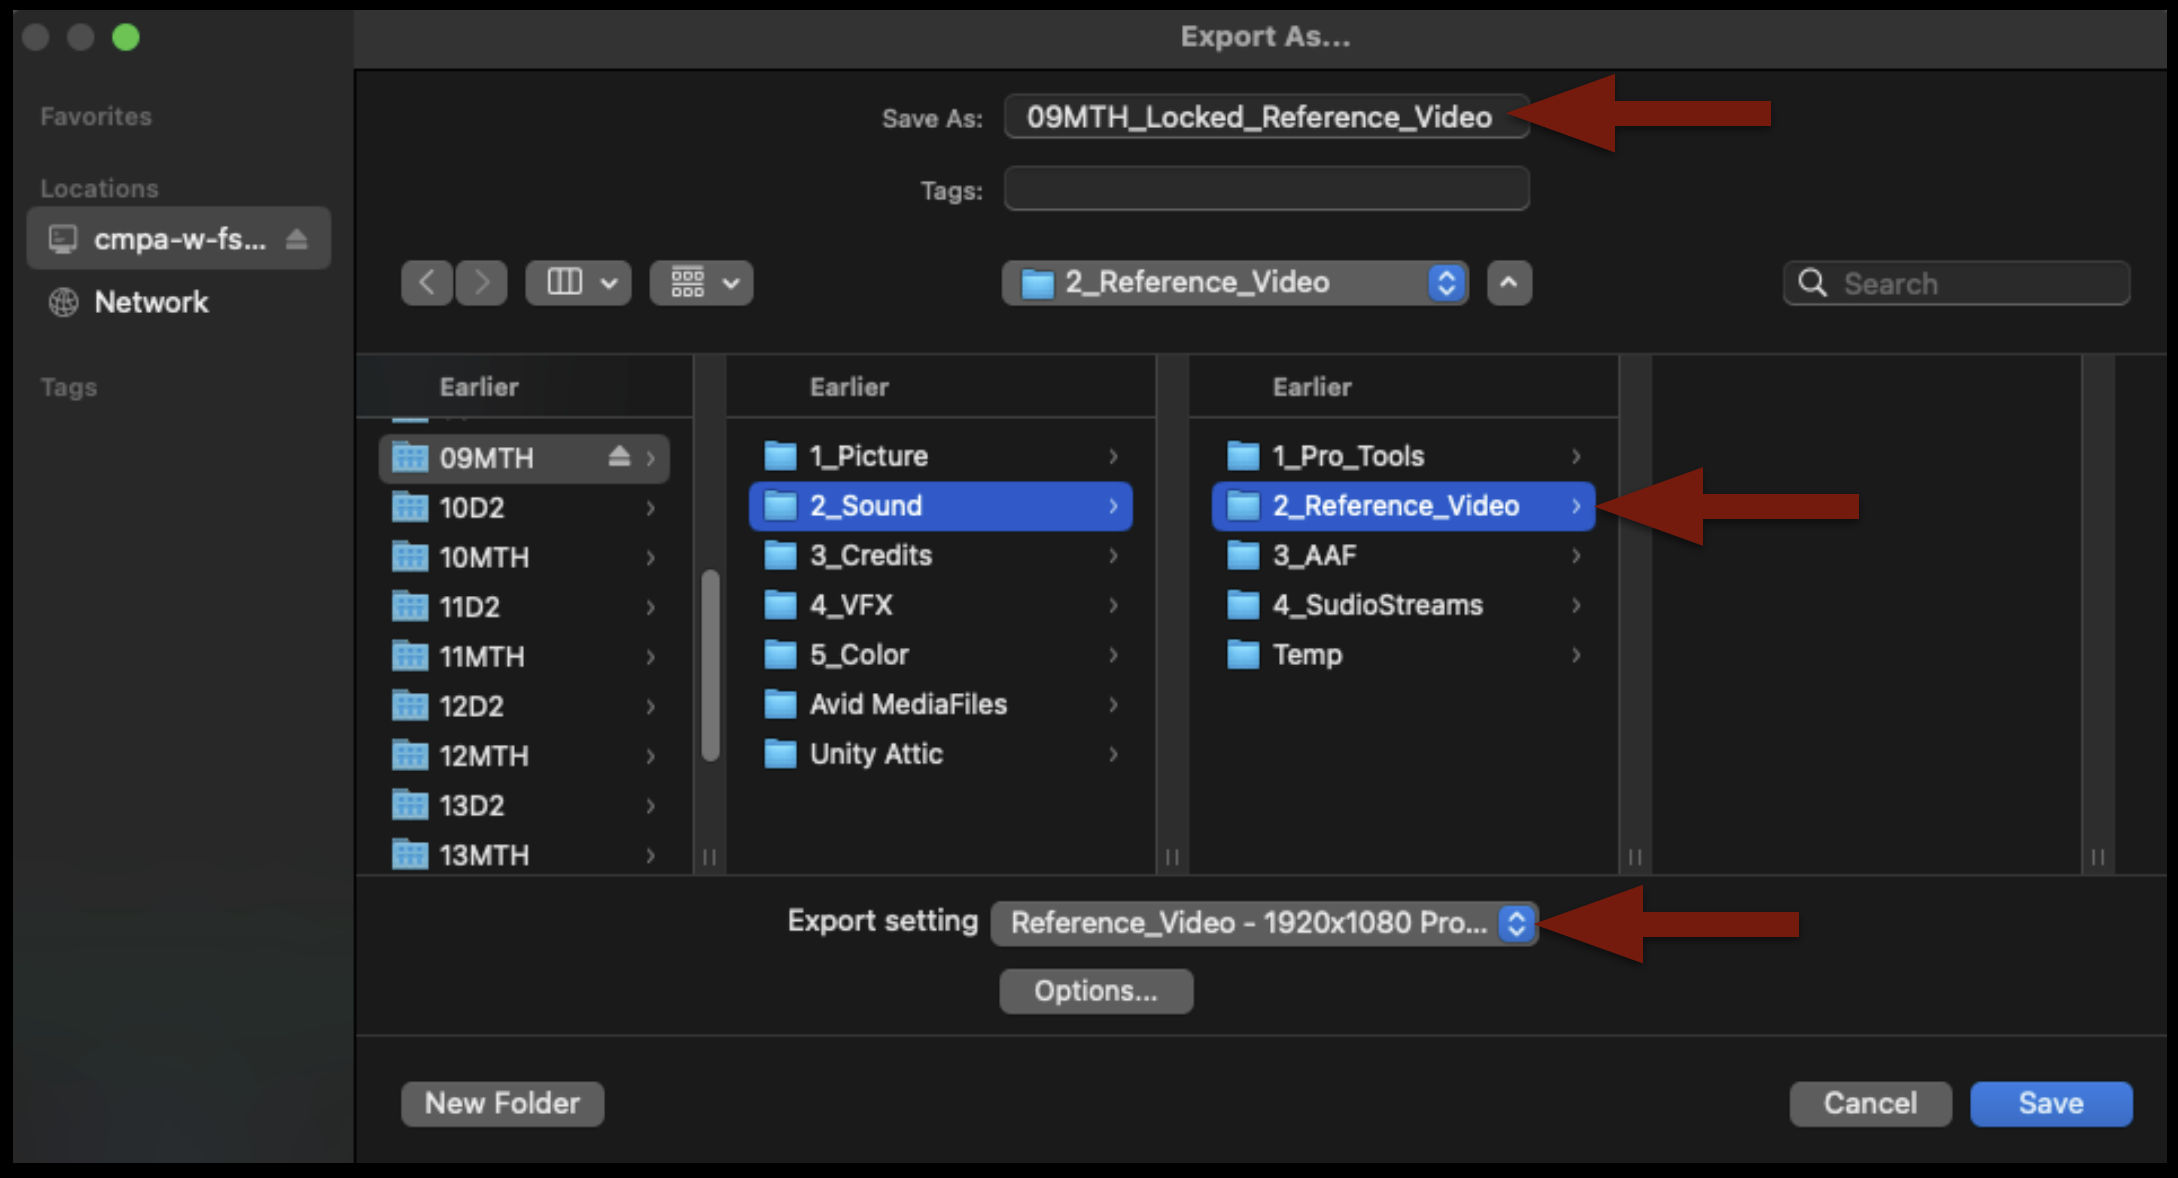
Change the filename to match the export name that you burned in. This name should be one version number up from any previous reference video.
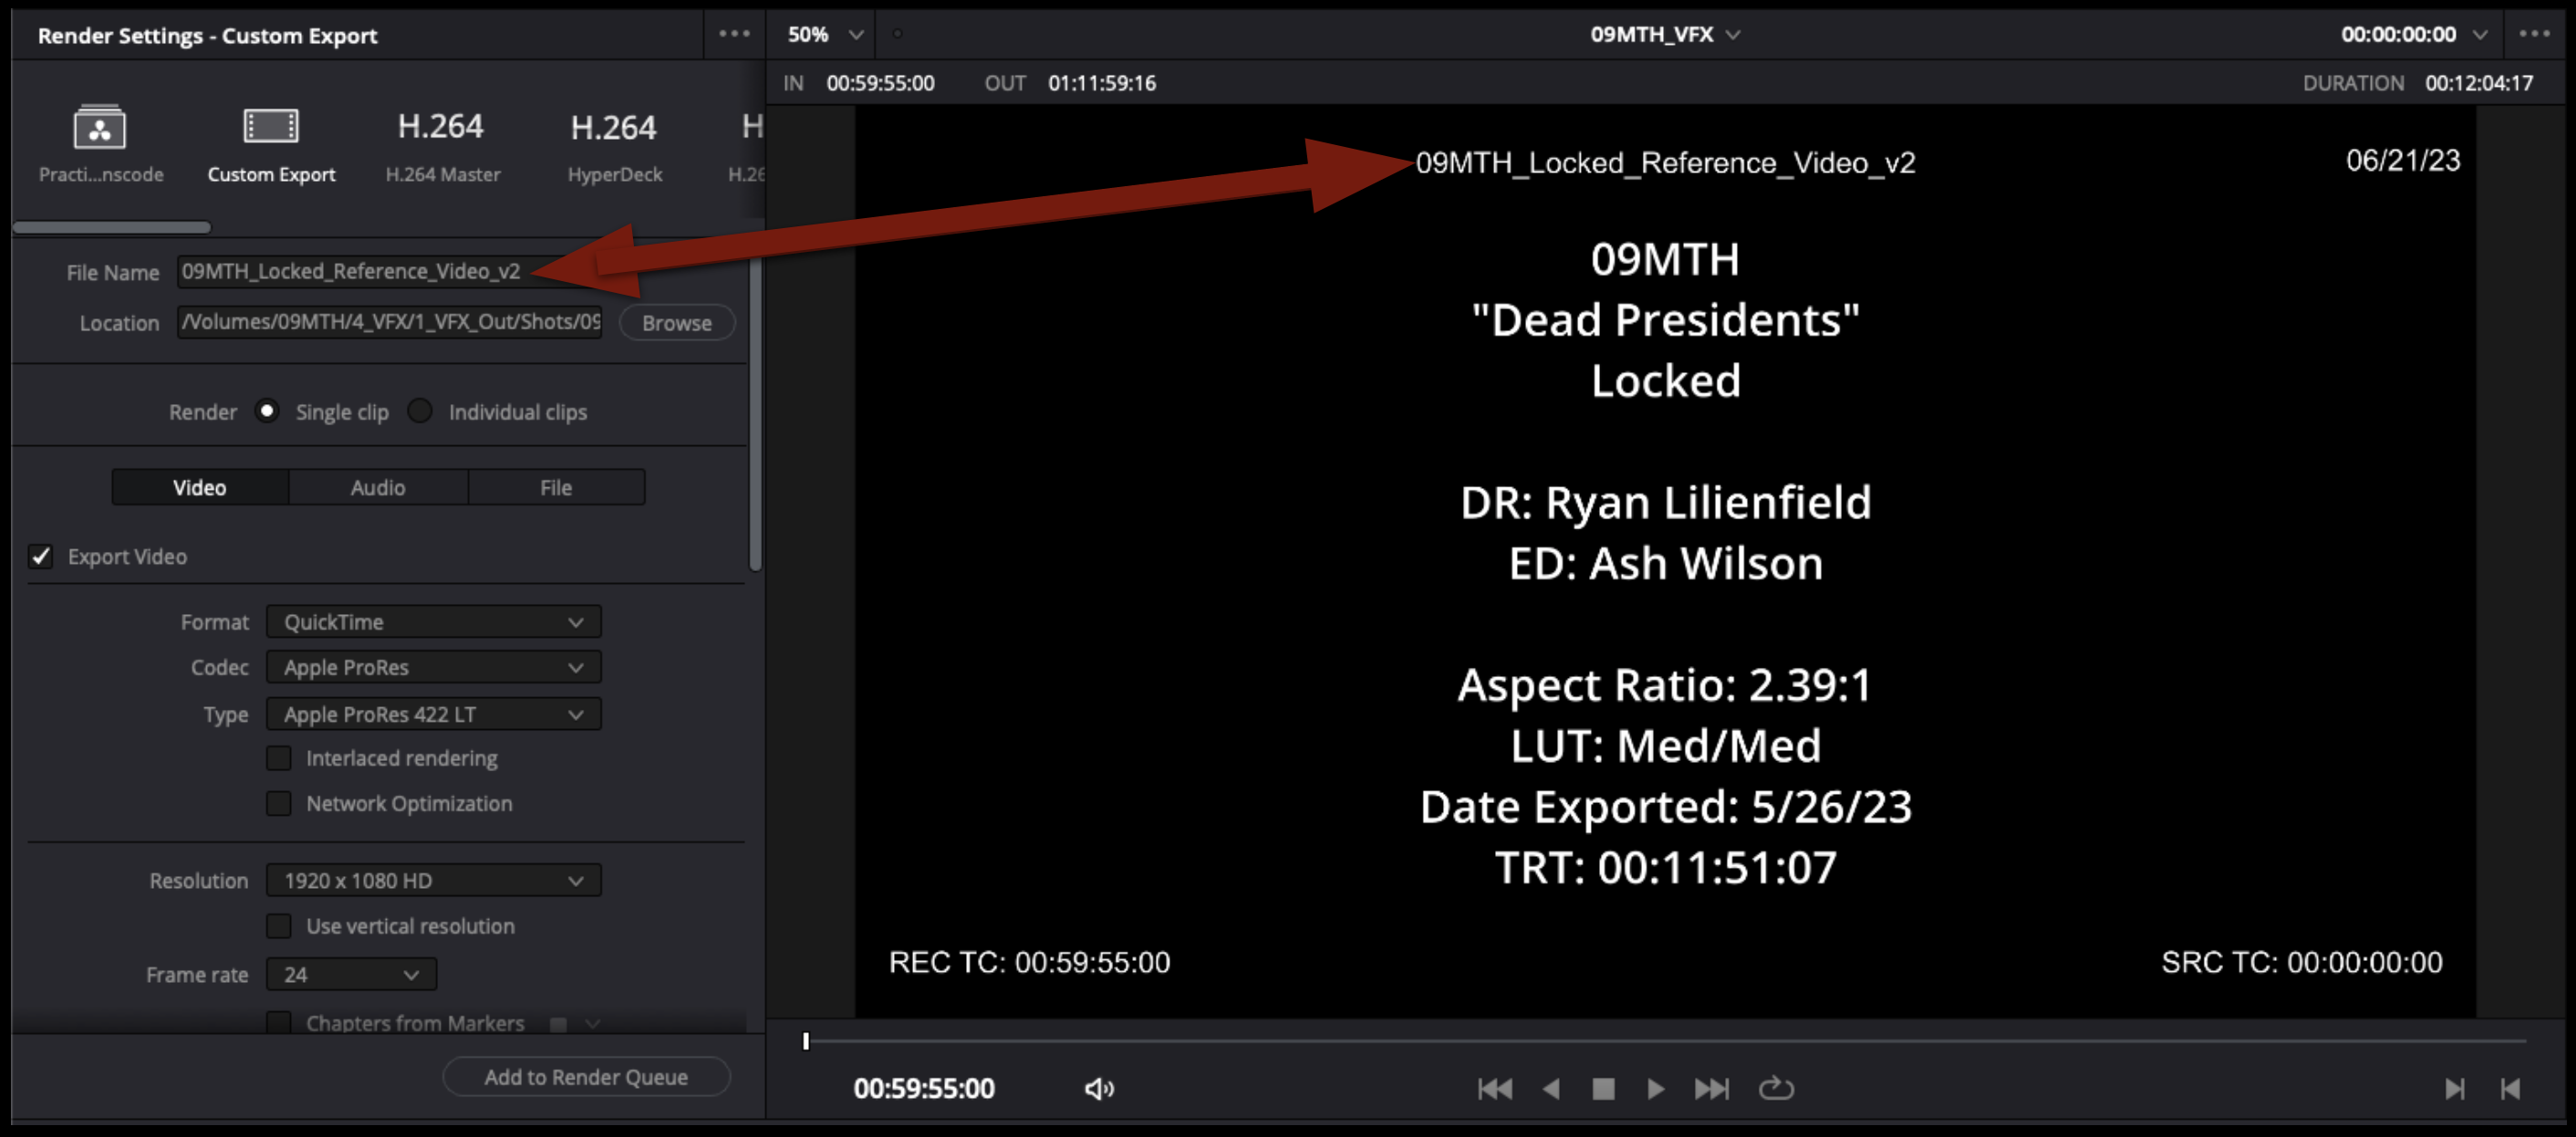
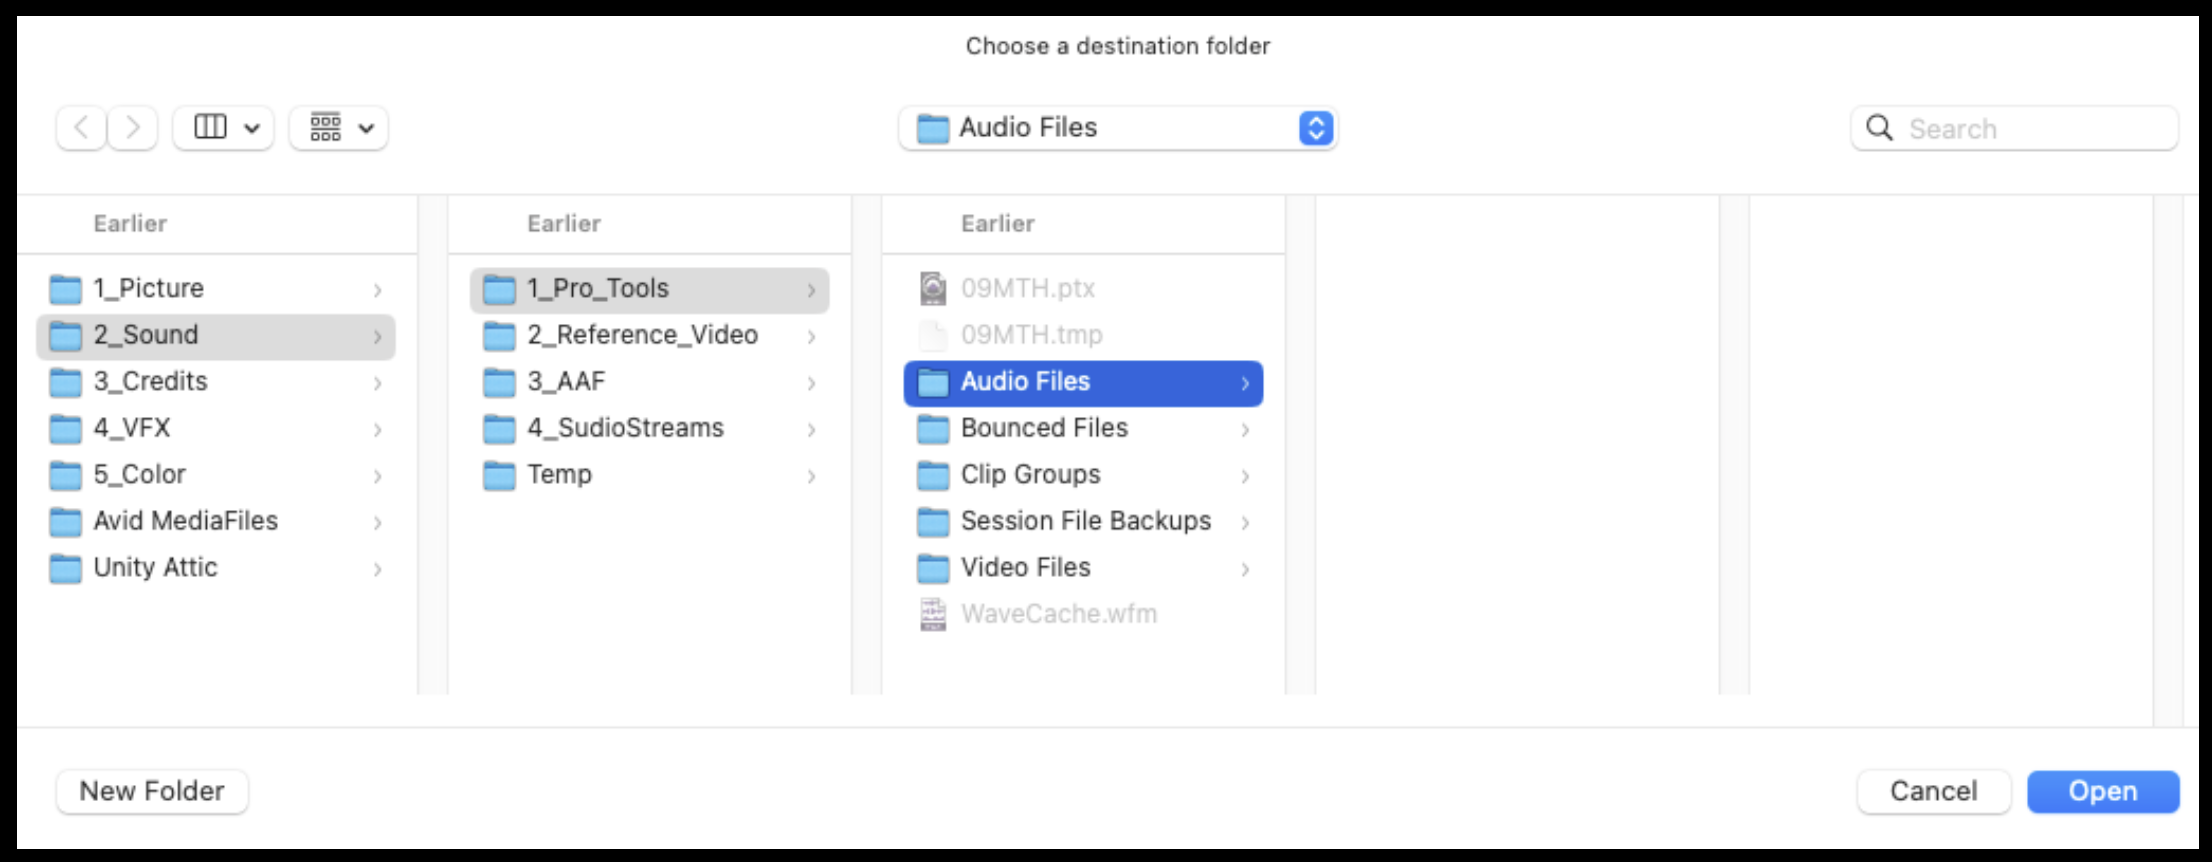
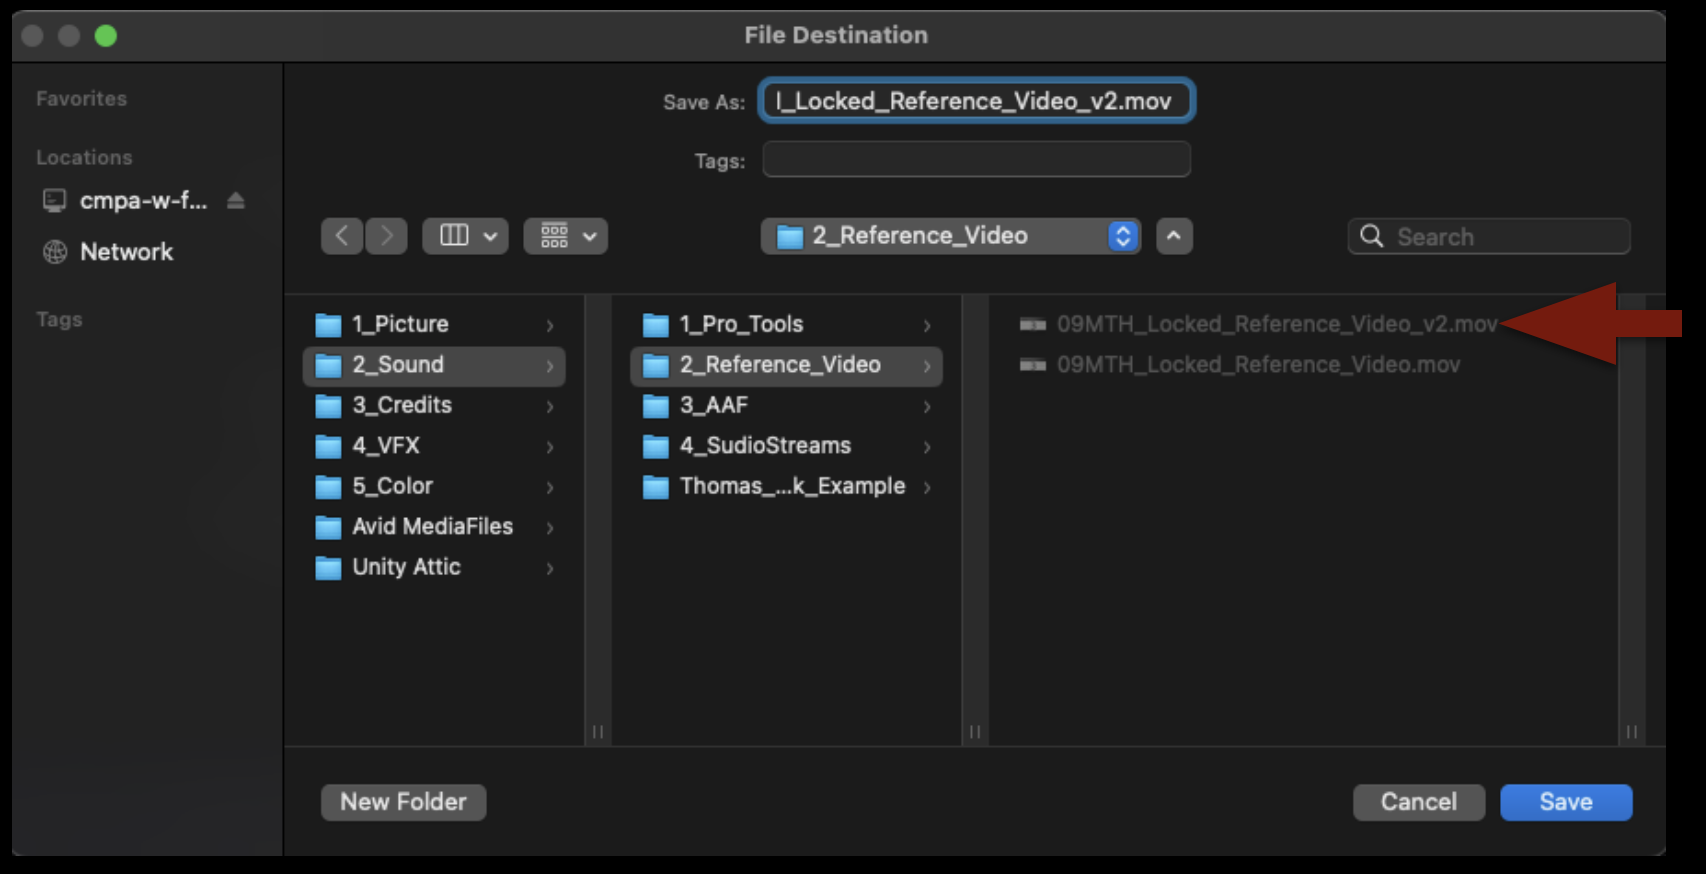
Point the export to the Sound > Reference Video folder on your Show Volume.
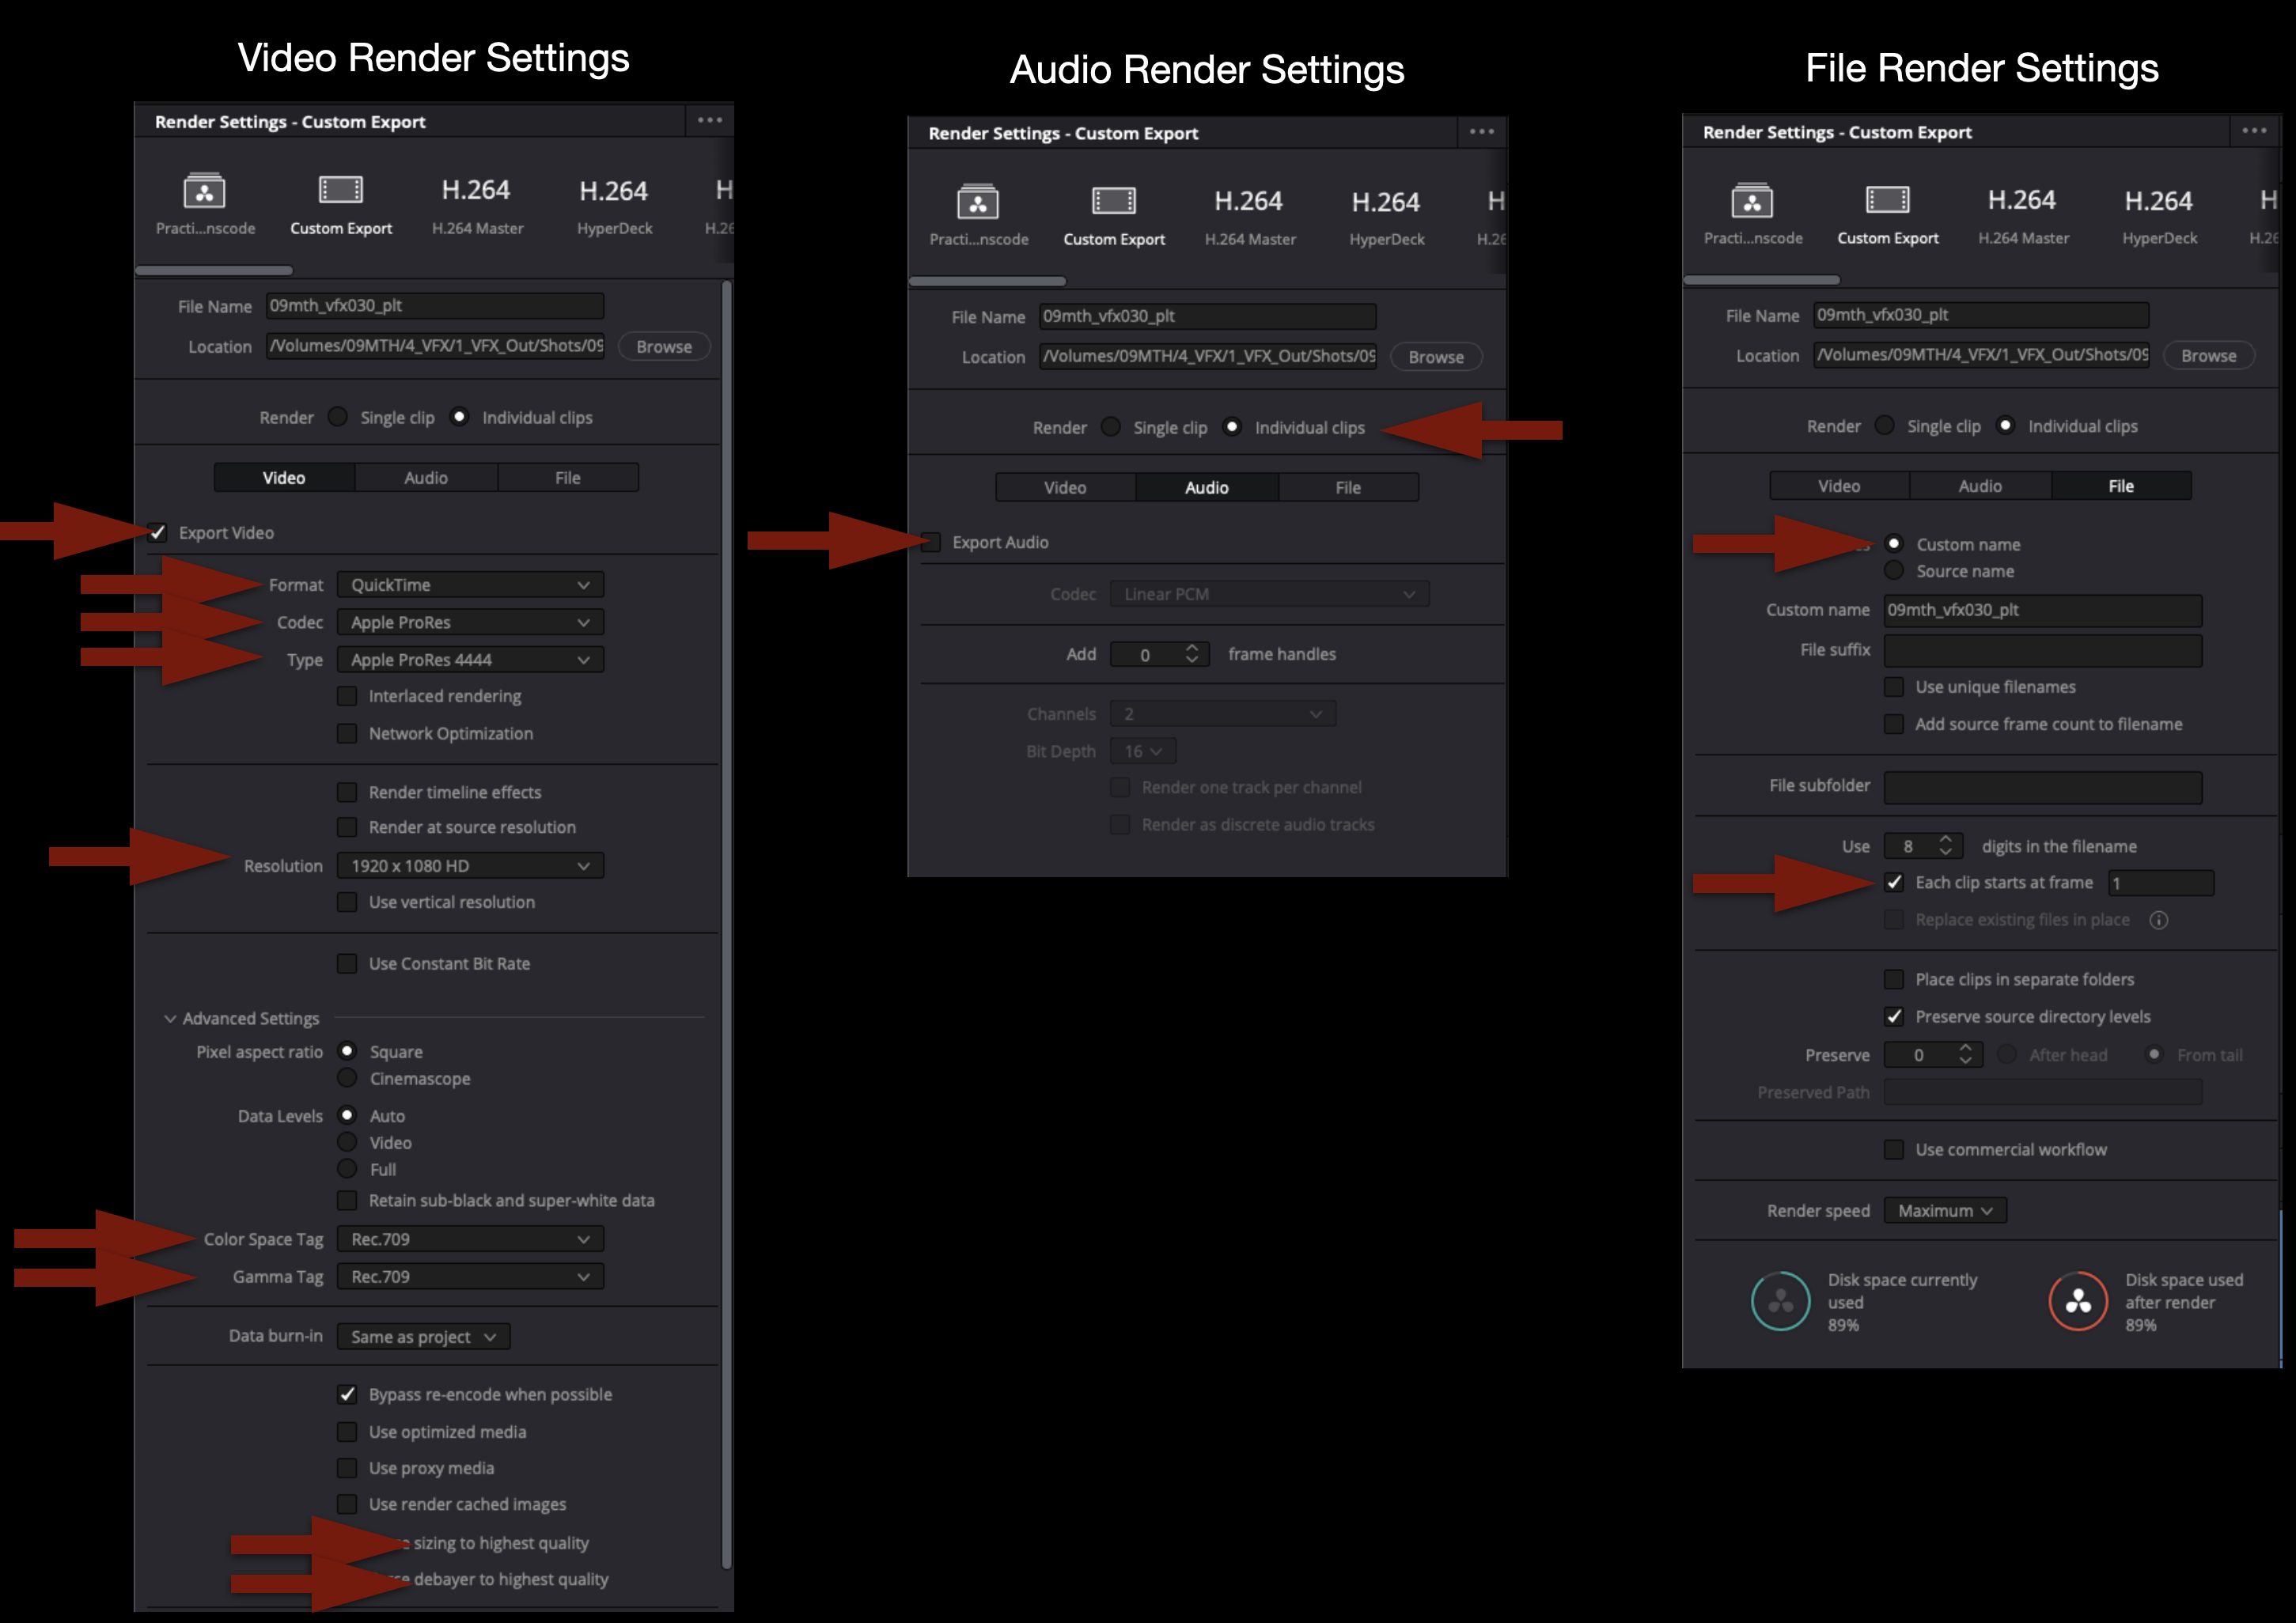
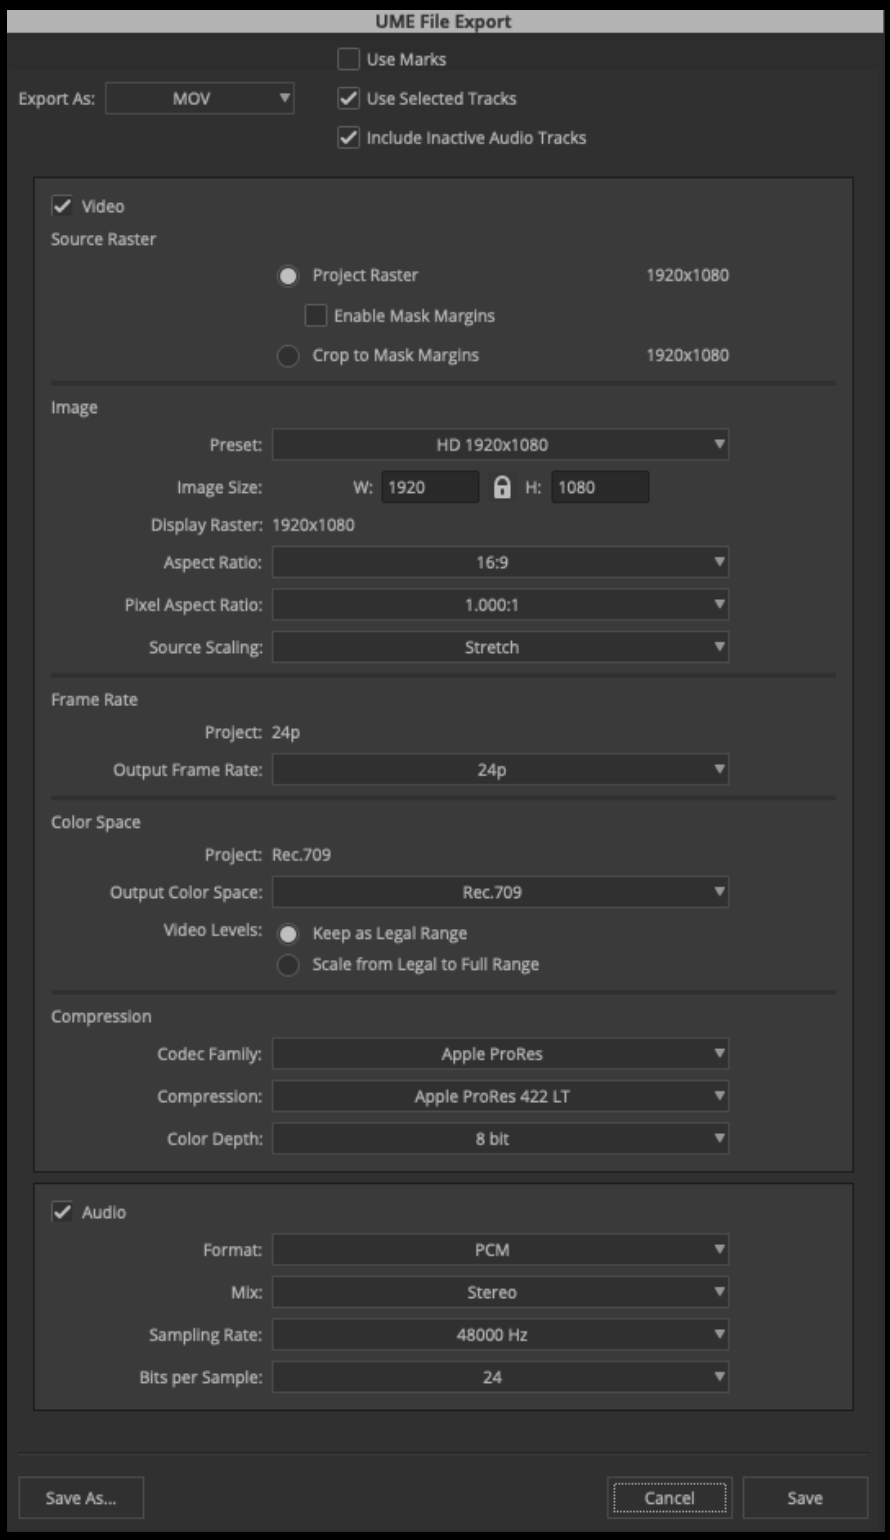
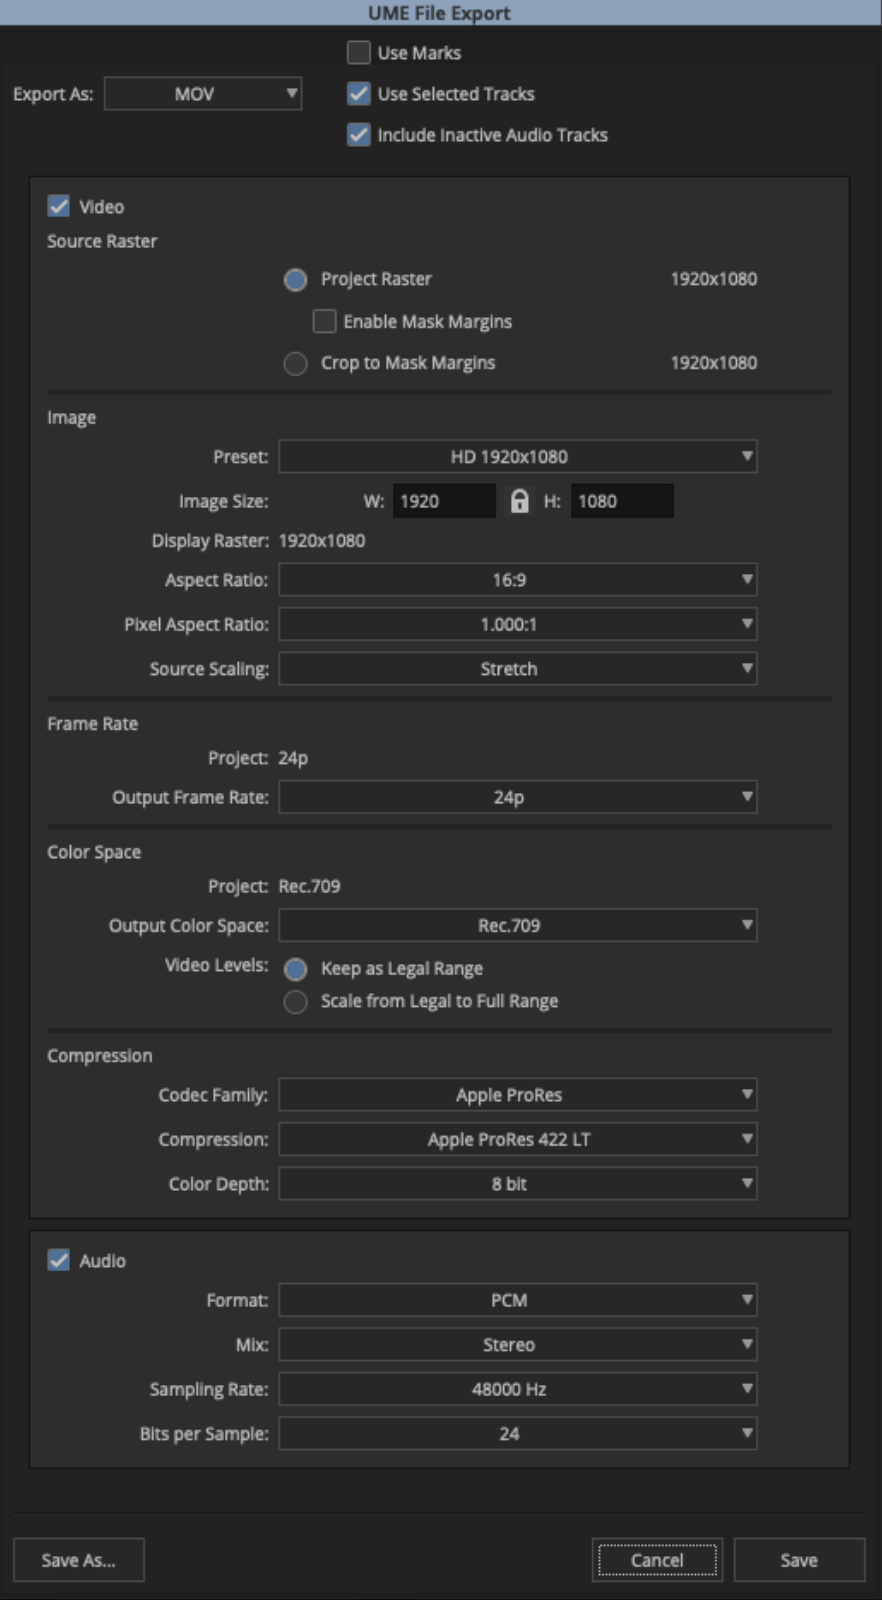
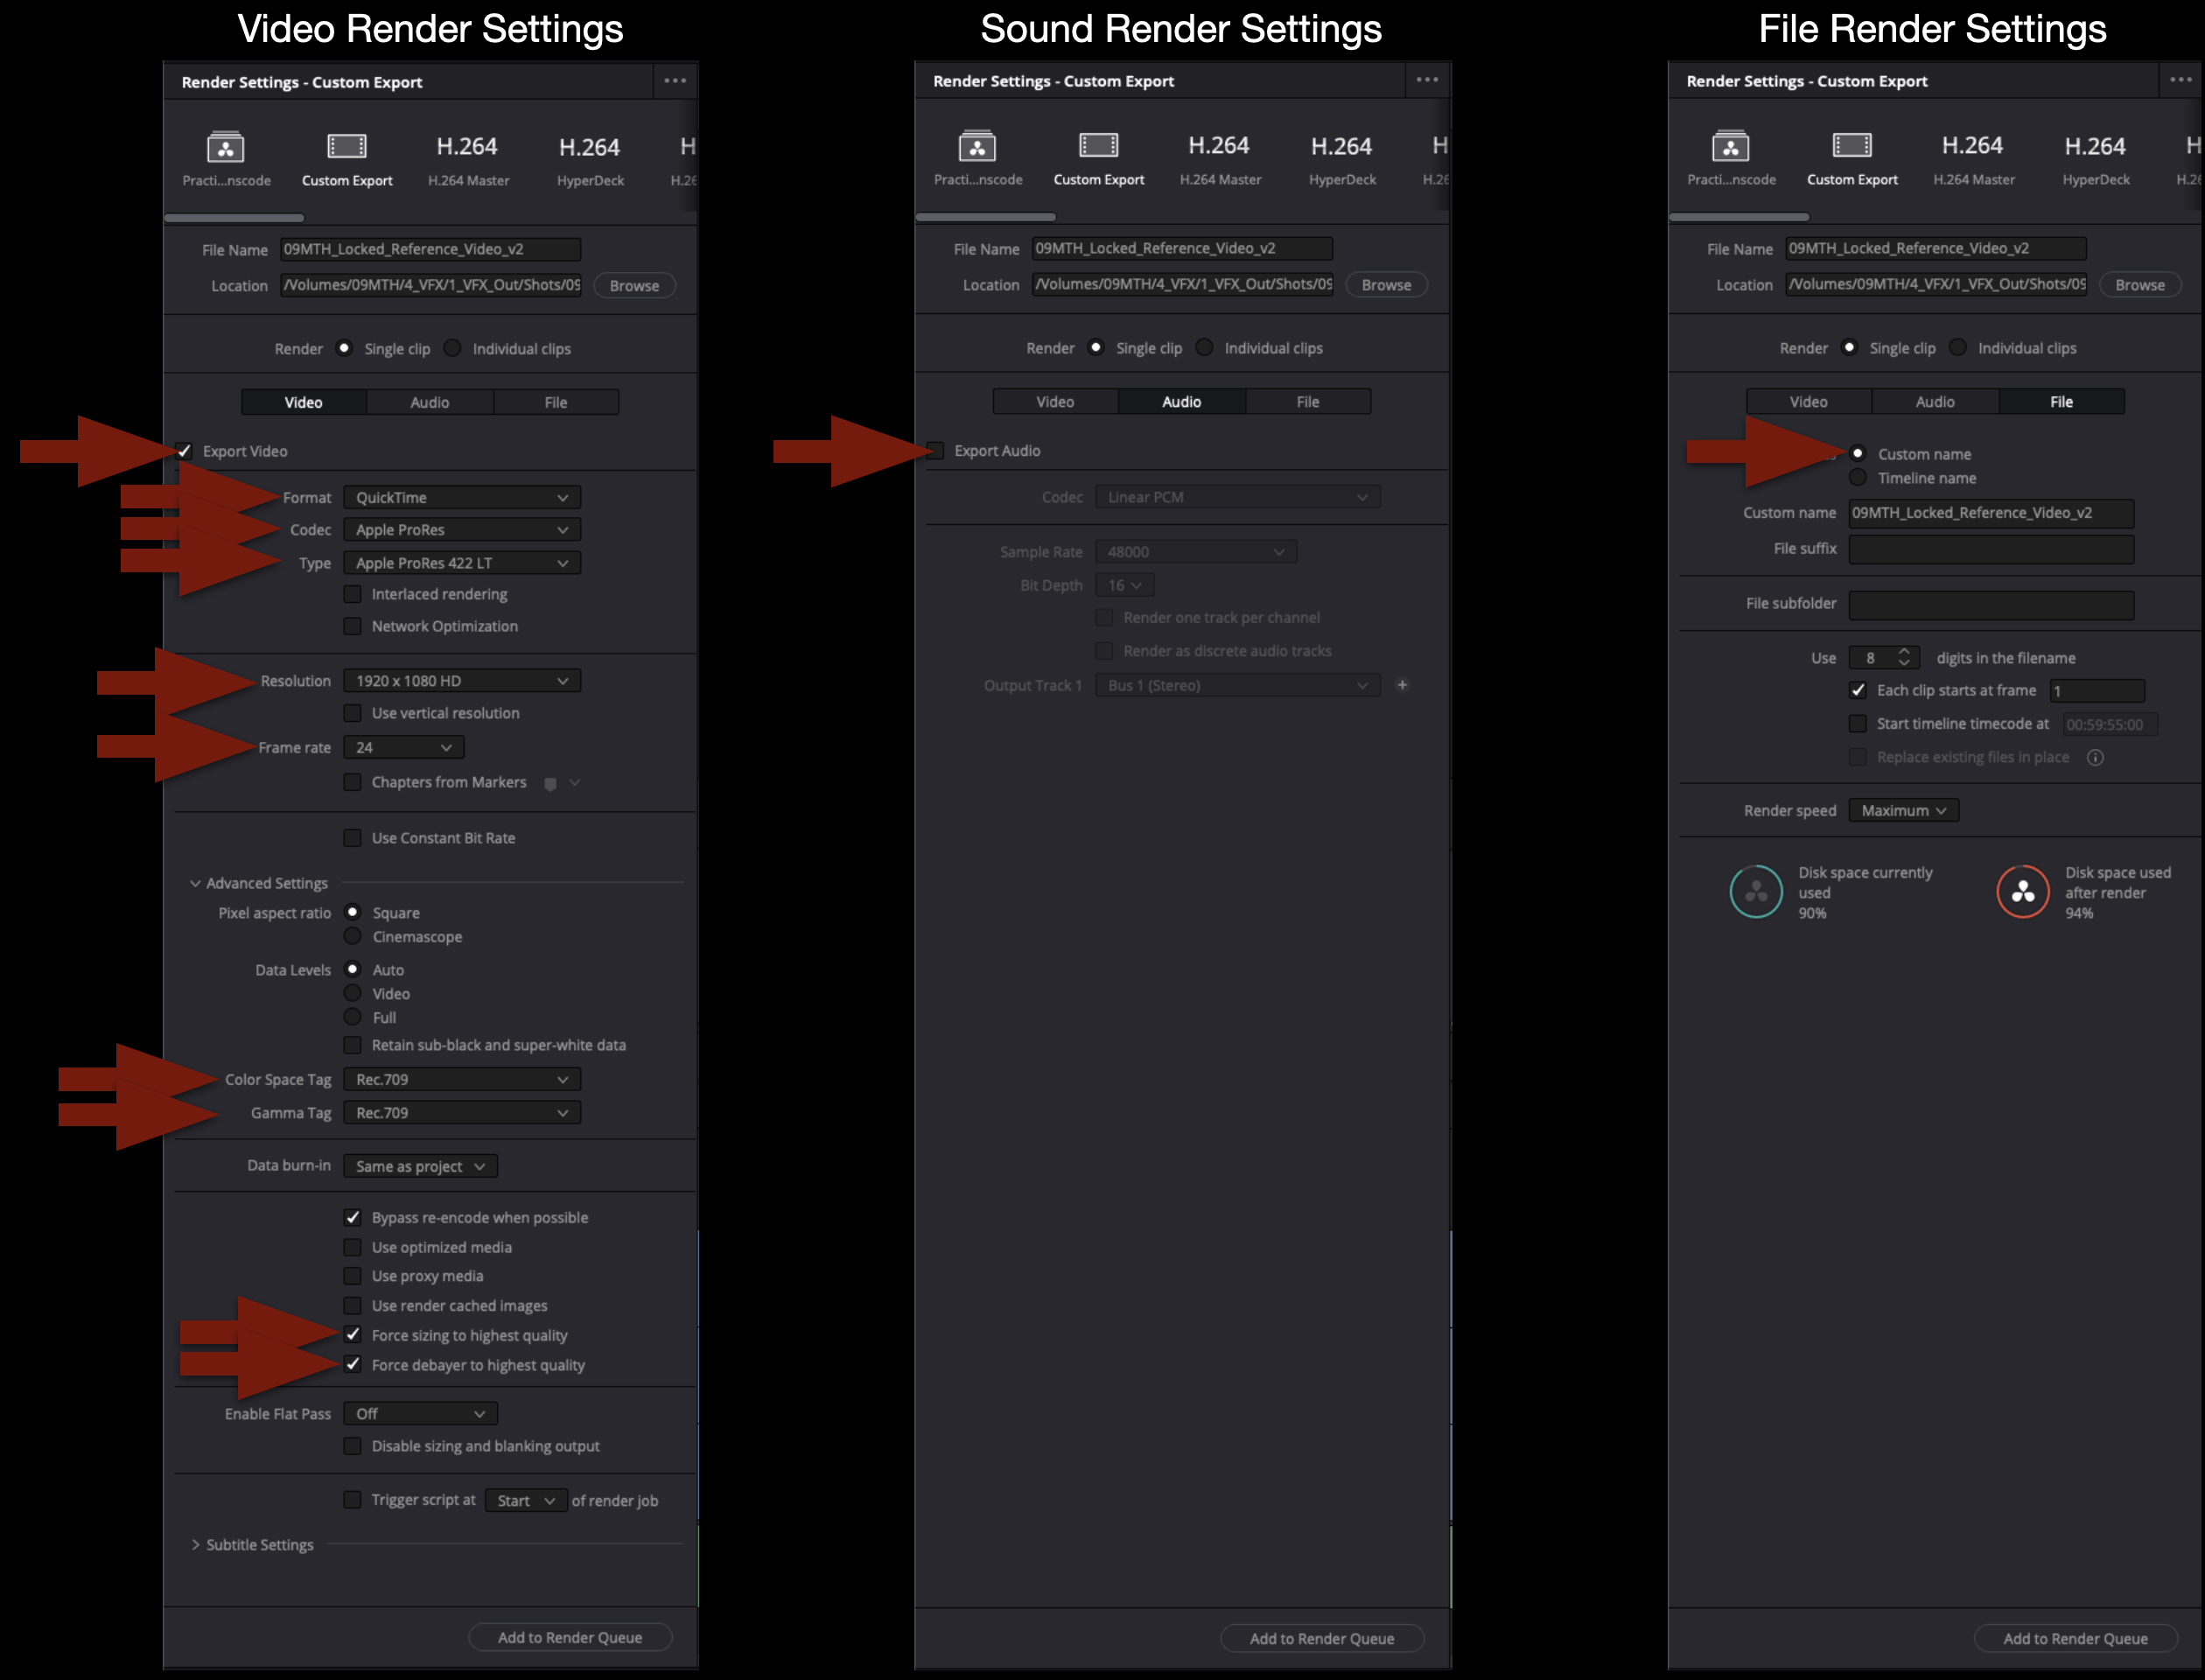
Below are the Render Settings for all reference videos exported from Resolve. Double-check the settings carefully before exporting.
When the export is complete, navigate in the Finder to where it was exported and open it in QuickTime Player to make sure everything is okay.

Wrap Up
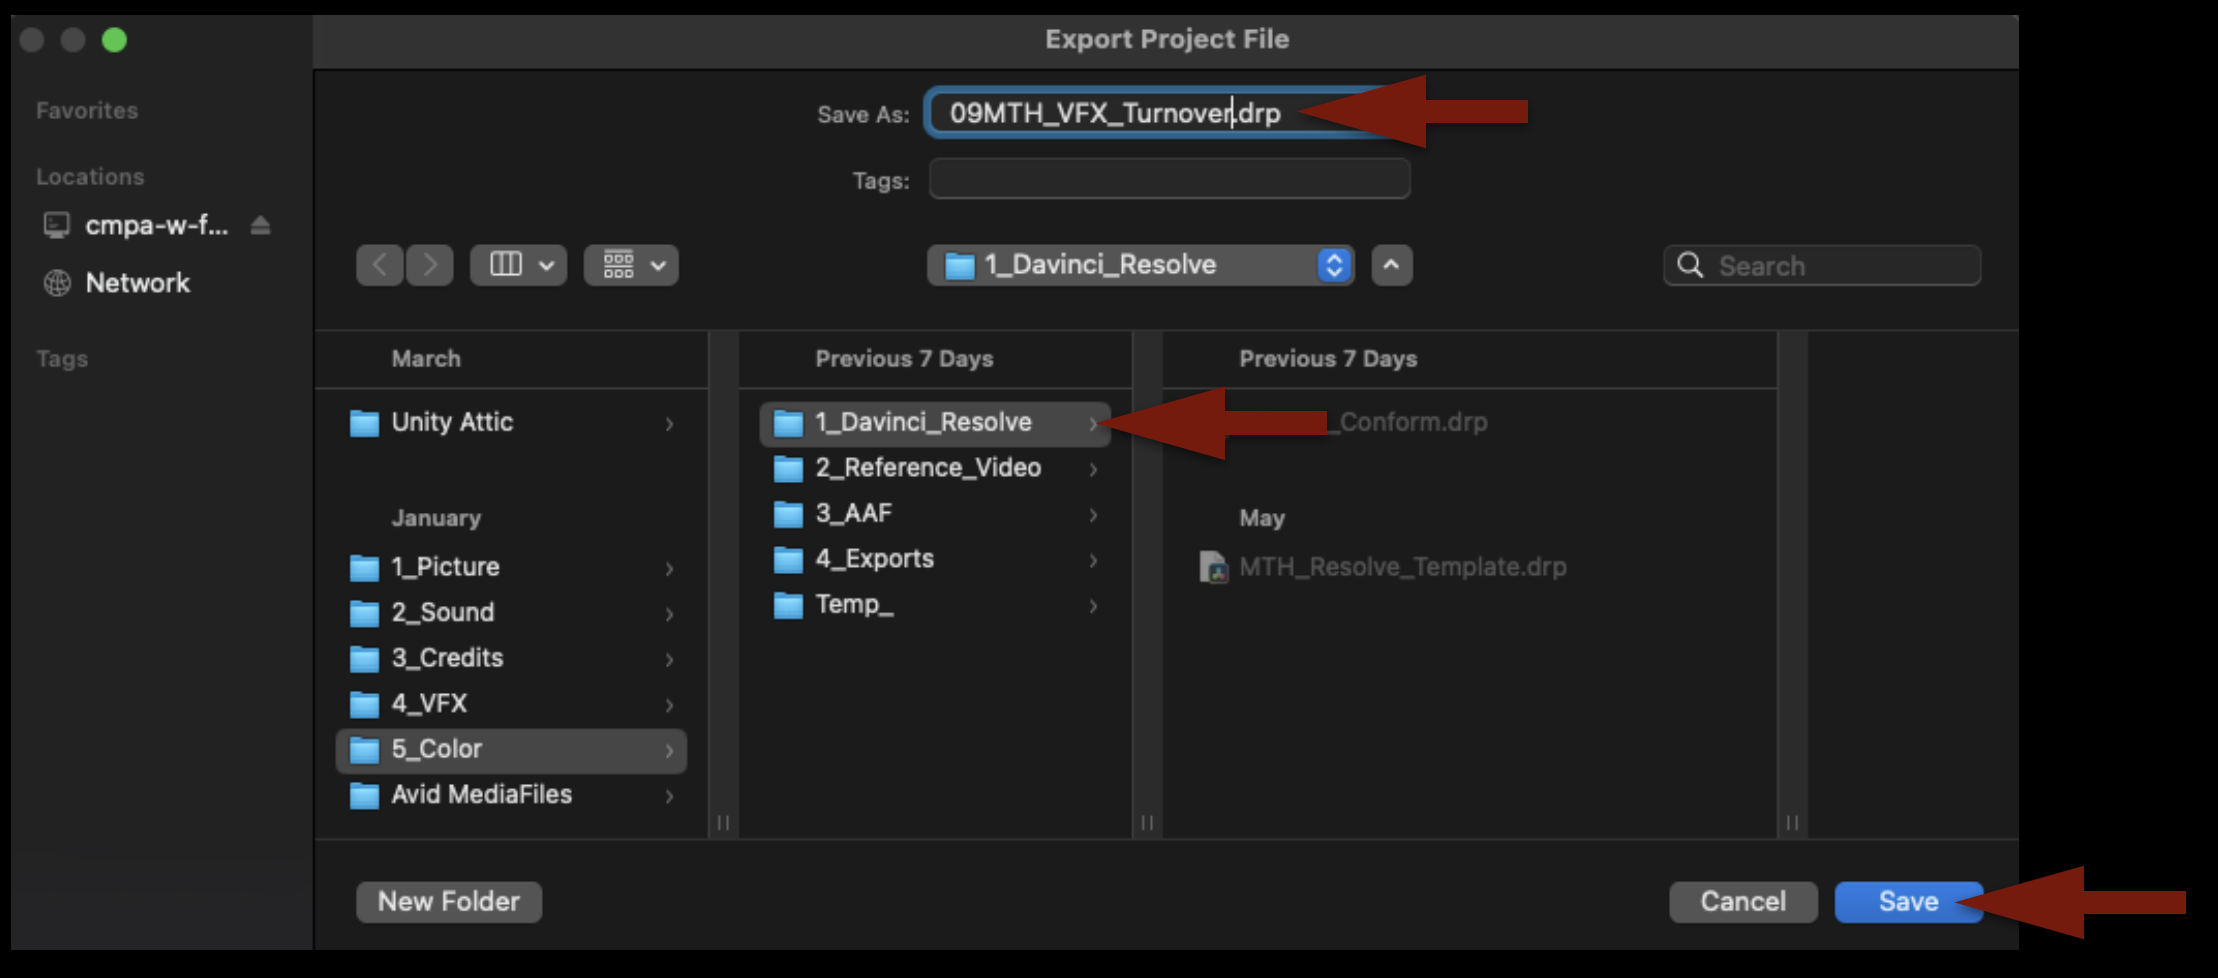
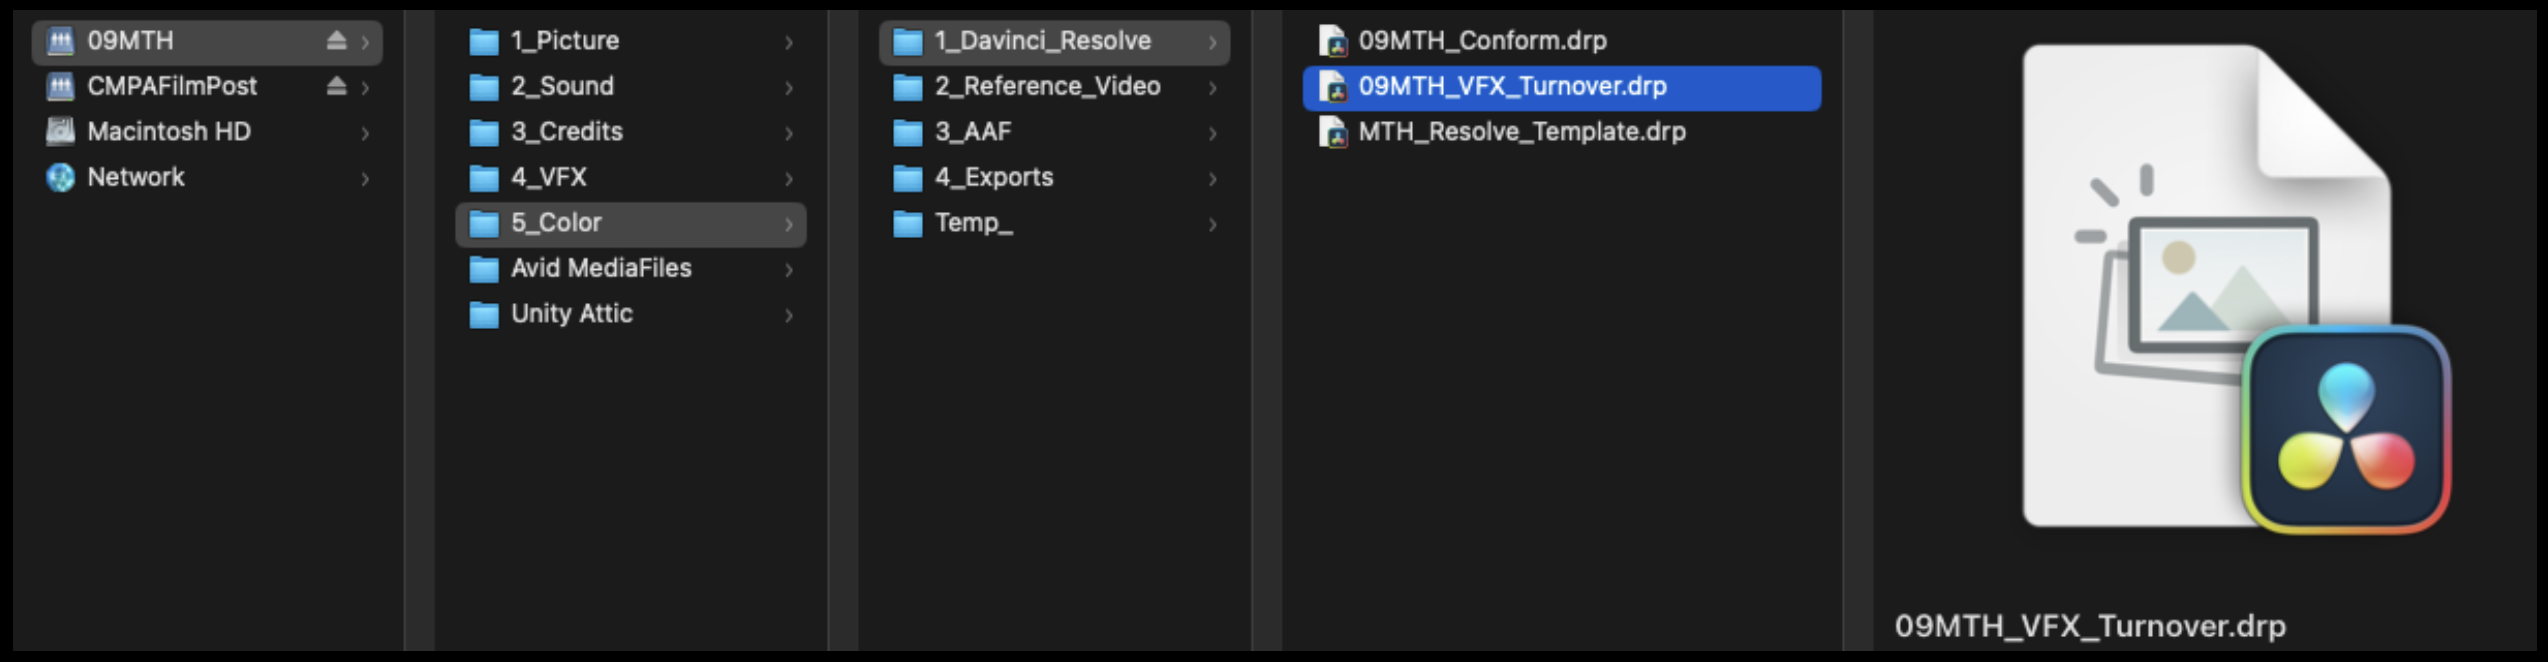
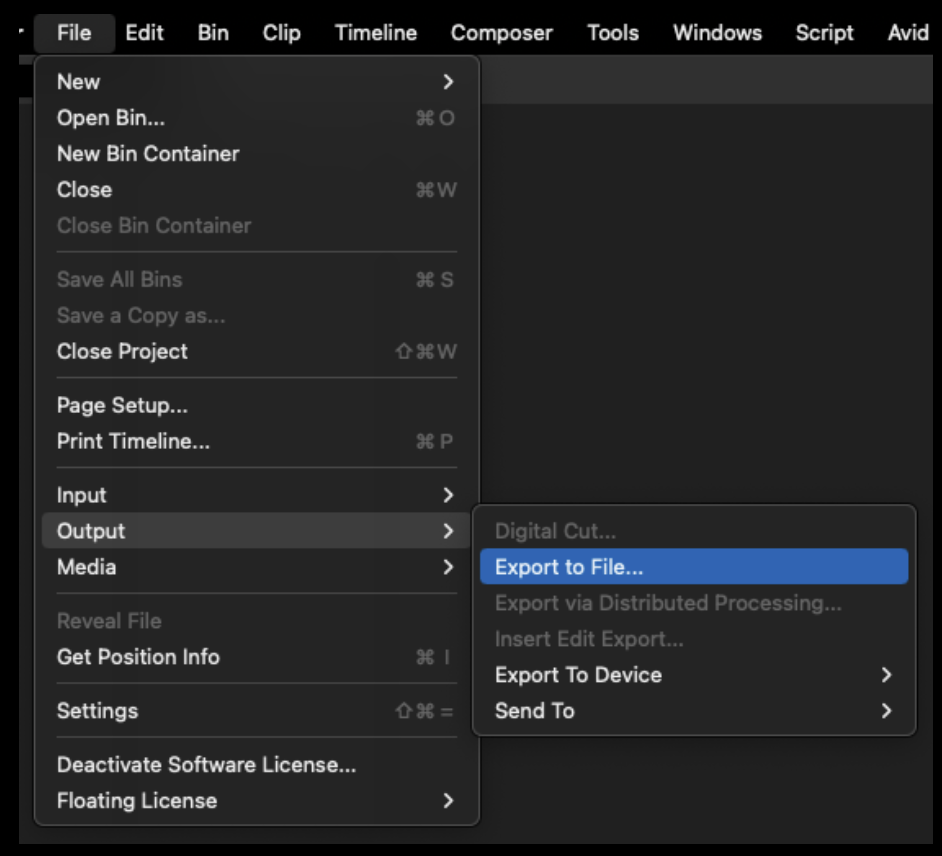
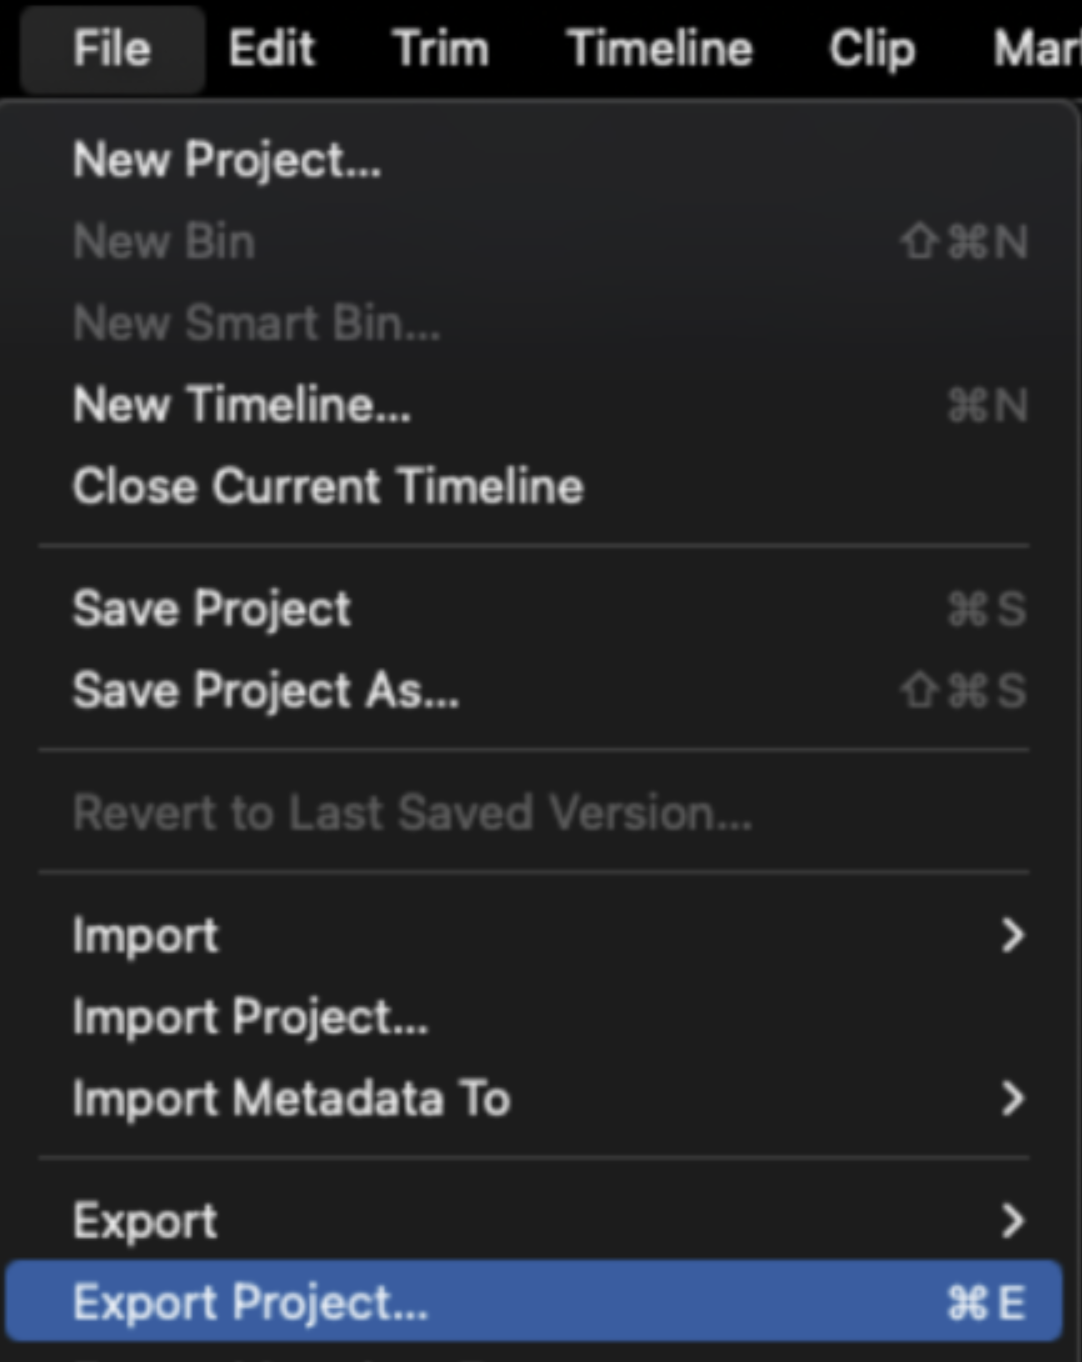
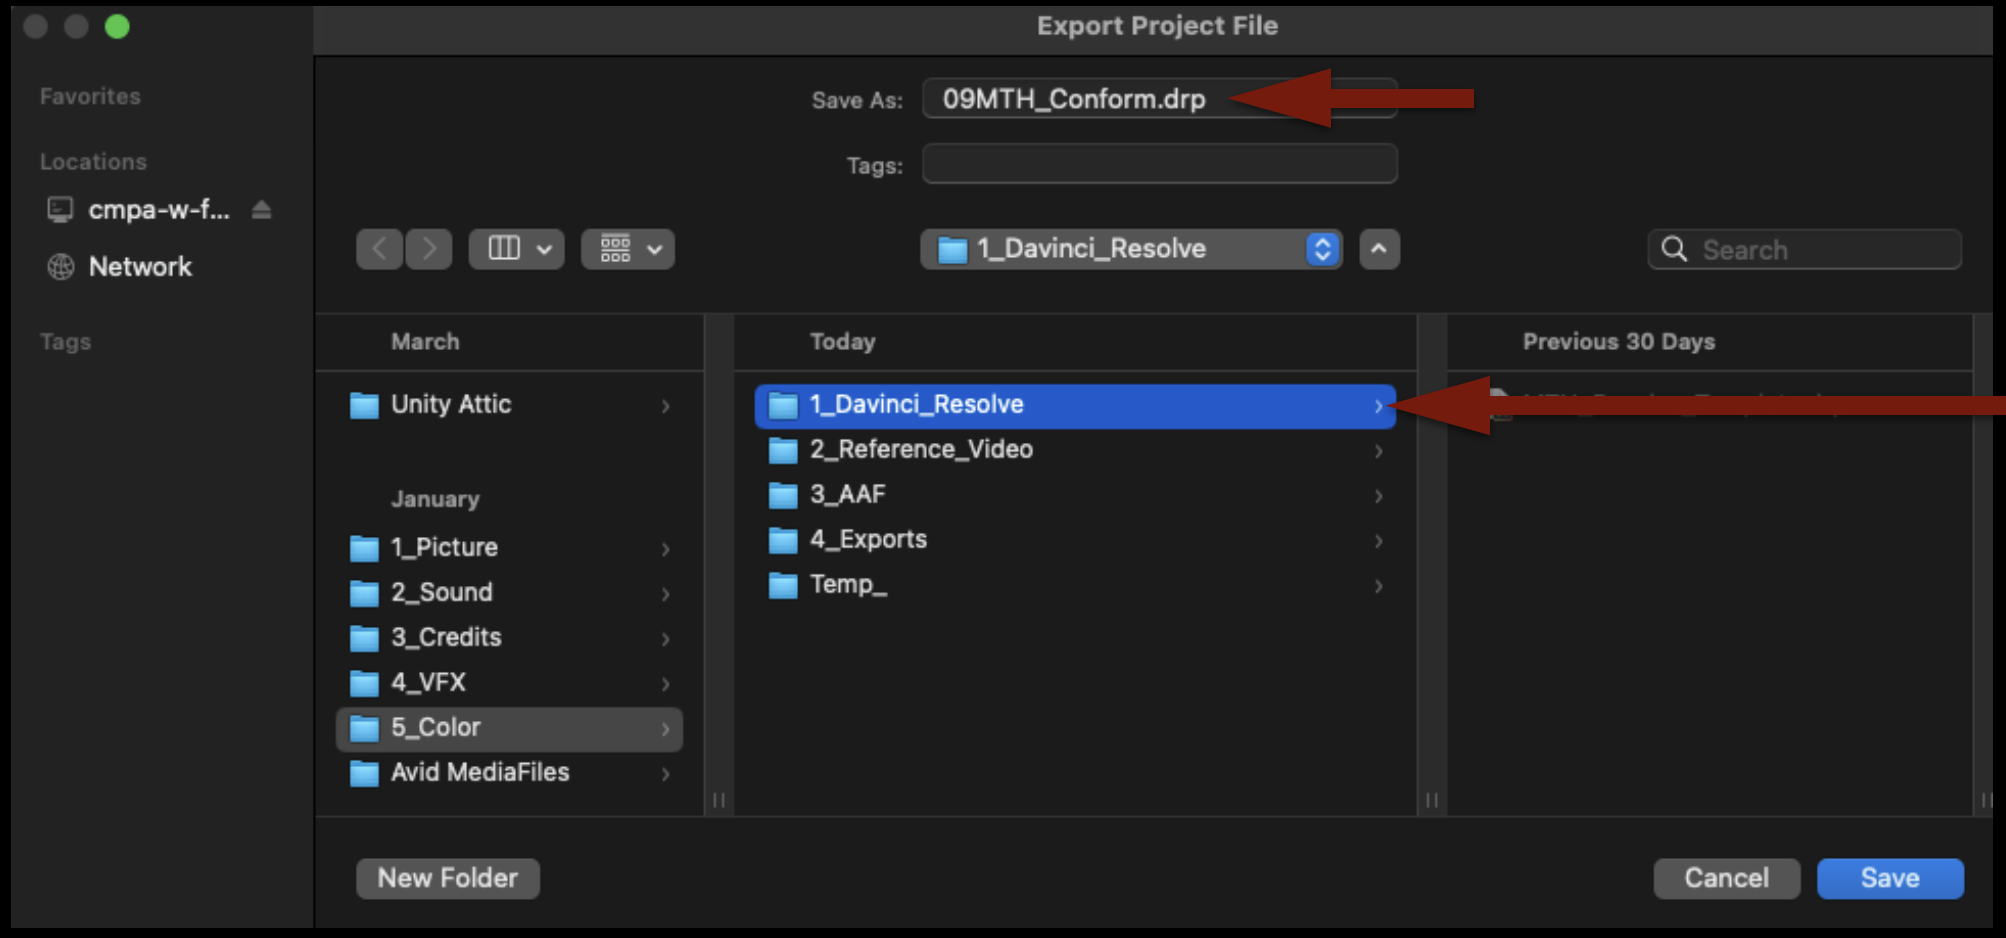
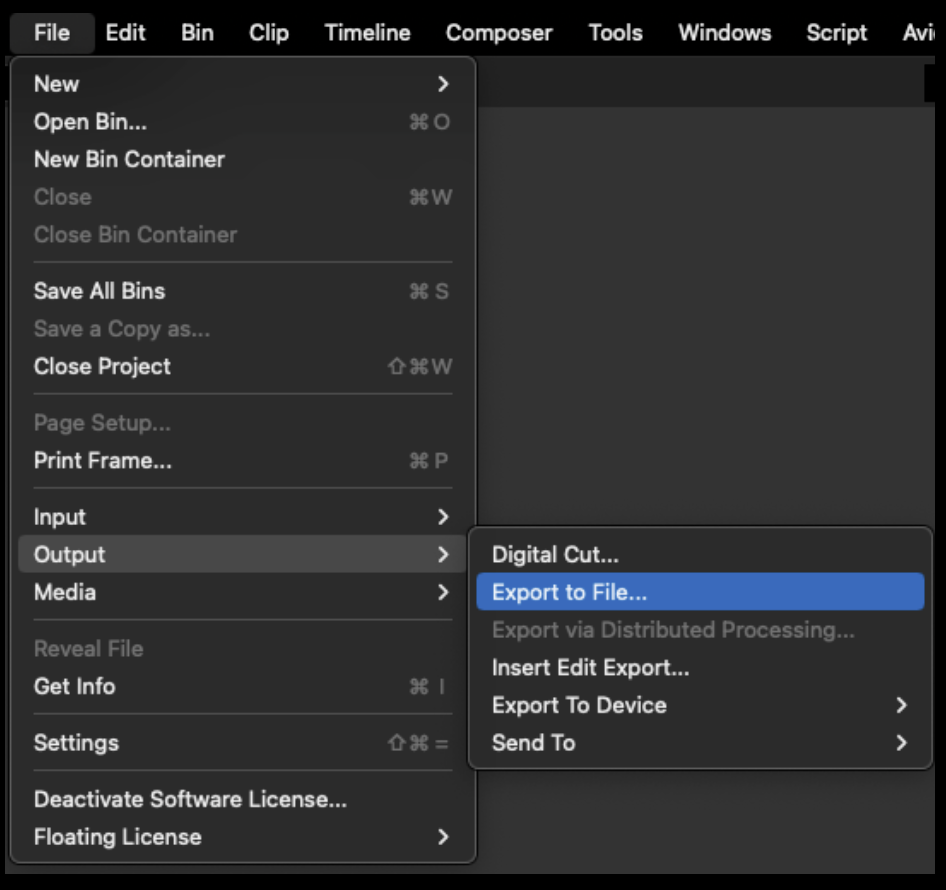
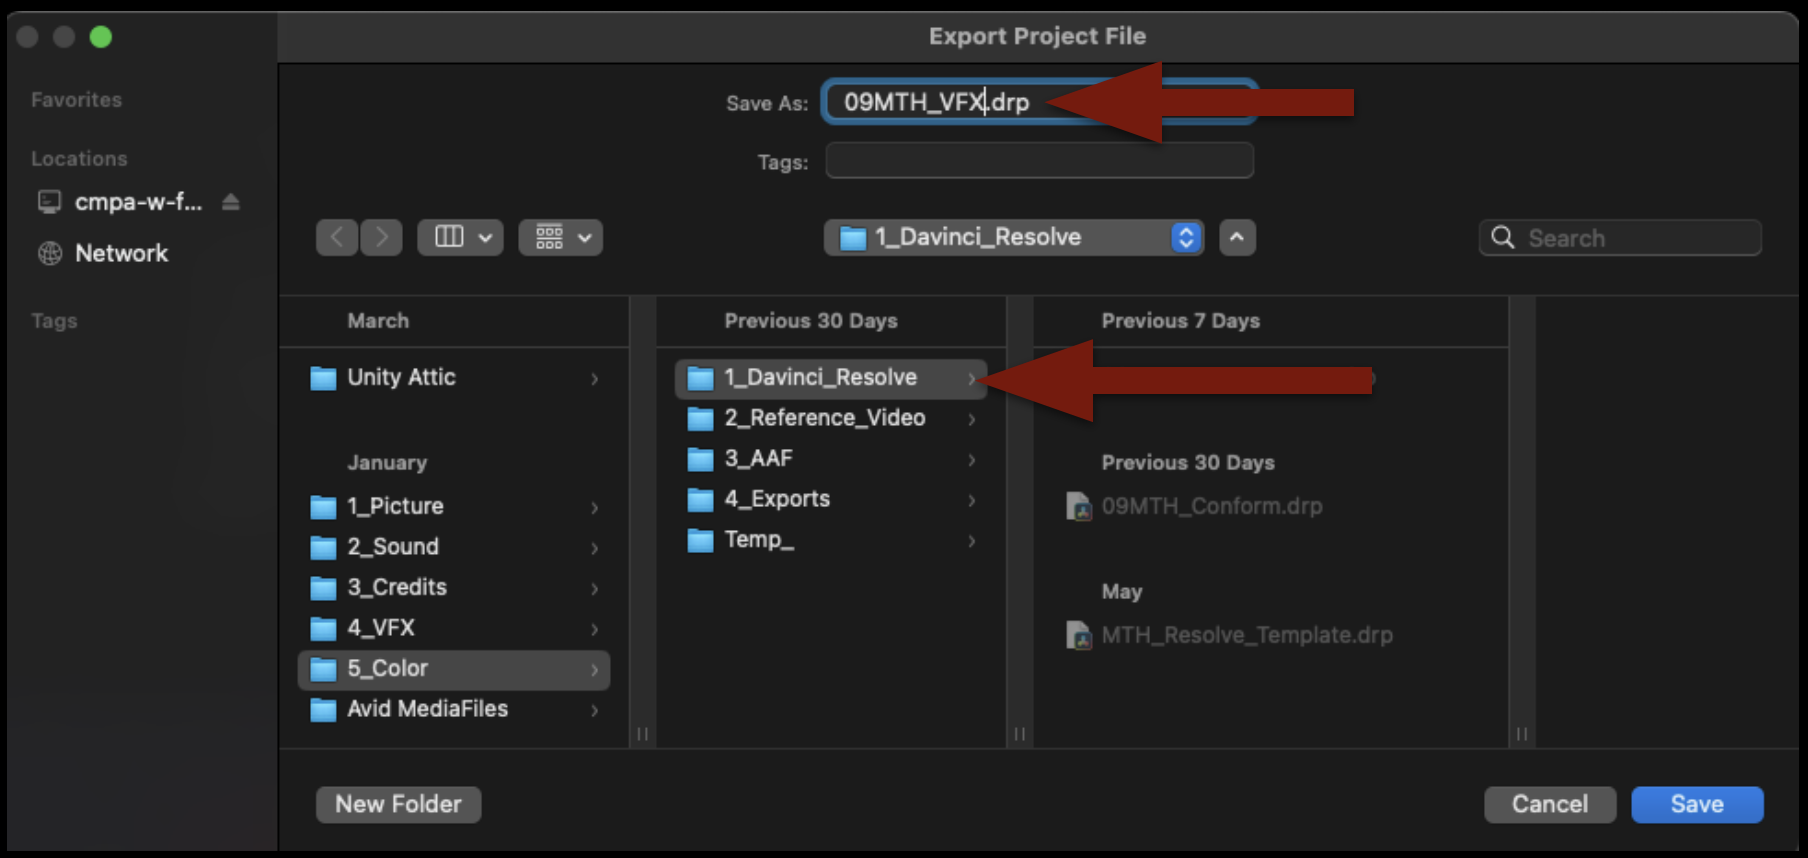
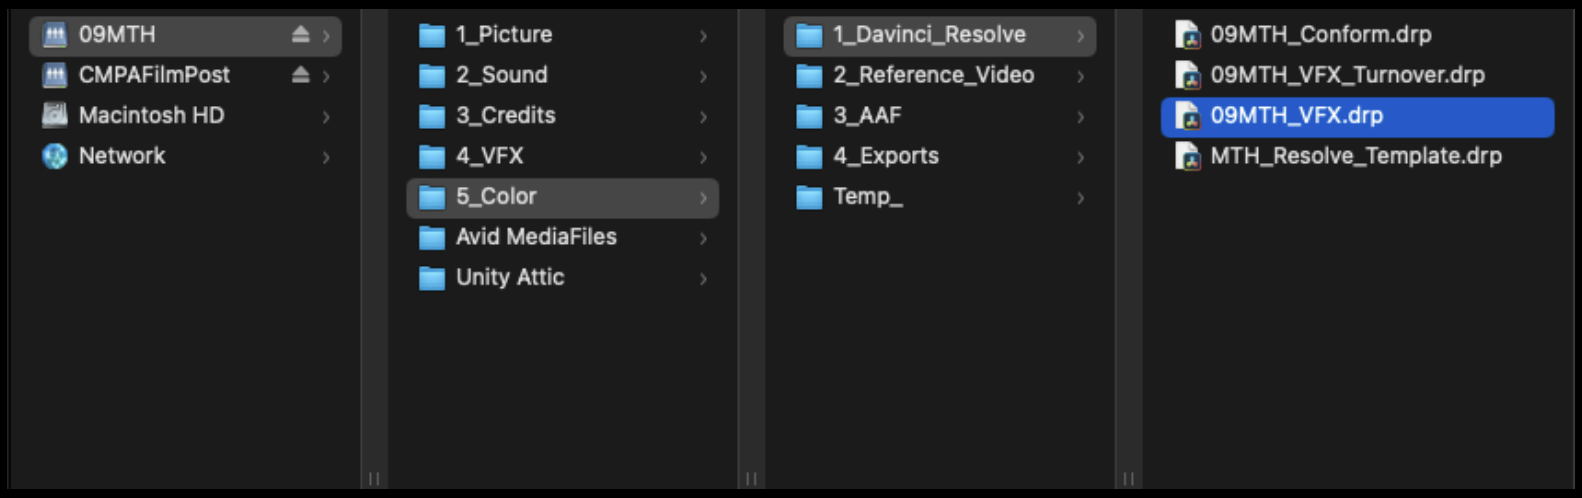
Save the project by hitting “Command+S”. Then go to the task bar and select Export Project… Make sure the project is named accordingly and place it in the proper folder on your show volume.
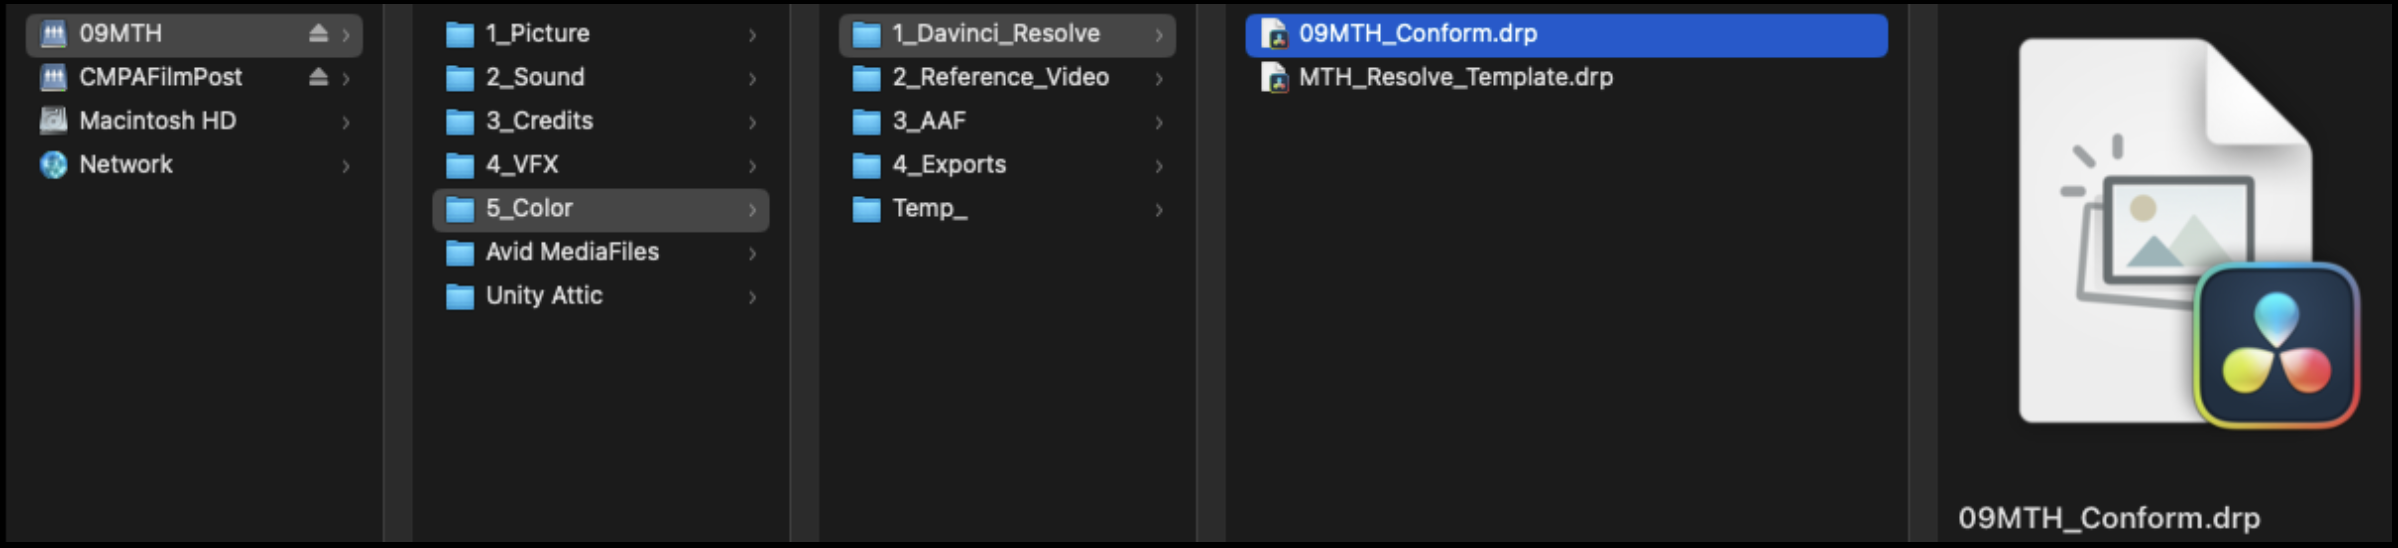
After you confirm that the .drp file is in the correct place, you can quit Resolve.
Congratulations, you are done!