Overview
In the industry, this process is referred to as “Onlining” or “Conforming” because this is where the picture edits made with the lower quality offline media in Media Composer are remade with the highest quality media. An Assistant Editor would normally be responsible for exporting all the necessary elements out of Media Composer. Those elements would then be sent to the facility that handles color grading and finishing. In our workflow, the Editor is responsible for both exporting the necessary files out of Media Composer and conforming to the highest quality media in DaVinci Resolve. This is to ensure that any issues during turnover can be caught immediately and the Resolve project is left ready for color grading.
This step-by-step guide for color turnover covers how to:
Export Reference Video From Media Composer
A reference video of the locked sequence will need to be exported so that it can be used in Resolve as an offline reference video to check the conformed sequence against.
Mount your Show Volume and launch your Media Composer project. Open the Locked Sequences bin. Select your locked sequence and hit “Command+D” to duplicate the sequence.
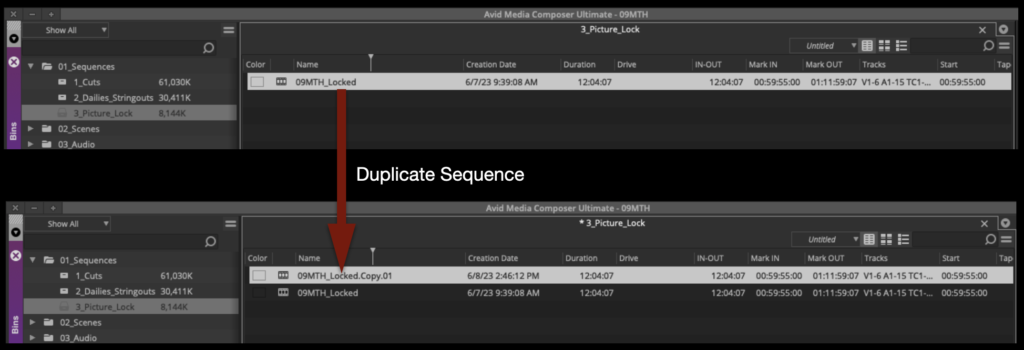
Rename the new sequence Show#_Locked_Reference_Video and move it to the Color Turnover bin.

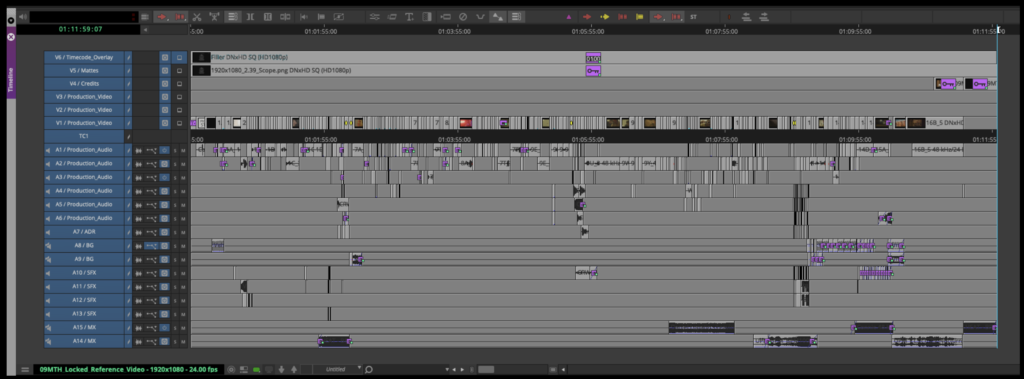
Open the new sequence. Mark In and Out for the entire timeline and activate all tracks.
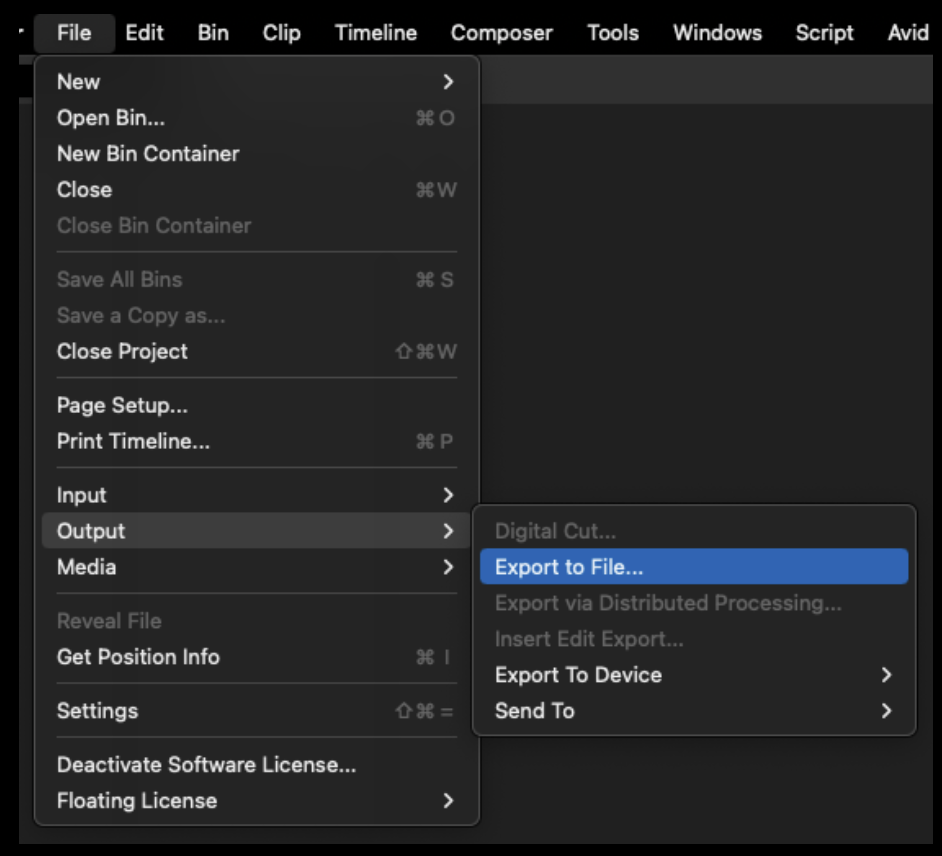
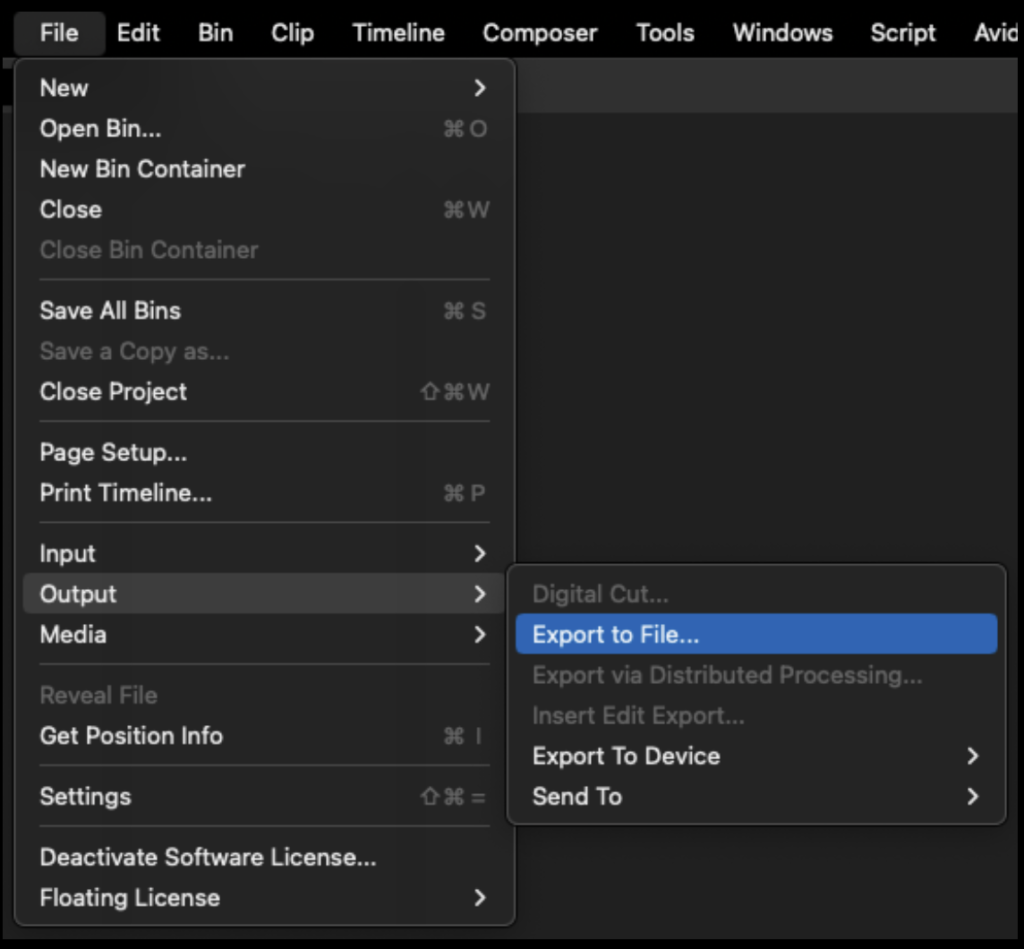
From the task menu select File > Output > Export to File…
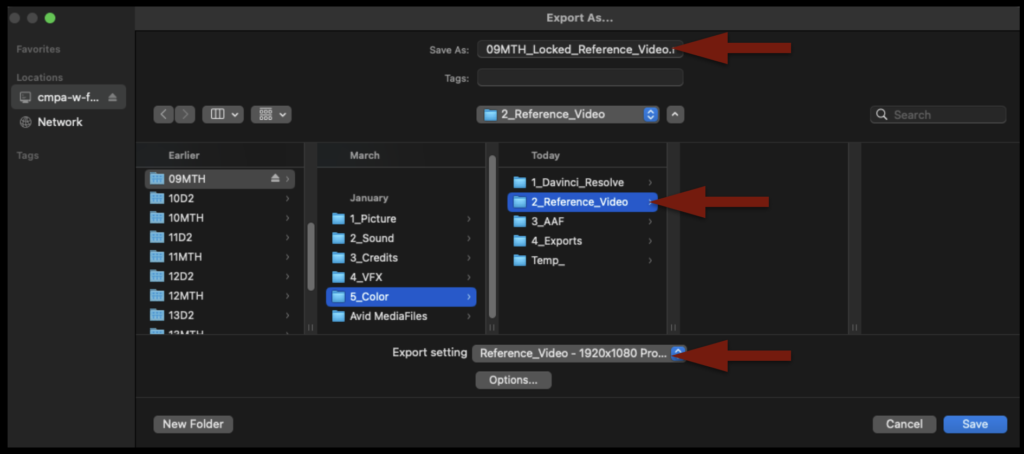
Point the export to the Color > Reference Video folder on your Show Volume. Check that the name of the export will be correct. Select the “Reference Video” preset.
Before clicking “Save” to export, double-check the preset by clicking “Options” and make sure the settings are exactly as shown in the example below:
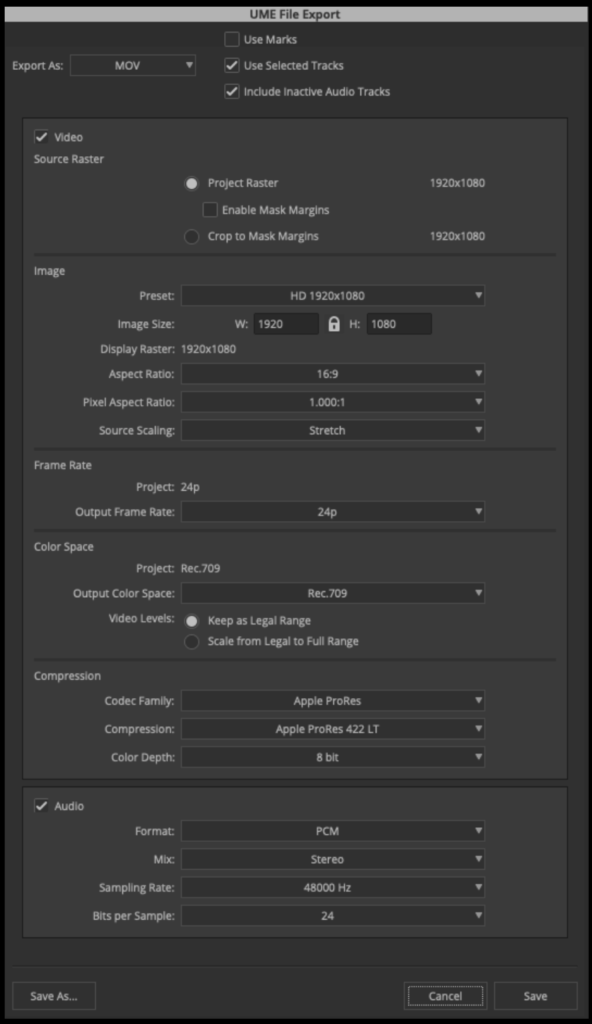
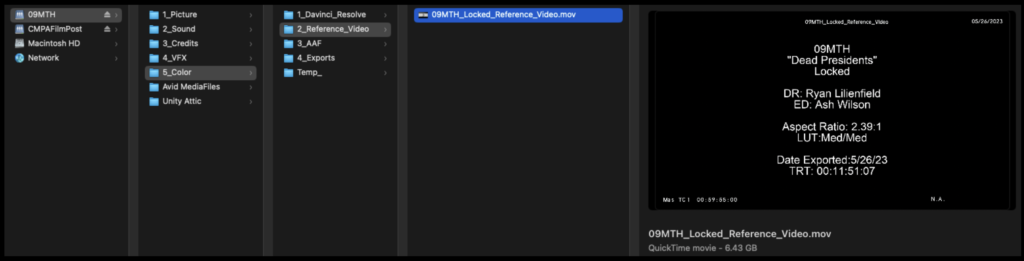
When the export is complete, navigate in the Finder to where it was exported and open it in QuickTime Player to make sure everything is okay.
Export AAF From Media Composer
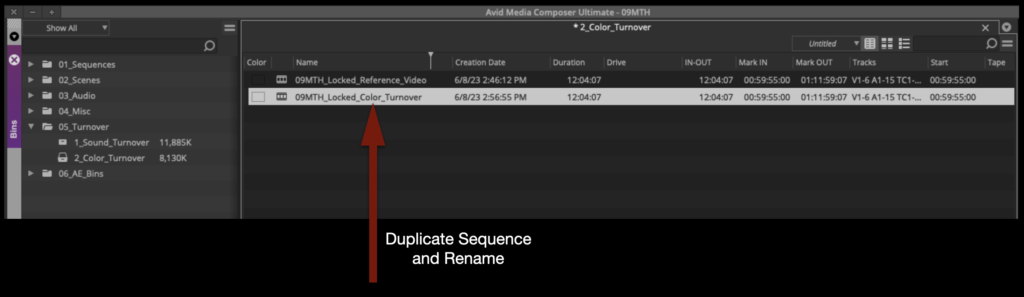
Duplicate the sequence named “Locked Reference Video” and rename it show#Locked_Color_Turnover as shown in the example below:
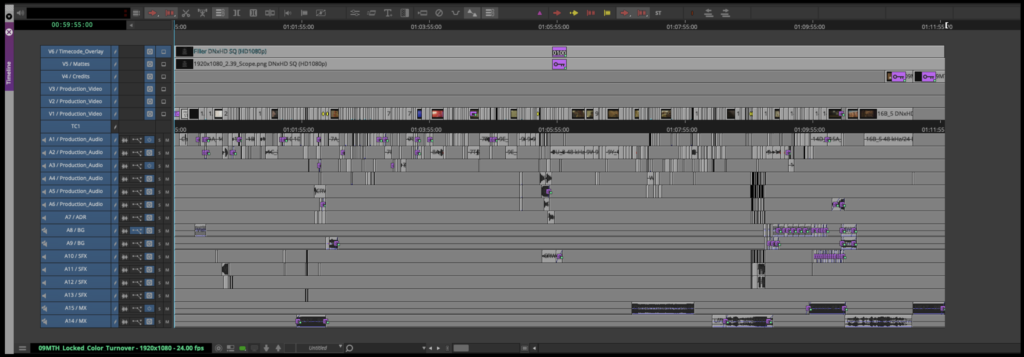
Open the new sequence. Mark In and Out for the entire timeline and activate all tracks.
From the task menu, select File > Output > Export to File…
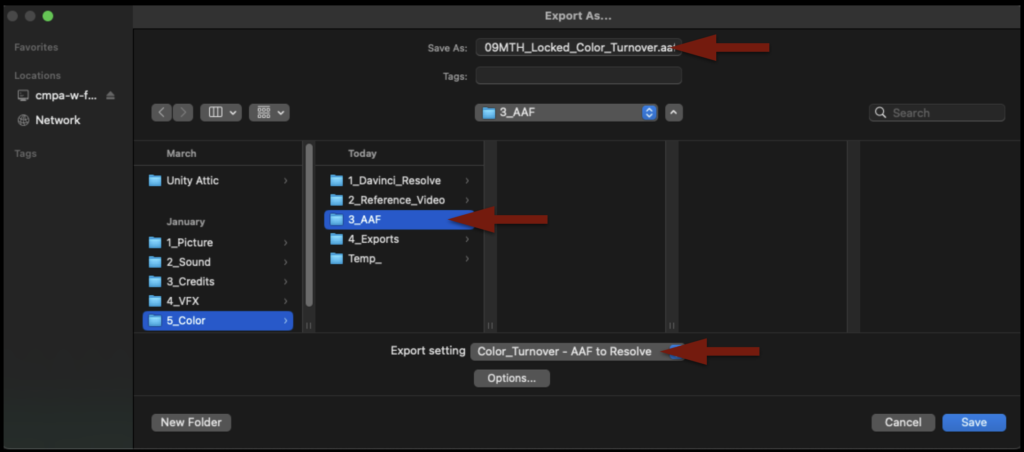
Point the export to the Color > AAF folder on your Show Volume. Check that the name of the export will be correct. Select the “Color_Turnover – AAF to Resolve” preset.
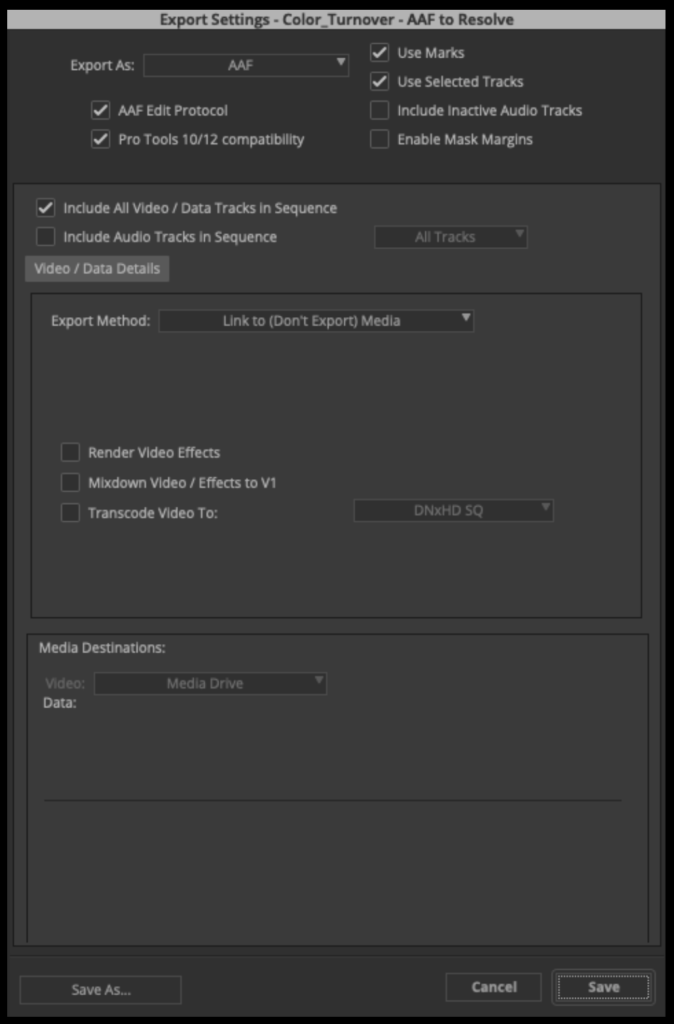
Before clicking “Save” to export, double-check the preset by clicking “Options” and make sure the settings are exactly as shown in the example below:
When the AAF is finished exporting, Media Composer will automatically import it back into the Color Turnover bin as a sequence. If you open the sequence, you will see that the AAF only held information describing the video tracks. That is all Resolve will need.

After you check that, you can close Media Composer.
Open Resolve Project
Launch Resolve from the dock.

You will be using the same Resolve project that your assistant editor used to make rushes when they sung dailies. So you need to open that same project. Navigate to the “Projects” folder, your “Cycle” folder, and then open your “Shows” project.

Your project should already have several folders made and labeled inside the Media Pool.

Some of the folders will already have media in them. The “extras” folder contains the media that is necessary for the online front sequence.

All of the OCF will already be in the project from when the assistant editor last used it.

Next, you will need to import any credits or titles. Navigate to your show’s Credits folder in the Finder and then select the Credits folder in the Media Pool.

To import the credits and titles, drag them into the open folder in the Media Pool.

Finally, you will need to import the reference video you exported out of Media Composer. Navigate to your show’s Reference Video folder in the Finder and then select the Reference Video folder in the Media Pool.

DO NOT drag the reference video into the open folder in the Media Pool. It needs to be imported in a specific way so that Resolve can use it as an offline reference clip. Right-click on the video reference file and then select “Add as Offline Reference Clip”.

Import AAF into Resolve
In the Media Pool, right-click inside the Sequences folder. Then navigate to Timelines > Import > AAF

Navigate in the Finder window to where you saved the AAF that was exported from Media Composer and click “Open”.

Inside the Import AAF window, you will need to make some adjustments before clicking “Ok”:
- Change the Timeline Name to
Show#_Locked_Conform - Check “Automatically set project settings”
- Check “Link to source camera files”
- Check “Use sizing information”

Since you did not select “Automatically import source clips into media pool,” it will prompt you to choose which folders in the Media Pool already contain the online media. Select the folders as shown in the example below and then click “Ok”.

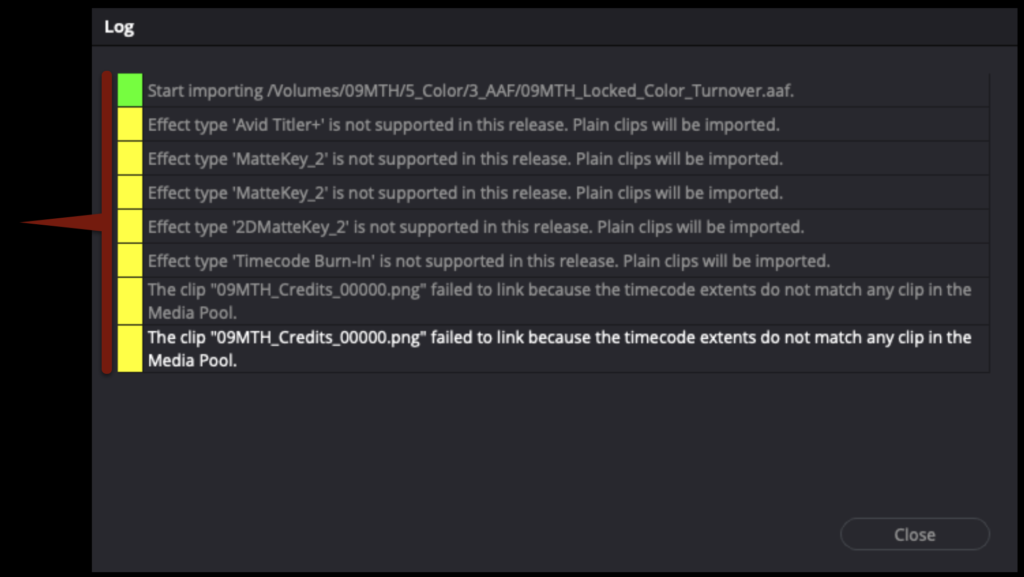
Do not be surprised if you get alerts that look like this in the Log after the AAF imports. This is a list of everything that was written into the AAF from Media Composer that cannot be reproduced in Resolve. In most cases this is limited to any use of the Avid Titler+ effect, the timecode burn in effect, or any stabilization that was done.
You should see that your sequence from Media Composer is now imported into the Sequences folder in Resolve.

Prep the Conform Sequence
The locked sequence is now connected to the online media. Before you can check it against the offline reference video, you will need to do some prep work. In Media Composer, Video Track 5 held the aspect ratio matte. Most likely it has come over into Resolve, but often it has become connected to another piece of media or appears as offline. Since Resolve has its own way of handling aspect ratio mattes, you can delete the matte from Video Track 5. The Credits can also be brought down from Video Track 4 to Video Track 2. When you have done this your sequence should look like the example below.

Since you deleted the aspect ratio matte from Video Track 5 you will need to reapply it. Go the task bar and select Timeline > Output Blanking > Your Aspect Ratio Matte. In the example below the 1.66:1 matte is being applied.

Right-click on one of the empty video tracks over on the left and select “Delete Empty Tracks” to clean up the sequence.

Right-click on the 2.0 audio track and select Change Track Type To > 5.1 > 5.1. This will prepare the sequence for eventually accepting the 5.1 audio mix.

Once you have done all of the above, your timeline should look similar to the example below.

Check the Conform Sequence
Now that your sequence is prepped and cleaned up it is time to check it against the offline reference video to ensure it matches your picture lock sequence from Media Composer.
Right-click on your sequence and then navigate to Timeline > Link Offline Reference Clip > Your Reference Video. This will link the reference video and your sequence together.

To take advantage of the link, you will need to switch the source monitor to “offline” mode. When set to “offline” mode, the monitor on the left will no lower behave as a source monitor but instead it will display your reference video. In this mode, the left monitor will play the reference while simultaneously the right monitor will display your Resolve sequence.

Before you check the Resolve sequence against the offline reference video, there is one last bit of prep. In Media Composer, your slate was created using the Avid Titler+ effect. Since that effect does not translate over into Resolve, you will need to apply the Text effect on th track above the SMPTE Countdown so that you can recreate the same text in Resolve. Make sure to extend the text effect so that it runs until the 2-pop.

In the example below, you can see the reference video on the left with the text that was created in Media Composer and on the screen on the right the same text that has been recreated in Resolve.

You are ready to begin checking your Resolve sequence against your reference video. If you right-click inside the right screen, you will see different options for Wipes and Overlays. With “No Wipe” applied, both screens should look very similar. However, it would be difficult to tell if they matched perfectly.

To make this easier switch the right screen to “Difference” mode. This will lay the reference video on top of the Resolve sequence on the right. Any pixels where the two line up perfectly will appear black. Play through the entire film this way and make sure that in Difference mode the right screen stays black. If it does then you know that the sequence in Resolve matches the reference video perfectly.

It’s possible that the sequence in Resolve and the reference video won’t match perfectly. This could happen for many reasons: e.g., reframing in Media Composer, speed changes in Media Composer, or other effects. This is not a problem, but it does mean you will need to correct it.
Below is an example of what it may look like if a reframe from Media Composer didn’t translate over perfectly. As you can see from the example, the fix is a simple manual adjustment in Resolve so that they match up.

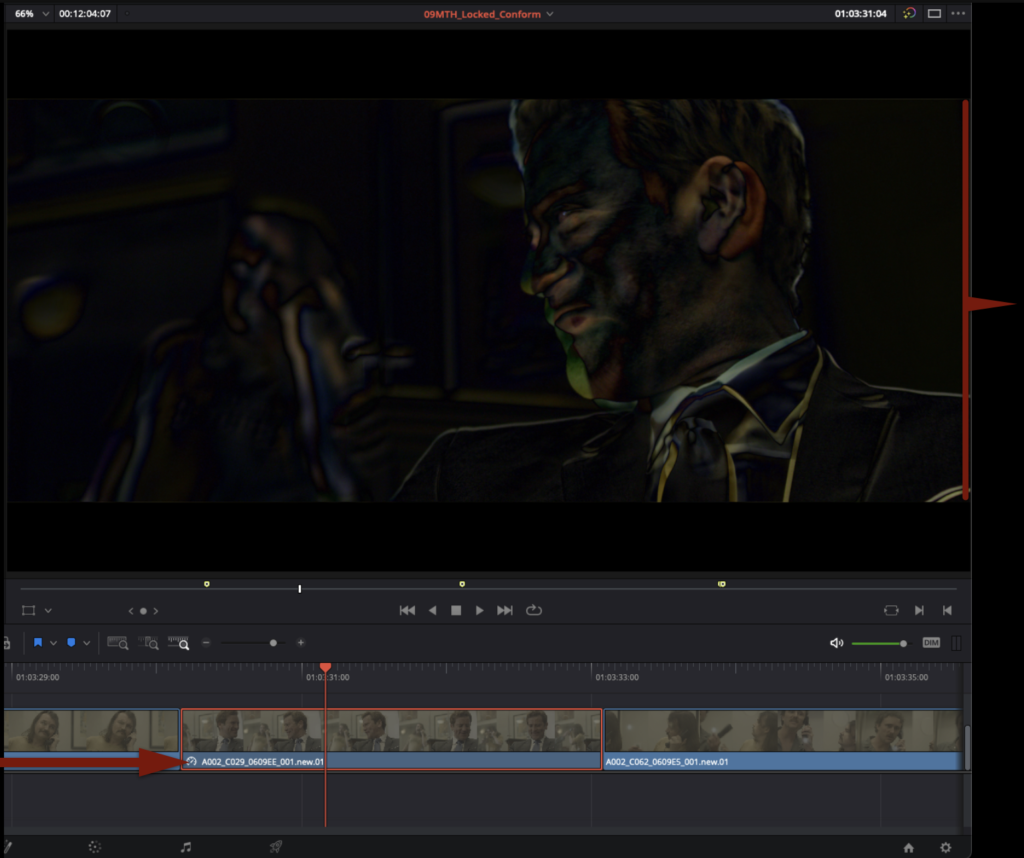
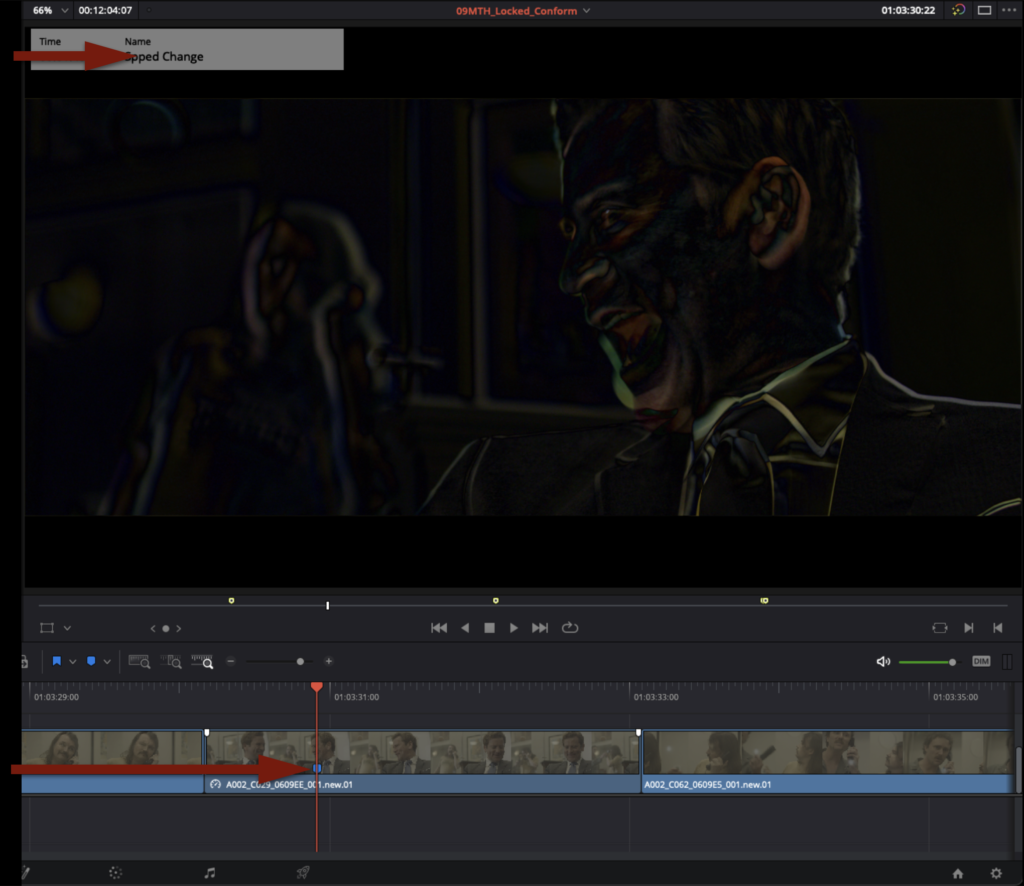
Another common reason why the Resolve sequence may not match the reference video is if a speed change has been applied. This may need to be tweaked in Resolve to allow it to match.
If you cannot get any shot to match perfectly, mark that shot with a blue marker and name it with a brief description of the problem. After you have made it through the entire film, reach out to the Post Staff and they can help you with any shots marked in blue.
Saving and Exporting Project
Once you have finished checking your Resolve sequence against the reference video and they match perfectly, the project is ready for color grading. Save the project by hitting “Command+S”. Then type “Command+Q” to quit the project.
Congratulations, you are done!