Overview
This is the process where the editorial department prepares and exports files so that the locked sequence in Media Composer can be turned over to ProTools for the sound department to work with. In the industry, an Assistant Editor would normally be responsible for exporting all the necessary elements to turn over to the sound department. Then the sound department uses those elements to conform the sequence in ProTools. In our workflow, the Editor is responsible for both exporting the necessary files out of Media Composer but importing those files into ProTools. This is to ensure that any issues during turnover can be caught immediately.
This step-by-step guide for sound turnover covers how to:
Export Reference Video from Media Composer
A reference video of the locked sequence will need to be exported so that the sound department has something to watch in ProTools during the sound design phase.
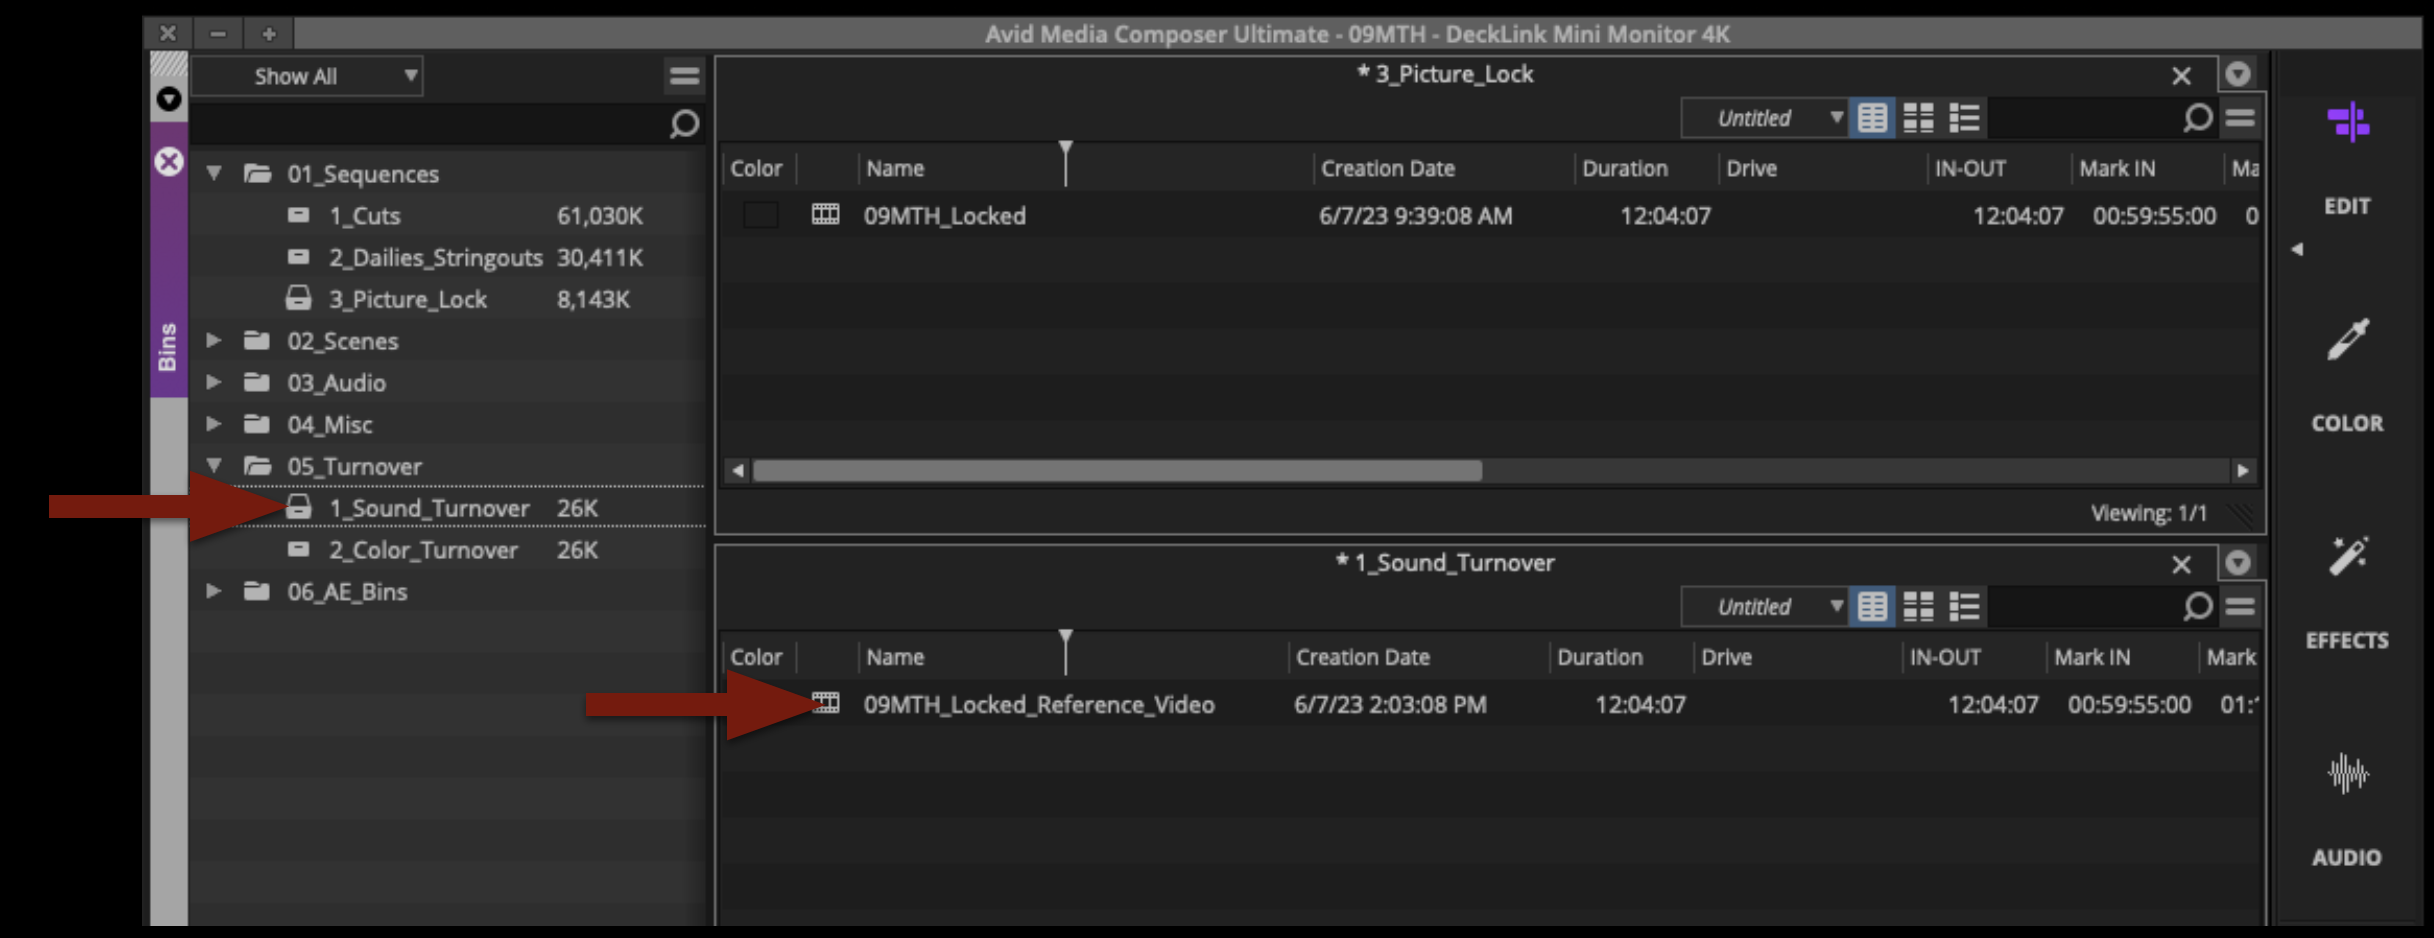
Mount your Show Volume and launch your Media Composer project. Open the Locked Sequences bin. Select your locked sequence and hit “Command+D” to duplicate the sequence.

Rename the new sequence Show#_Locked_Reference_Video and move it to the Sound Turnover bin.
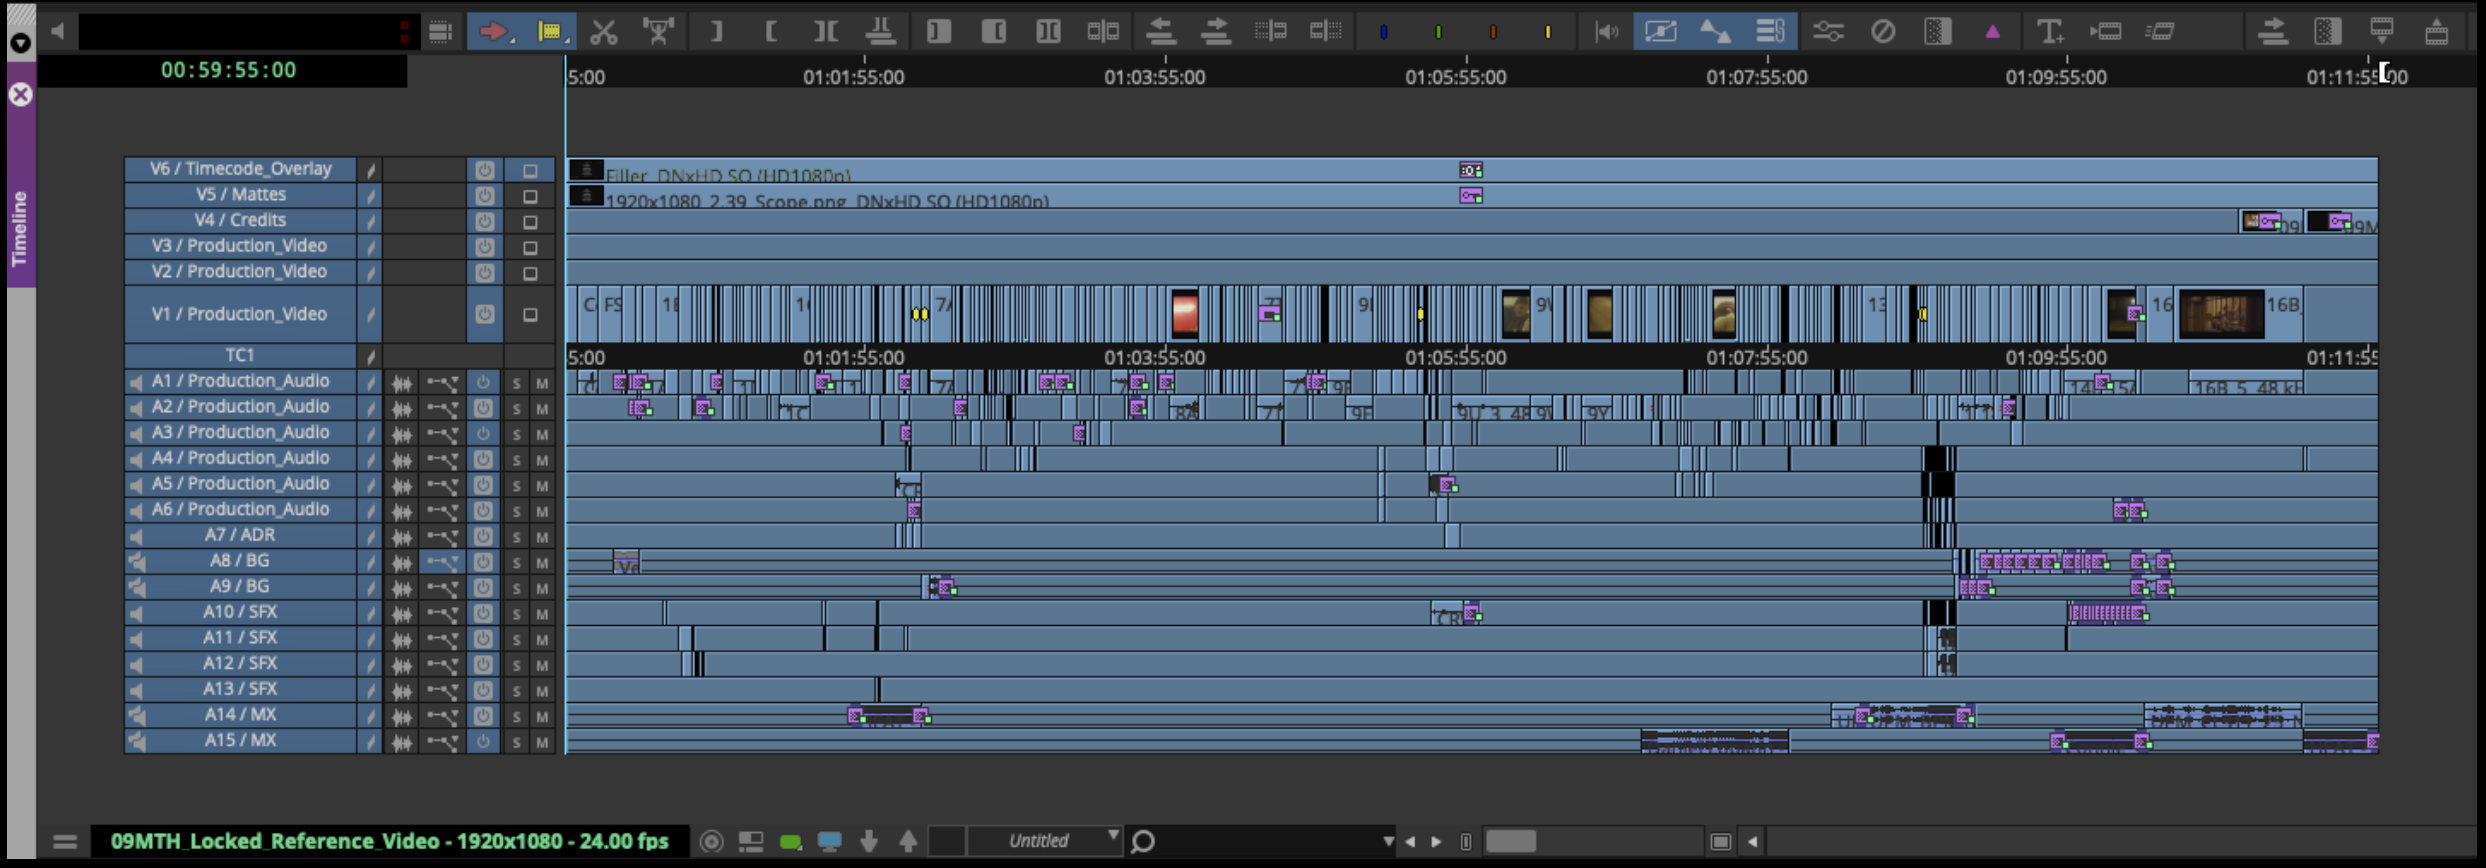
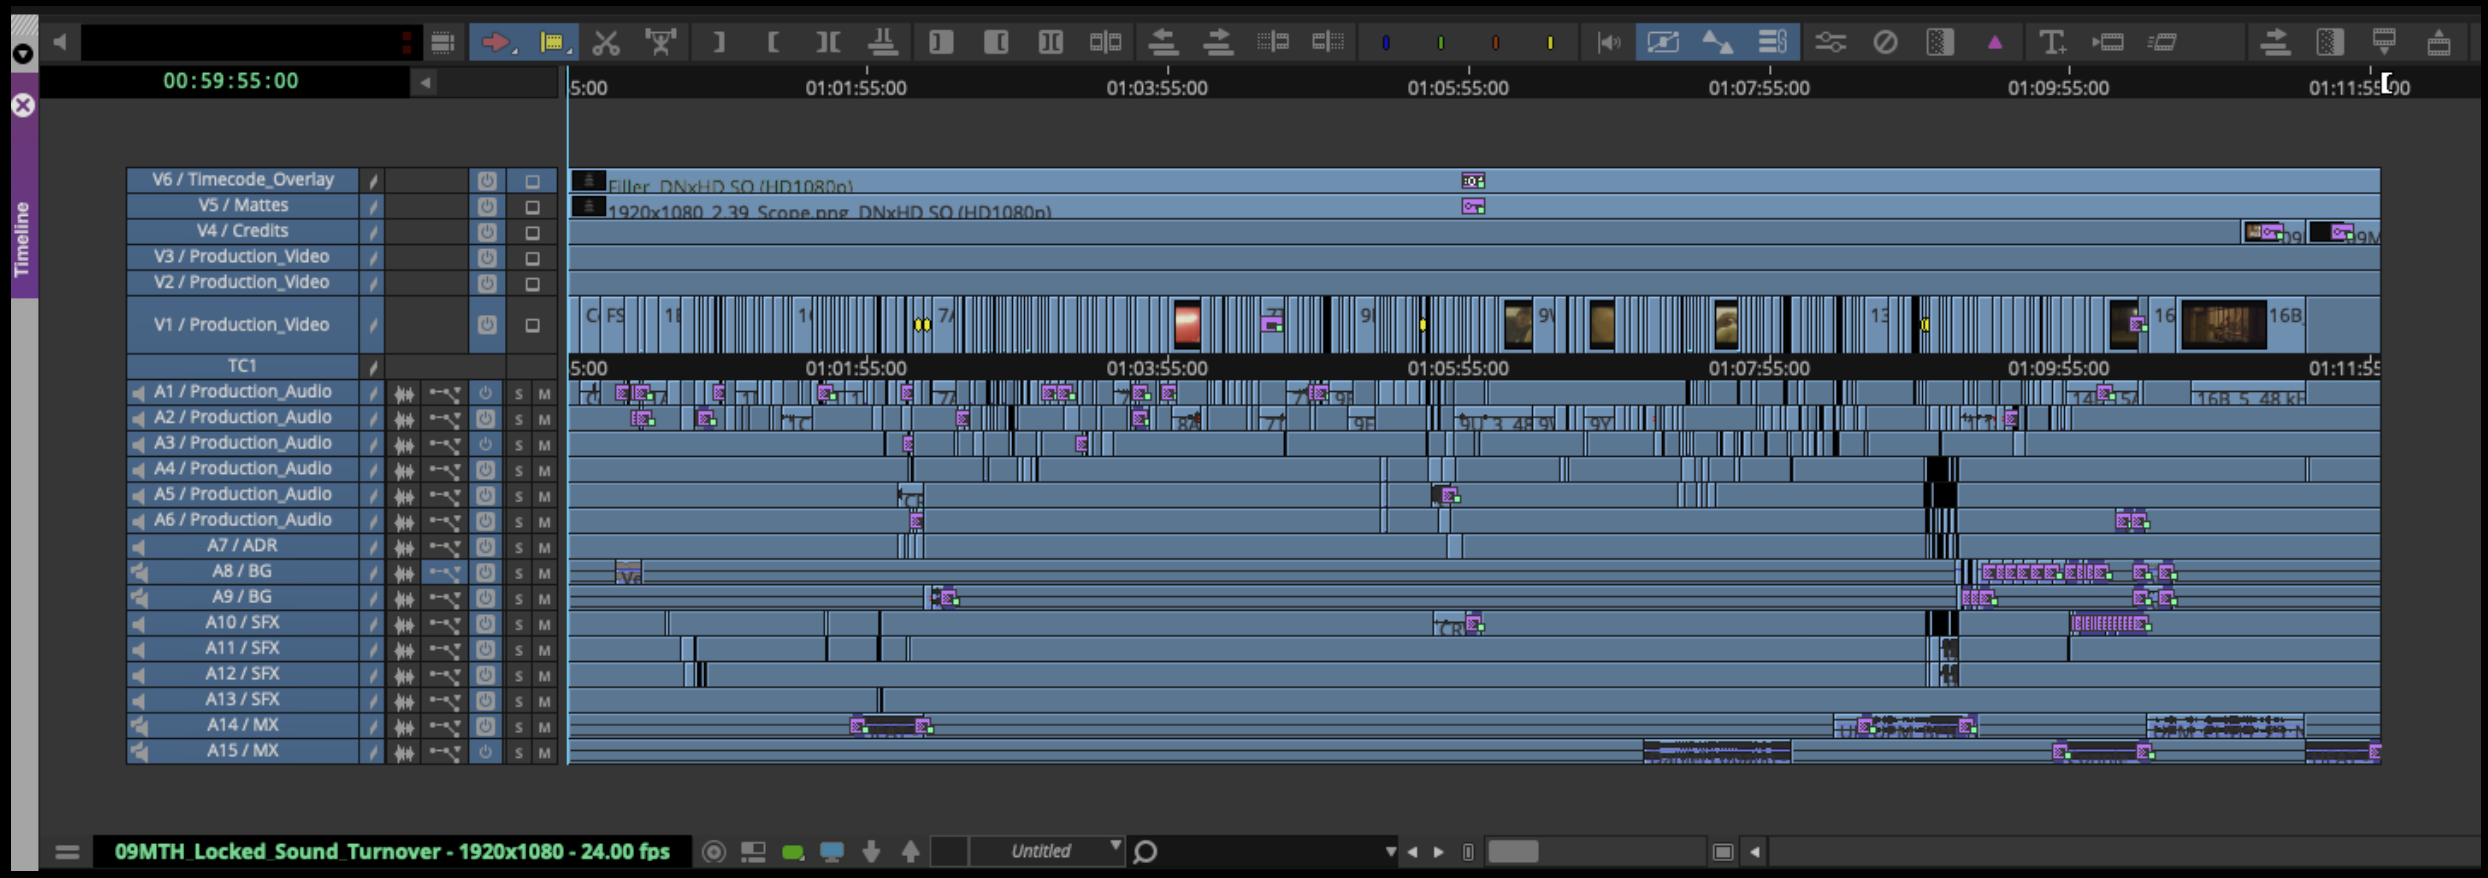
Open the new sequence. Mark In and Out for the entire timeline and activate all tracks.
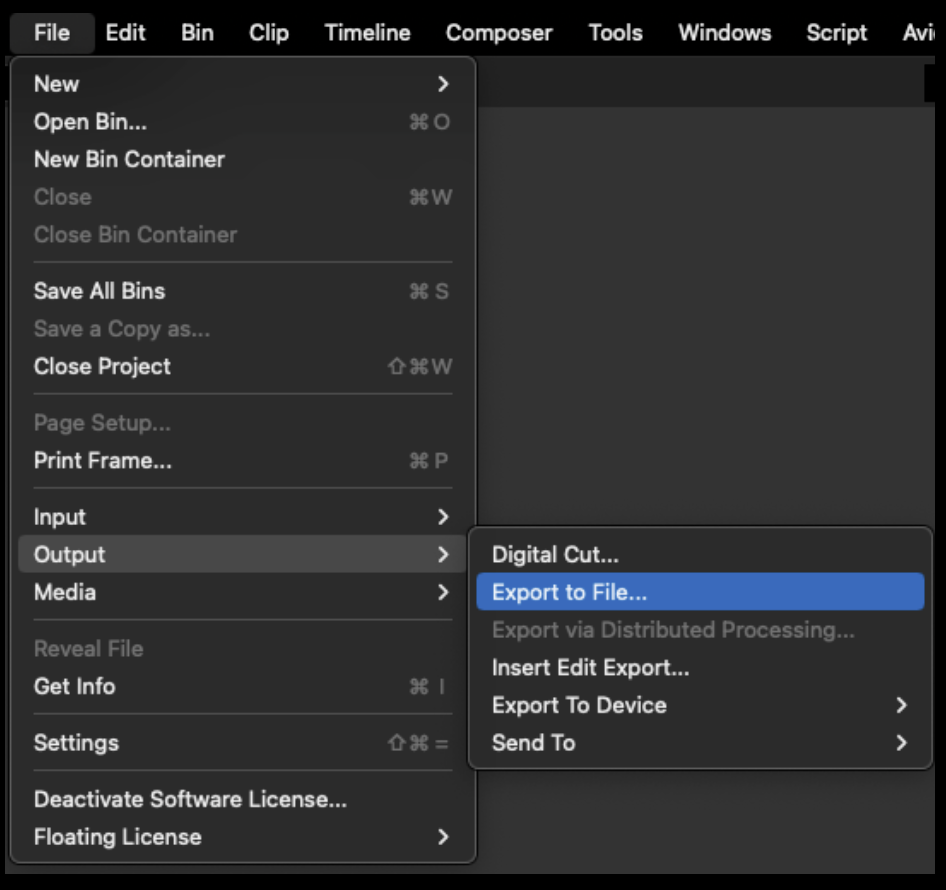
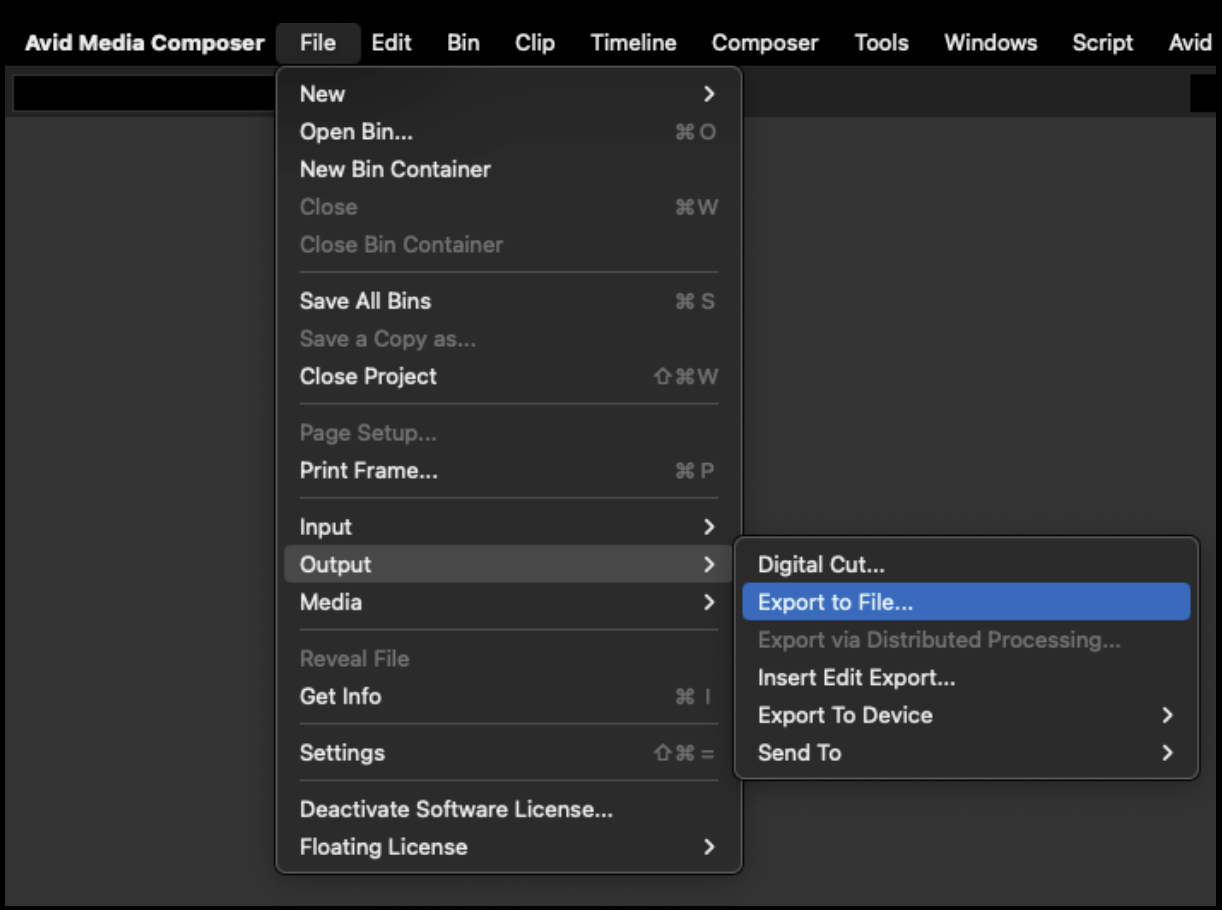
From the task menu select File > Output > Export to File…
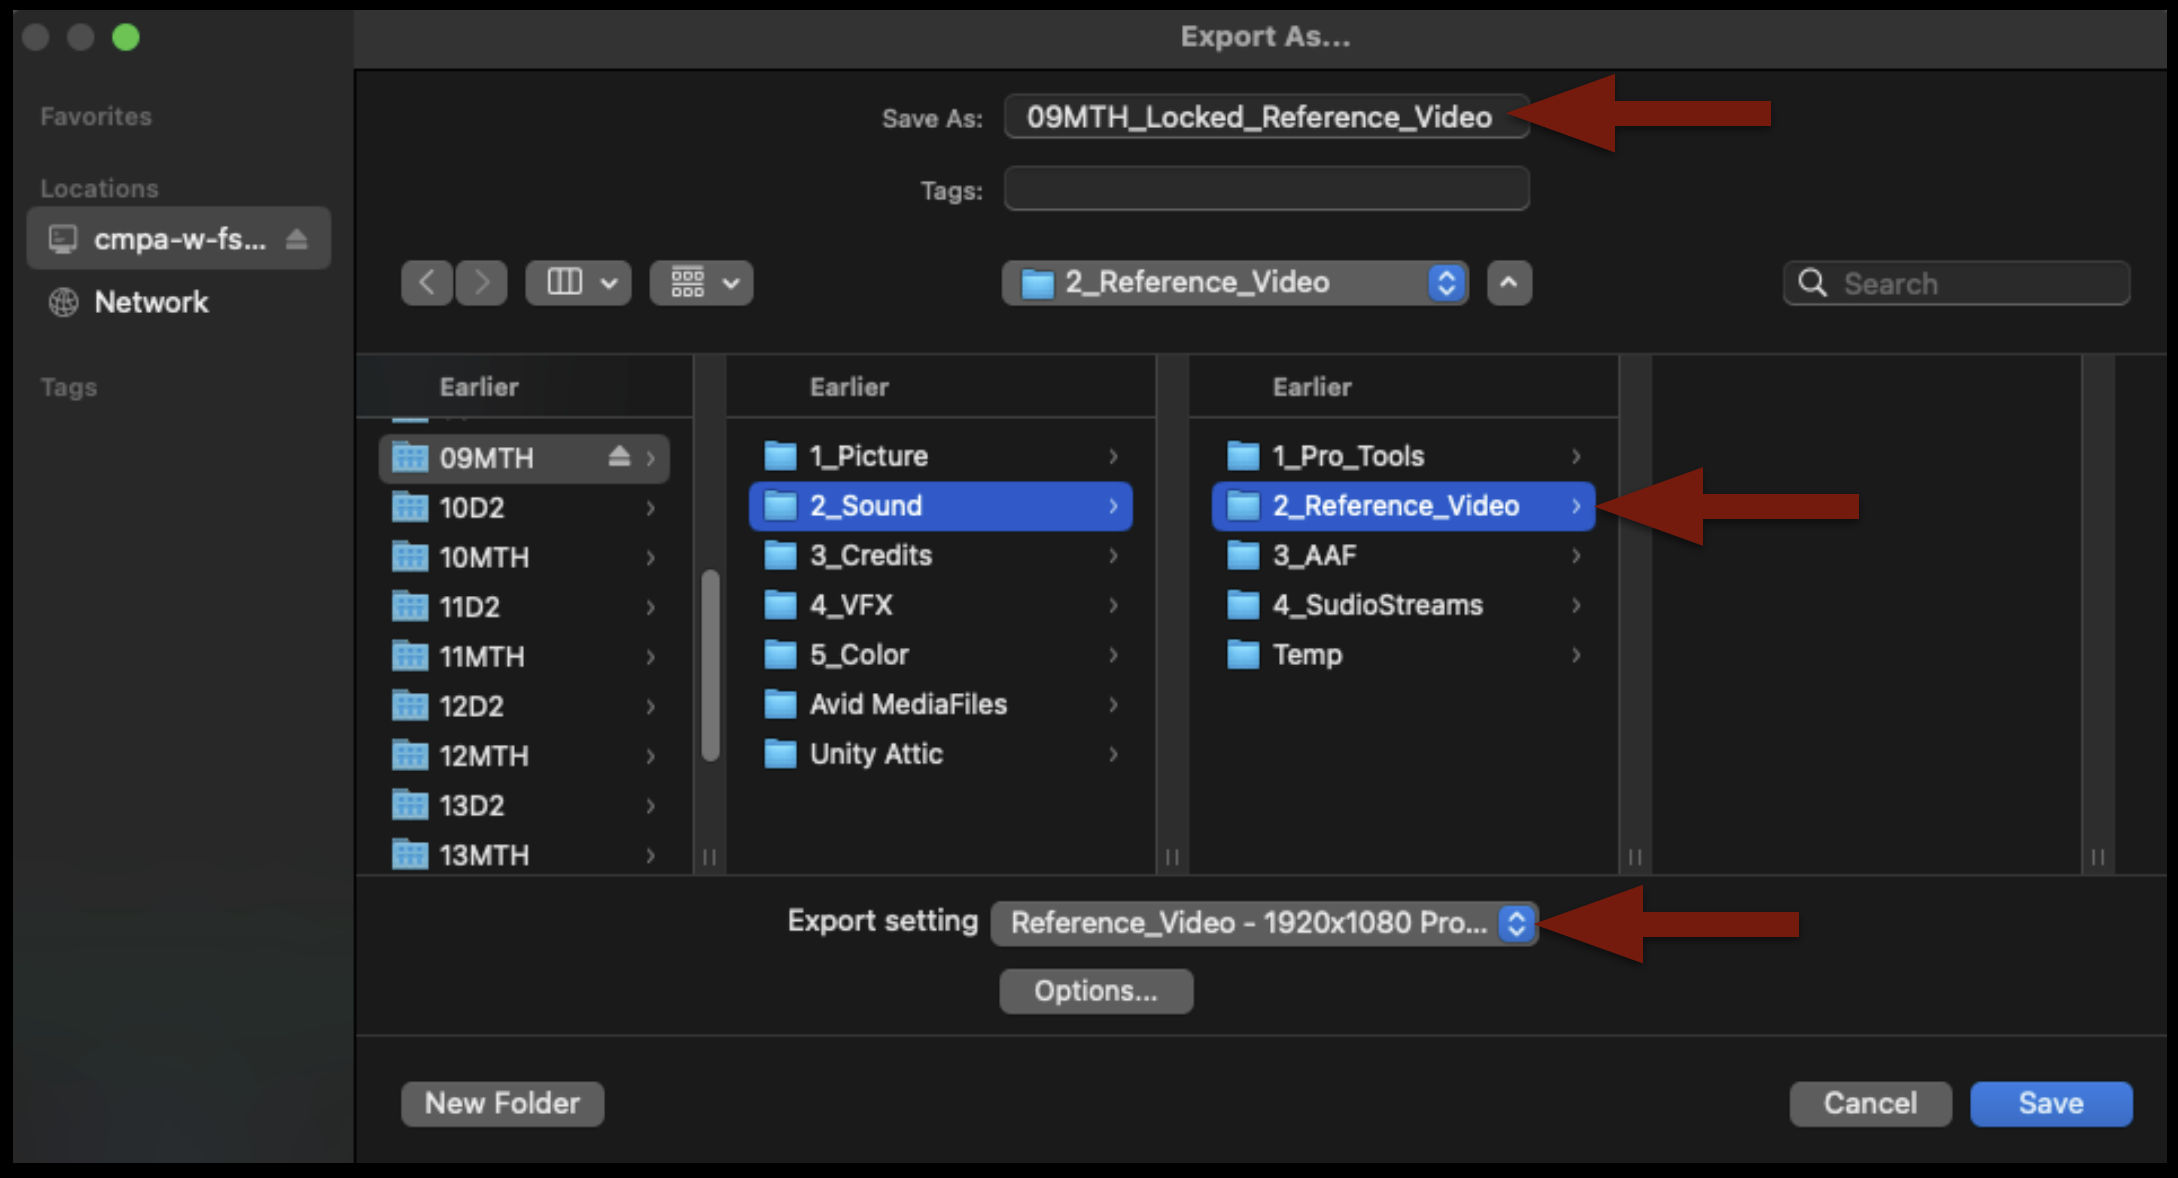
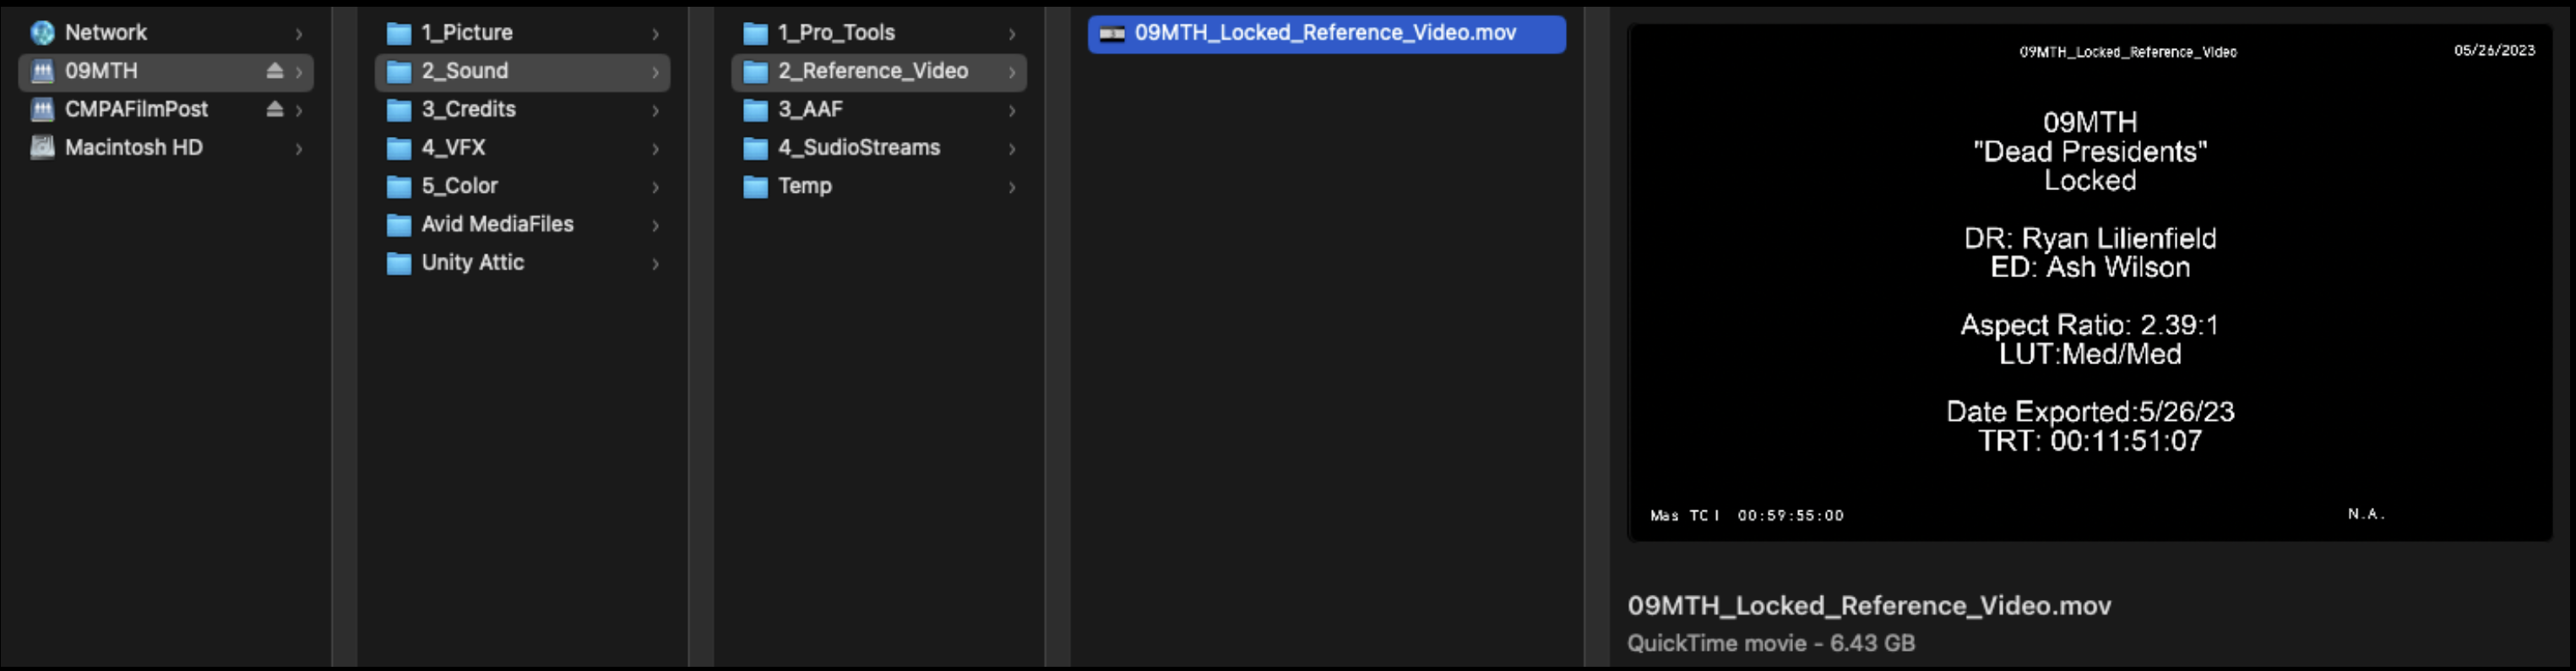
Point the export to the Sound > Reference Video folder on your Show Volume. Check that the name of the export will be correct. Select the “Reference Video” preset.
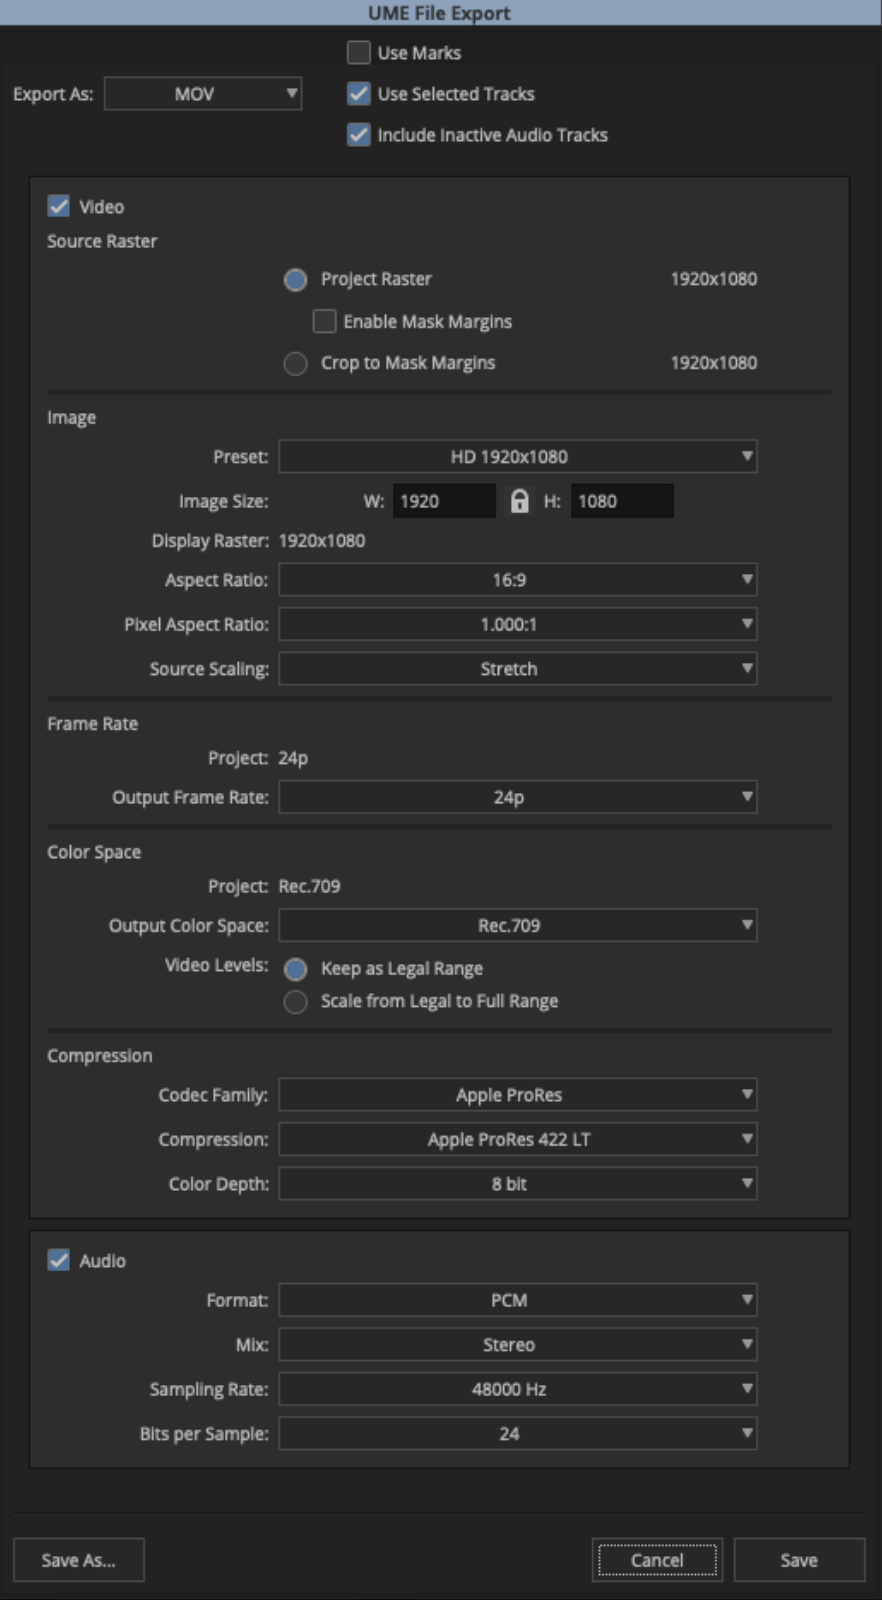
Before clicking “Save” to export, double-check the preset by clicking “Options” and make sure the settings are exactly as shown in the example below:
When the export is complete, navigate in the Finder to where it was exported and open it in QuickTime Player to make sure everything is okay.
Export AAF from Media Composer
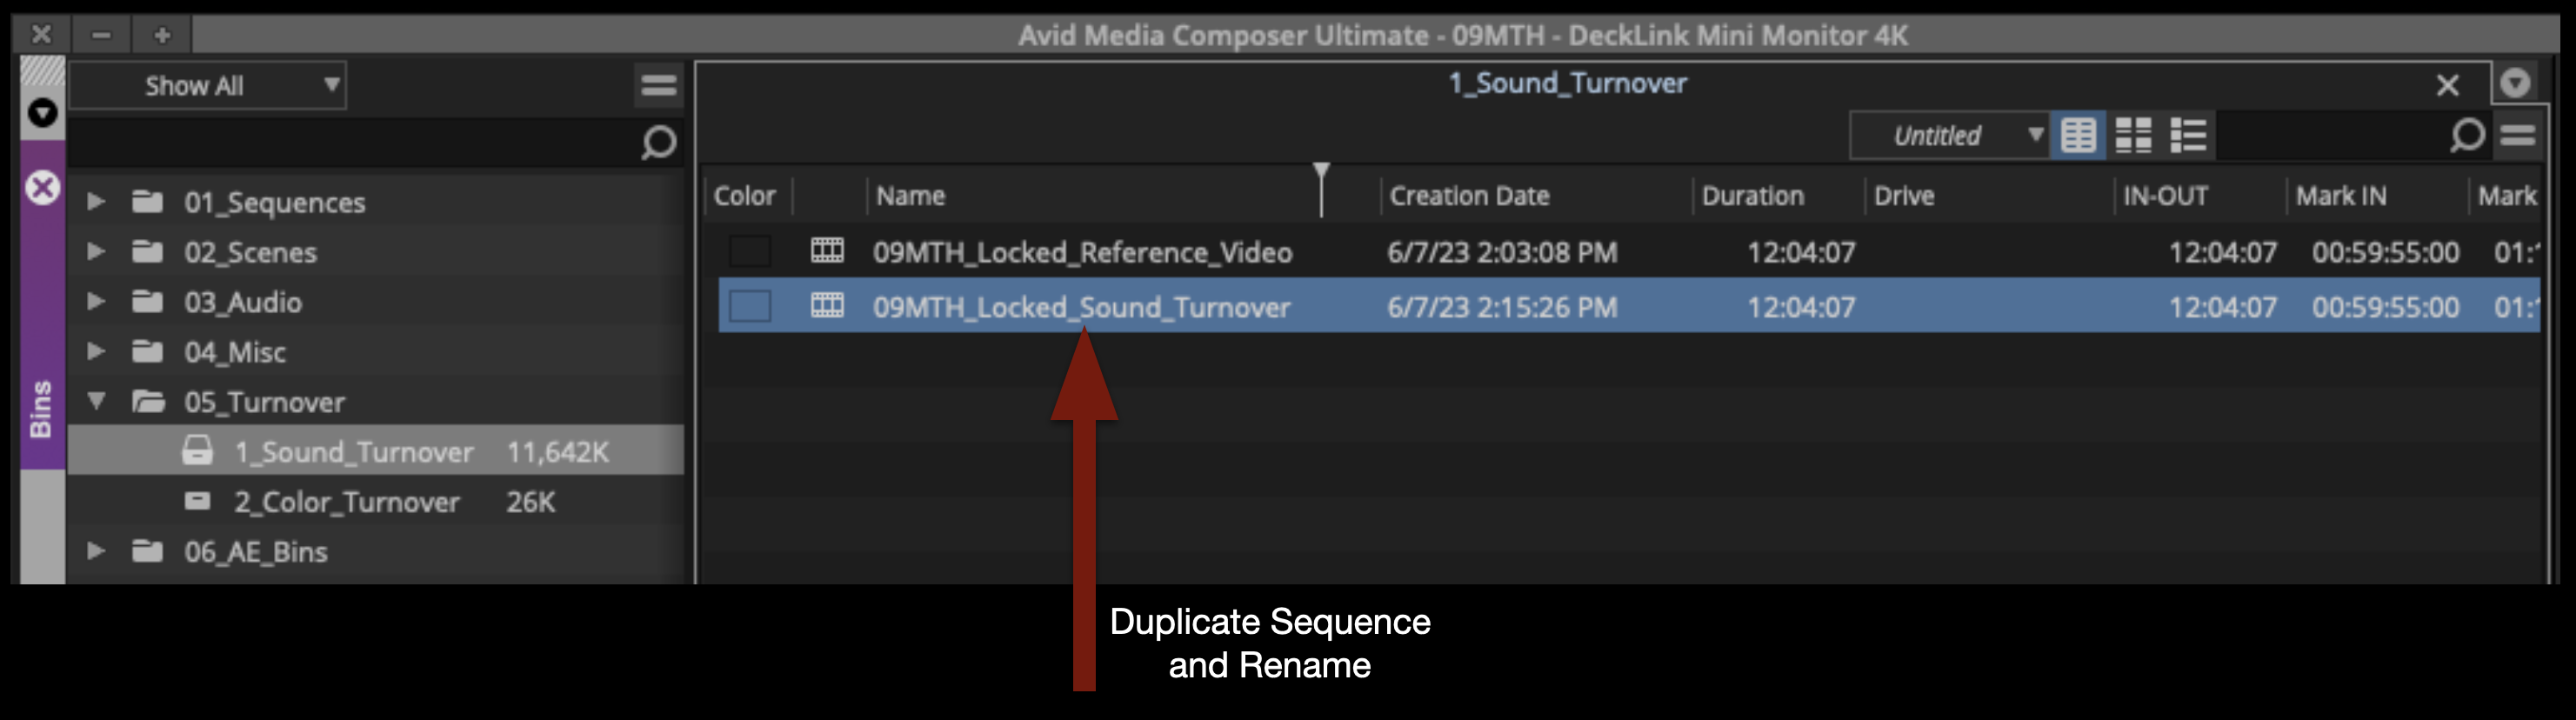
Duplicate the sequence named “Locked Reference Video” and rename it show#Locked_Sound_Turnover as shown in the example below:
Open the new sequence. Mark In and Out for the entire timeline and activate all tracks.
From the task menu, select File > Output > Export to File…
Point the export to the Sound > AAF folder on your Show Volume. Check that the name of the export will be correct. Select the “Sound_Turnover – AAF to Protools” preset.
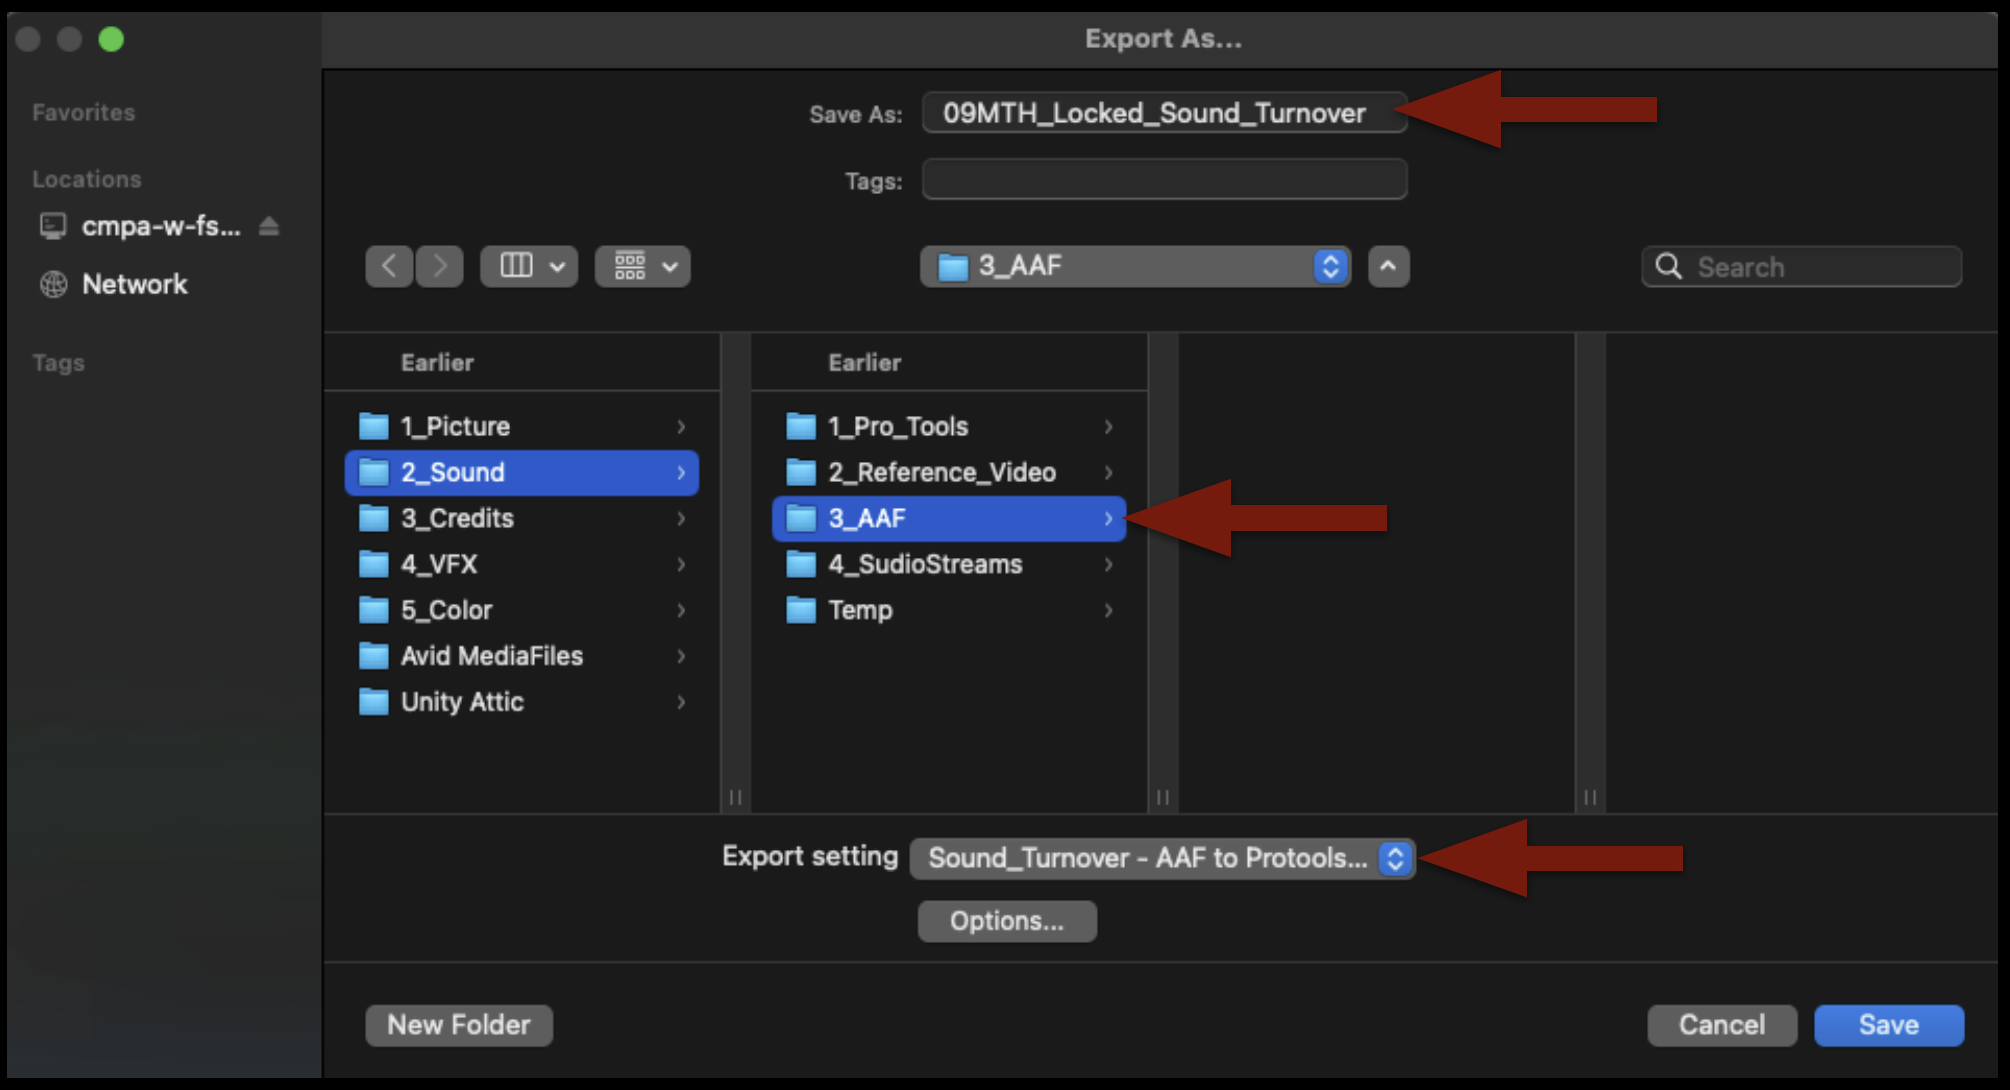
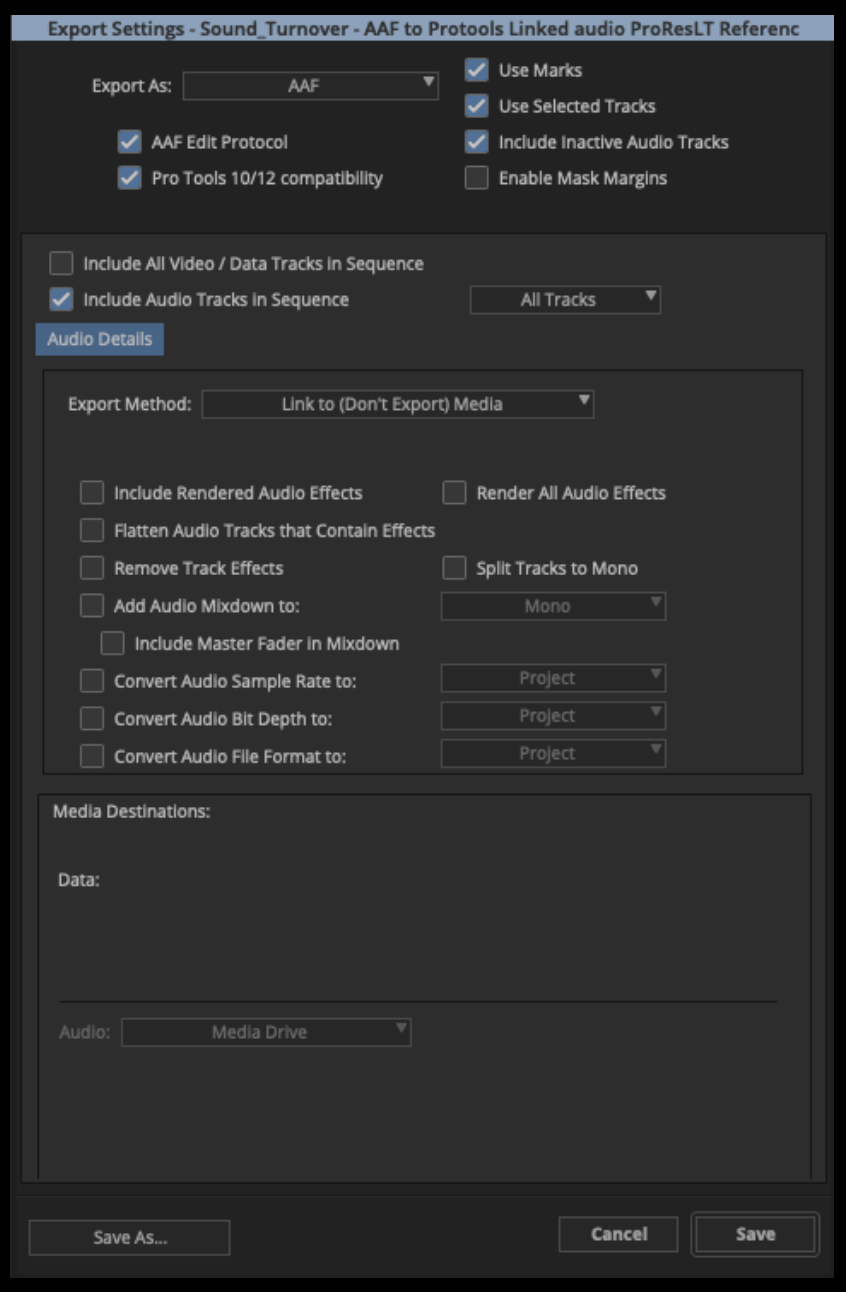
Before clicking “Save” to export, double-check the preset by clicking “Options” and make sure the settings are exactly as shown in the example below:
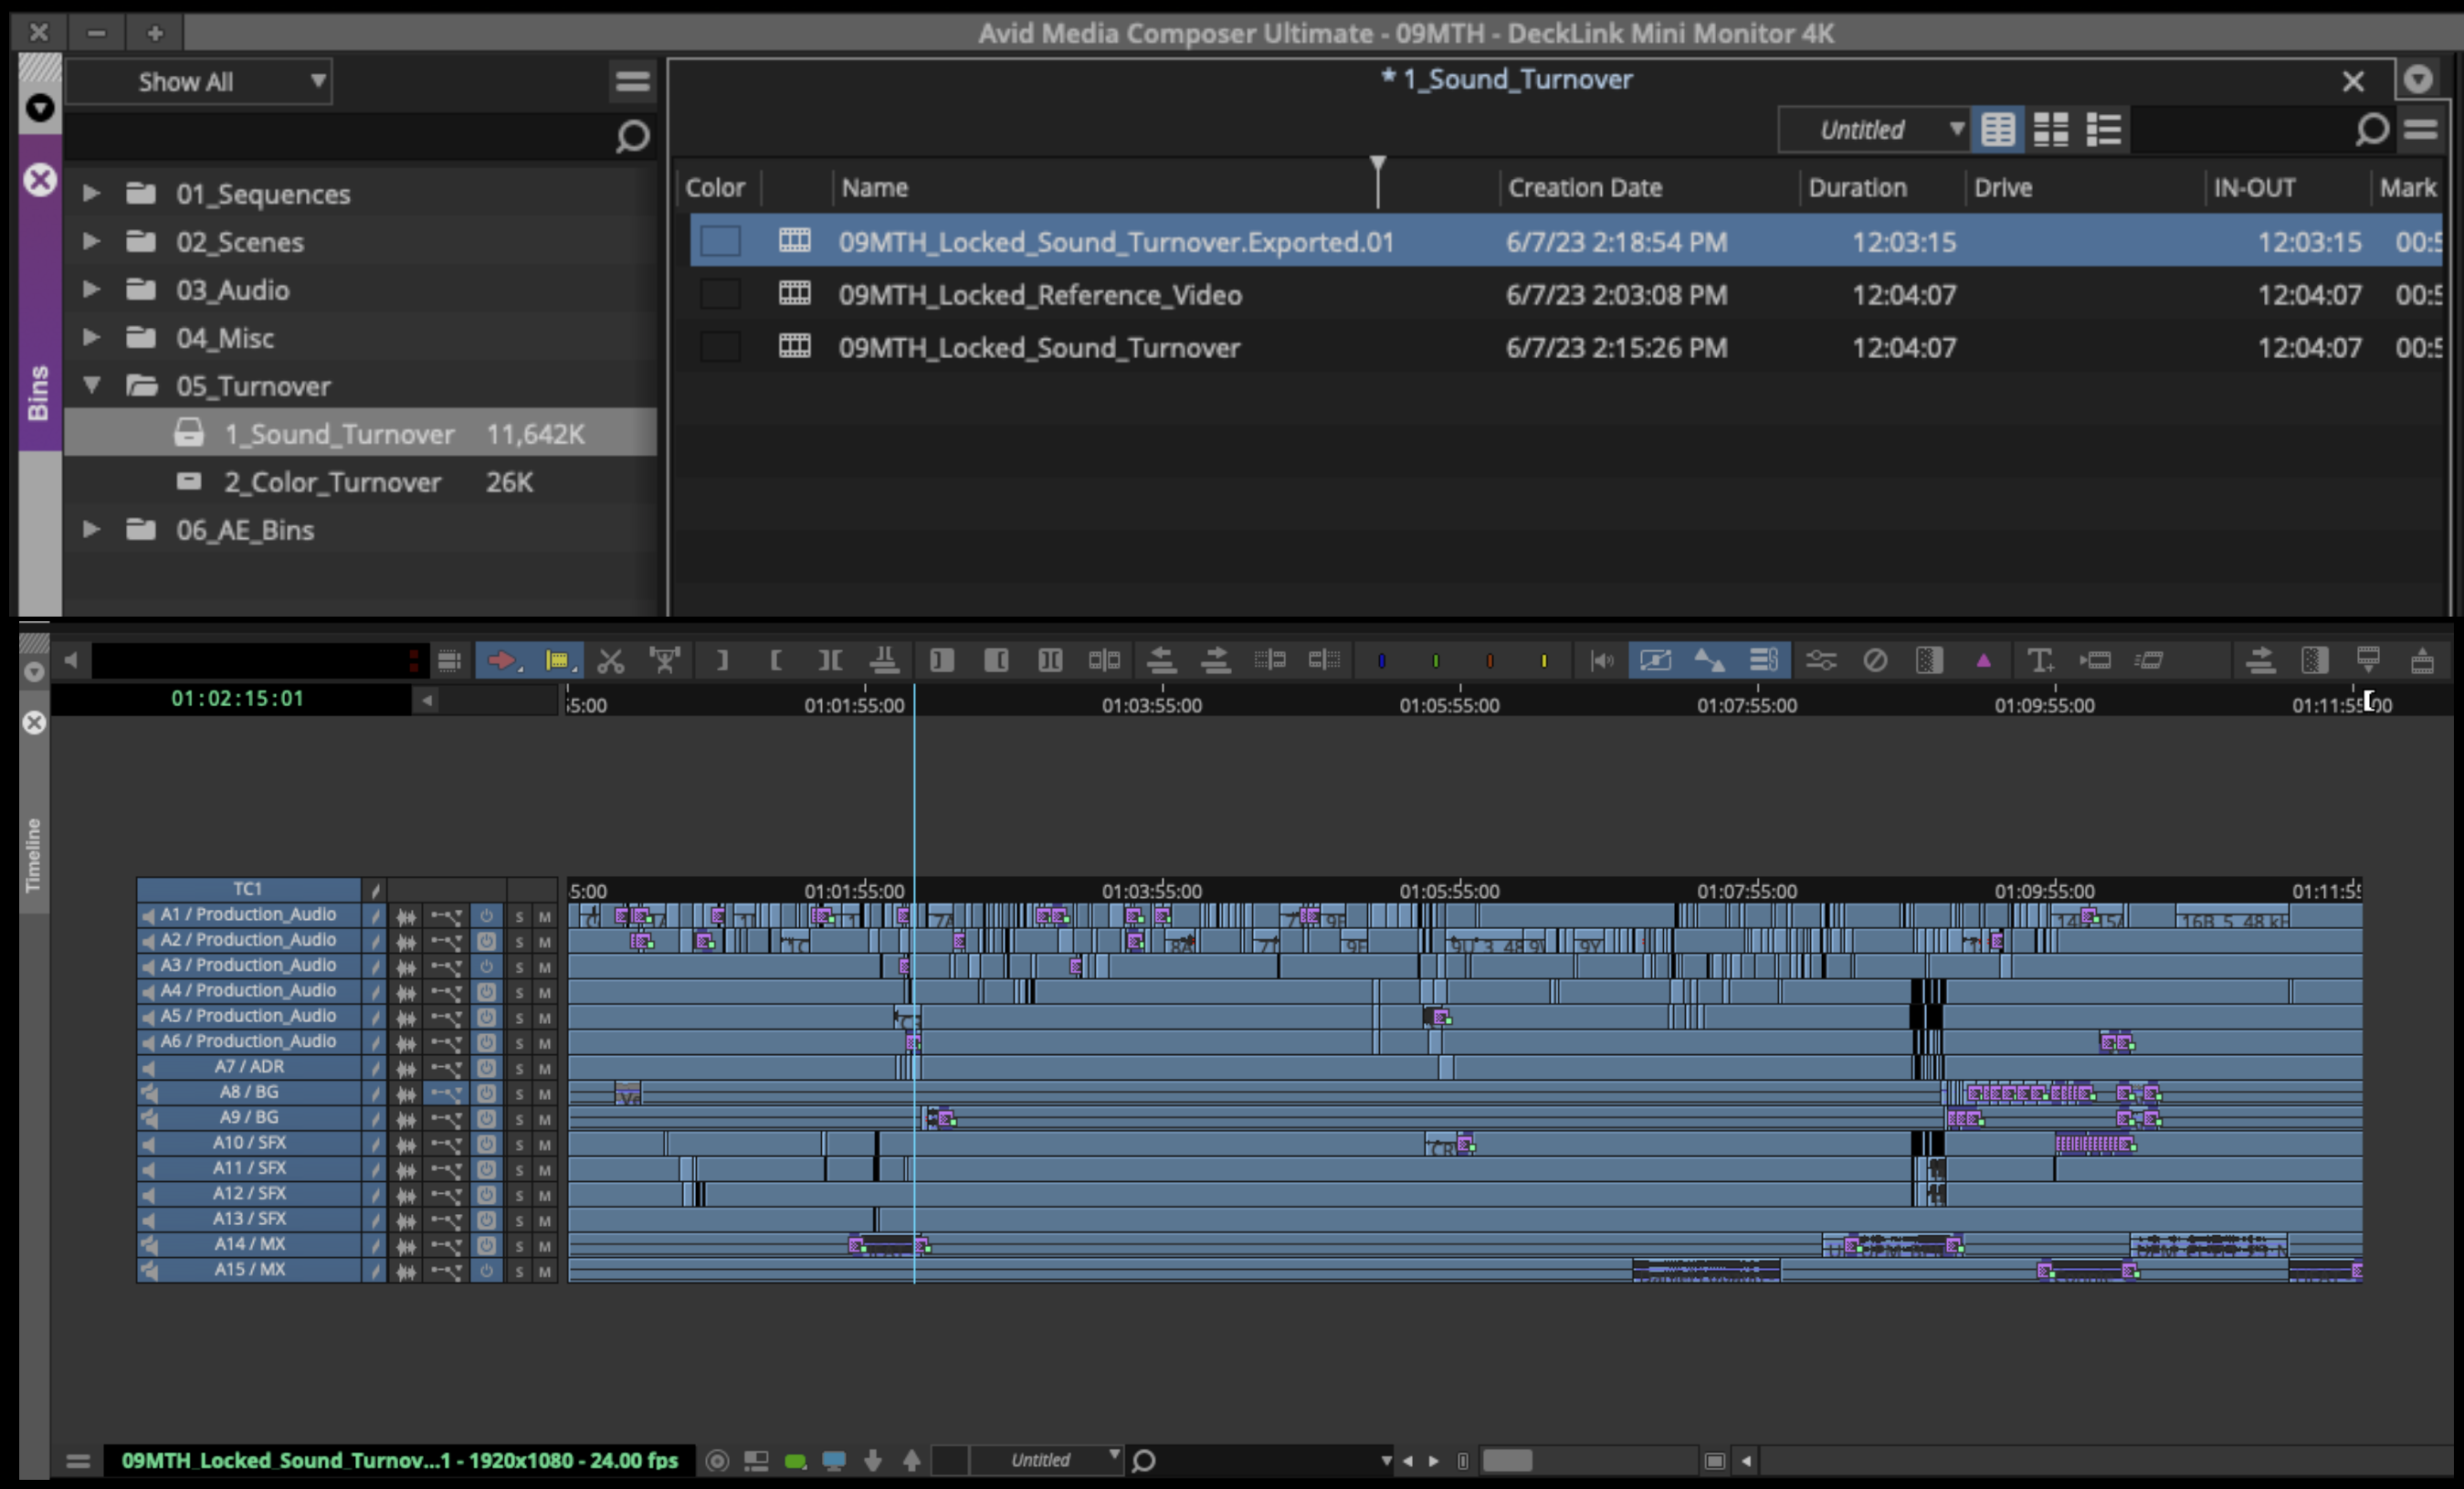
When the AAF is finished exporting, Media Composer will automatically import it back into the Sound Turnover bin as a sequence. If you open the sequence, you will see that the AAF only held information describing the audio tracks. That is all ProTools will need.
After you check that, you can close Media Composer.
Import AAF into ProTools
Navigate on your Show Volume to your ProTools project and open it.
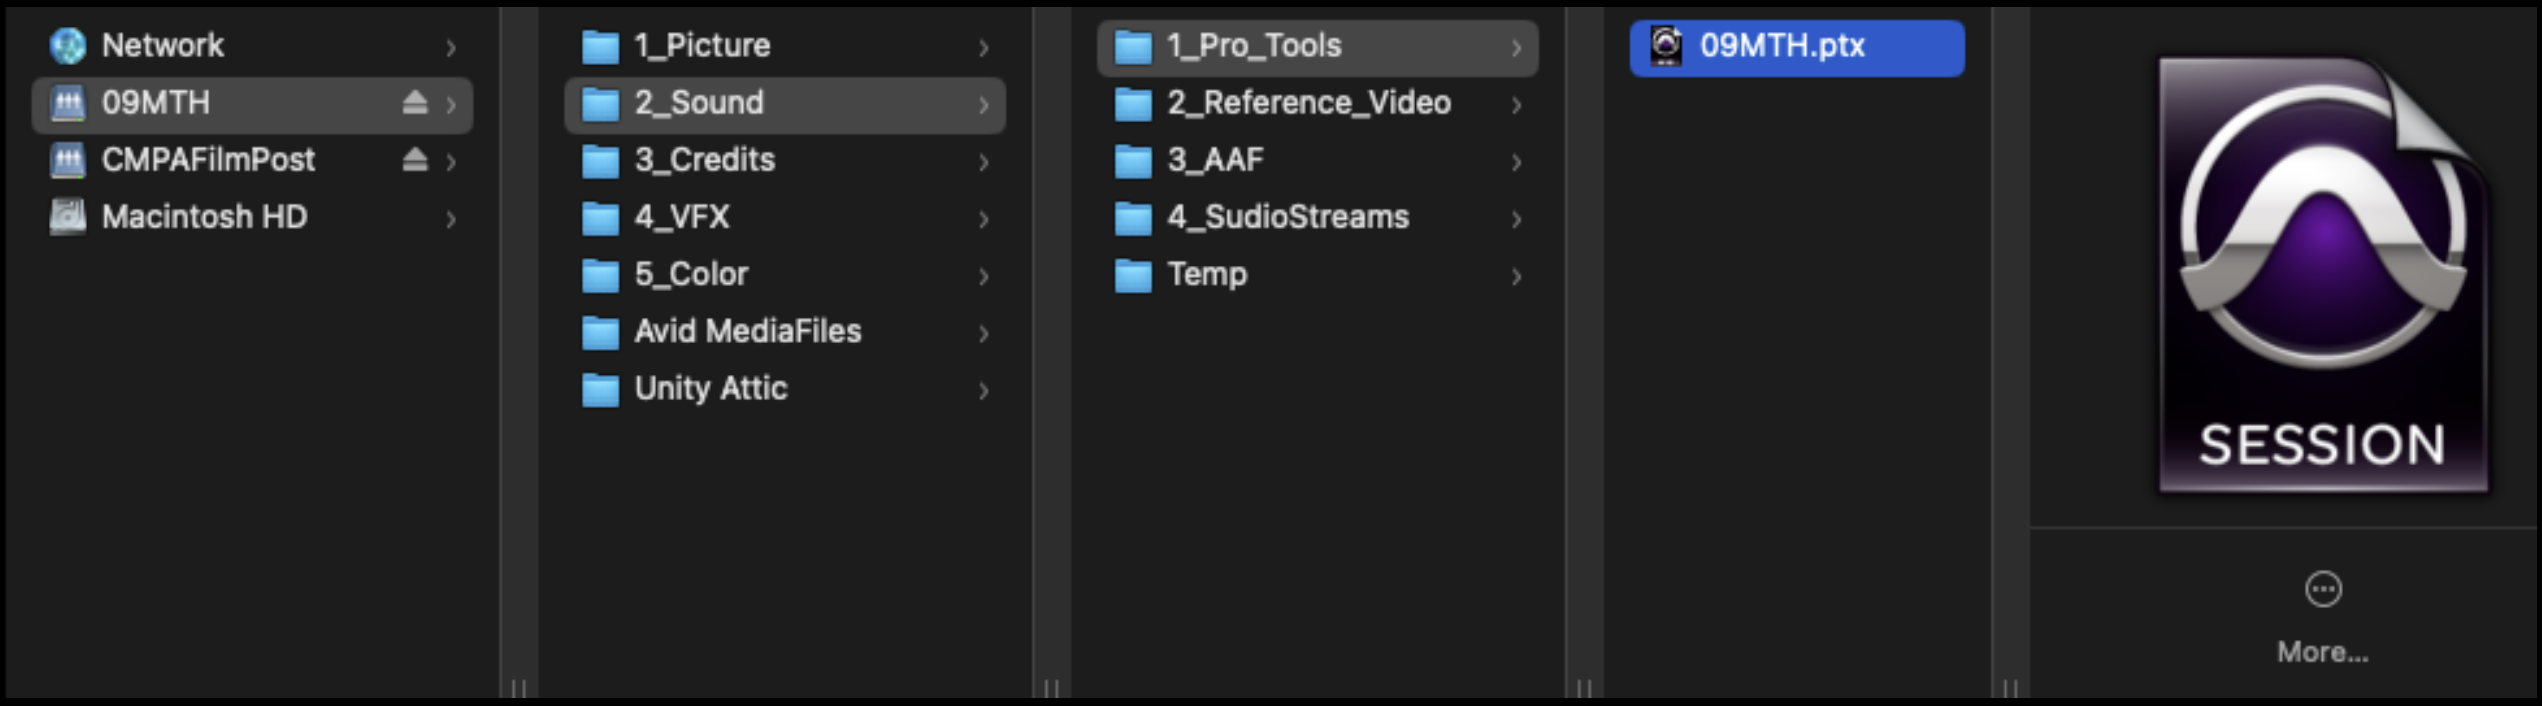
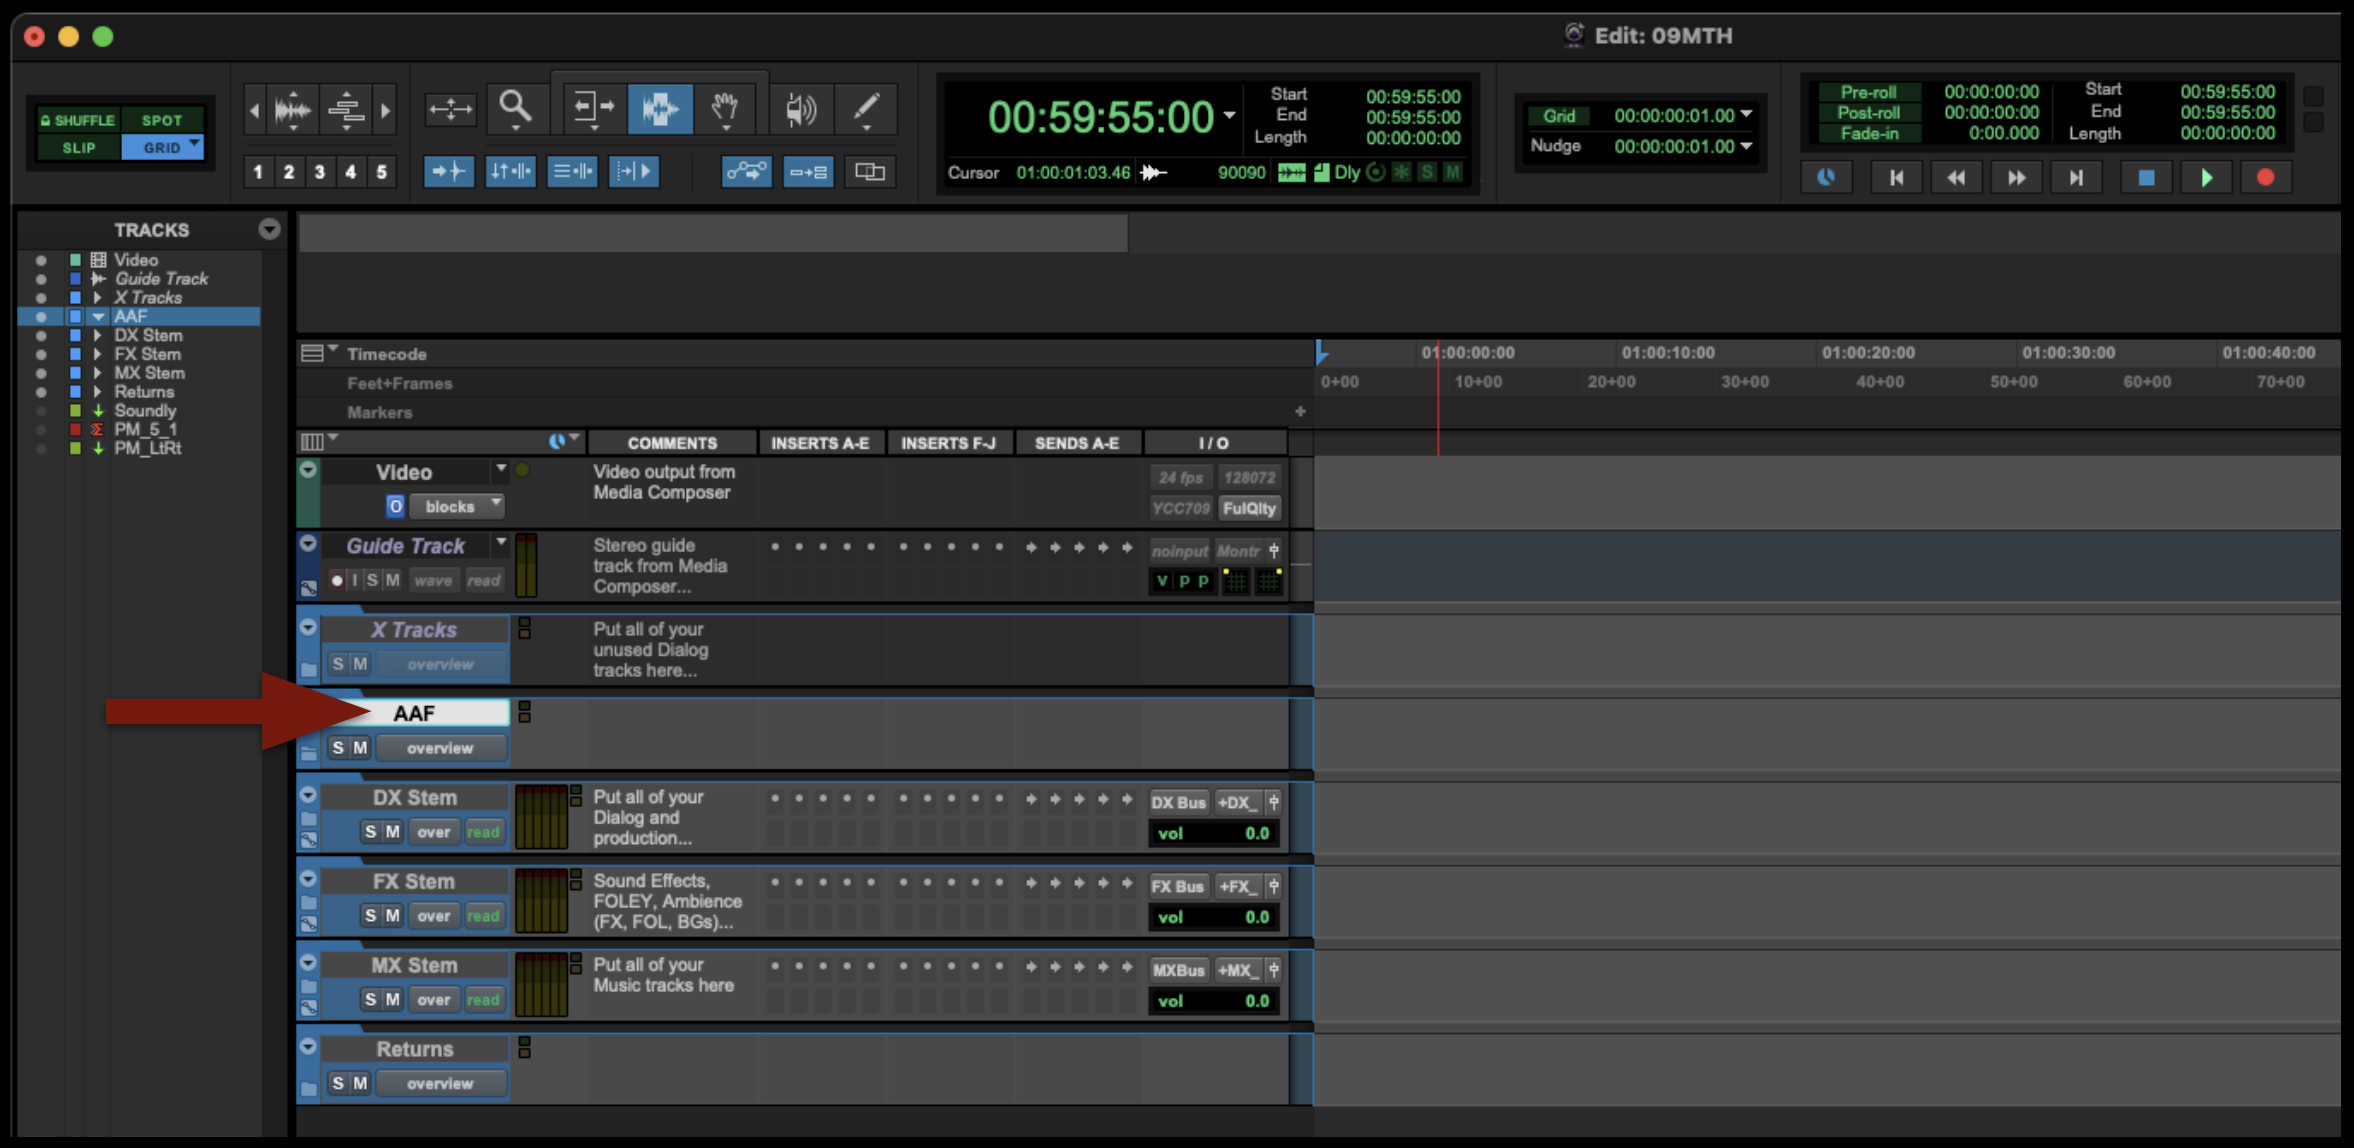
When ProTools opens, select the folder labeled “AAF”:
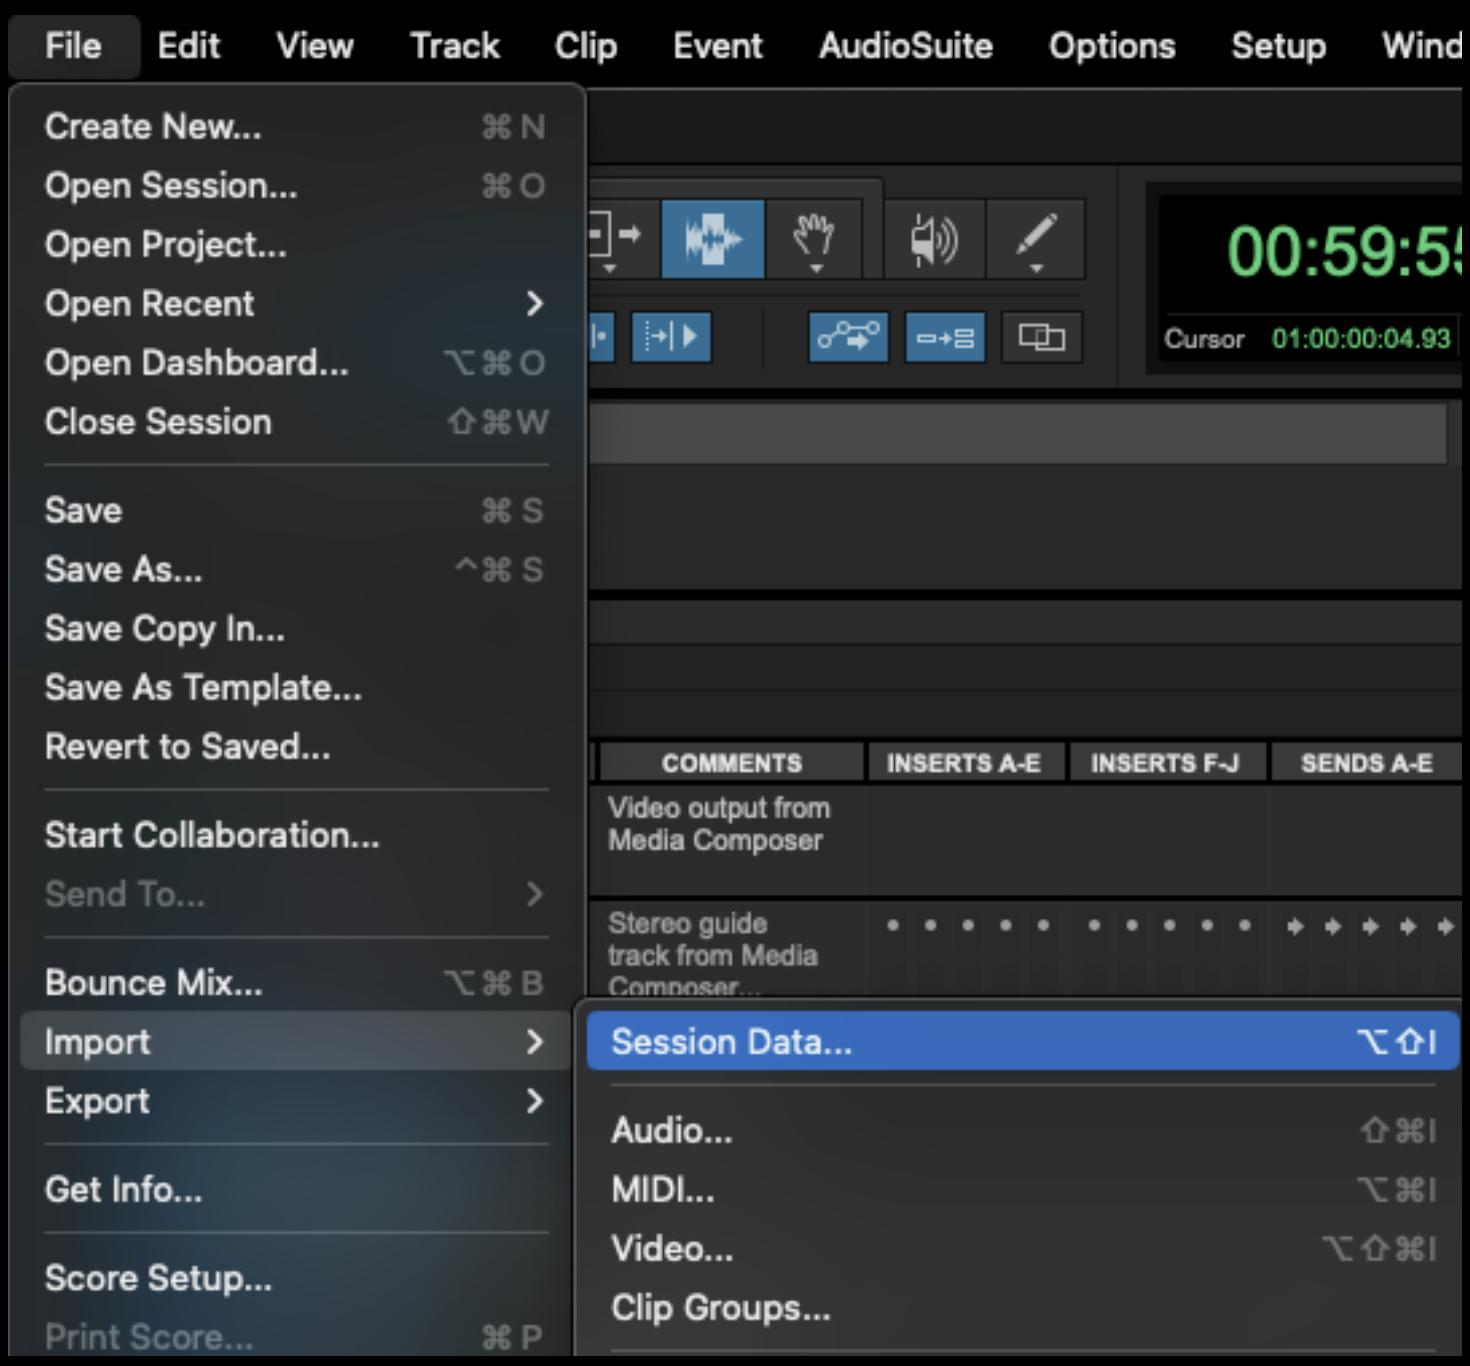
From the task menu, select File > Import > Session Data…
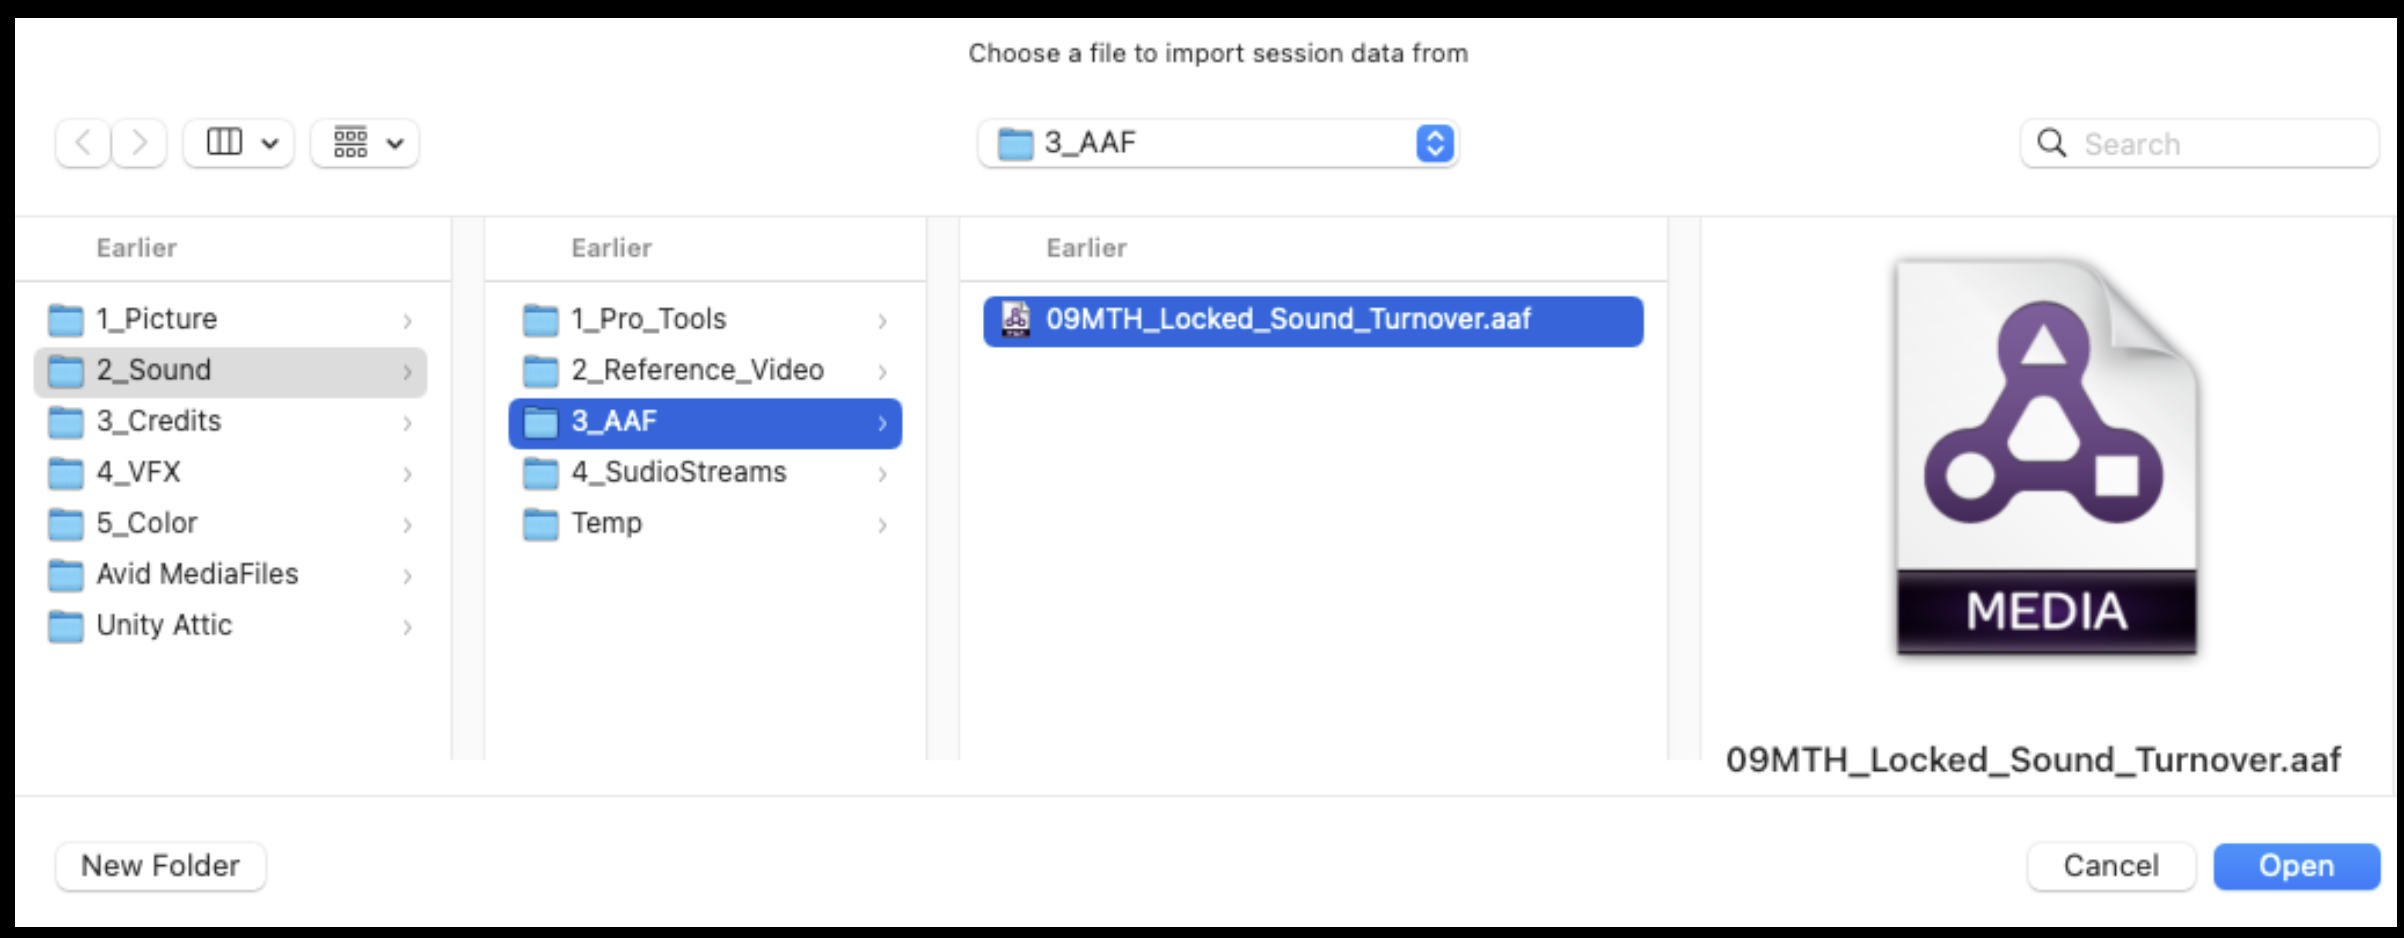
Navigate in the Finder window to where you saved the AAF that was exported from Media Composer and click “Open”.
In the Import Session Data page make sure the select “Link to Source Media” under Audio Media Options. And check the box labeled “Import Rendered Audio Effects”. Then select “OK”.
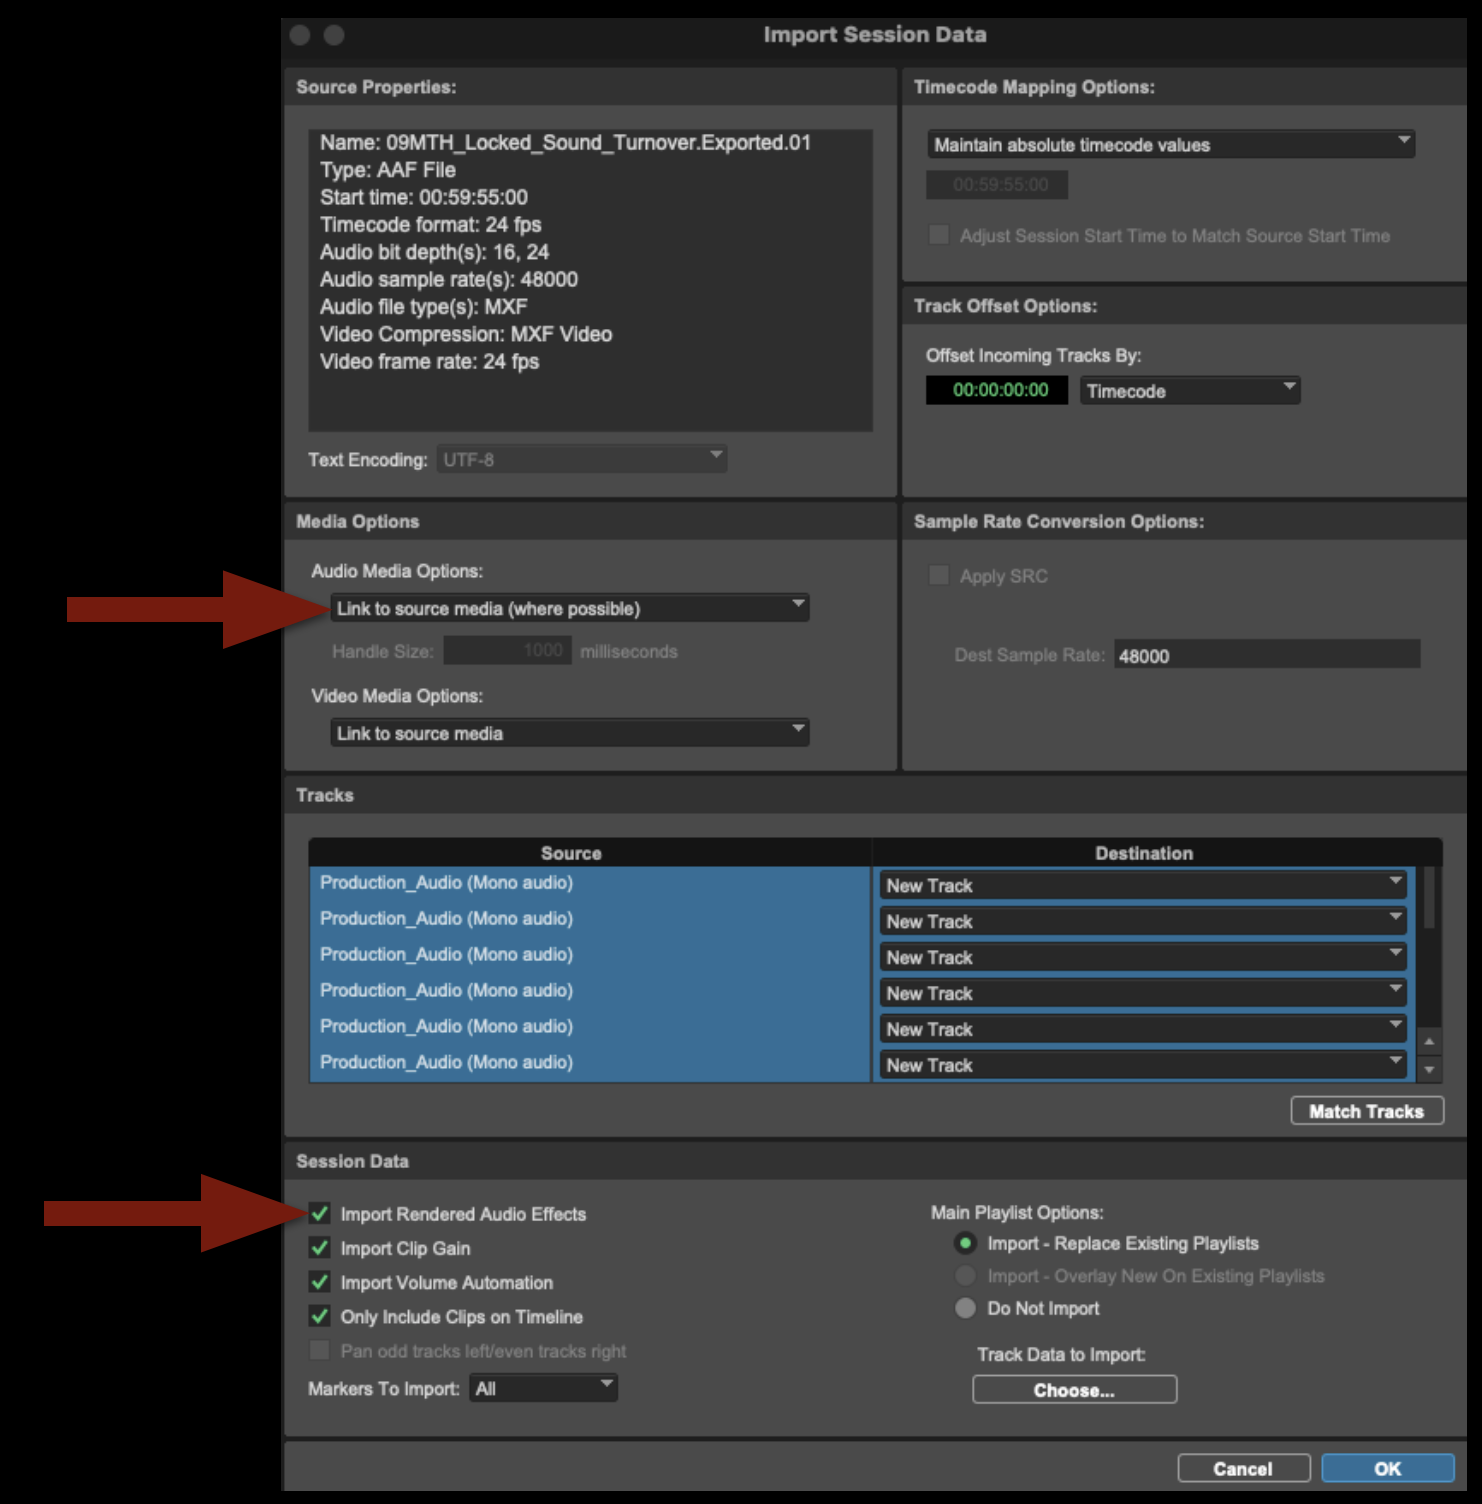
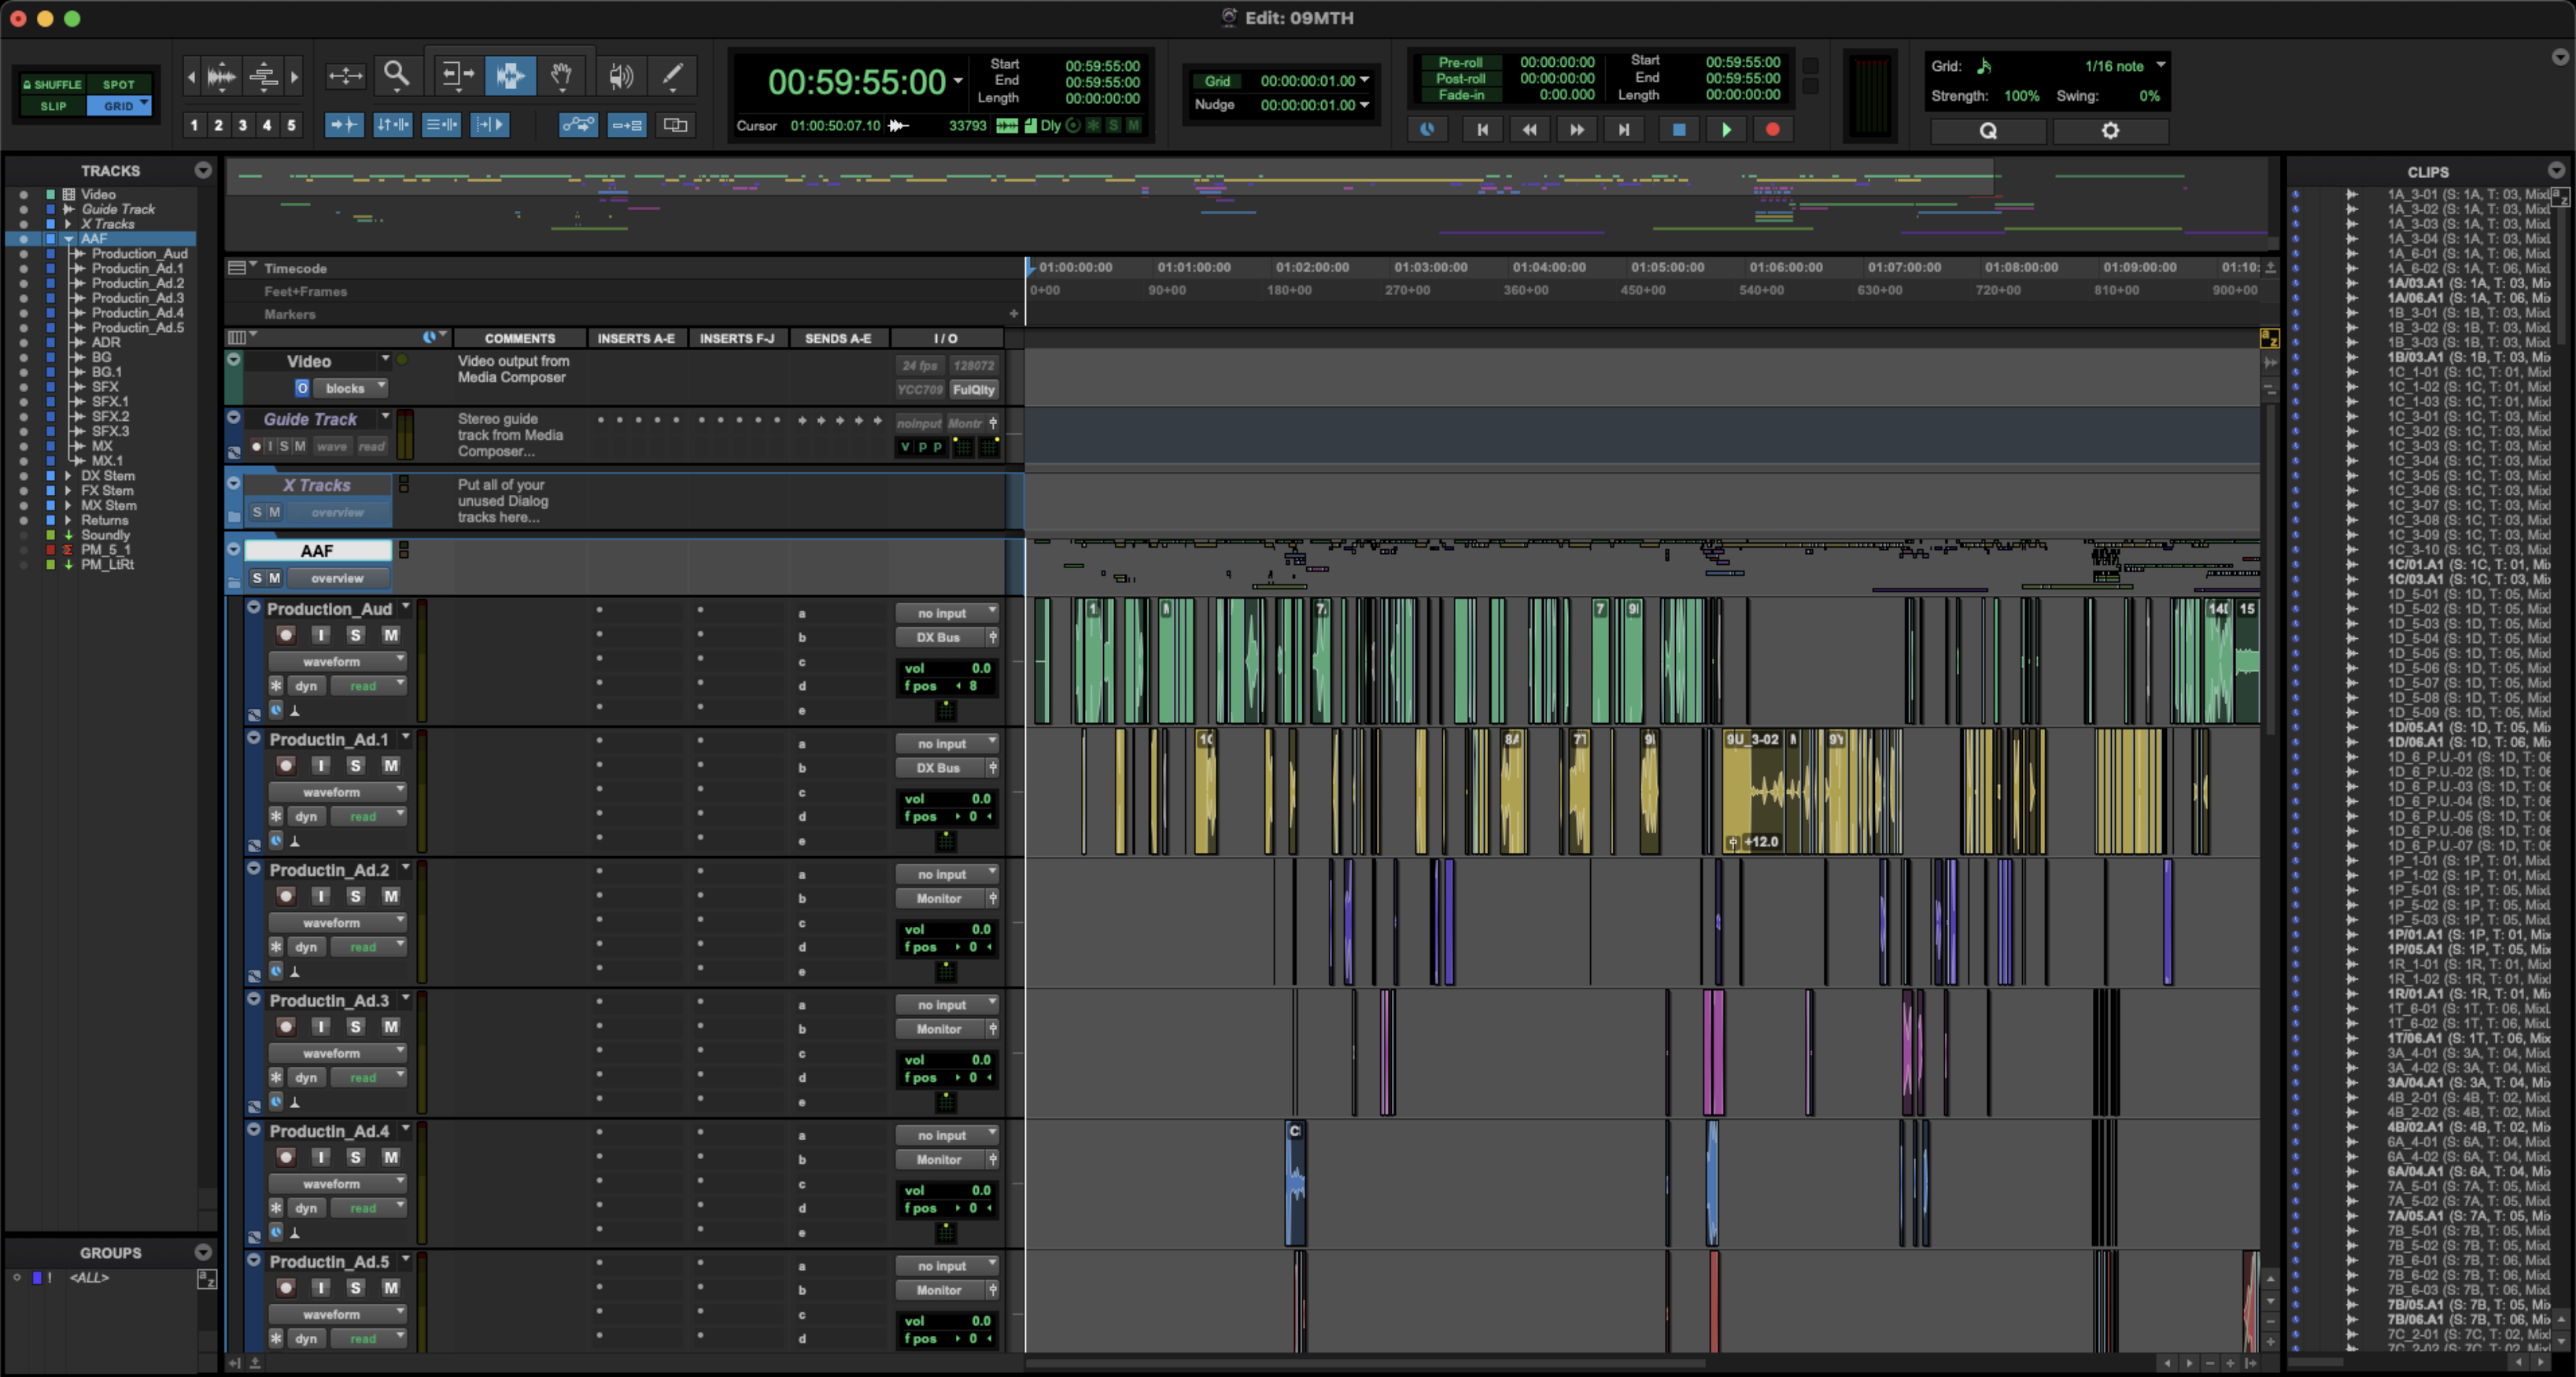
The AAF folder will populate with all the audio tracks from your locked sequence. This may take a few minutes to finish. When it does, it will look like the example below.
If you get any kind of error while importing your AAF, it is likely because something was not done properly during the picture lock stage. Go back to the Media Composer project and double-check the steps in the handbook. If that doesn’t fix the error, ask the Post Staff for help.
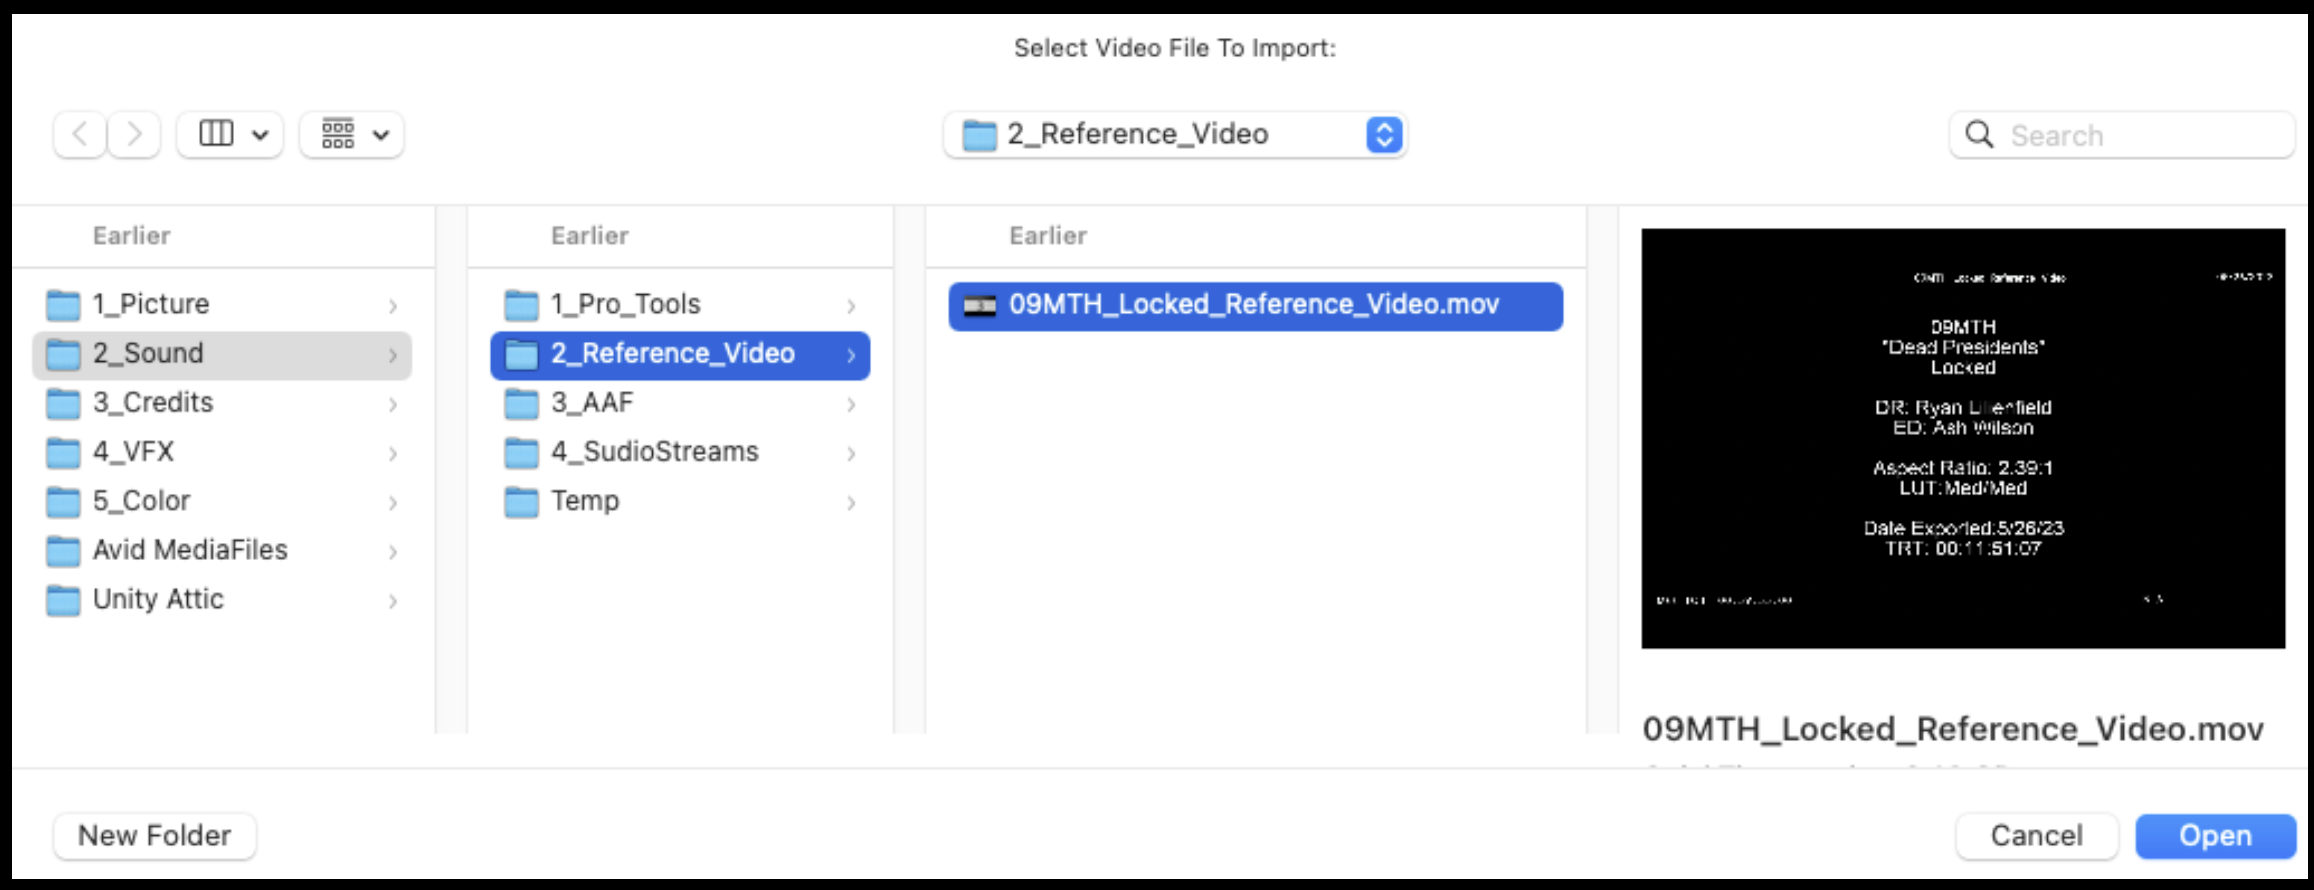
Import Reference Video into ProTools
Next, you will need to import the reference video that was exported out of Media Composer into ProTools. Select the “Video” folder:
From the task menu, select File > Import > Video…
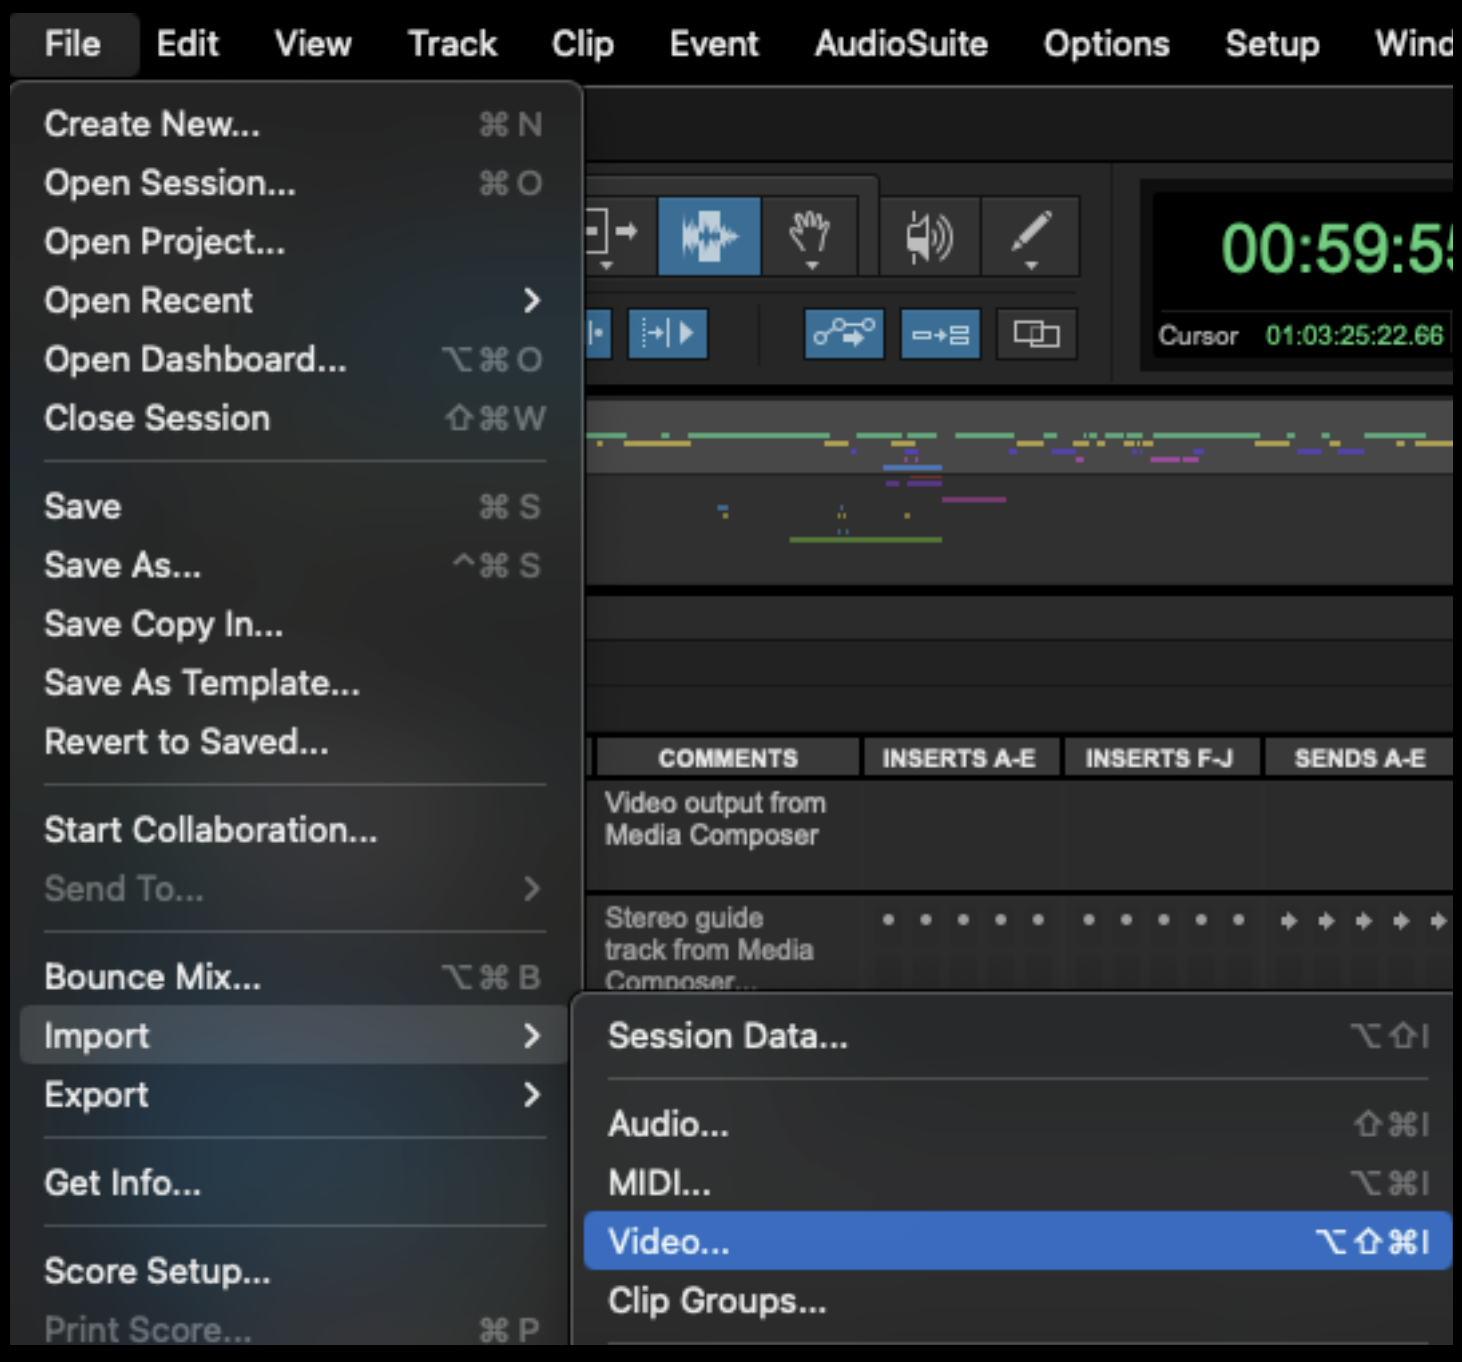
Navigate in the Finder window to where you saved the Reference Video that was exported from Media Composer and click “Open”.
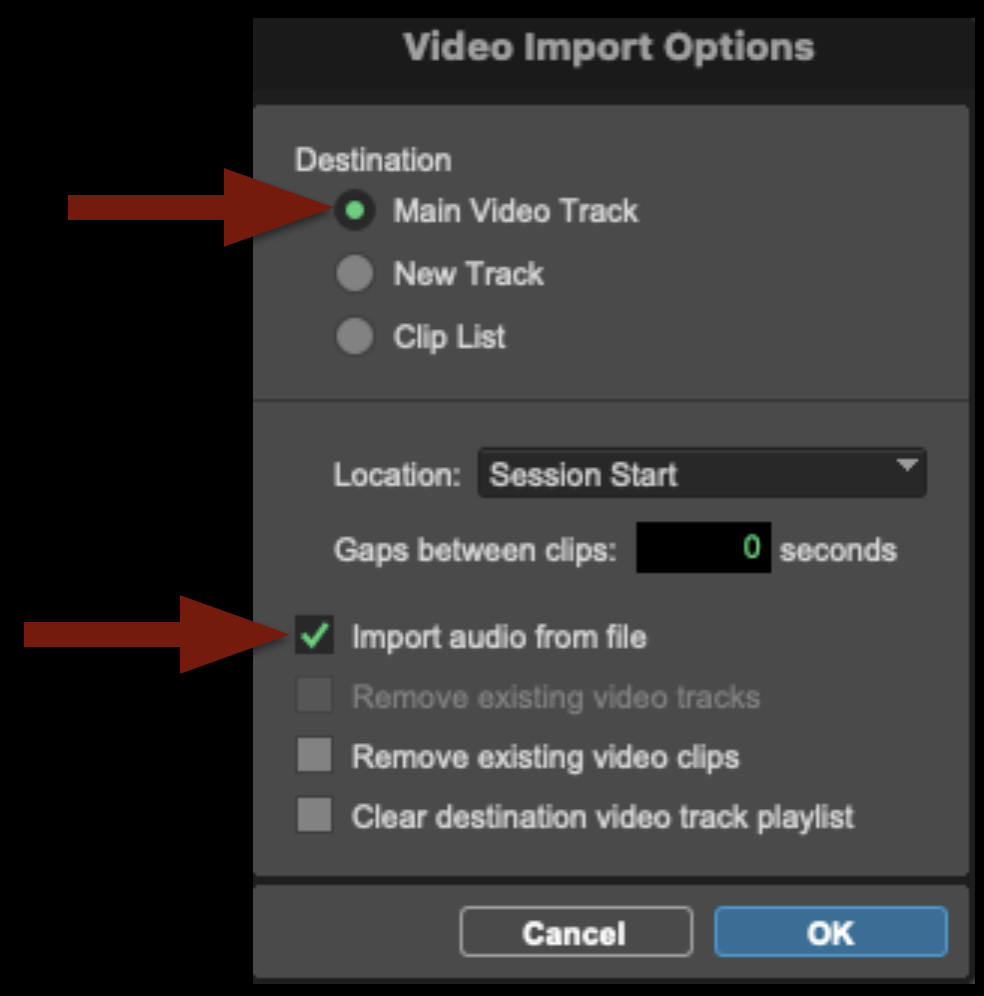
In the Video Import Options page make sure to select “Main Video Track” as the Destination and check the box labeled “Import audio from file”. Then select “OK”.
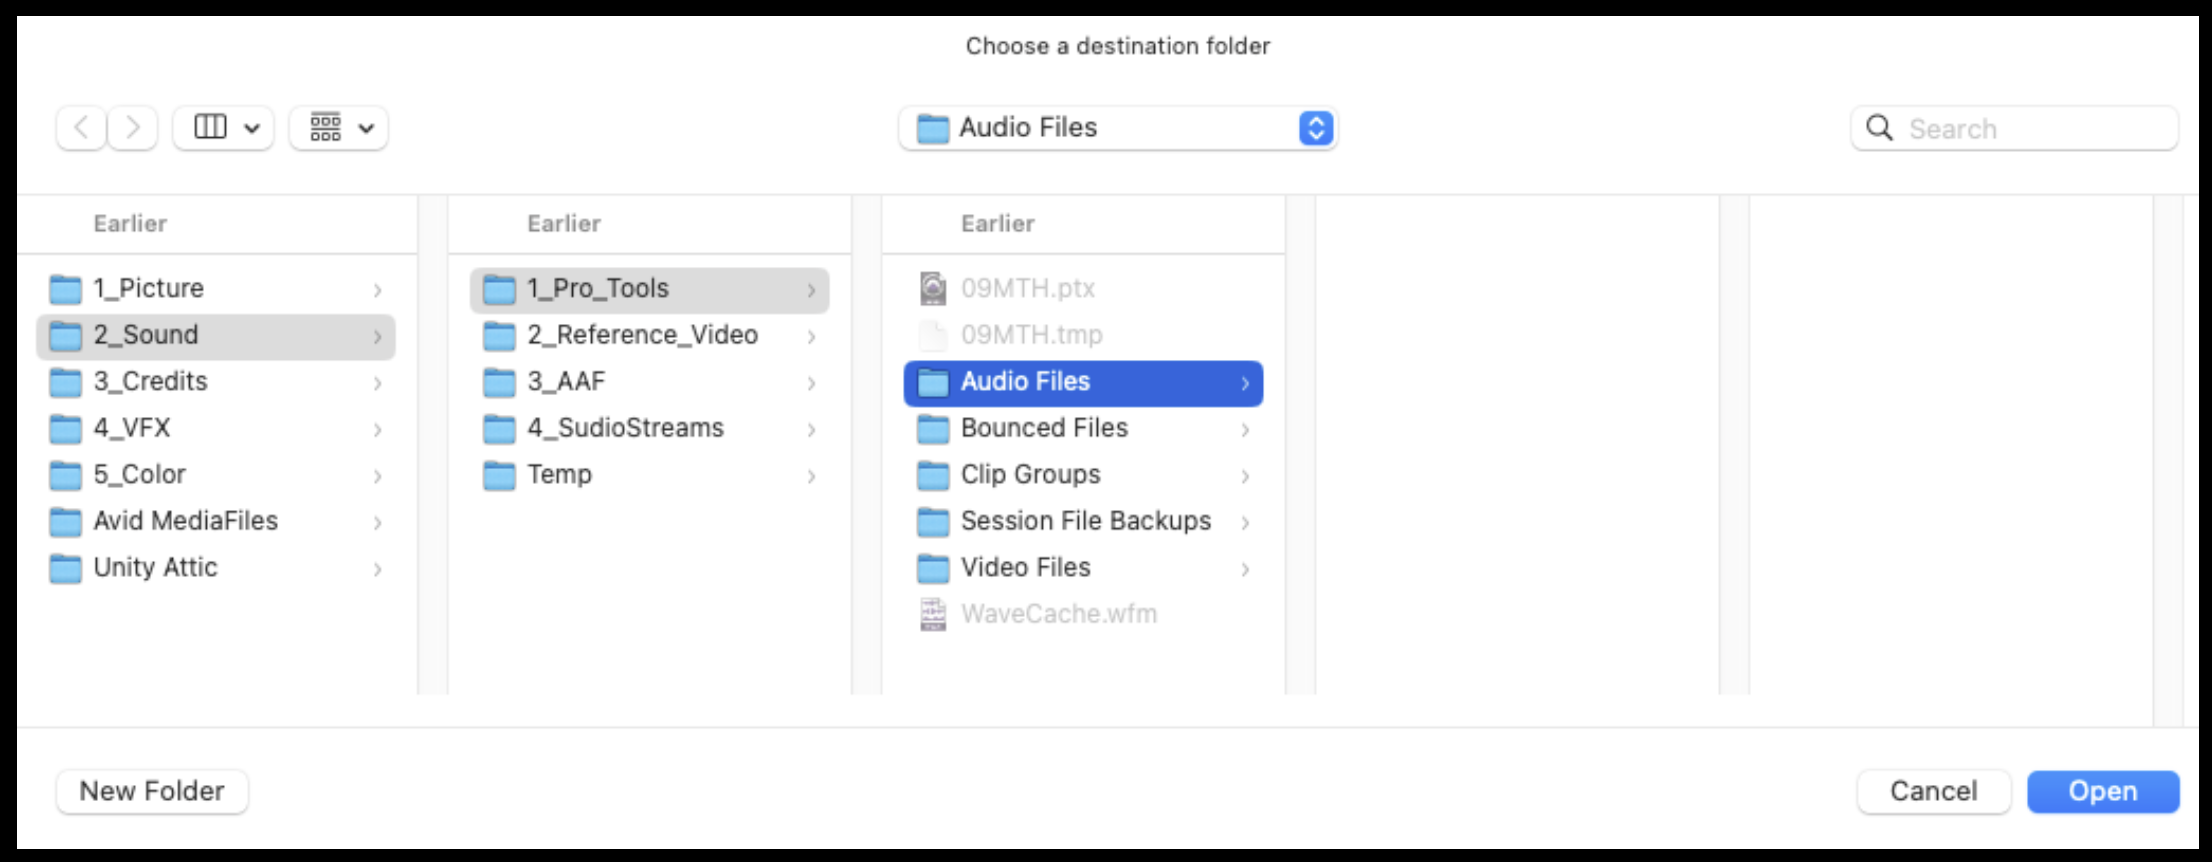
It will ask you to choose a destination for the audio and will default to the correct “Audio Files” folder. Click “Open”.
The reference video will come in on the correct track, but the audio attached to it will need to be moved.

Move the audio down to the Guide Track.

Lock both the Video and Guide Track by selecting them and hitting “Command + L”.
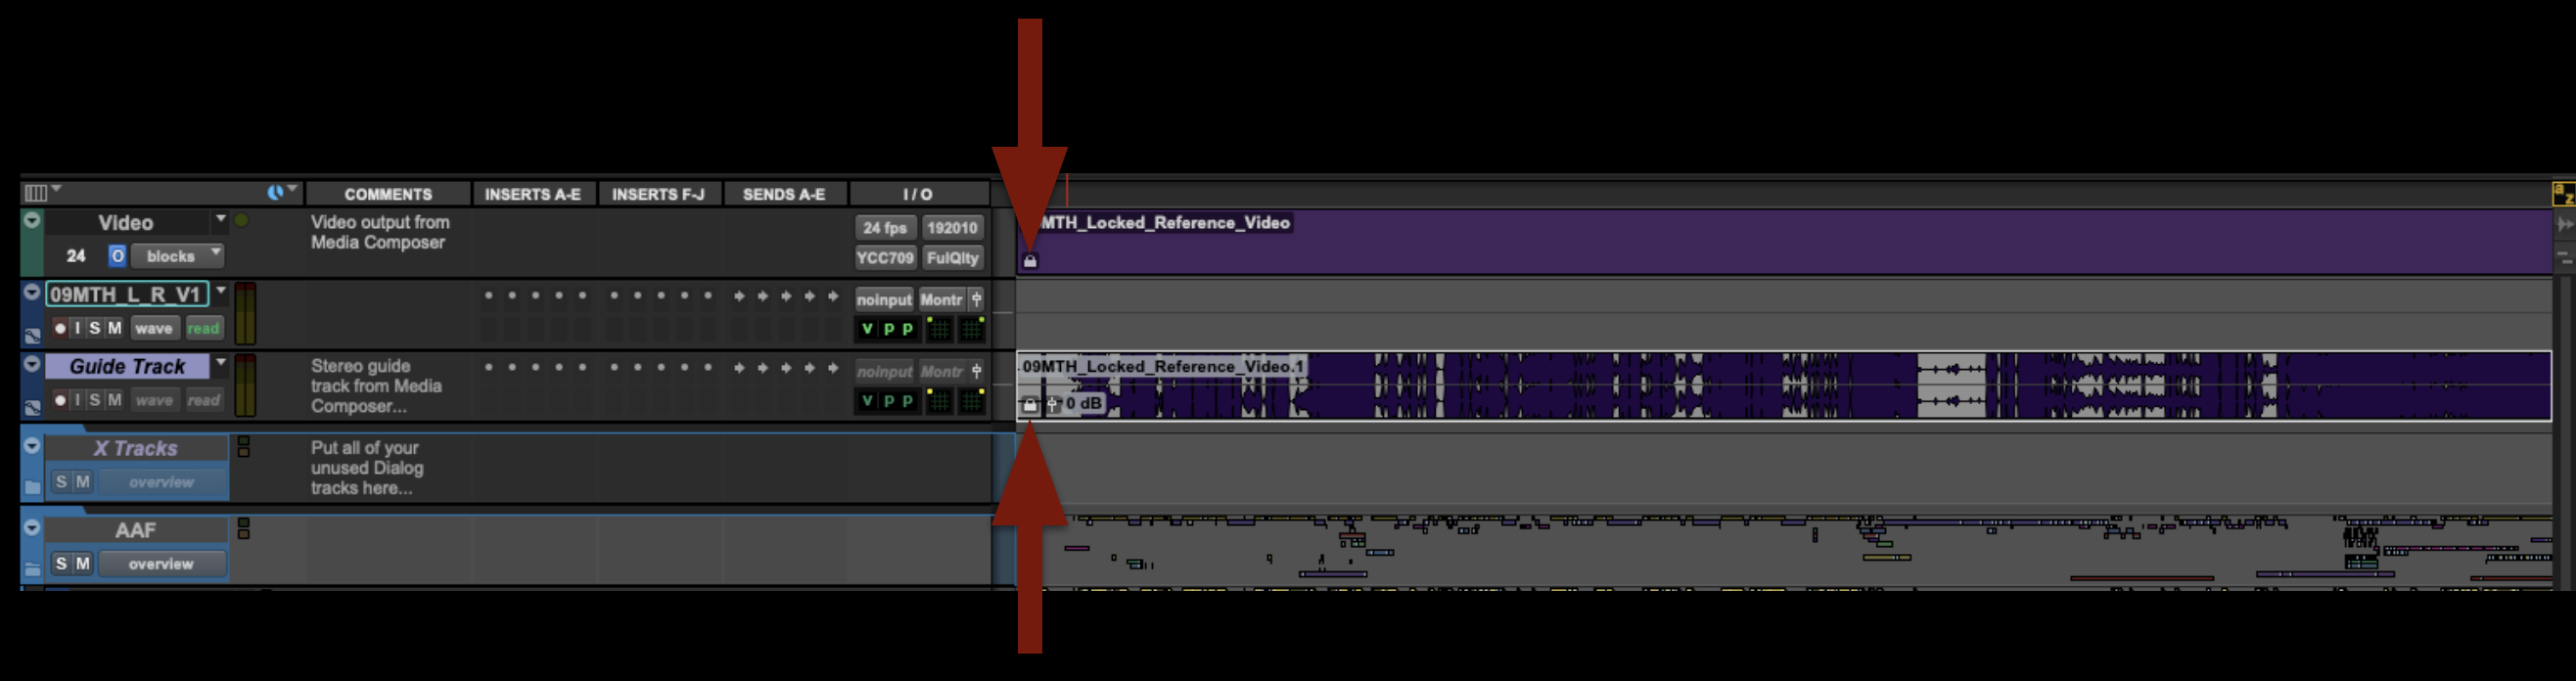
Delete the empty track to clean up your project.

Congratulations, you are done! The ProTools project can now be saved and closed. It is ready for the sound design phase.