Overview
This guide is only necessary for shows with approved VFX shots.
In the industry, VFX are rarely completed in the NLE that the editor is using to cut picture. It is common practice for editors or assistant editors to create rough versions of VFX shots inside the NLE as a proof of concept while editing; these are sometimes called “slap comps” and are useful to evaluate how the VFX shot will work in the context of the edit. For the final shots, though, VFX vendors are contracted to do the work. This is for four primary reasons:
- The editor is cutting with “offline” quality footage which is of lesser quality
- The picture editing application is rarely the best tool to accomplish the required visual effect
- The editor is not normally the person with the expertise to accomplish the required visual effect
- The editor’s time is more valuably spent on the storytelling aspect of editing
The editorial department coordinates with the VFX vendor to send them all the high quality elements, references, and notes required to create the final shots. It is this process of creating and packaging everything that the VFX vendor needs that is referred to as a “VFX Turnover”. This would normally be done by an assistant editor or VFX editor in the editorial department in coordination with the lab that is storing all the original camera files, and there may be several turnovers during the editorial process for different VFX vendors. In our workflow this responsibility rests on the editor at picture lock. The turnover is completed in DaVinci Resolve after the steps outlined in the Turnover to Color page.
Locked Reference Video
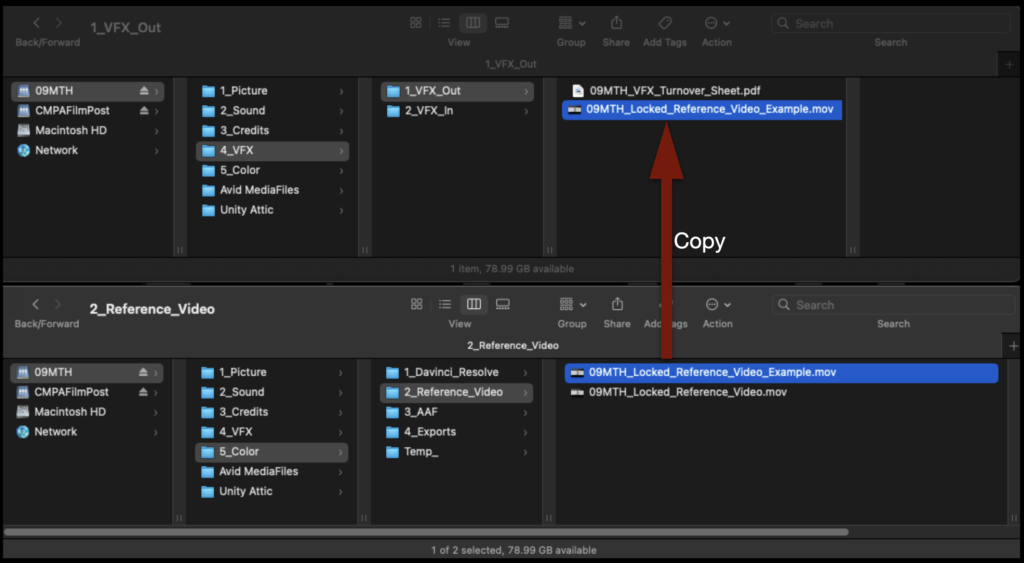
The editor will assemble the “turnover packet” that will be sent to the VFX department in the show volume inside the VFX Out folder. The VFX Out folder should already have the VFX Turnover Sheet that was made at picture lock and outlined in the Picture Lock – VFX Prep guide. The next thing that needs to be added to this folder is a copy of the Locked Reference Video. This is the same reference video that was used in the color and sound turnover.
Copy the Locked Reference Video (don’t move it) from the Color folder to the VFX Out folder.
Resolve Project Setup
Only proceed with these steps after you have completed everything in the Turnover to Color page.
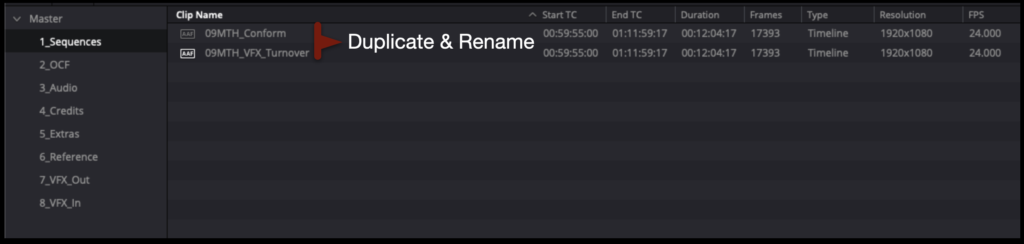
In the Media page inside the Sequences bin, duplicate the sequence named “Conform” and rename the new sequence VFX_Turnover as shown in the example below.
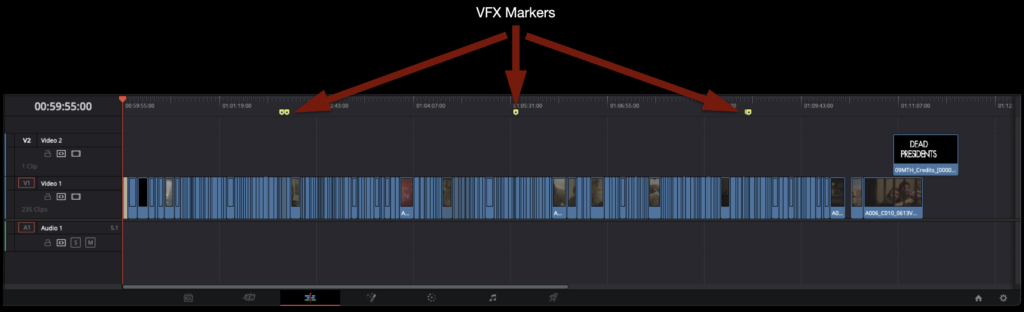
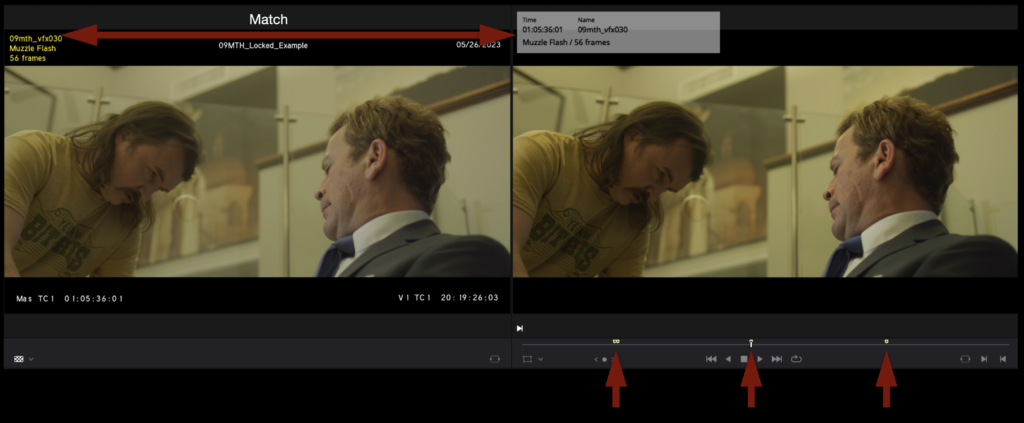
You will notice that the yellow VFX markers that you made in Media Composer to label and track the VFX shots have carried over into your Resolve sequence. In Resolve you can jump between markers quickly by using the keyboard shortcut “Shift + Up-or-Down Arrow”.
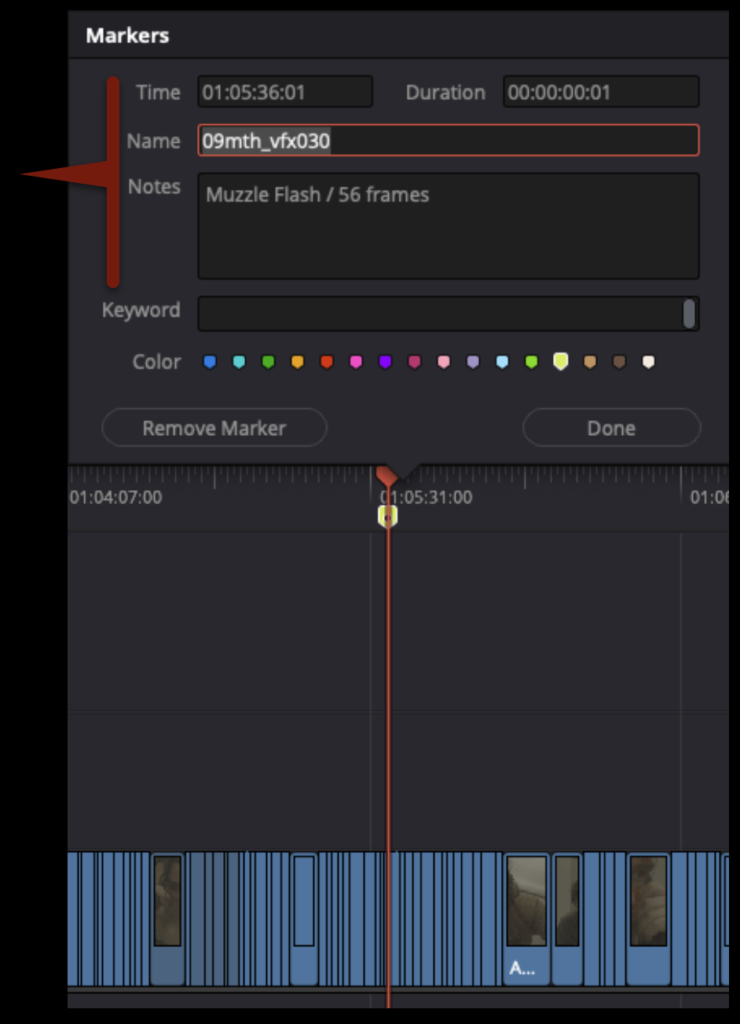
If you select one of the markers, you will see that all of the information that was logged into the marker in Media Composer and is in your VFX Turnover Sheet is present in the Resolve markers.
In the Media page comparing the online reference video and the Resolve sequence, you should notice that the VFX info burnt into the reference media matches the Resolve markers’ information.
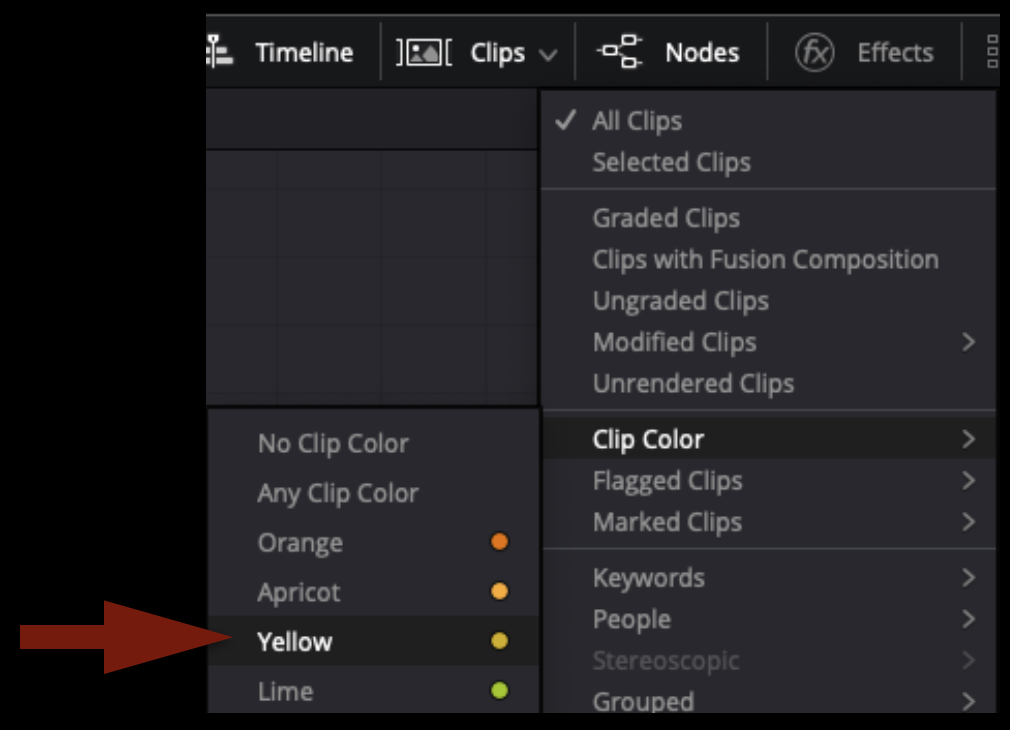
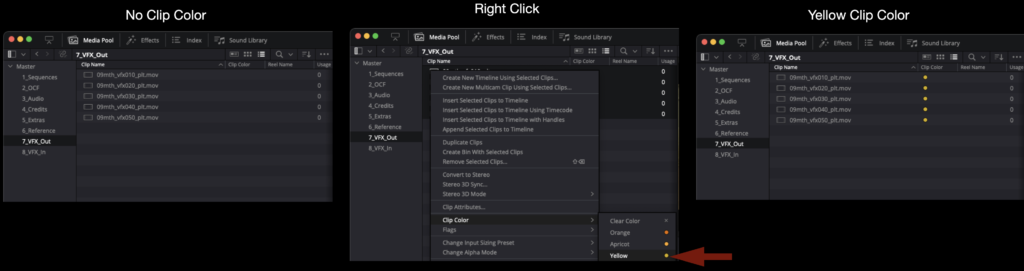
To make the following steps easier, you will need to change the VFX shots in the timeline to a different color. Right-click on each of the VFX shots and then select Clip Color > Yellow.
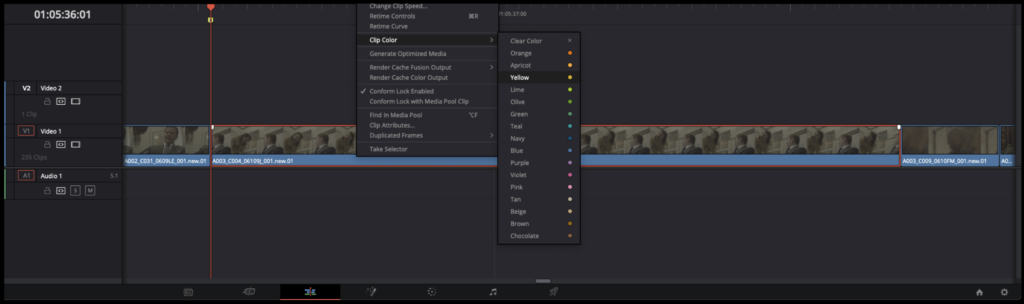
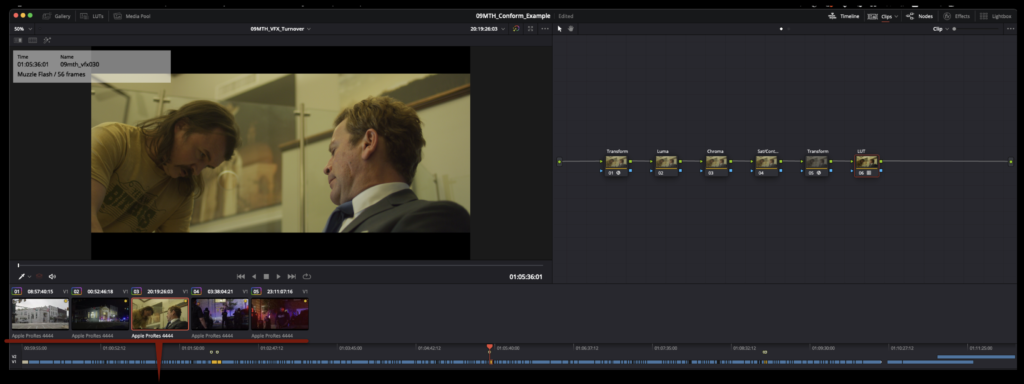
After you have changed the clip color to yellow for all of your VFX shots, your sequence should look similar to the example below.
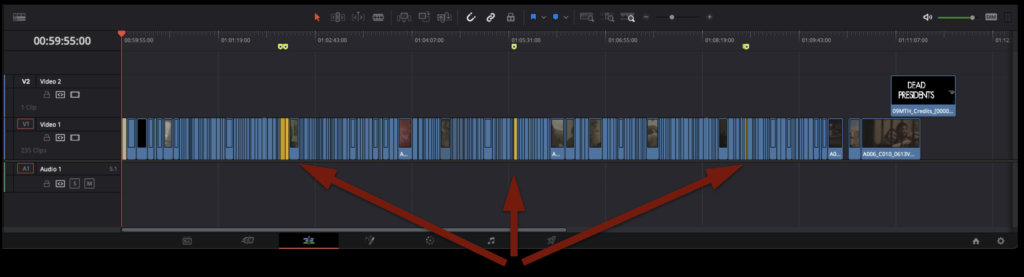
By default, the Clips Thumbnail Timeline in the Color page displays every clip in the sequence. But now that your VFX shots are tagged with a different color, you can sort by that color. Select clips as shown in the arrow bellow.
In the dropdown menu, select sort by Clip Color > Yellow.
As you can see in the example below, only the VFX clips are now shown in the Clips Thumbnail Timeline.
Exporting VFX Elements
After that prep work is done, you are ready to begin exporting out the elements that will be sent to the VFX department. In our workflow these elements are the exact length as the shot that appears in the locked cut. Under certain circumstances the VFX Faculty may request that these elements get exported with “handles” (i.e., a number of extra frames on either side). However, the default turnover is “no handles”.
NOTE! This guide details how to turnover simple VFX shots requiring only one element or “plate”. This is why in the example shown there is only one “VFX element” per “VFX shot”. More complex VFX shots requiring the compositing of multiple live action elements captured during production are done the same way using the same naming logic. However, if your show has more complex VFX shots like this, please check with VFX Faculty and Post Staff before proceeding for more guidance.
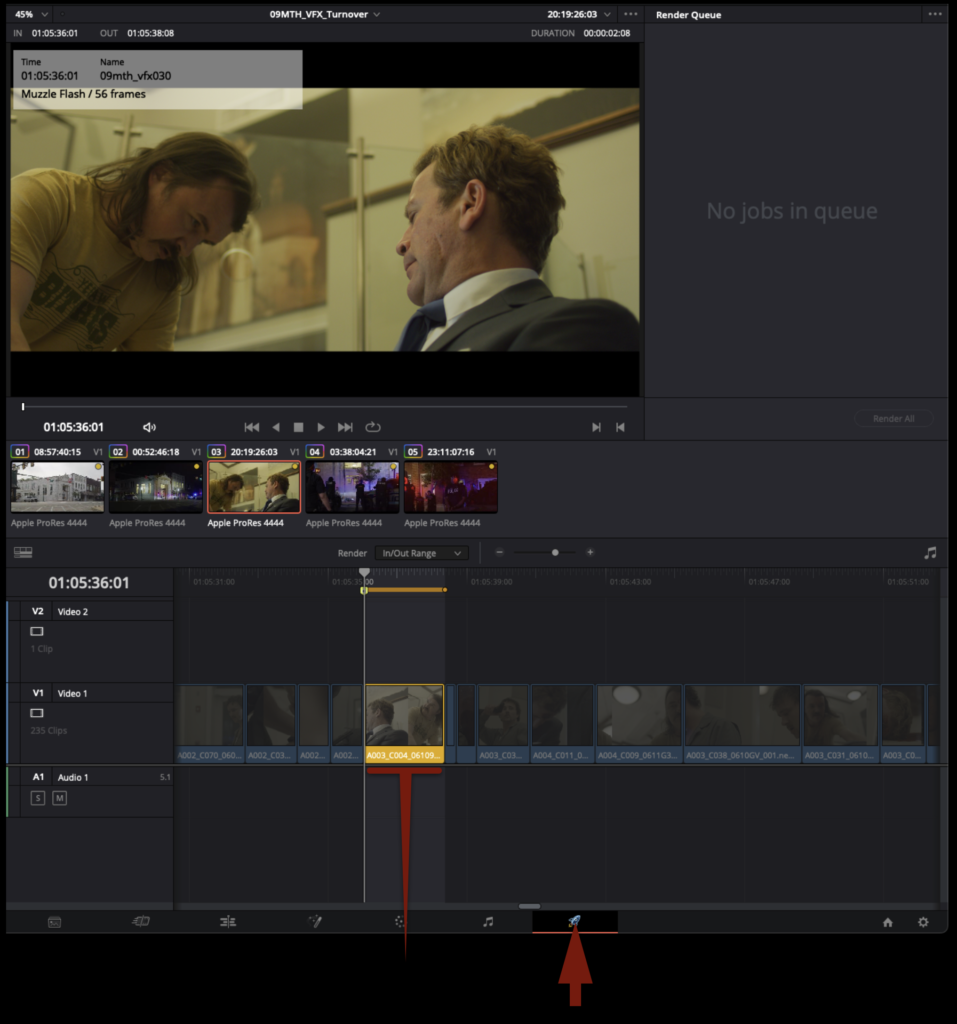
In the Delivery page, you can easily navigate to your VFX shots by selecting them in the Clips Thumbnail Timeline. Once selected, you can hit “I” and “O” on the keyboard to mark in and out around the selected clip. It is important in this step that you have marked around the entire clip and no additional frames on either side. You do not want to turn over elements with extra frames.
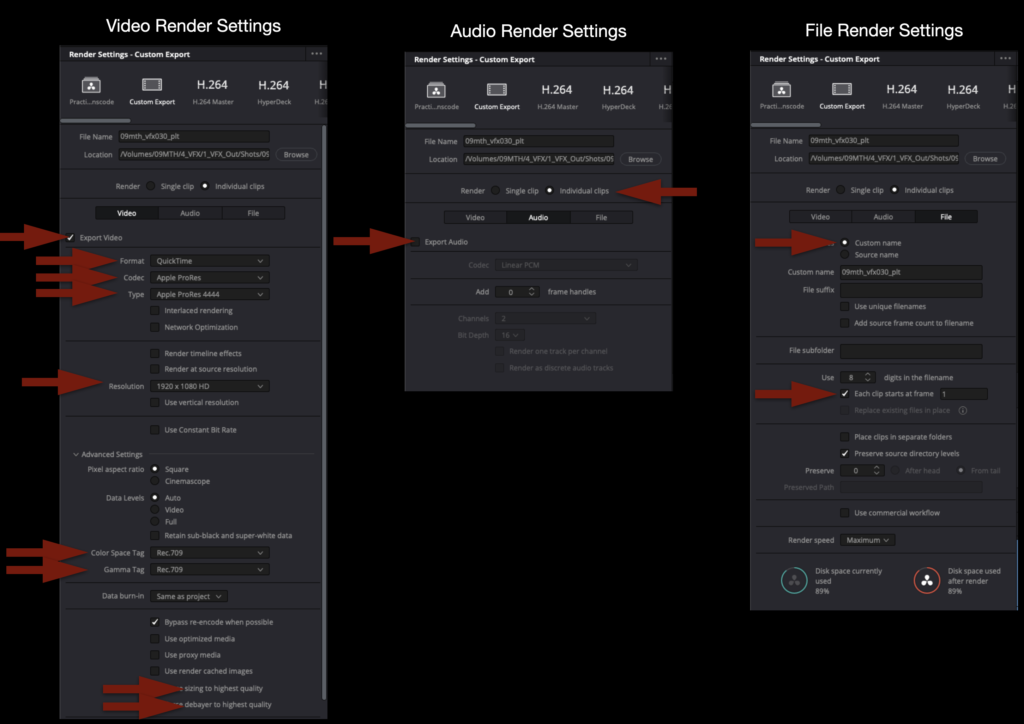
Under Render Setting on the Delivery page, you will need to label each element that you are going to export. The naming convention follows from the “names” or “shot code” that were assigned when the VFX shots were labeled in Media Composer (see the VFX Prep page). This naming convention MUST be followed.
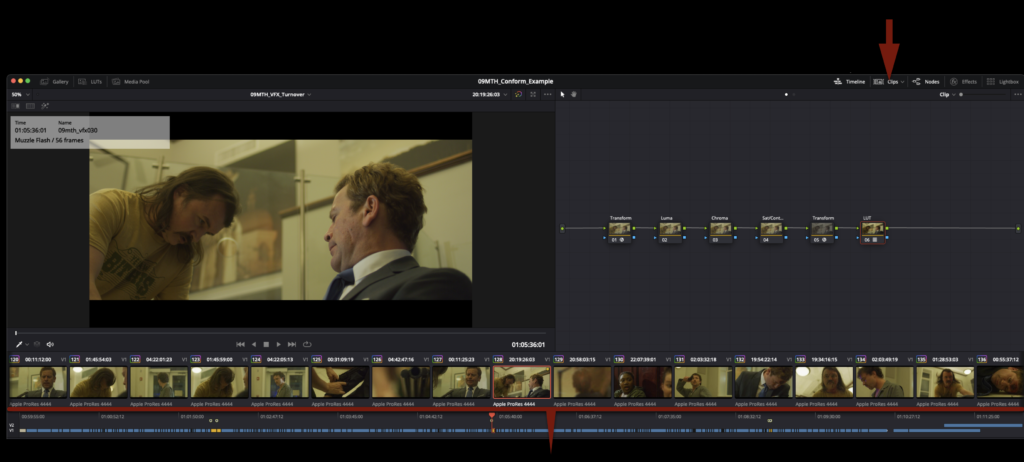
Each element will be named with the assigned VFX name followed by “_plt”. In the example below the VFX shot is named “09mth_vfx030”. The element that is being turned over to the VFX department is a “plate” and thus should be labeled 09mth_vfx030_plt.
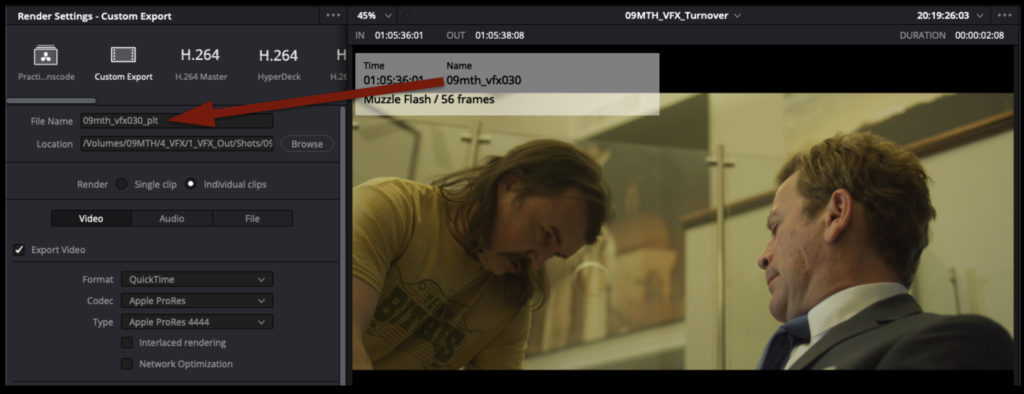
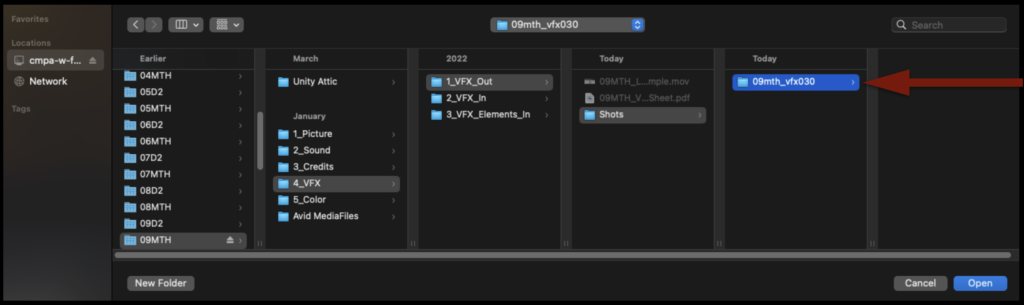
Select Browse to choose where to export. These plates should be exported to your show volume in the VFX > VFX Out > Shots folder. You will need to create the Shots folder and then a separate folder for each VFX shot, based on the VFX shot name.
Below are the Render Settings for all VFX Turnovers. Double-check the settings carefully before exporting.
If you have more than one VFX shot or element to export, you can add each export job to the render queue and then render them all at once.
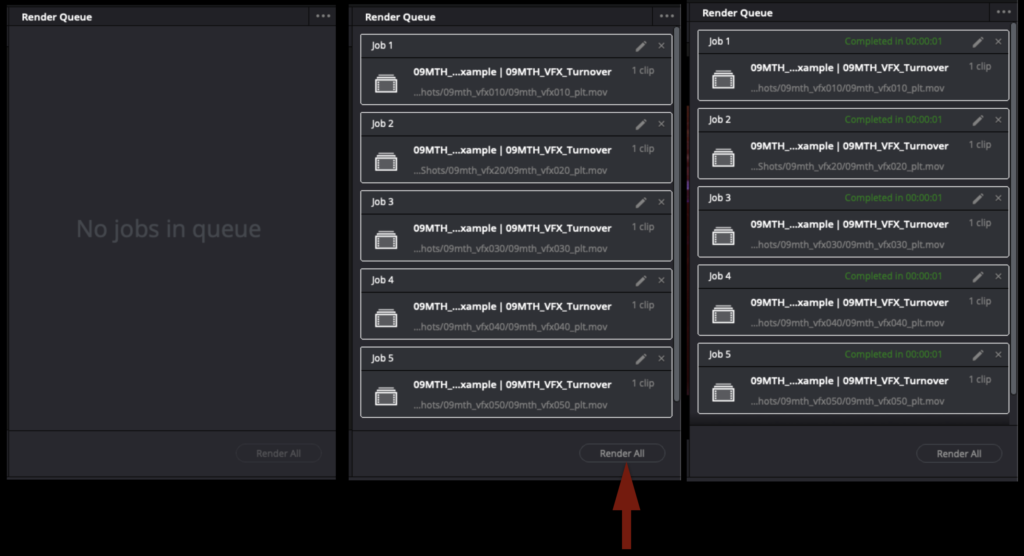
Once all of your renders are complete, it should look something like the example below. Notice how each VFX shot has its own labeled folder and inside that folder are the labeled VFX elements.

Check VFX Renders
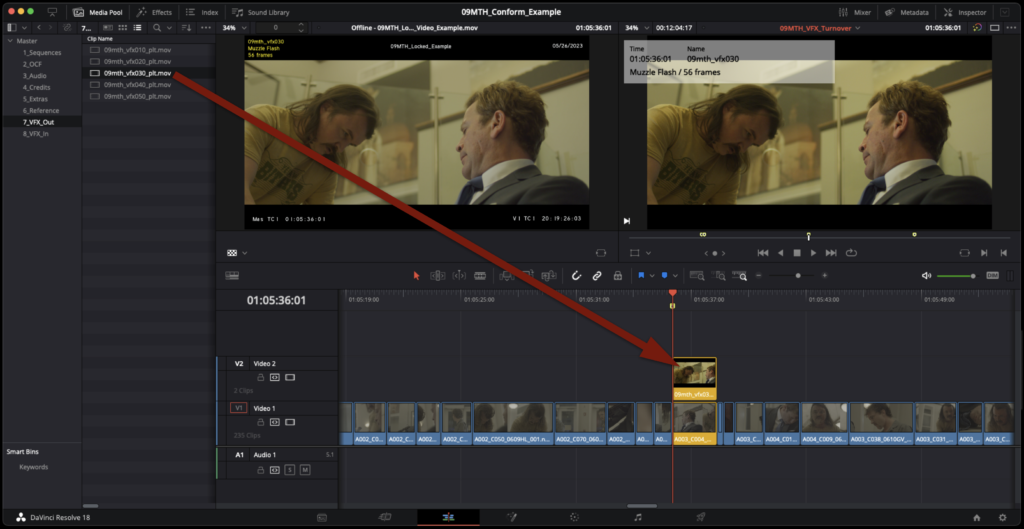
To check that the exports you made of each VFX element are correct, you will need to import them back into the Resolve project. On the Media page, navigate through your media storage to your VFX shots and drag them into the Media Pool to import them.

These clips should also be changed so that that the clip color is yellow inside of Resolve, to denote that they are VFX shots. In the Media Pool, you can highlight them all, right-click, and select clip color.
In the Edit page, carefully cut each turned-over VFX element back into the sequence on Video Track 2. This will ensure that you did not miss any VFX shots and that you exported out everything that needed to be turned over.
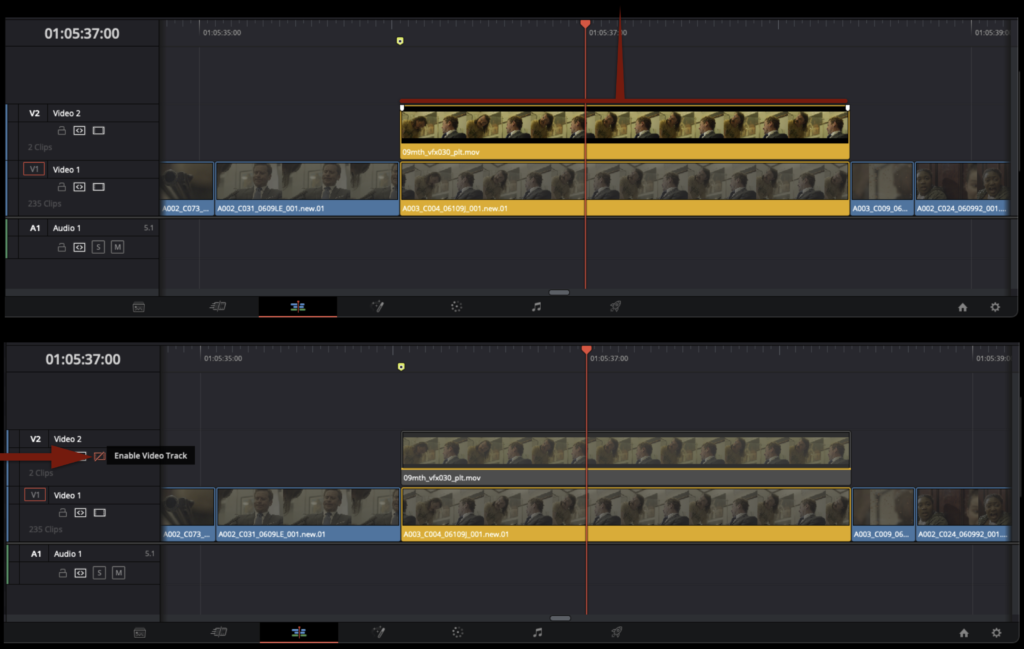
While the elements are on Video Track 2, you need to double-check two things. First, make sure that the export has the exact same number of frames as the clip below it. It should match exactly. Second, you can toggle Video Track 2 on and off to make sure that both layers are visually identical. You want to ensure that the elements turned over to the VFX department are identical to the Camera Original Files.
Wrap Up
Once you have checked each of the VFX elements that were exported, you should be left with a folder tree in the VFX Out folder that looks like the example below.

The VFX Turnover package, which consists of a Locked Reference Video, VFX Turnover Sheet, and all the VFX Plates are now ready for the VFX Department. In the industry, this package would typically be sent to the VFX Vendor over a secure, cloud-based application or loaded onto a hard drive and shipped. In our workflow, everything can stay in the VFX Out folder on the show volume. When the VFX cycle begins, the VFX artist will copy this folder to the VFX server and begin working from there.

Save the project by hitting “Command+S”. Then close the project and quit resolve by hitting “Command+Q”.
Congratulations, you are done!